Overview
The Admissions and Enrollment List Pages are a great way to see the status of your admissions and enrollment contacts, and perform a variety of bulk actions. Some examples include downloading completed teacher recommendations or contracts, sending emails to a targeted set of contacts for checklist or form completion, updating checklist items in bulk, and more. Filter Options allow you to drill down on the subset of contacts you want to manage.
How to set Filter Options
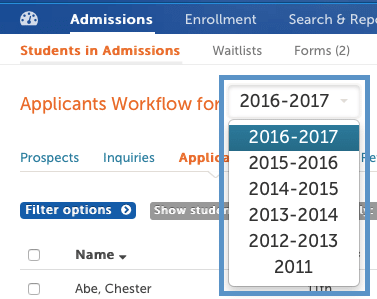
Similar to the Dashboard, there’s filter options on the List Page that are unique to the admissions process. At the top of the page, you have a Terms picker which defaults to the default reporting year. You can select the Term or school year that you wish to view data for by selecting it from the drop-down.

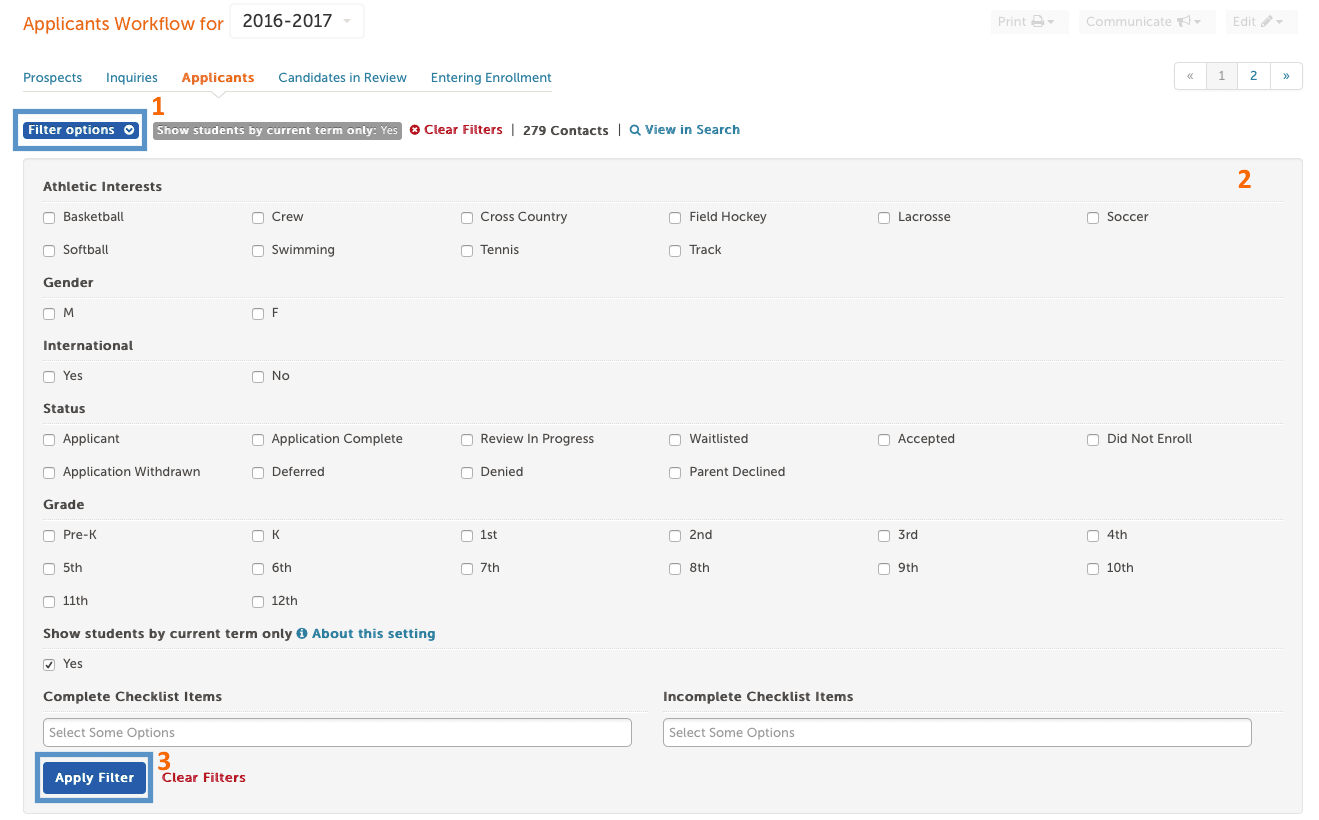
Once you have the Term set, click on filter options (1) to display your criteria. Each list page has a pre-defined set of filters that are contextual to the workflow. For example, Applicant list pages have a different set of pre-defined filters than Enrollment list pages. By default, you may have the following filters: Status, Apply/Enroll Grade, and Complete/Incomplete Checklist Items. Your filter options update according to the contact list you select. For example, if you’re viewing a list of Inquiries, you’ll see statuses and checklist items that are specific to Inquiries only.
Custom Filter Options
We can add custom filter options for all list pages as long as the field is a boolean, single-select, or multi-select field. Each custom filter option will display on all list pages, the dashboard, and report pages where 'filter options' are displayed. They cannot be customized on a per page basis. To request custom filters, contact Finalsite Enrollment Support. Some best practices for filter option considerations include:
-
Pick fields you'll use often to send targeted communications or for checklist management. Any one-off fields can be used within Search and Reports. Some examples include International Y/N, Boarding/Day, Academic or Athletic Interests, etc.
-
Pick fields with smaller option lists. A "current school" single select field wouldn't be a good option as there's too many results and would cause scrolling in the list page. This information can be reported on more easily within Search and Reports.
Applying Filter Options
Next, you can apply filters to drill down for specific contacts within your process for targeted communications, checklist completion or any other relevant bulk action. Check off the criteria you want to filter by (2) and then click apply filter (3). Some examples you can try are:
-
Filter all of your elementary, middle school, or high school students for a given apply year.
-
Filter for all of your Accepted kids so that you can change their status in bulk to Enrollment in Progress via the Edit menu.
-
Filter all of your applicants that completed their application form (complete checklist item) but did not complete their application fee (incomplete checklist item).

Show Students by Current Term only Filter
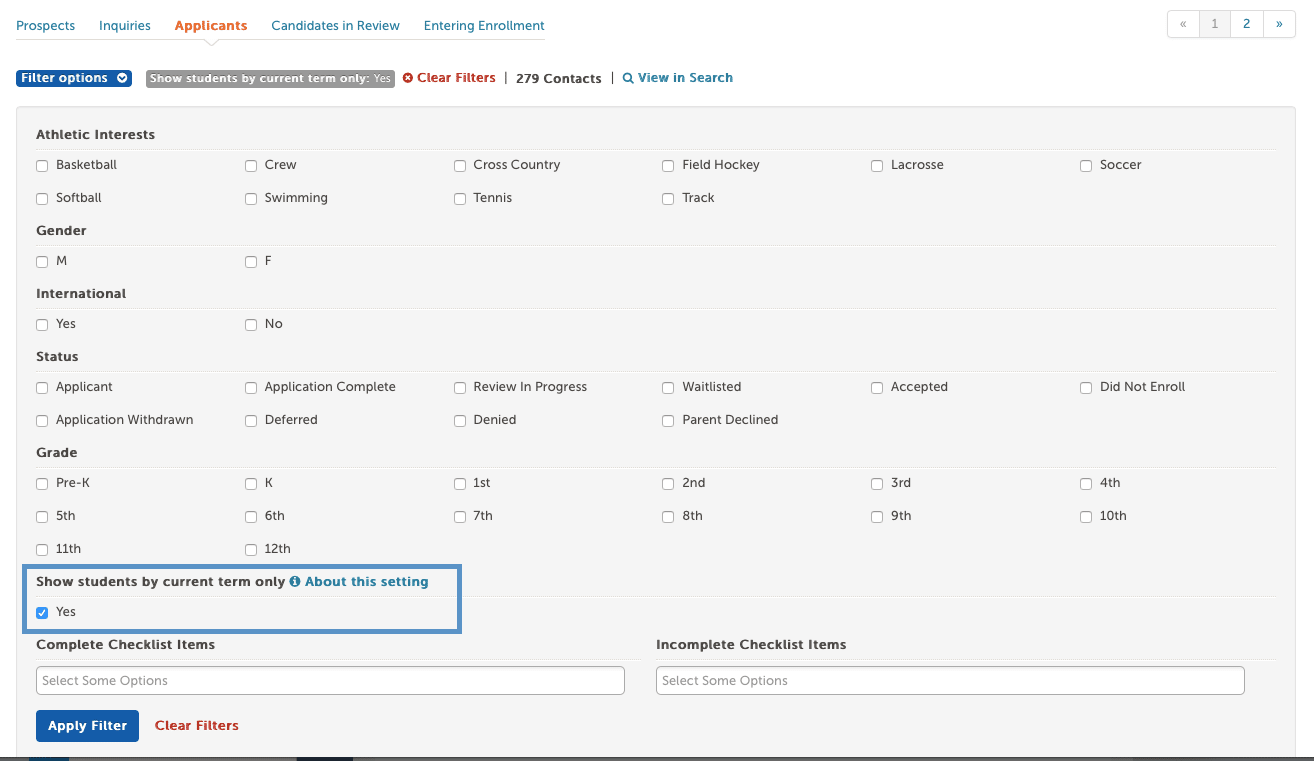
Within the Filter Options, there’s a show students by current term filter. This filter is turned on by default, however, you can override it by deselecting the checkbox and clicking apply filter. The following behaviors take place:
-
If set to Yes, students will only show on the list page that correspond to their current admissions or enrollment year. For example, if the Student has applied to multiple years, he or she will only appear on the list page that corresponds to the most recent year that they have status and checklist history.
-
If this option is deselected, a Student will appear on every list page in which they have a status and checklist history. For example, if a Student applied two years in a row, they will show up in both year’s list page with different status and checklist history for each year.

View in Search
If you need to do a one-off search for something that’s not in your commonly used filters such as interests, birthdate, parent or household information, etc, you can open your filtered results in the Search and Reports page by clicking on View in Search. Once the results open up in the Search and Reports page, you can add custom columns, change your reporting view, save your search or export it.

Comments
0 comments
Article is closed for comments.