
In Finalsite Enrollment, students exist in specific Terms (or school years). Students can have a history and status in multiple terms. Occasionally, you may need to change the current term for a student in the system. This article will discuss the three main ways you can do this and the difference between each method.
💡Quick Answers
- Copy vs. Move, what's the difference? A Copy keeps the student in their original term and adds them to the new term, preserving history. A Move deletes the student from the original term and relocates them entirely. Use Copy for re-applications and gap-year returns; use Move to correct a wrong-term mistake.
- Can I undo a Move? No. Once a student is Moved out of a term, their data in that term is gone. To recover, you'd need to Move them back (or rebuild the record from scratch). If you're not sure, use Copy or submit a request to Support first.
- What happens to checklist items when I change a student's term? Depends on the option and whether you do it in bulk or individually. Copy in bulk clears checklist answers by default (unless you check Retain Checklist Answers); Copy individually keeps them by default. Move in bulk keeps checklist answers; Move individually keeps them by default with per-item checkboxes for adjustment. See the Copy and Move sections below for full details.
- My student got accepted. Do I use Move or Copy to send them into Enrollment? Neither. Moving an Accepted applicant into the Enrollment workflow is a status change (Accepted → Enrollment in Progress), not a term change. Visit the article "Moving Applicants (New Students) to Enrollment" to learn more.
In this Article
- Which Option Should I Use?
- Change Current Term: Copy to New Term
- Change Current Term: Move to New Term
- Student Rollover
Which Option Should I Use?
Before changing a student's term, identify which path matches your scenario. Each option behaves differently; choose carefully, since some changes can't be reversed without rebuilding records.
| Your Scenario | What To Do | Where to Read More |
| A student inquired or applied to the wrong term, and you want no record of them in the wrong term. | Use Move to relocate them to the correct term. The student is removed from the wrong term entirely. | Change Current Term: Move to New Term section below. |
| A student applied or enrolled in a prior term and is now applying again for a new term (didn't complete the application last year, gap year, re-inquiry). | Use Copy to bring the student into the new term while preserving their history in the prior term. | Change Current Term: Copy to New Term section below. |
| An Accepted applicant is ready to begin the enrollment process (contract, enrollment checklist). | This is a status change, not a term change. Move them from "Accepted" to "Enrollment in Progress." | Moving Applicants (New Students) to Enrollment |
| End-of-year: all current Enrolled students are graduating into next year's Enrollment workflow. | Use Rollover (Enrollment module only). | Student Rollover section below. |
Not sure if you need to act?
Open the student's contact record and check the Term displayed at the top. If it doesn't match where the student should be, one of the options above is your path. The current term is also visible on the Admissions and Enrollment list pages.
Heads up: These actions are not always reversible
- A Move deletes the student from their original term. If you Move to the wrong destination, you'll need to Move them again (or rebuild from scratch).
- A Copy is safer because the original record stays put.
- A Status change (Accepted → Enrollment in Progress) can be reversed by changing the status back, but checklist progress in the new workflow may need to be cleaned up.
If you're not sure which option fits, submit a request to Support before making the change.
Please note regarding copying over checklist items containing forms:
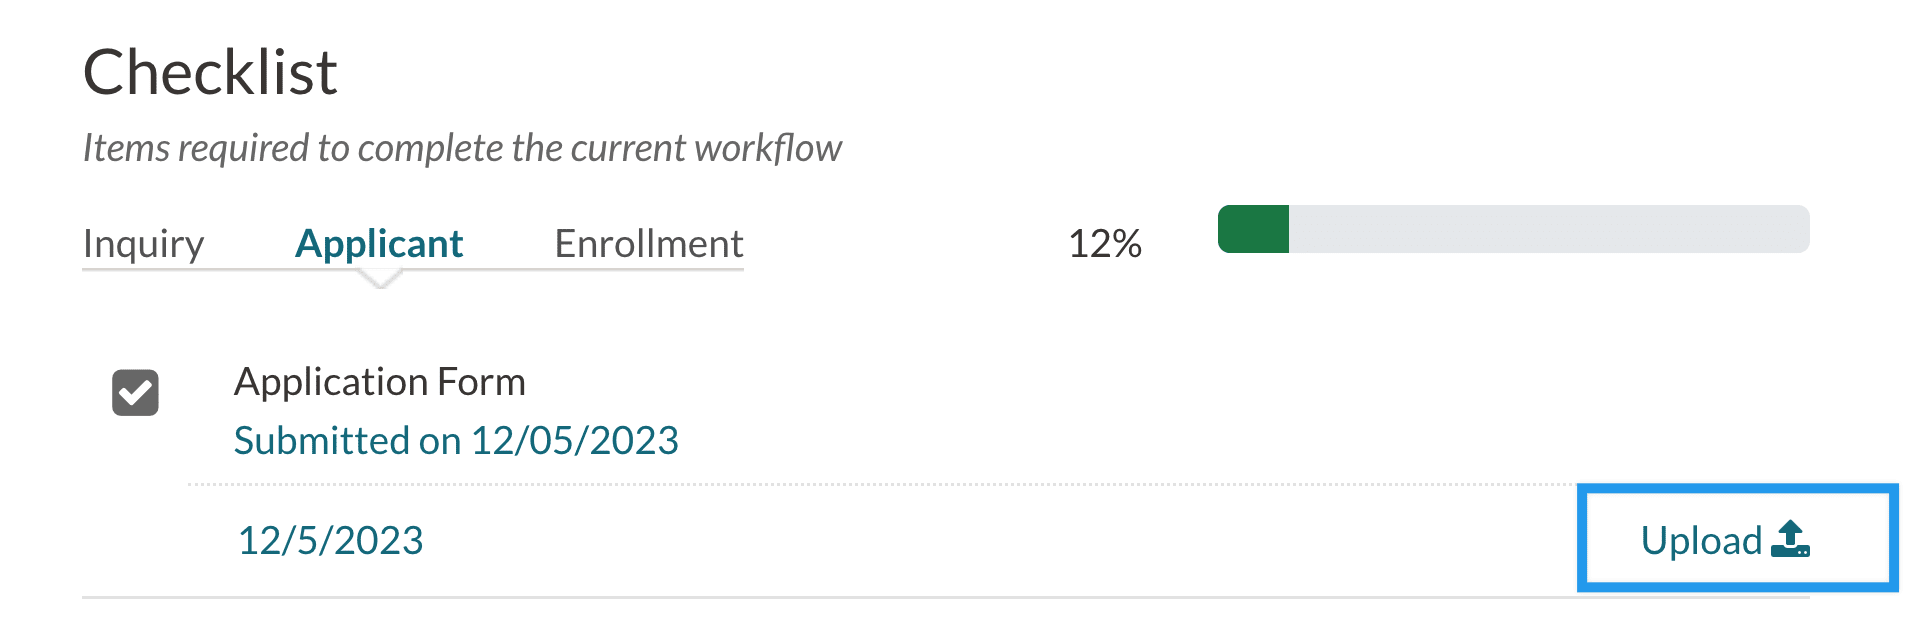
If you opt to copy over the checklist completion, the checklist item will retain its status in the new term (checked or unchecked), but the form itself will be found under the Form & Document Submission History section rather than attached to the checklist item.
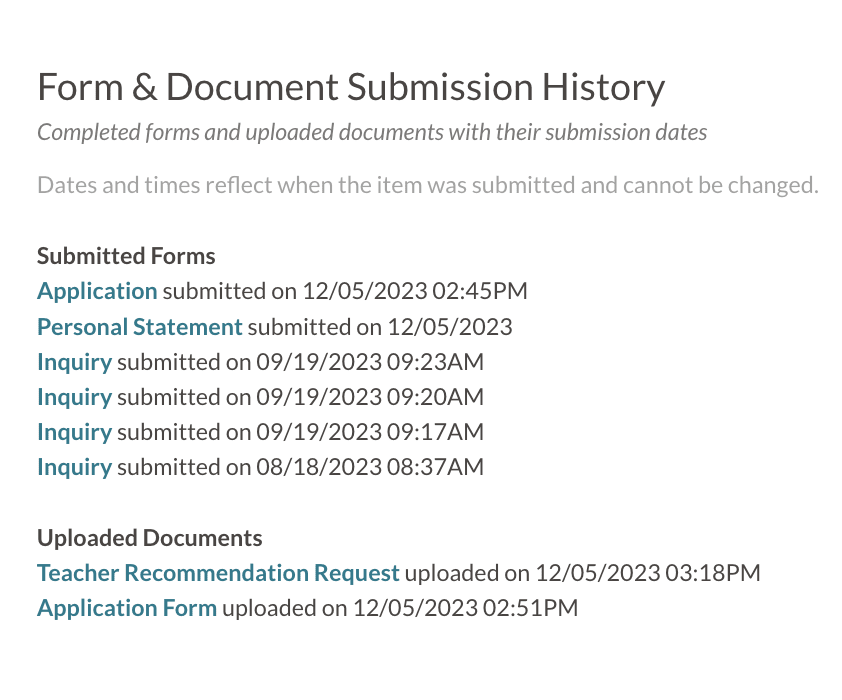
If you want the form attached to the checklist, download it from the Form & Document Submission History and re-upload it to the corresponding checklist item through the Upload button. The instructions on using the Upload button can be found in the article "Admin File Upload on Form Checklist Items."
Change Current Term: Copy to New Term
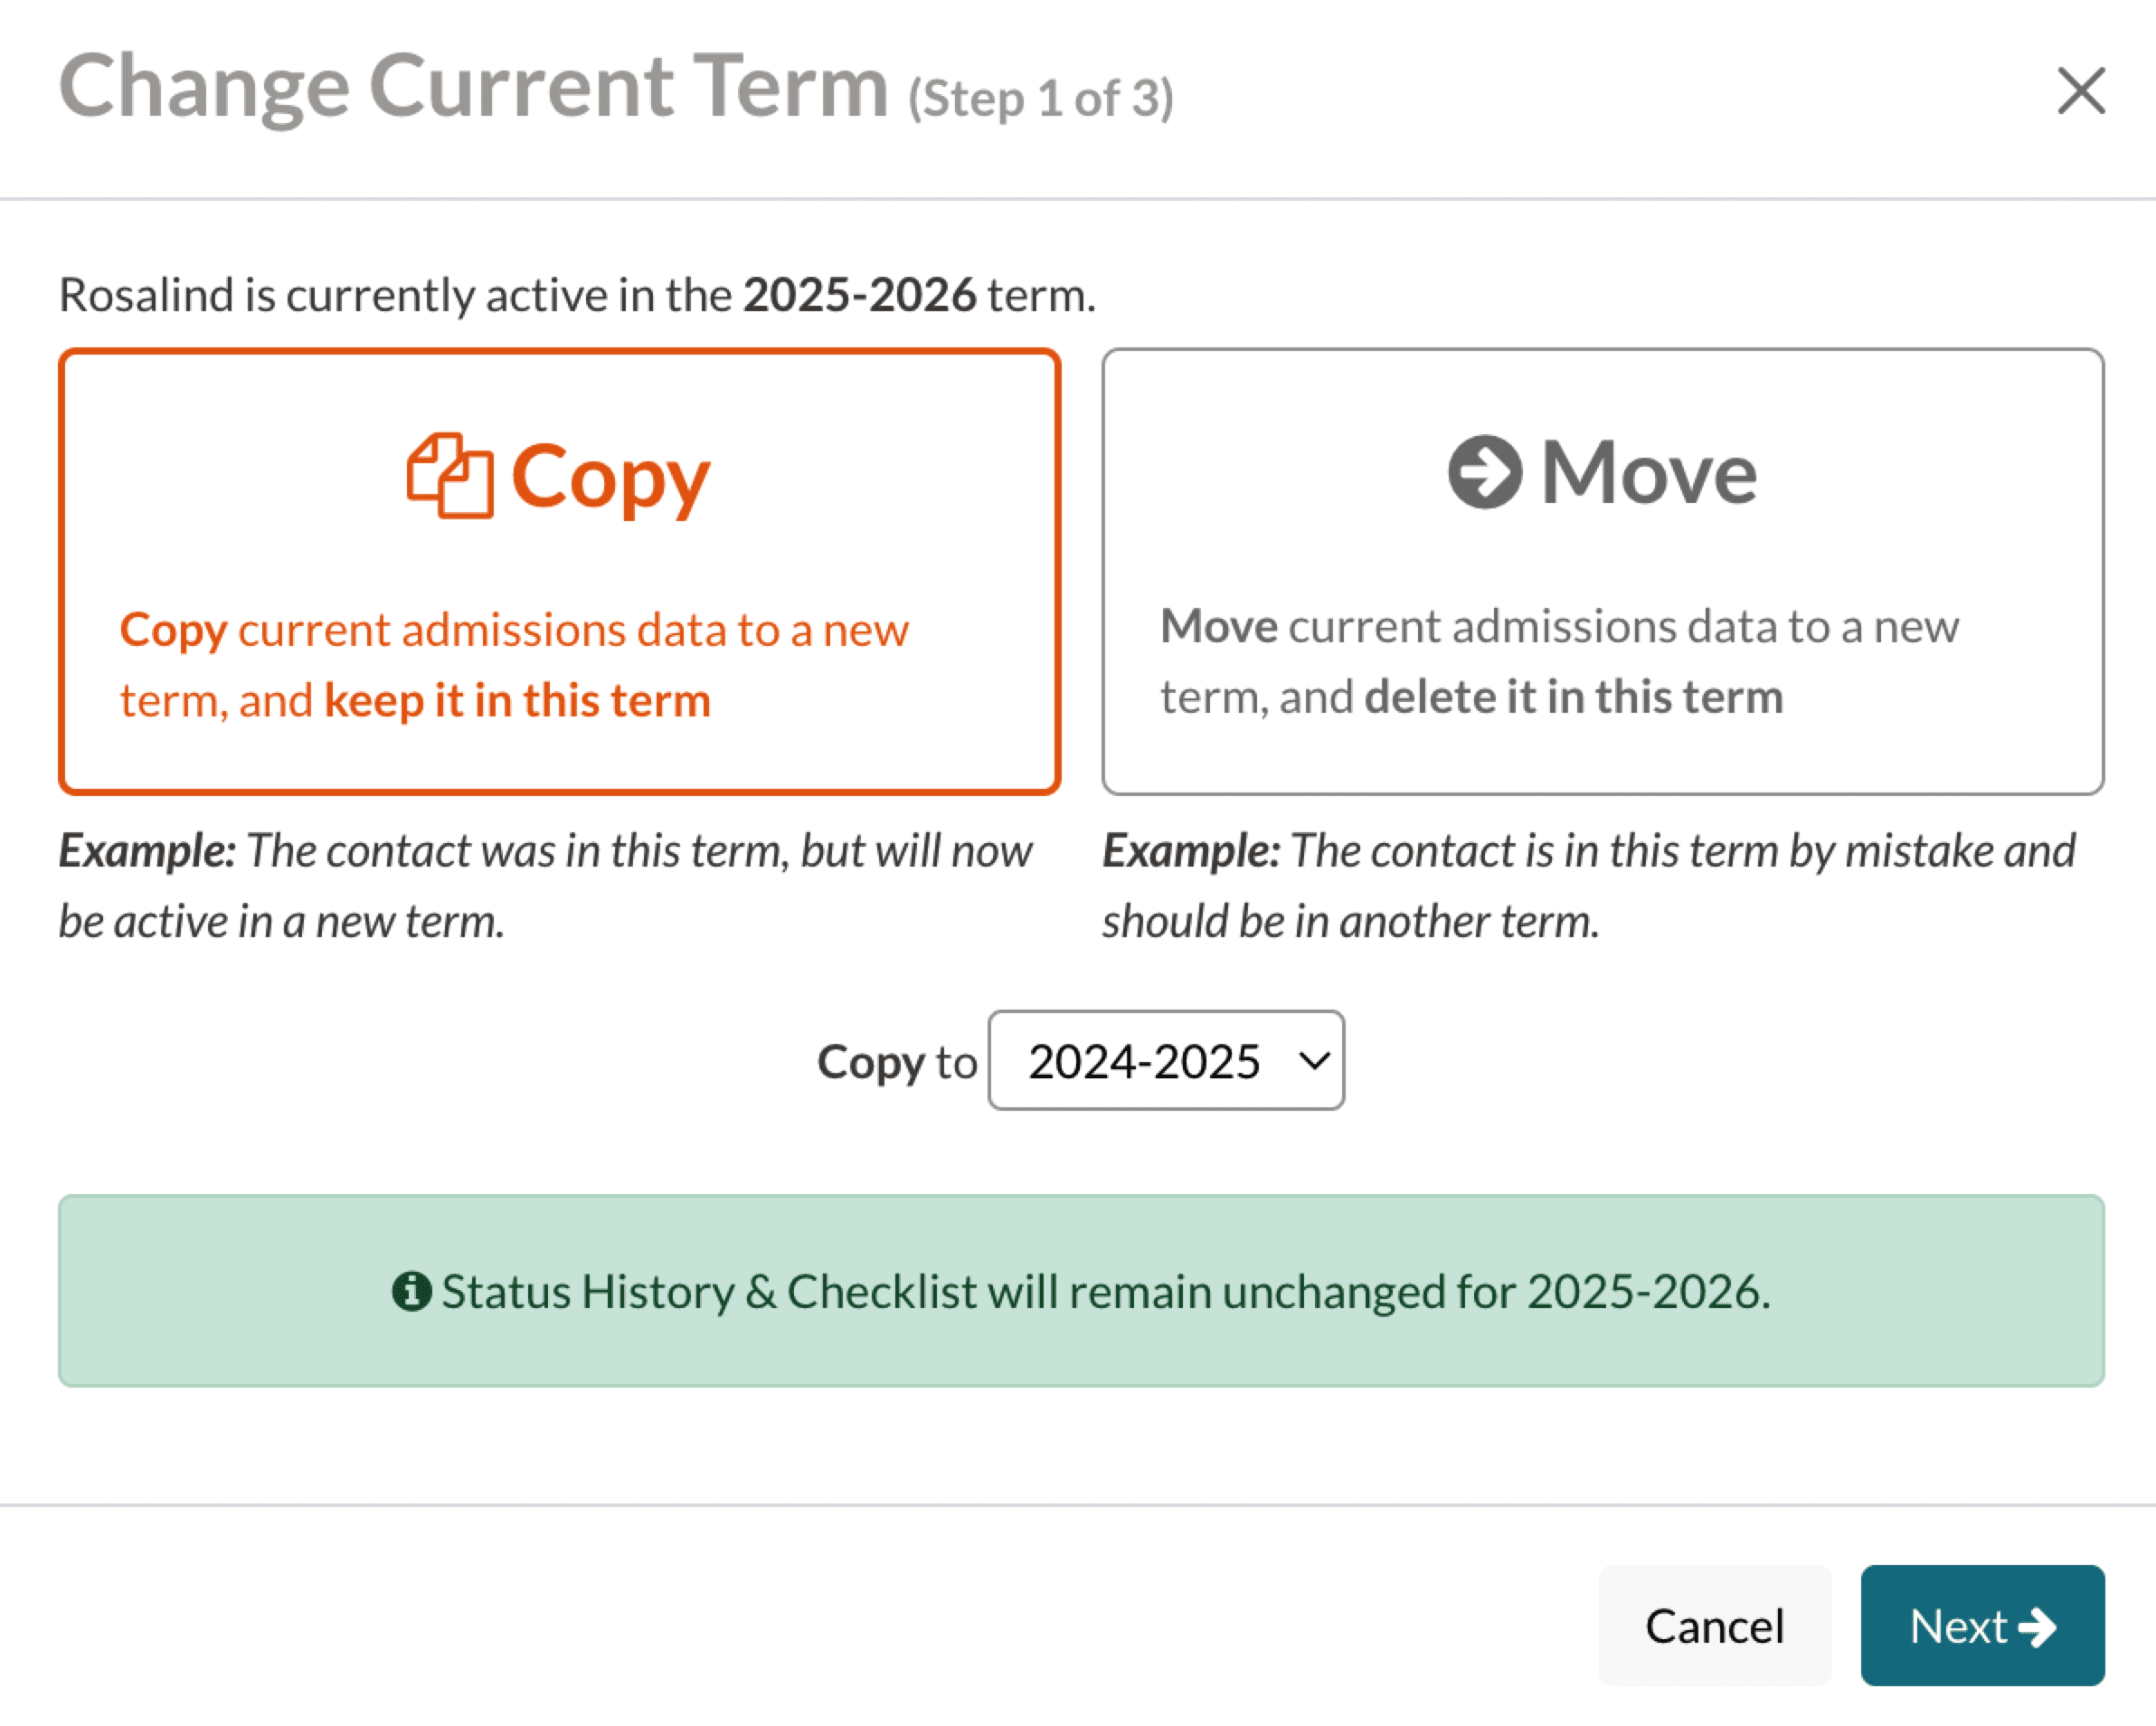
Selecting the Copy option under Edit > Change Current Term will maintain the student's data (e.g., checklist, history, term-based fields) in the term they currently exist in, and copy them to another term as well.
- Example: Student A applied in 2020-2021 but did not complete the process. You want to maintain their history of applying in 2020-2021, but also move them to 2021-2022 so they can finish the process for your new admissions year. In this case, you would want to COPY the student.
Students can be copied to a new term through a bulk action on the Admissions list page or individually from their contact record. The behavior differs slightly depending on whether you choose to copy in bulk vs. individually.
Copying Students via Bulk Action
From the Admissions List Page, select a group of students and click Edit > Change Current Term. For a full list of steps on changing the current term for students in bulk, visit the "Change Current Term" section of the article "Bulk Updates."
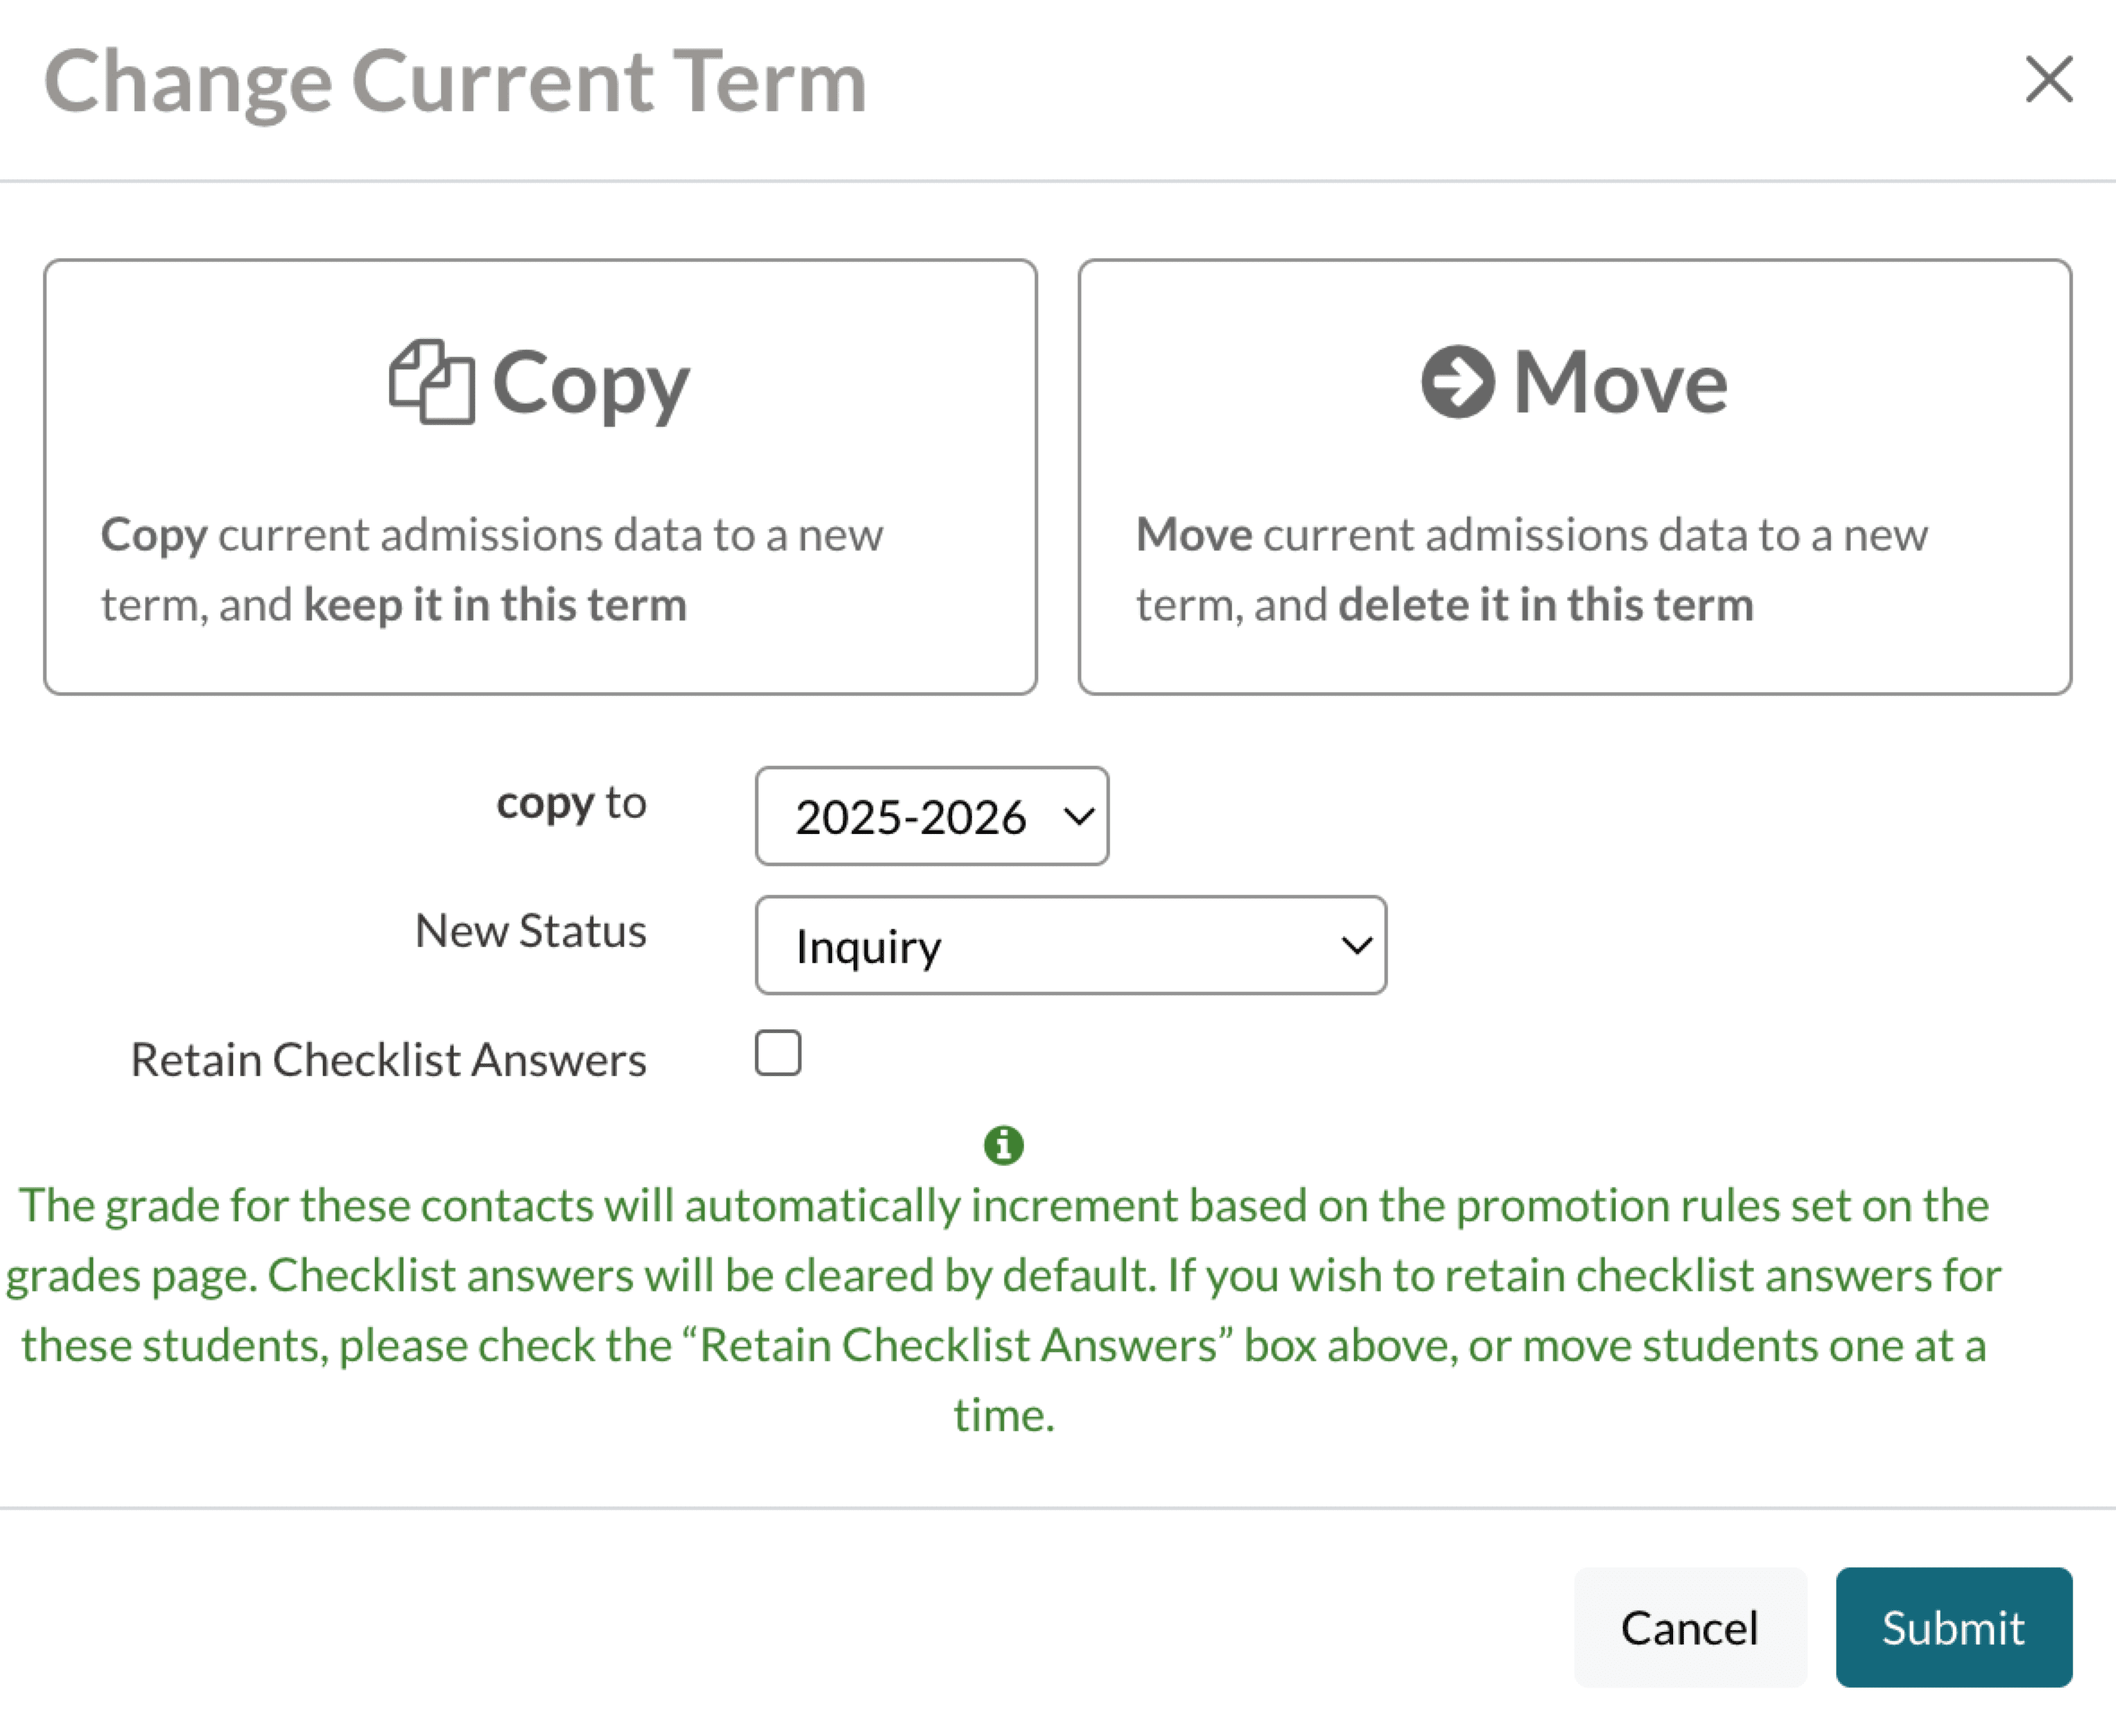
- Grade: All student grades will increment automatically based on the grade advancement rules set on the Grades setup page.
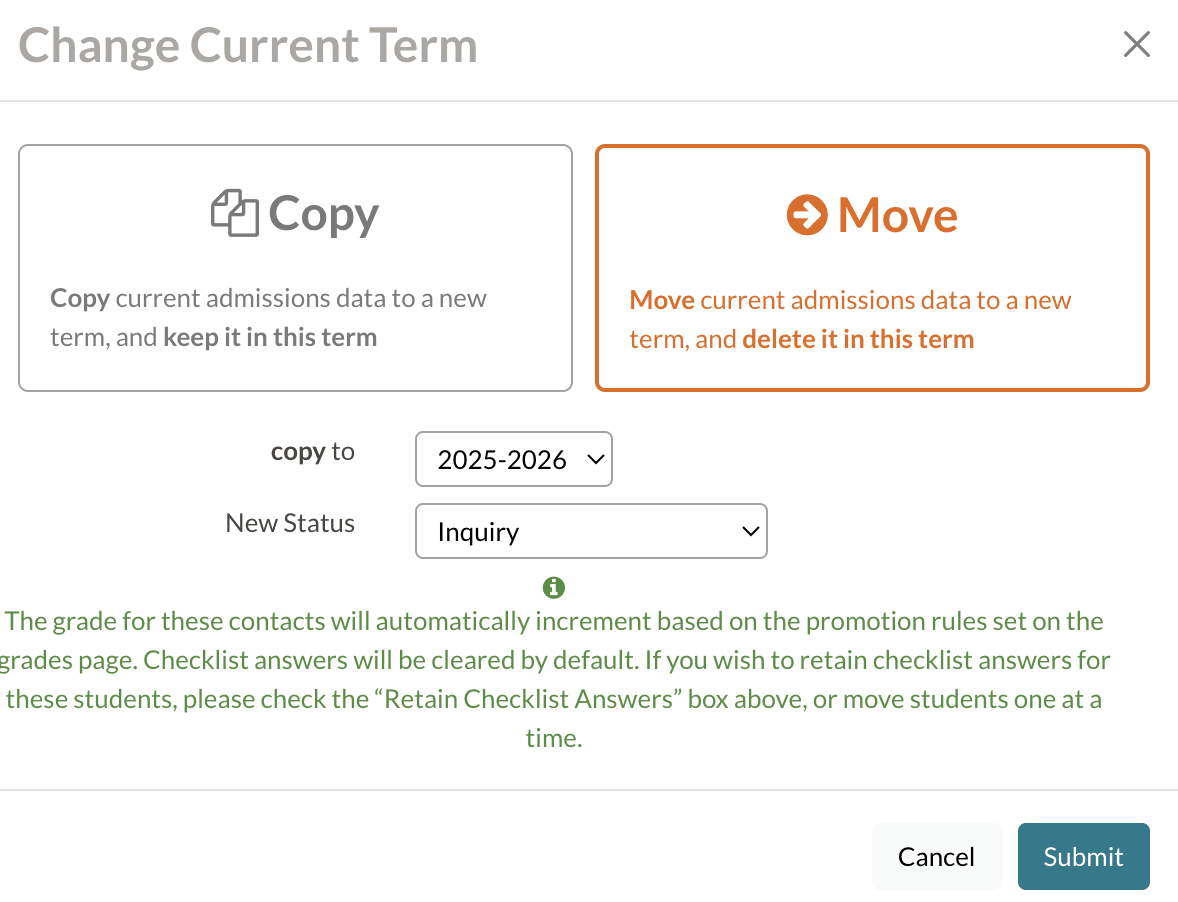
- Status: All students will be copied into the status selected in the 'New Status' menu on the Change Current Term window. If you need to move students into different statuses, move them one at a time or select in smaller groups based on the statuses.
- Checklist Items: Checklist answers (i.e. complete/incomplete status) are cleared by default in a bulk copy. However, if you want to copy the checklist answers over to the new term, you can check the Retain Checklist Answers box in the Change Current Term window. To copy over only specific checklist answers, you will need to copy students one at a time.
Copying Students Individually (from Contact Record)
From a student's record, click Edit > Change Current Term. For more information on changing the current term for individual students, visit the article "Contact Record: Edit Menu."
- Grade: You can specify which grade the student will be in the new term by using the Grade drop-down menu in Step #2 on the Change Current Term window.
- Status: You can specify which status the student will be in the new term by using the Status drop-down menu in Step #2 on the Change Current Term window.
- Checklist Items: Checklist answers (i.e. complete/incomplete status) are selected by default to copy into the new term. To change which checklist items will be marked complete or not in the new term, use the checkboxes in Step #3 on the Change Current Term window.
Gap Year Note
In some cases, a student will leave the school for a year and then return. In these cases, it's typical to Copy the student over to the new term. When you do that, you may notice that the Contract checklist item is unchecked but still says Submitted under it.

This issue is not a cause for concern and does not affect the student in any way. When you are ready, simply generate the contract for the student and proceed as normal.
Change Current Term: Move to New Term
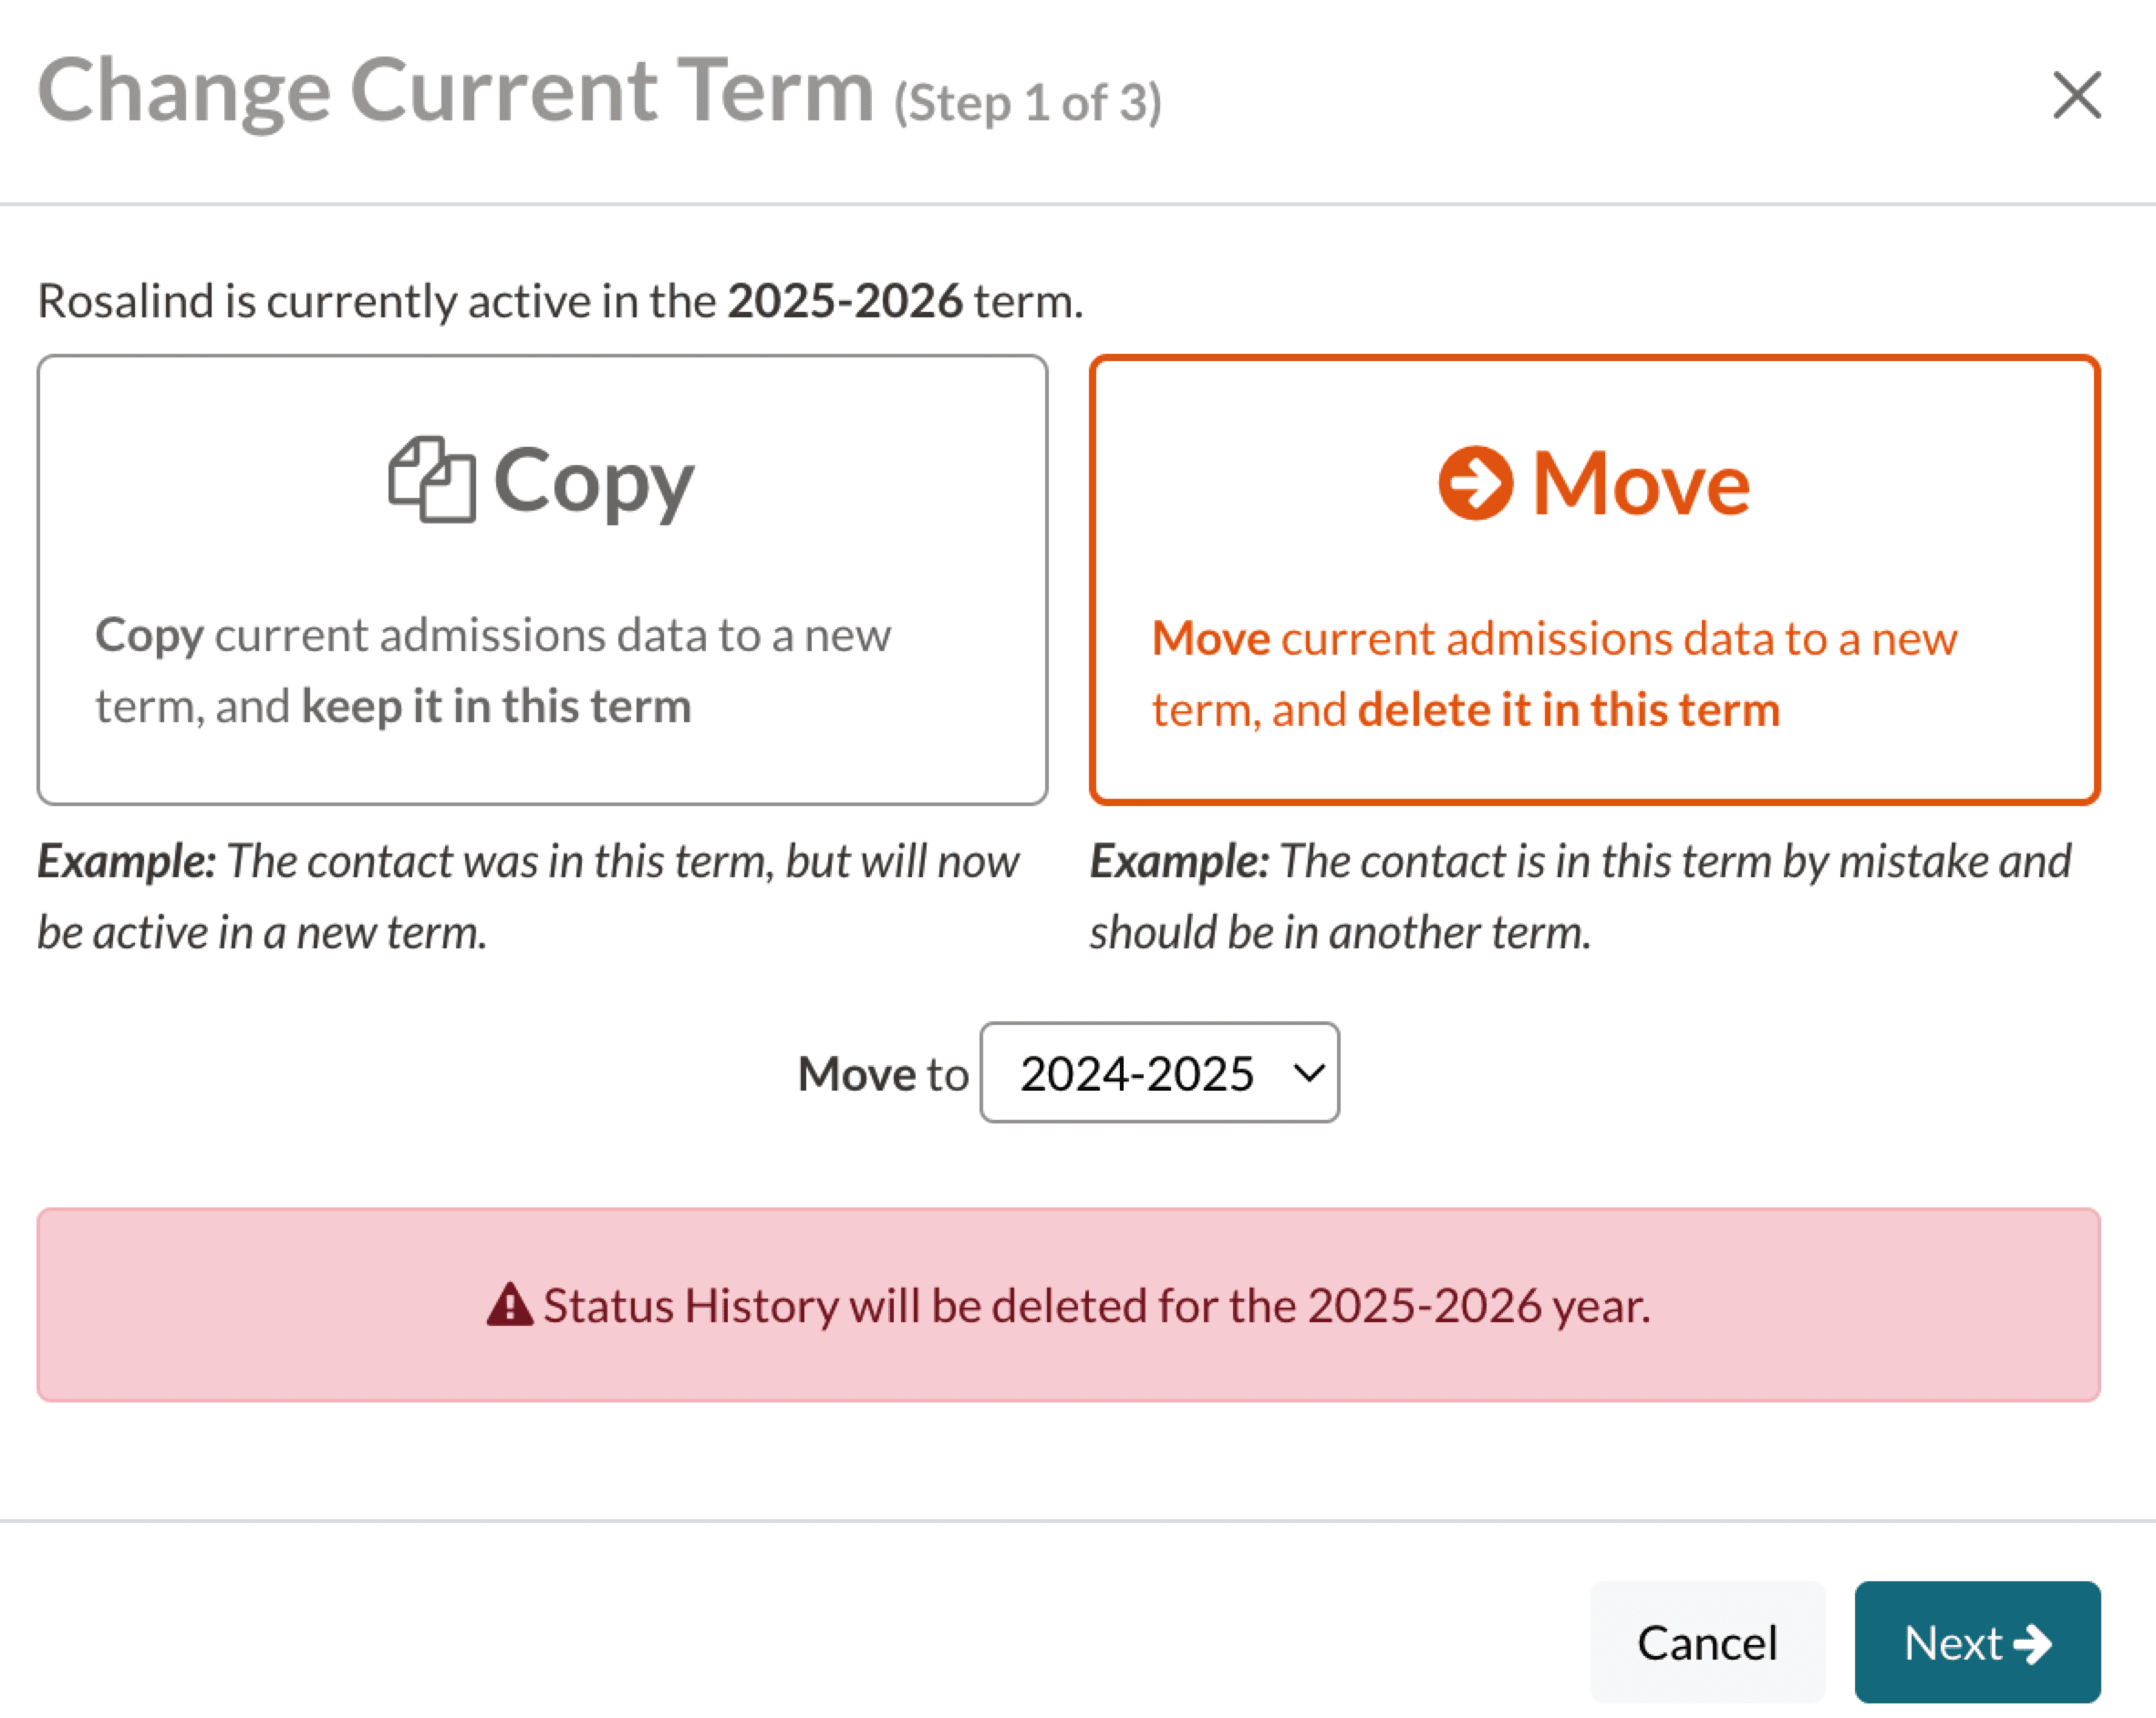
Selecting the Move option will delete the student's data (e.g., checklist, history, term-based fields) from the term they currently exist in, and move it to another term entirely.
- Example: Student A applied for the 2020-2021 term, but then the family contacts your school and says they actually meant to apply for the 2021-2022 term. You want to move the student's data to 2021-2022 without having a record of them in the 2020-2021 workflow. In this case, you would want to MOVE the student.
Students can be moved to a new term through a bulk action on the admissions list page or individually from their contact record. The behavior differs slightly depending on if you choose to move in bulk vs. individually:
Moving Students via Bulk Action
From the Admissions List Page, select a group of students and click Edit > Change Current Term. For a full list of steps on changing the current term for students in bulk, visit the "Change Current Term" section of the article "Bulk Updates."
- Grade: All student grades will remain the same in the new term as they were in the old term.
- Status: All students will be moved into the status selected in the 'New Status' menu on the Change Current Term window. If you need to move students into different statuses, move them one at a time or select in smaller groups based on the statuses.
- Checklist Items: Checklist answers (i.e., complete/incomplete status) will remain the same in the new term as they were in the old term. If you want to select specific checklist answers to move to the new term, you will need to move students one at a time.
Moving Students Individually (from Contact Record)
From a student's record, click Edit > Change Current Term. For more information on changing the current term for individual students, visit the article "Contact Record: Edit Menu."
- Grade: You can specify which grade the student will be in the new term by using the Grade drop-down menu in Step #2 on the Change Current Term window.
- Status: You can specify which status the student will be in the new term by using the Status drop-down menu in Step #2 on the Change Current Term window.
- Checklist Items: Checklist answers (i.e. complete/incomplete status) are selected by default to move with the student into the new term. To change which checklist items will be marked complete or not in the new term, use the checkboxes in Step #3 on the Change Current Term window.
Student Rollover
Rollover is only available in the Enrollment module. Rollover refers to the process of moving your Enrolled students from one term to Enrollment in Progress in the following term each school year. Students can only be rolled over from the Enrolled Students list page under the Enrollment tab.
When students are rolled over, their history as an Enrolled student and values for any term-based fields from the past term is maintained. In addition, the following will take place:
- Grade: All student grades will increment automatically based on the grade advancement rules set on the Grades setup page.
-
Enrollment Type: If a student's enrollment type was previously 'New', it will become 'Returning' after rollover.
- Checklist Items: Students will have a new checklist and a new contract will need to be generated for them to complete after the rollover.
Comments
0 comments
Article is closed for comments.