Overview
The Household Details page, within the Households tab of the contact record, allows you to view, edit, or delete any of the household addresses associated with the contact you're viewing. You can also add new household addresses from this page!
Click here to return to the Contact Record Overview.
How-To: Use the Household Details Tab
Access the Household Details page by going to any contact record, then clicking on the Households tab - Household Details sub-tab.
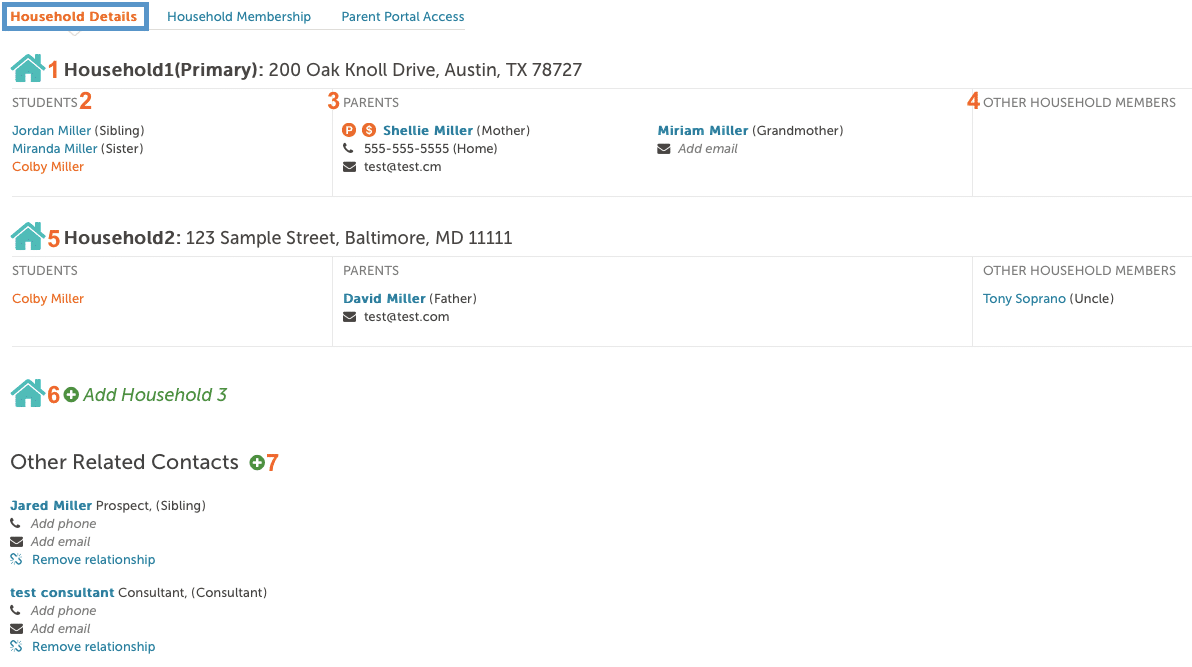
Within this page, you will find the following information:
-
Household Address: Household 1 is the primary household, which consists of Parent 1 and Parent 2. The primary parent and student must live in the primary household. If they need to be moved to a different household, the primary parent will need to be changed first. Any additional households will be listed below Household 1.
-
Students: In the left section of any household block you will see a list of all in-workflow students that are assigned to the household. The name of the student whose record you are currently viewing will be highlighted in orange. The relationship of the other students in the household will be displayed in parentheses next to their name, and you can click on the relationship type if you need to update it.
-
Parents: All parents that live in the household will be listed here. This could also include other relationship types (e.g. grandparent, aunt/uncle, etc.) that are designated as guardians in the system. The relationship of these contacts is displayed in parentheses next to their name, and you can click on the relationship type if you need to update it.
The primary parent is designated on this page by the orange (P) icon, and any financially responsible contacts are designated by the orange ($) icon - click either of these icons to reassign. You can also edit (or add, if it's currently blank) the primary phone number and email address for any contact by clicking on them from here.
-
Other Household Members: Any other household members (i.e. any contact who is not an in-workflow student or a parent/guardian) will be listed here. Their relationship to the student is displayed next to their name in parentheses, and you can click on the relationship type if you need to update it.
-
Add Household: You can add an additional household by clicking the green plus (+) button. Click here for more information. Once you have added a new household, you can assign members to it within the Household Membership tab.
-
Other Related Contacts: This is where you can see other related contacts (e.g. consultants) that do not live in any of the households. You can add new related contacts here or manage existing ones.
Please note: The data model in Finalsite Enrollment states that Parent 1 and Parent 2 belong to Household 1, while Parent 3 and Parent 4 belong to Household 2.
 Editing a Household
To edit a household address, hover over it until the blue pencil icon appears:
Click on it and the 'Edit Household' window will pop up:
Make any necessary changes to the address and then click the blue 'Save Household' button. To cancel the changes, click 'Close' or the X button in the upper right.
Deleting a Household
To delete a household address, hover over it until the red trashcan icon appears.
Click on it and you will be asked to confirm the action:
Please note: You cannot delete a household without moving all contacts to another household first. This can be managed within the Household Membership page.
Adding a New Household
To add a new household, click on the 'Add Household' text or the green plus (+) button next to it.
Click on it and the 'Add New Household' window will pop up:
Fill out the required information and then click the blue 'Save Household' button. To cancel adding the new household, click 'Close' or the X button in the upper right.
You can add members to this new household from the Household Membership page.
Updating the email tied to a parent's portal account
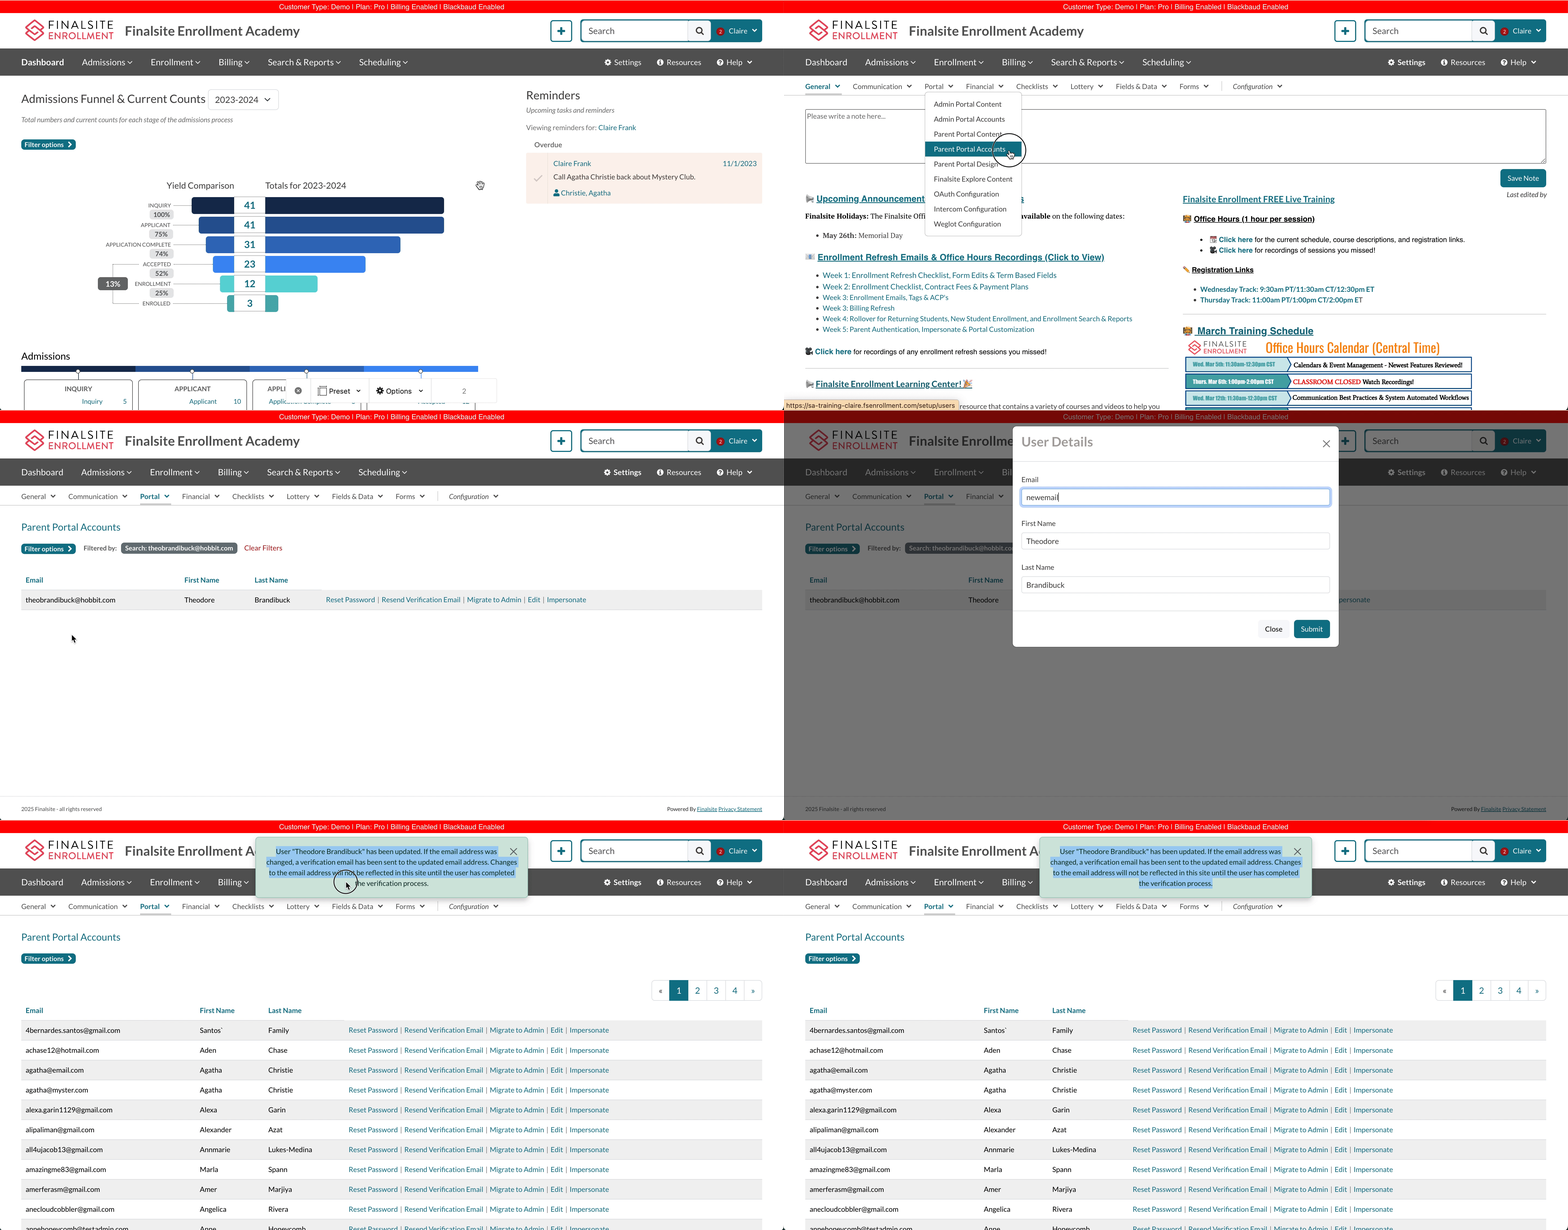
Updates to the email address tied to the parent's portal login must be done on the Parent Portal Accounts page. This is the only place on your end that will allow you to adjust the email that the parent logs into their account with.
- Navigate to the Parent Portal Accounts page (Settings > Portal > Parent Portal Accounts)
- Search for the parent by name or email address.
- Select the Edit option.
- Enter the new email address.
- Click Submit.
This will send a verification email to the parent. The email will include a link which they must select in order to verify their account.
Important Billing Note
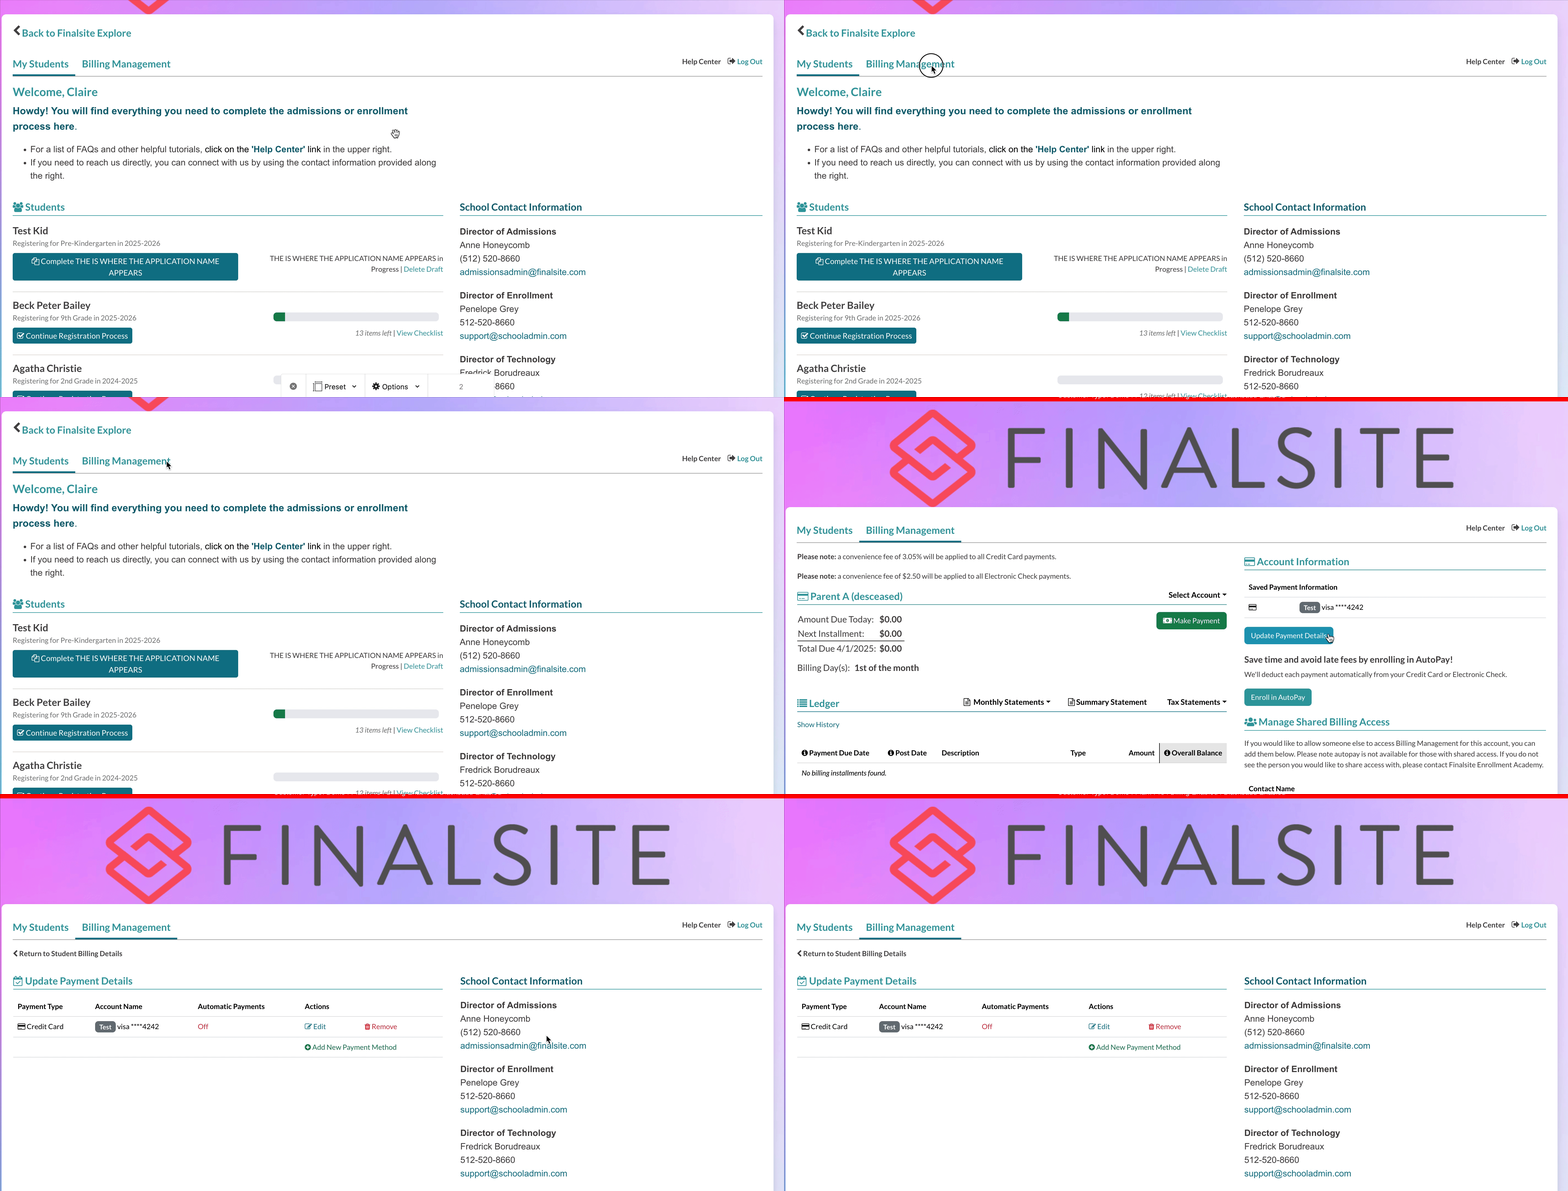
Important: When a parent's portal email address is updated, all saved payment methods associated with that parent will be removed. If you update the email address for a parent with an existing billing account ledger, you should contact them and request that they log in with their new email and add their payment method back.
Updating or adding a payment method:
Parents who use the Billing module will need to log in to the parent portal, navigate to the 'Billing' tab, and select 'Update Payment Method' to re-enter their payment details.
Additional resource:
- Parents have access to this video through their help center. It walks through how to add or update a payment method in their billing management tab. Feel free to share the link to this video directly with them: Add or Update Payment Info


Comments
0 comments
Article is closed for comments.