
Schedules let you label and color-code different appointment slots within a single calendar (host, location, age group, format). Each schedule can carry its own video conferencing link and custom appointment text, which can be merged into confirmation and reminder emails. You can also display schedule colors and titles to parents in the Parent Portal so they can choose between options before booking.
💡Quick Answers
- How do I create a schedule? Scheduling > Calendars > select the calendar > click the plus next to Schedules in the left sidebar. Set a name, background color, and optionally a unique video conferencing link or custom appointment text, then Submit.
-
Why would I add a video link or custom text per schedule? Each schedule can have its own meeting link or instructions, so families booking through that schedule receive their schedule-specific link or text. Use the merge tokens
{{appointment.video_conferencing_link}}and{{appointment.custom_schedule_text}}in confirmation and reminder emails to pull them in. - How do I attach a schedule to an appointment slot? When creating a new time slot, pick the schedule from the Schedule dropdown. For existing slots, click the slot, click Edit, pick the schedule, Submit, then confirm whether the change applies to that one slot or to all recurring instances.
- How do I make schedules visible to parents? Calendar Settings > Edit Settings > Calendar Access > enable "Allow parents to view schedules in the Parent Portal," then Submit. Parents will see schedule colors and names in the calendar and can filter which to display.
- What if I only have one schedule on a calendar? Parents will not be asked to choose between schedules; they just see the calendar directly.
- How do I delete a schedule with booked appointments on it? You can't delete it outright. You'll be prompted to pick a different schedule to move those booked appointments onto first, then the deletion can proceed. Schedule deletion is permanent.
In this article
- Create a new schedule
- Add a schedule to an appointment slot
- Display schedules to parents
- Edit or delete existing schedules
- Viewing Schedule Details in Search & Reports
Create a new schedule
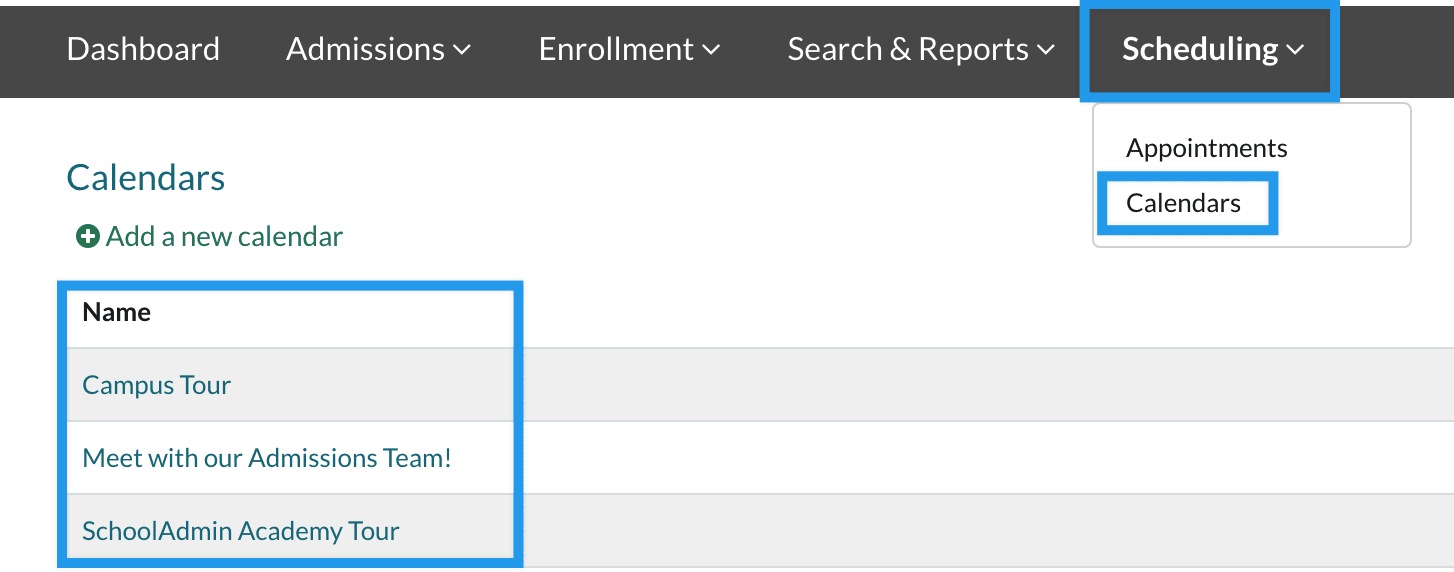
To create a schedule, start by navigating to Scheduling -> Calendars and selecting the desired calendar from the list.
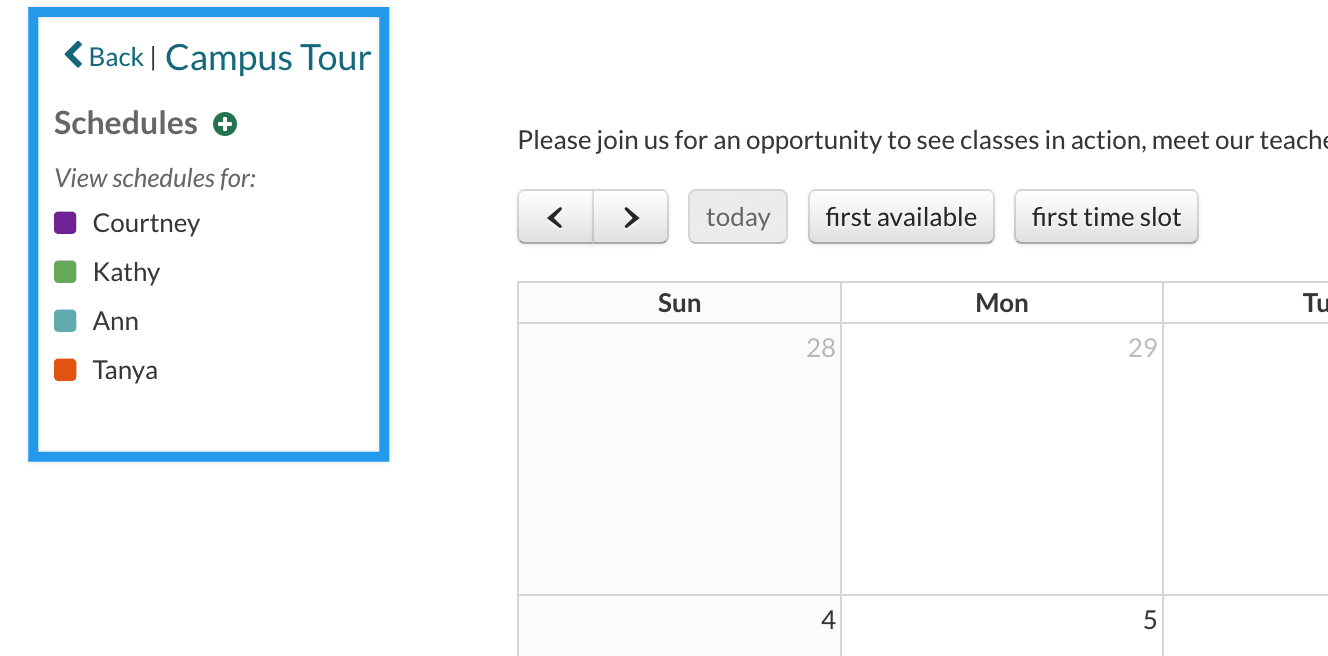
Once on the page for that calendar, click on the plus sign next to Schedules along the left sidebar.
This will open the Schedule Details window.
In the Schedule Details window, you will enter the following information.
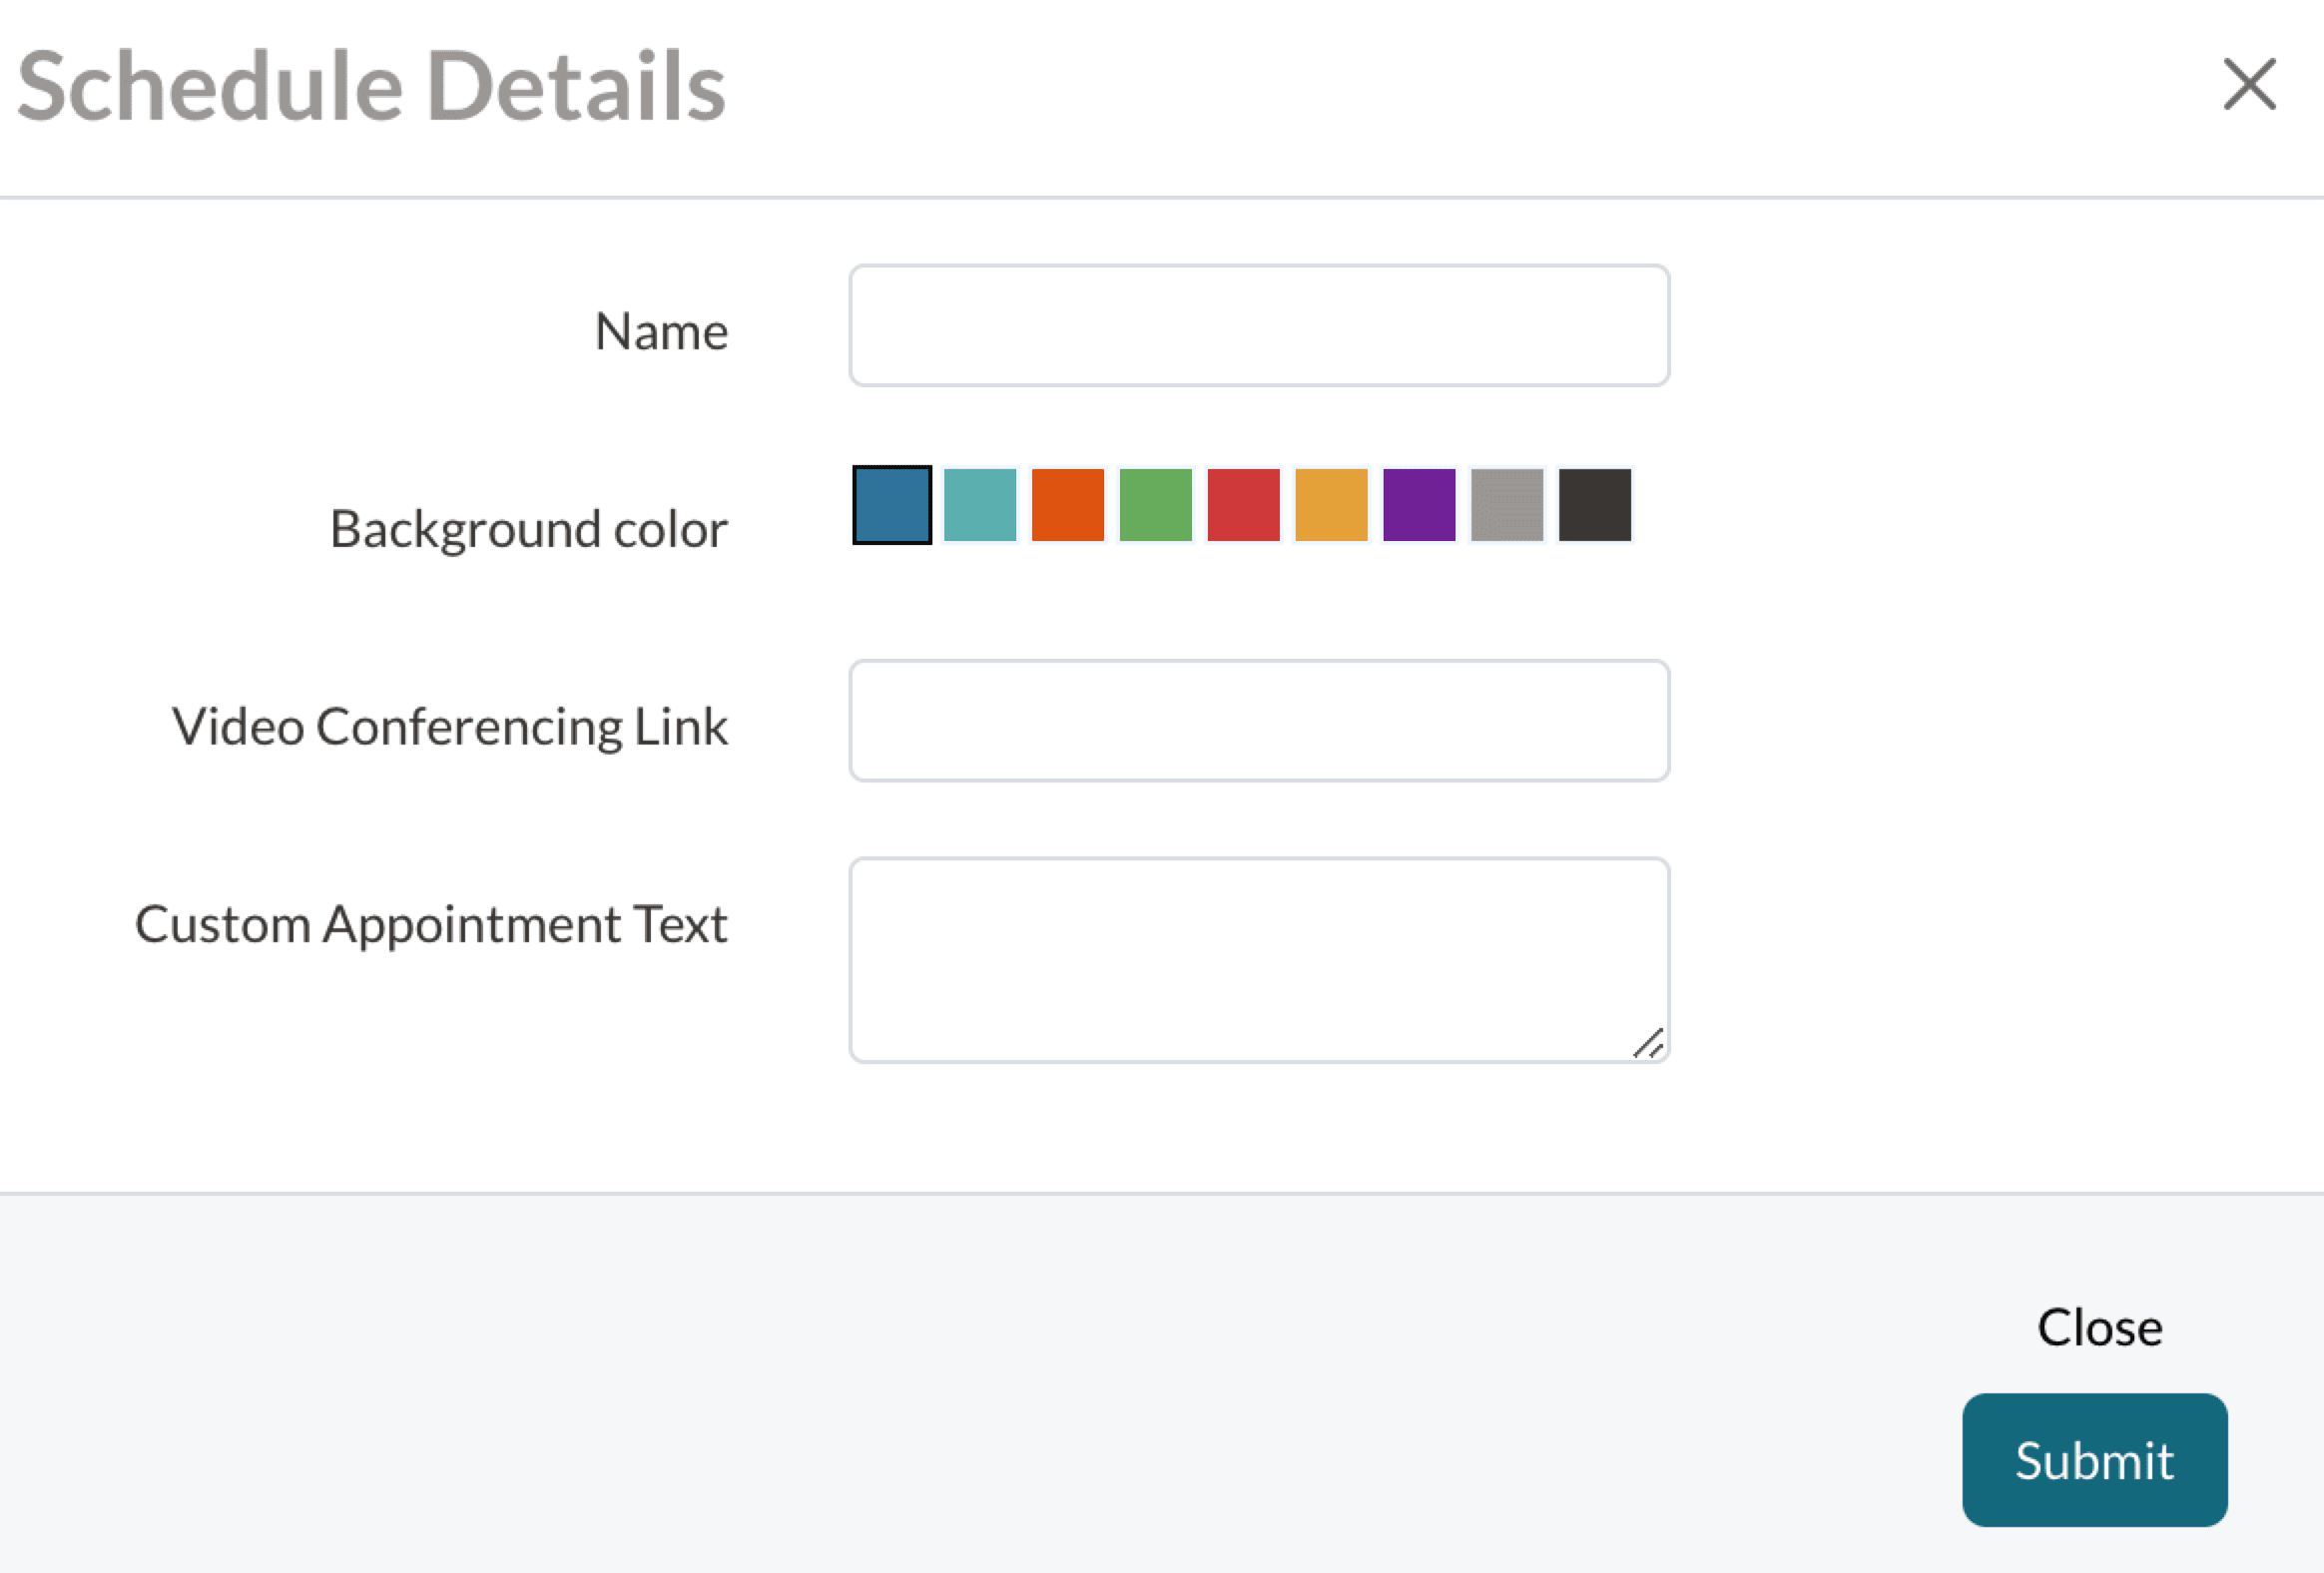
- Name of the Schedule you wish to add.
- Background color to distinguish the schedule from any others you have set up.
- (OPTIONAL) Video Conferencing Link: You can choose to add a unique video conferencing link for anyone who books an appointment from that schedule. To pull this link into the calendar confirmation/reminder email, add this merge token: {{appointment.video_conferencing_link}}
- (OPTIONAL) Custom Appointment Text: You can also choose to add custom appointment text for anyone who books an appointment from that schedule. To pull this text into the calendar confirmation/reminder email, add this merge token: {{appointment.custom_schedule_text}}. Please note: HTML and Liquid formatting are not supported in the Custom Appointment Text; however, line breaks will be preserved.
- Don't forget to click the blue Submit button to save your changes!
Once you create a schedule, you can use it when adding or editing appointment slots within the calendar. In addition, you'll have the option to display the schedule color and title to parents. Read more on that option below.
Video Conferencing Note
If you add custom virtual conferencing links in each schedule, the parents will receive the specific link attached to their schedule.
Families can always view the Video Conferencing Link and Custom Appointment Text by clicking the View Appointment button next to the calendar item on the student's checklist.
To learn more about how to integrate links/custom text into the event confirmation and reminder emails that send to parents, refer to our article on Integrating Virtual Events with Calendar & Emails.
Add a schedule to an appointment slot
Now that you have created your new Schedule, it can be added to any new or existing time slot within the calendar.
Add a schedule when creating a new time slot
- Select the Add a time slot button
- In the Schedule dropdown, select the schedule that you'd like to attach
- Set up the additional time slot details, such as time and availability
- Select Submit
Add a schedule to an existing time slot
- Select one of your time slots within the calendar
- Select Edit
- In the Schedule dropdown, select the schedule that you'd like to attach
- Select Submit
- Confirm whether you'd like to edit just the current appointment slot or all of the other occurrences.
Appointment slots will now show up on the calendar in the colors you assigned to each schedule.
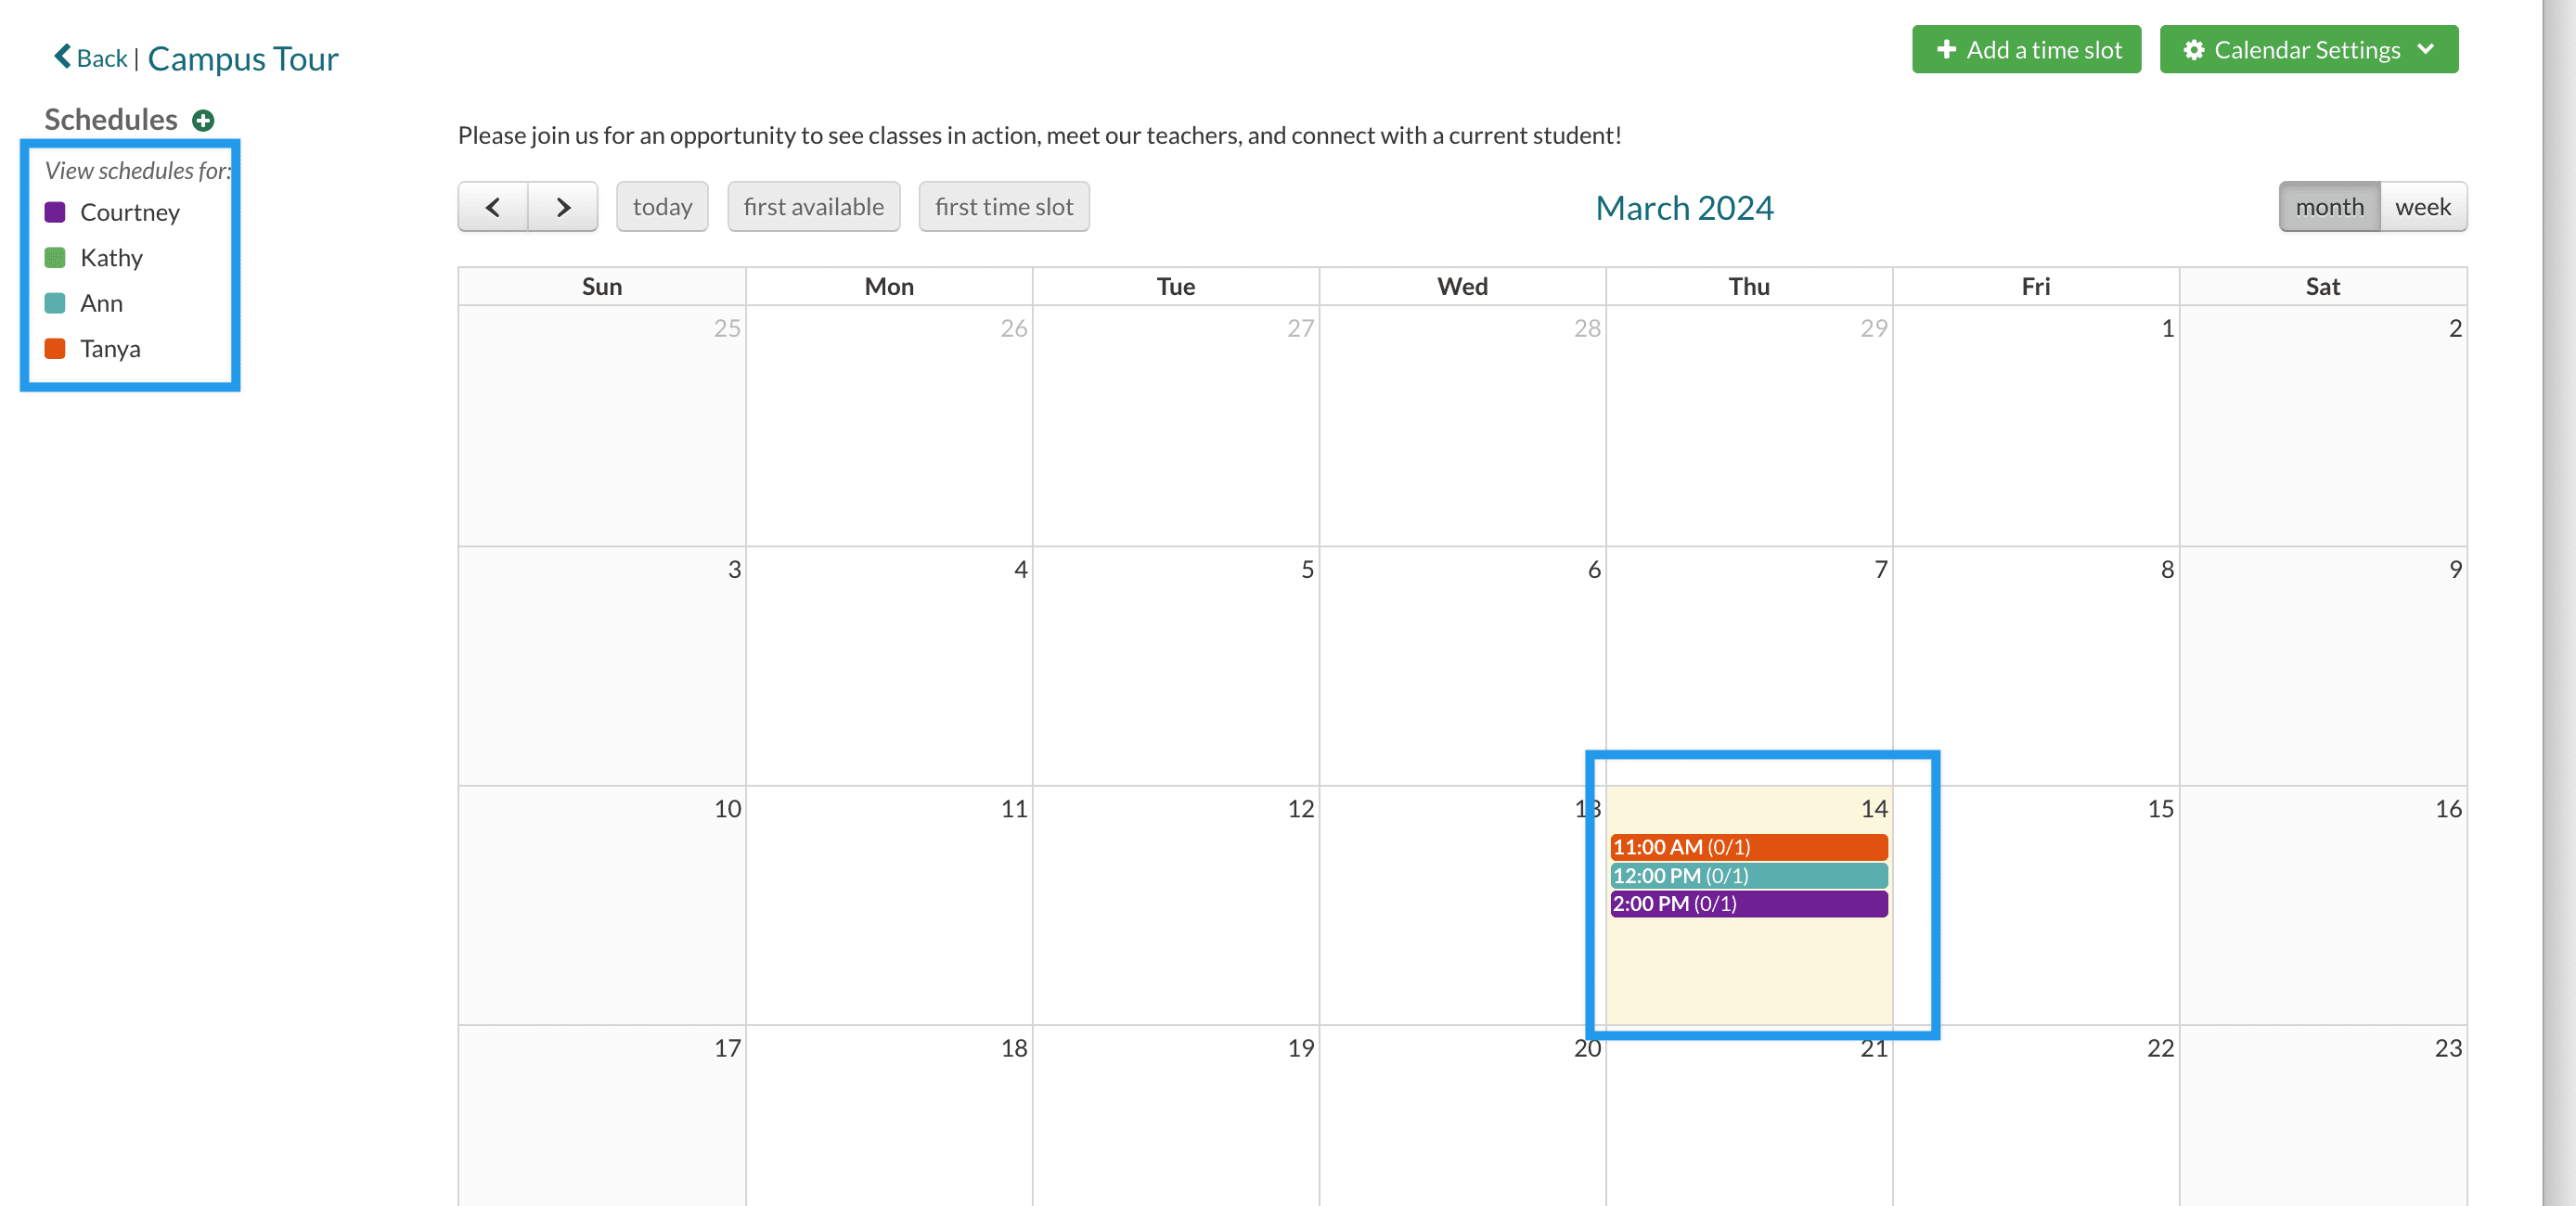
If you want to hide one or more of the schedules from your view, uncheck the box to the left of the schedule name in the Schedules section of the left sidebar.
Display schedules to parents
Schedules can be displayed to parents, which can be helpful if you need to allow parents to differentiate between the different options you have for an appointment.
How to make schedules parent-facing
- Within the calendar, select the Calendar Settings dropdown
- In the Calendar Access section, enable the Allow parents to view schedules in the Parent Portal option
- Select Submit to save the change
Parent Experience with viewing schedule color/titles
Public Links and Calendar signups in the checklist
When a parent opens the calendar, they will first select which schedules they’d like to display before proceeding to the calendar. After selecting the schedule to display, parents will see the calendar and have the ability to select a time slot.
- Both the color and title will display within the calendar for the parent.
- On the left side of the calendar, parents can select or deselect which schedules to display.
Example of accessing a calendar with parent-facing schedules from the checklist
Good to know
If there is only one schedule in a calendar, parents will not be asked to choose the schedule when accessing the calendar.
Calendars within a form
In the date picker dropdown, the name of the schedule will appear after the date/time.
Example of parent-facing schedules in a form
Important Note
You will need to enable the "Allow parents to view schedules in the Parent Portal" option within the calendar's settings menu for the schedules to become visible on your forms. Follow the instructions in the "How to make schedules parent-facing" section above.
Editing or Deleting Existing Schedules
If you need to edit your schedules (i.e. change the name, color, video conferencing link, or custom appointment text), hover over its name in the Schedules section of the left sidebar, and the Edit option will appear.
Once you click on the Edit button, the Schedule Details window will open. From here, you can update any of the information, and then click the Submit button to save your changes.
You can also delete the schedule from this menu by clicking on the red Delete Schedule button. Deleting schedules is permanent and they cannot be recovered. If there are booked appointments for the schedule you are trying to delete, you will need to select a schedule to move those appointments to before you can delete the schedule.
Viewing Schedule Details in Search & Reports
When creating event registration and attendance tracking reports, you may want to include schedule information and appointment details. To learn how, click here.
Pop some Popcorn!
New to Calendars or need a refresher? Check out our quick learn video here. It's under 5 minutes!
Comments
0 comments
Article is closed for comments.