Overview
The Waitlist page (Admissions > Waitlists) is where you can view and manage your waitlisted students.
Who can access this feature?
Admin Account Types: System Admin, Admin, User
Permissions: Admissions
In this Article
- Overview of the Waitlist Workflow page
- How students are added to the Waitlist page
- Viewing the Waitlist number on the student's record
Overview of the Waitlist Workflow page
Term
At the top of the page, you can select the term.
Grade
In the dropdown menu, select the grade level. Once you do that, a list of waitlisted students in for that grade and term will appear (if there are any).
Columns
- Position: The waitlist number of the student. Drag and drop the student to change their position within the waitlist.
- Name: The name of the student.
- Apply grade: The grade the student is applying for.
- Term: The term the student is applying in.
- Status: The status of the student.
- Checklist: Hover over the checklist bar to see a pop-up of the student's checklist that shows their progress.
- Notes: Hover over the notepad icon to view the notes that have been added to the student record.
Custom Columns
Custom columns can be added to this page. Whatever columns you include in the Lottery Columns box within the List Page Configurations page (Settings > General > List Page Configurations) will appear on this page after the notes column.
Edit Options
When you select one or more students from the list, you will see the edit menus appear.
-
Download: Use the download menu to download files and forms for the student(s). You'll see the following download options:
- Inquiry
- Admissions (hover over to see the list of Admissions forms and files)
- Enrollment (hover over to see the list of Enrollment forms and files)
- Contact Photos
-
Communicate: Use this menu to communicate with the families in the list. Depending on your site setup, you may see all or some of the following options:
- Send Emails
- Send Text Messages
- Generate Letters
- Generate Labels
-
Edit: Use this menu to update or edit the students within the list.
- Add a note or activity
- Change Status
- Update Checklist
- Update a Field
- Remove From Term
How students are added to the Waitlist page
Auto-Waitlist
The Auto-Waitlist feature can be enabled through the Terms page. When it's enabled for a grade, if a student applies to that grade, they will automatically be added to the waitlist. (This is set up on a term-by-term basis, and you can set an open and close date/time so that the system automatically starts waitlisting a grade (or grades) on a certain date/time.) Learn more about this in our Auto-Waitlist article.
Lottery
If your school utilizes the lottery feature, students who are not accepted when a lottery is run will be auto-waitlisted and will appear on this waitlist page.
Admin Entered Applications
If you internally submit an application for a student in a grade set to Auto-Waitlist, the student will automatically be added to the waitlists page.
Manual Status Update
If you manually update a student's status to Waitlisted, they will also appear on the Waitlists page.
Viewing the Waitlist number on the student's record
For easy reference, you can pull the student's waitlist position to be displayed when working on the student record.
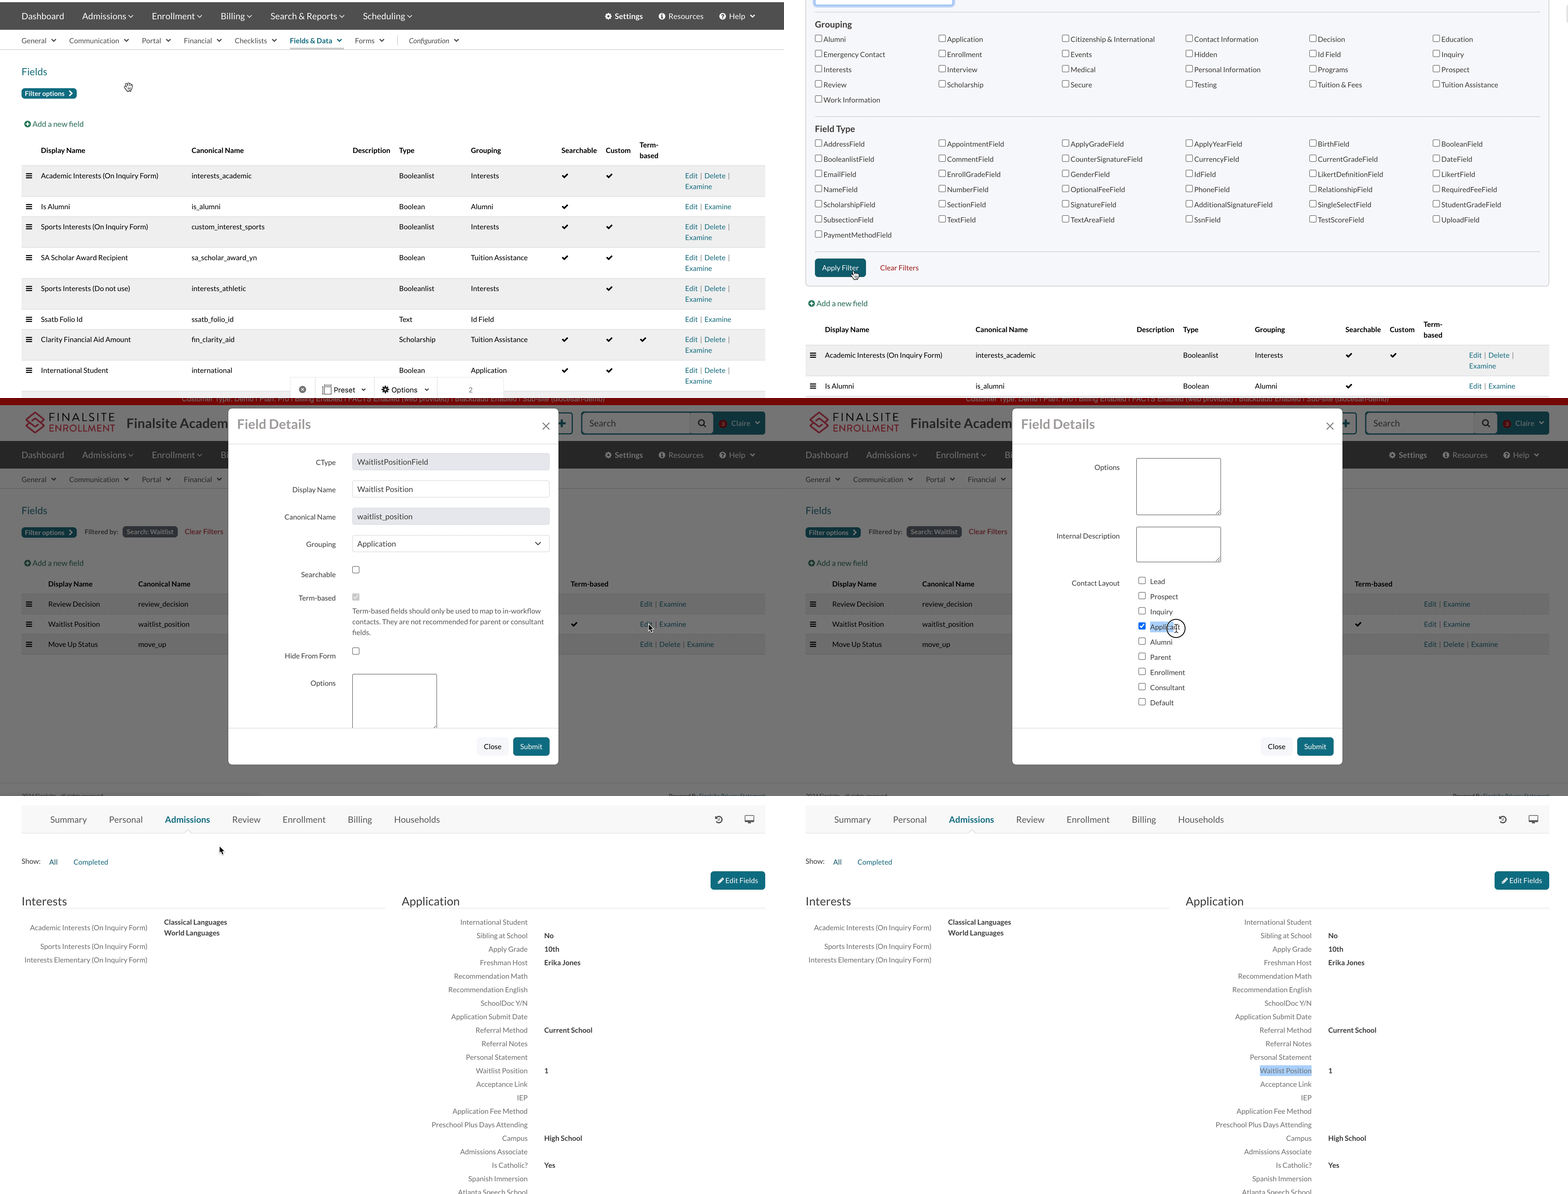
How to add the Waitlist position to the student's record (or to find out if it's already added)
- From the Fields page (Settings > Fields & Data > Fields), use the Filter Options to search for "Waitlist." (You're looking for the Waitlist position field.)
- Open the Edit pop-up to see/adjust where the field is displayed within the student's record. As a reminder:
- Grouping refers to the category of fields that it's grouped with and Contact Layout refers to which tab(s) it's listed under.
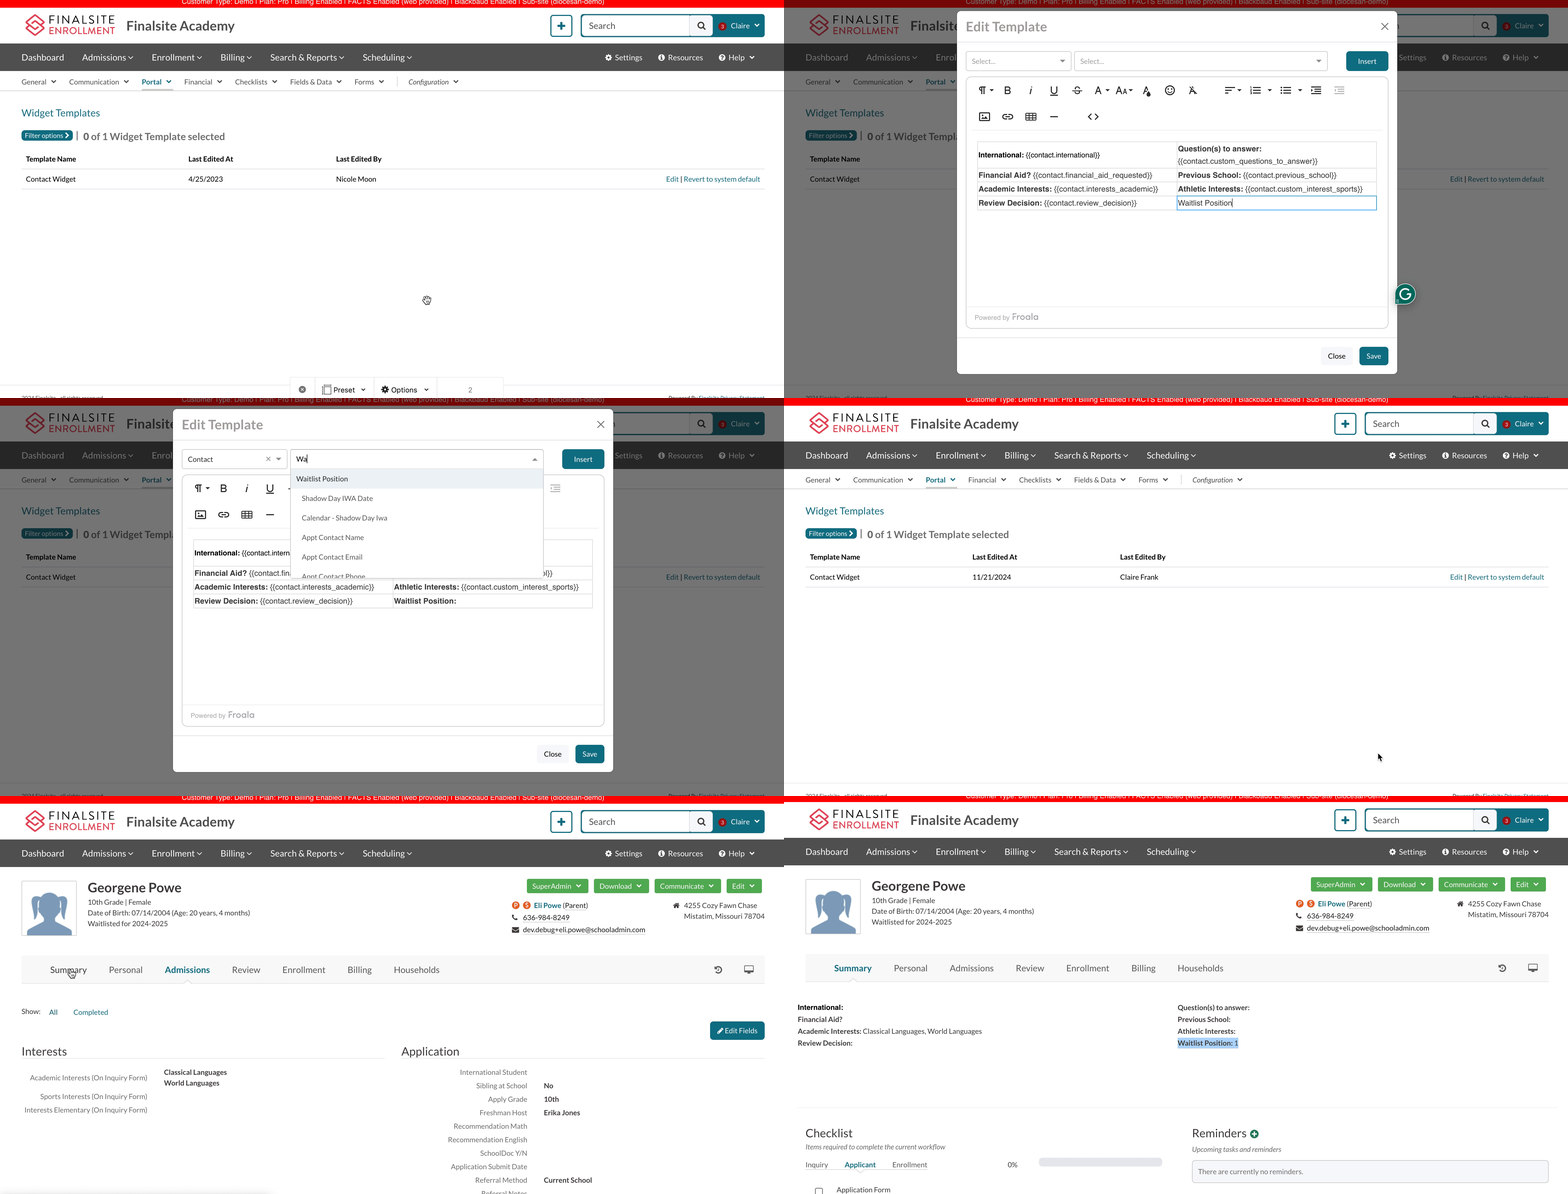
How to add the Waitlist position to display in the Contact Widget
(The contact widget is right above the checklist on the record.)
- From the Admin Portal Content page (Settings > Portal > Admin Portal Content), select Edit on the Contact Widget.
- In the dropdowns at the top, select Contact in the left dropdown and search Waitlist in the right dropdown.
- Click Insert to pull it into the widget.
Pro-Tips:
- Write the field name in the widget in front of where you paste in the token. This will make it much easier when you are looking at it on the student's record.
- Before inserting the token, put your cursor inside the widget where you want the token to appear.


Comments
0 comments
Article is closed for comments.