
The Auto-Waitlist feature, configured on the Terms page, automatically moves applicants to Waitlisted status when a grade's close date or maximum applicant cap is reached.
💡Quick Answers
- How do I enable auto-waitlisting for all grades in a term? On Settings > General > Terms, expand the term settings, click Edit under Global Configuration For All Grades, set a Close Date, select Collect and auto-waitlist applications, and save.
- Is a Close Date required for auto-waitlist to work? Yes, the Close Date is required; without it the setting will not activate. The Open Date is optional.
- How do I set a cap or close date for a specific grade? In the Custom Grade Configuration section of the Terms page, edit the grade, set a Max Applicants cap and/or Close Date, select Collect and auto-waitlist applications, and save.
- Do custom grade settings override global settings? Yes, any custom configuration for a specific grade takes precedence over the global settings for that grade.
- How do I manage students after they are waitlisted? View and reorder waitlisted students on the Waitlist page (Admissions > Waitlists).
In this article
- How to enable auto-waitlist
- Waitlist Status
- Waitlists Page
- Ideas for Improving the Waitlist Experience
- Automated Communications for Waitlisted
How to enable auto-waitlist
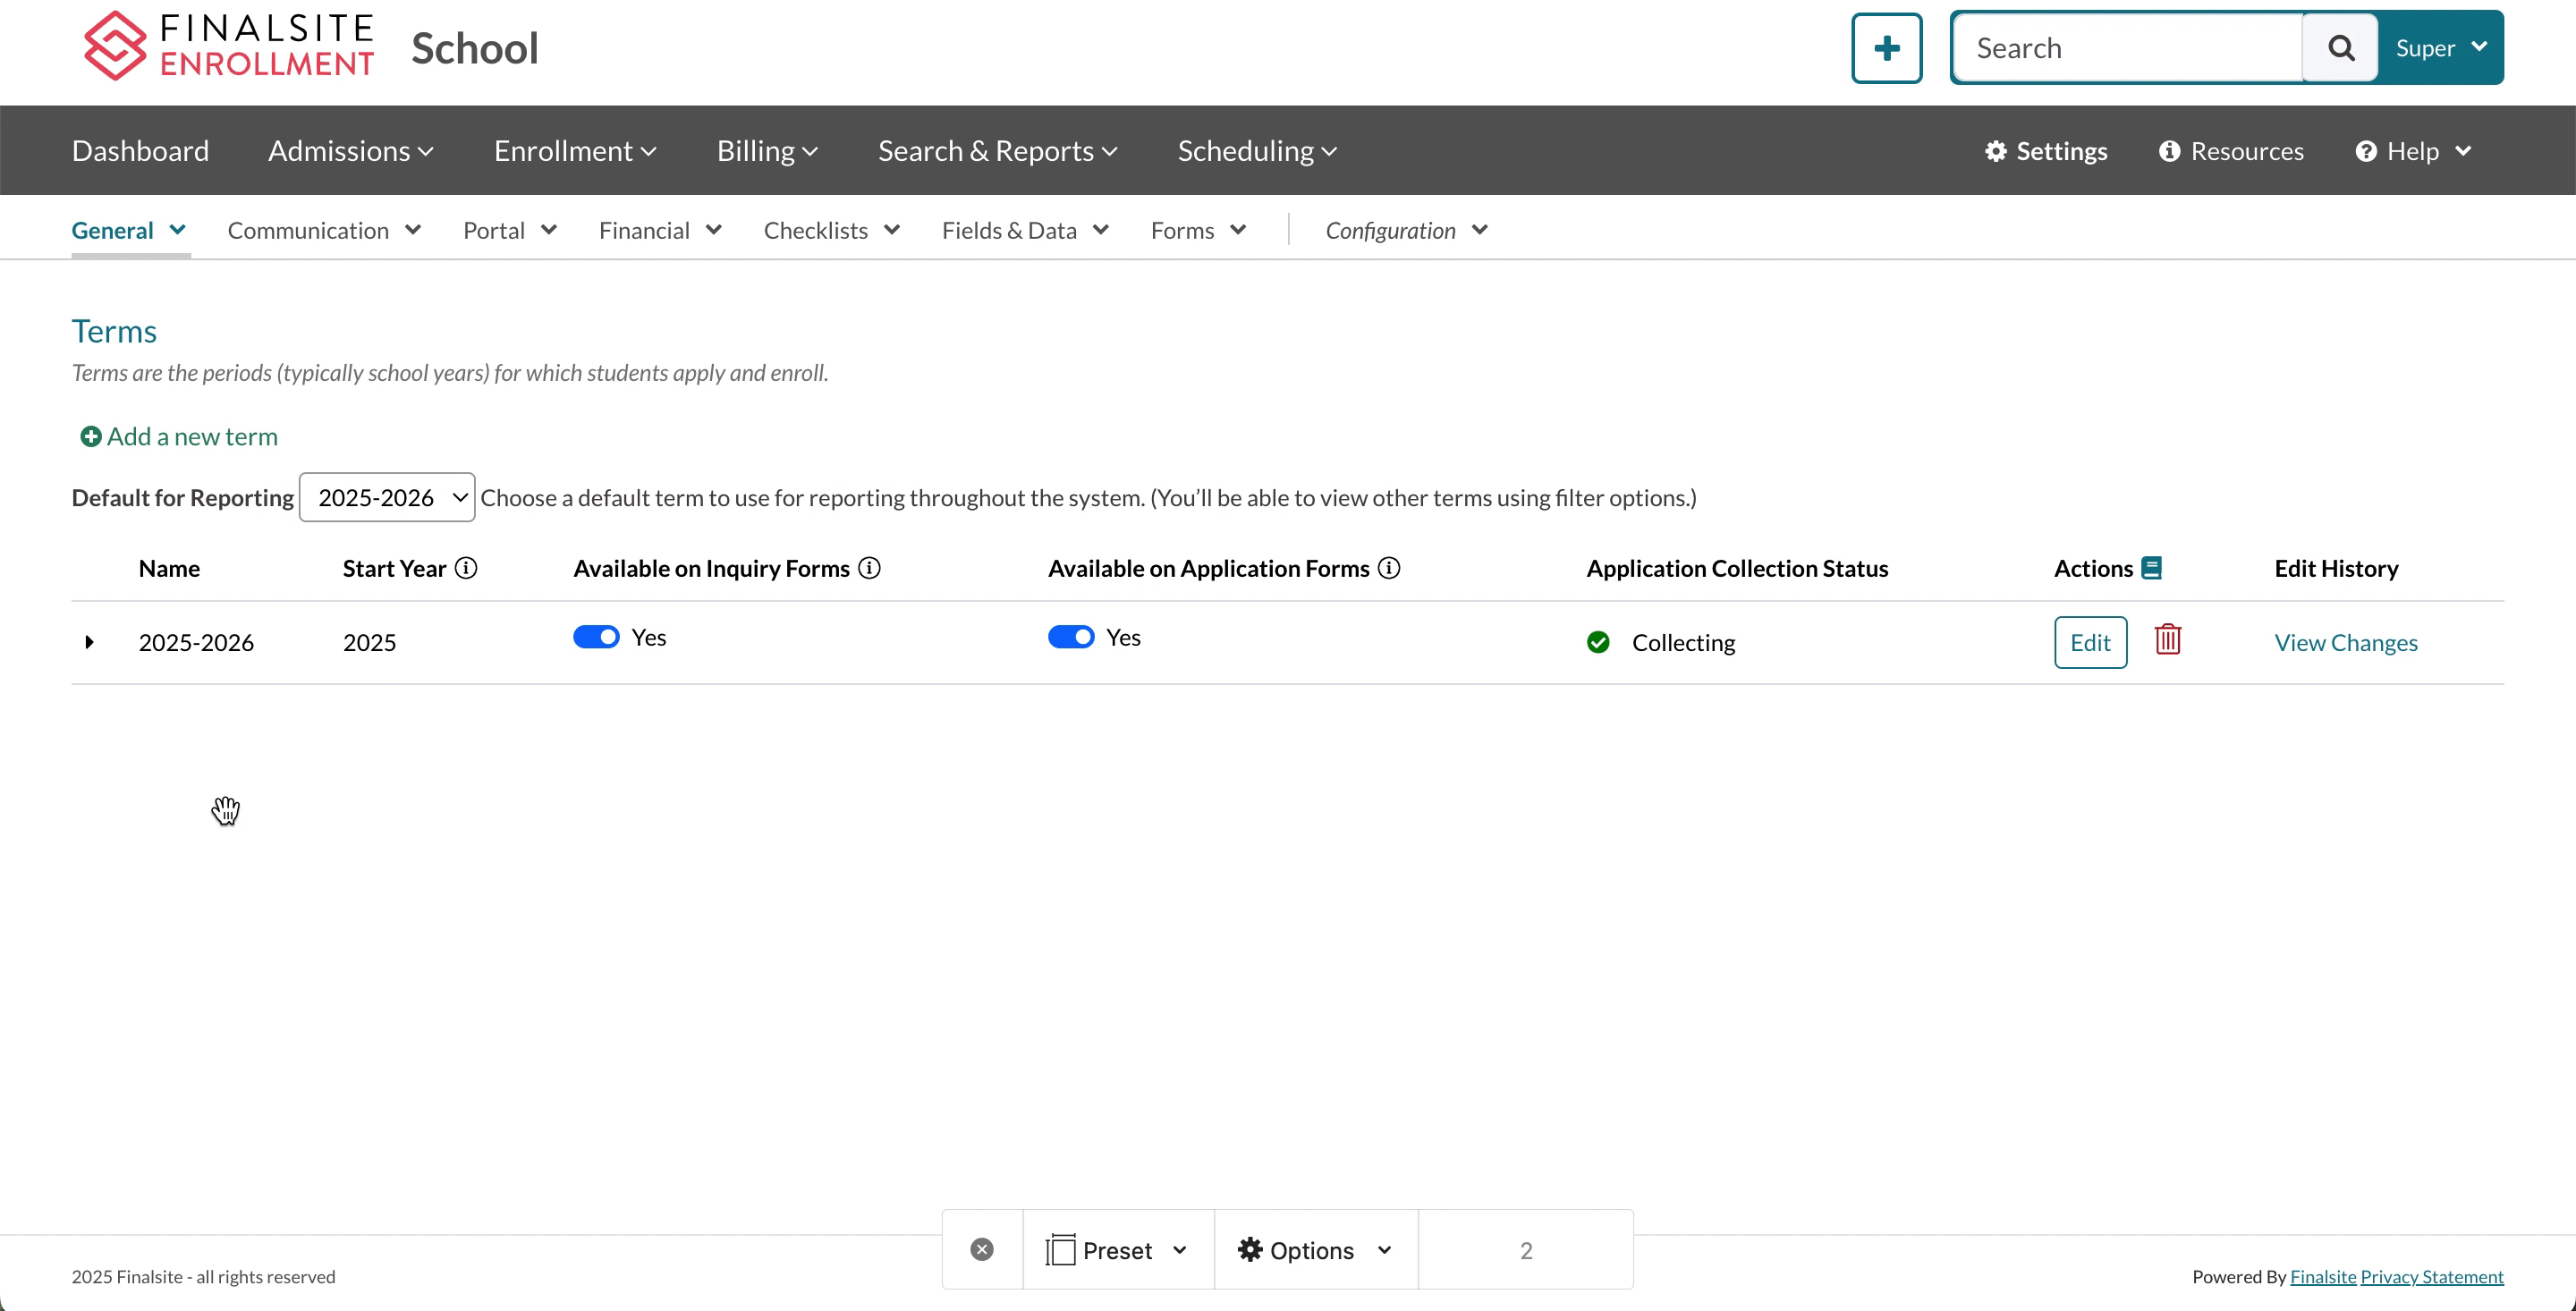
Under Settings > General > Terms, you can enable automatic waitlisting for applicants. Waitlisting can be set up by term for all grades or specific grades.
Setting up auto-waitlisting for your grade(s) will automatically put any student who applies for that grade on the waitlist page and update their status to Waitlisted.
Waitlist all grades in a term (Global Configuration for All Grades)
How to set all grades within a term to automatically waitlist applicants based on a specific date:
From the Terms page (Settings > General > Terms), select the 'expand' icon on the left side of the page, the settings option for the term.
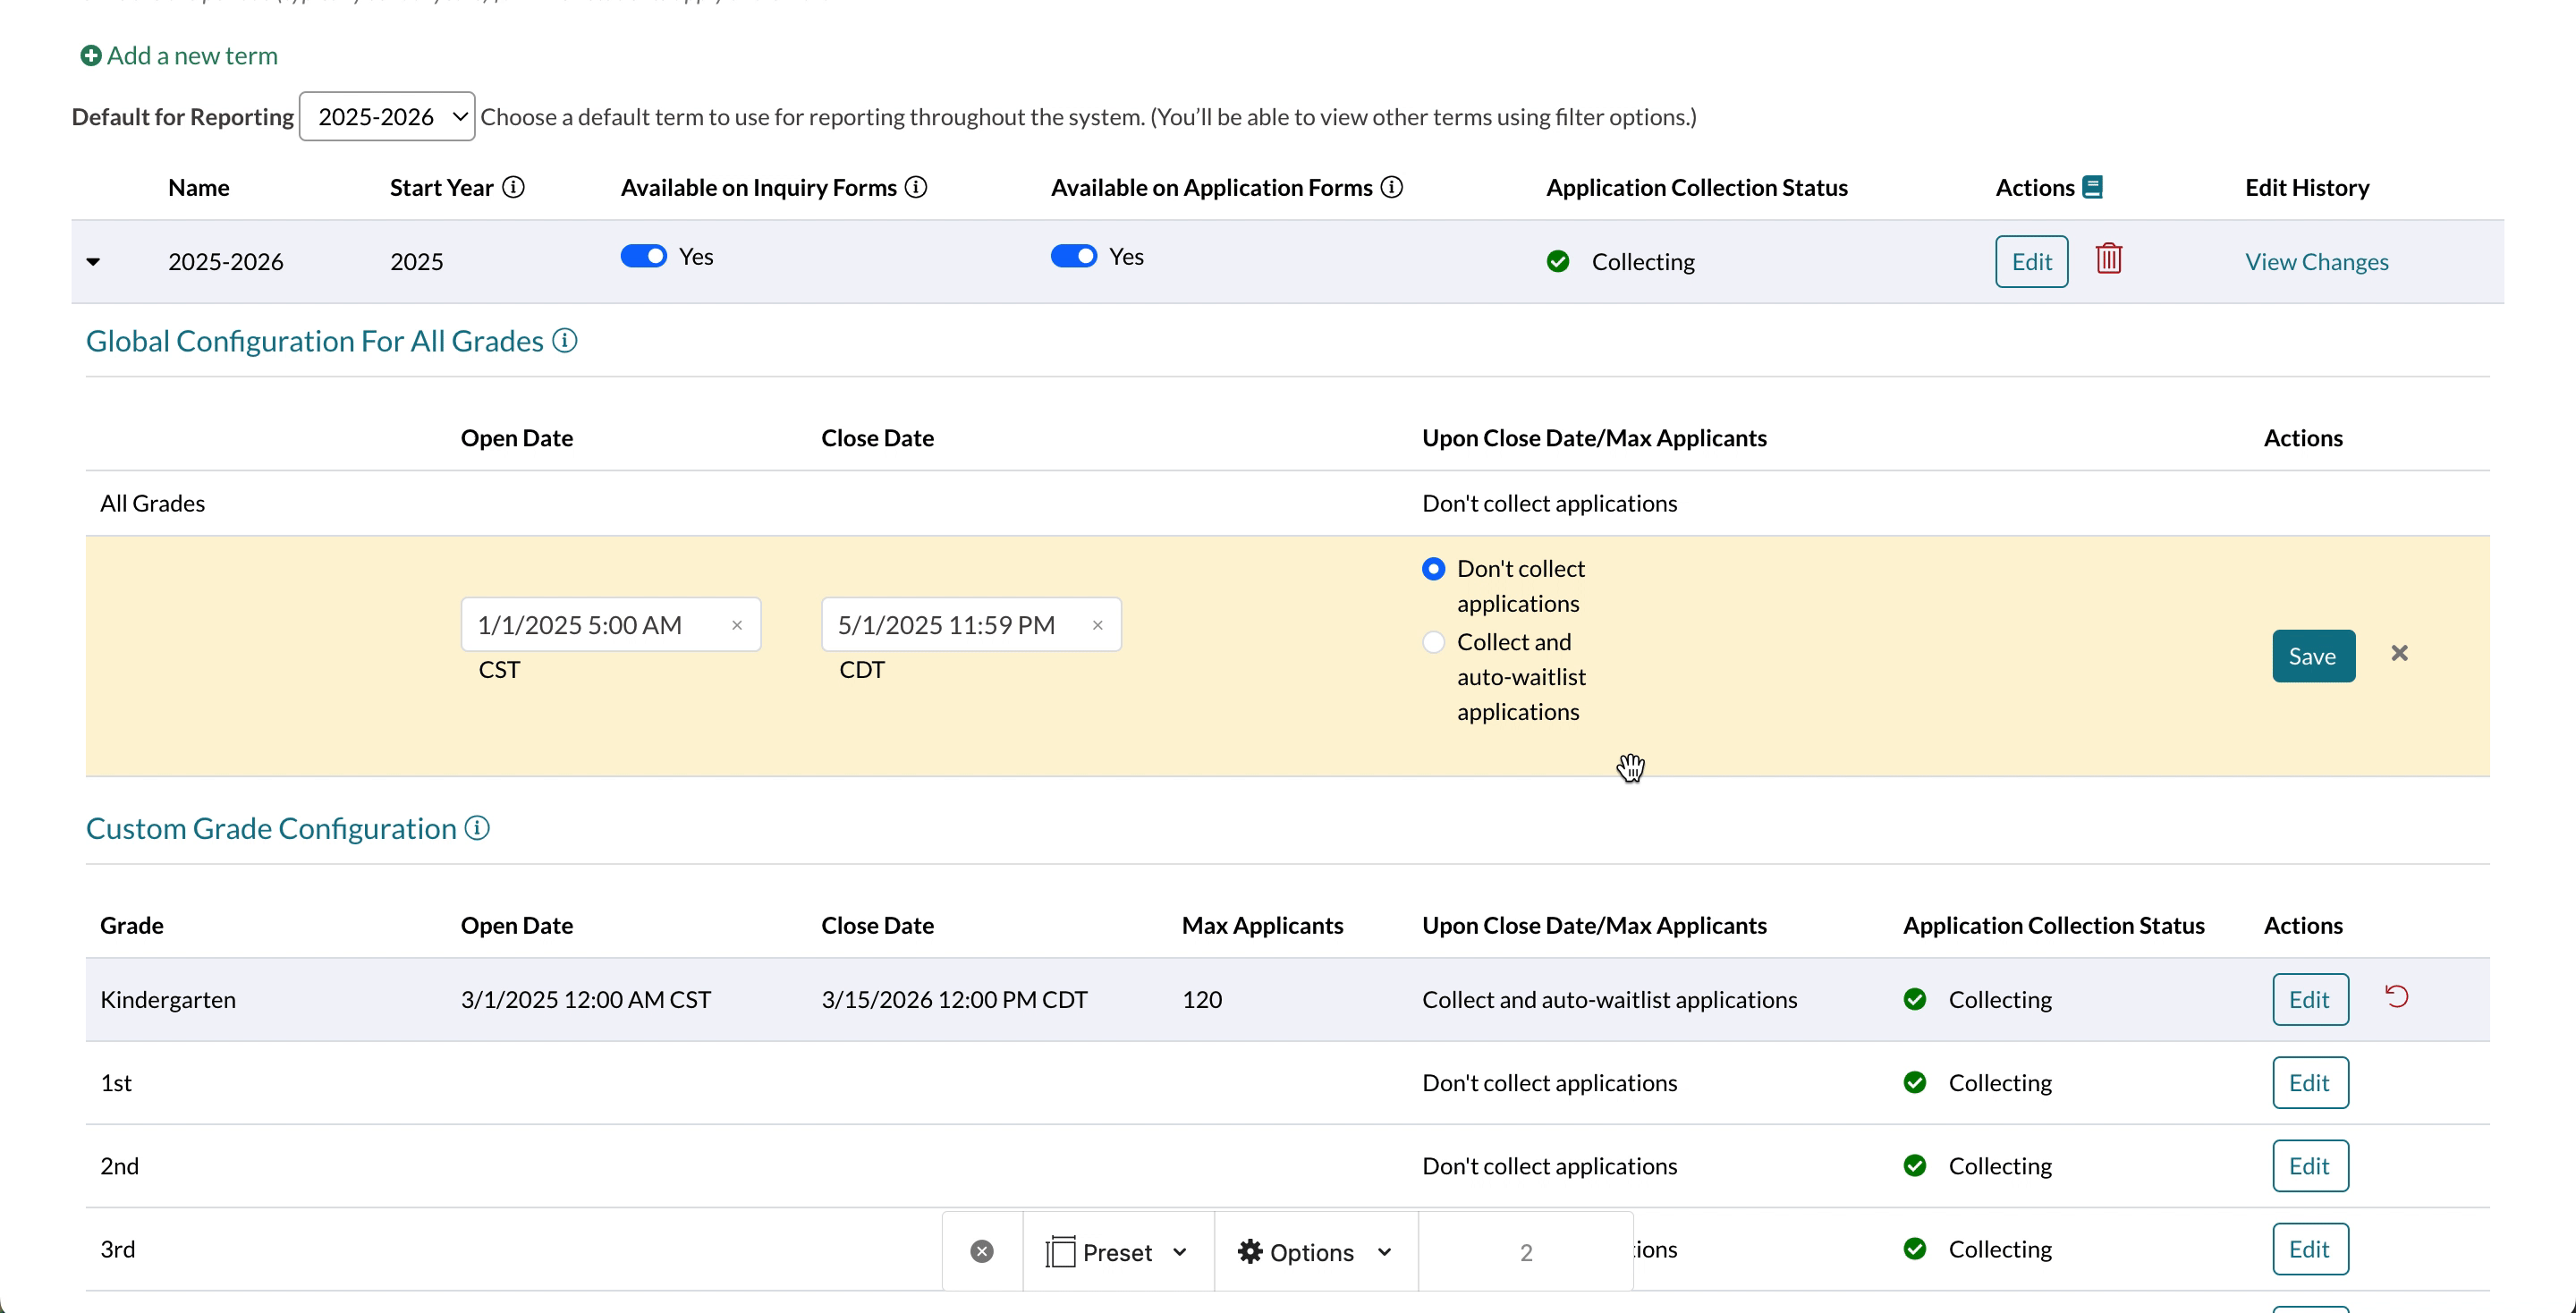
Within the Global Configuration For All Grades section, click Edit within the actions column.
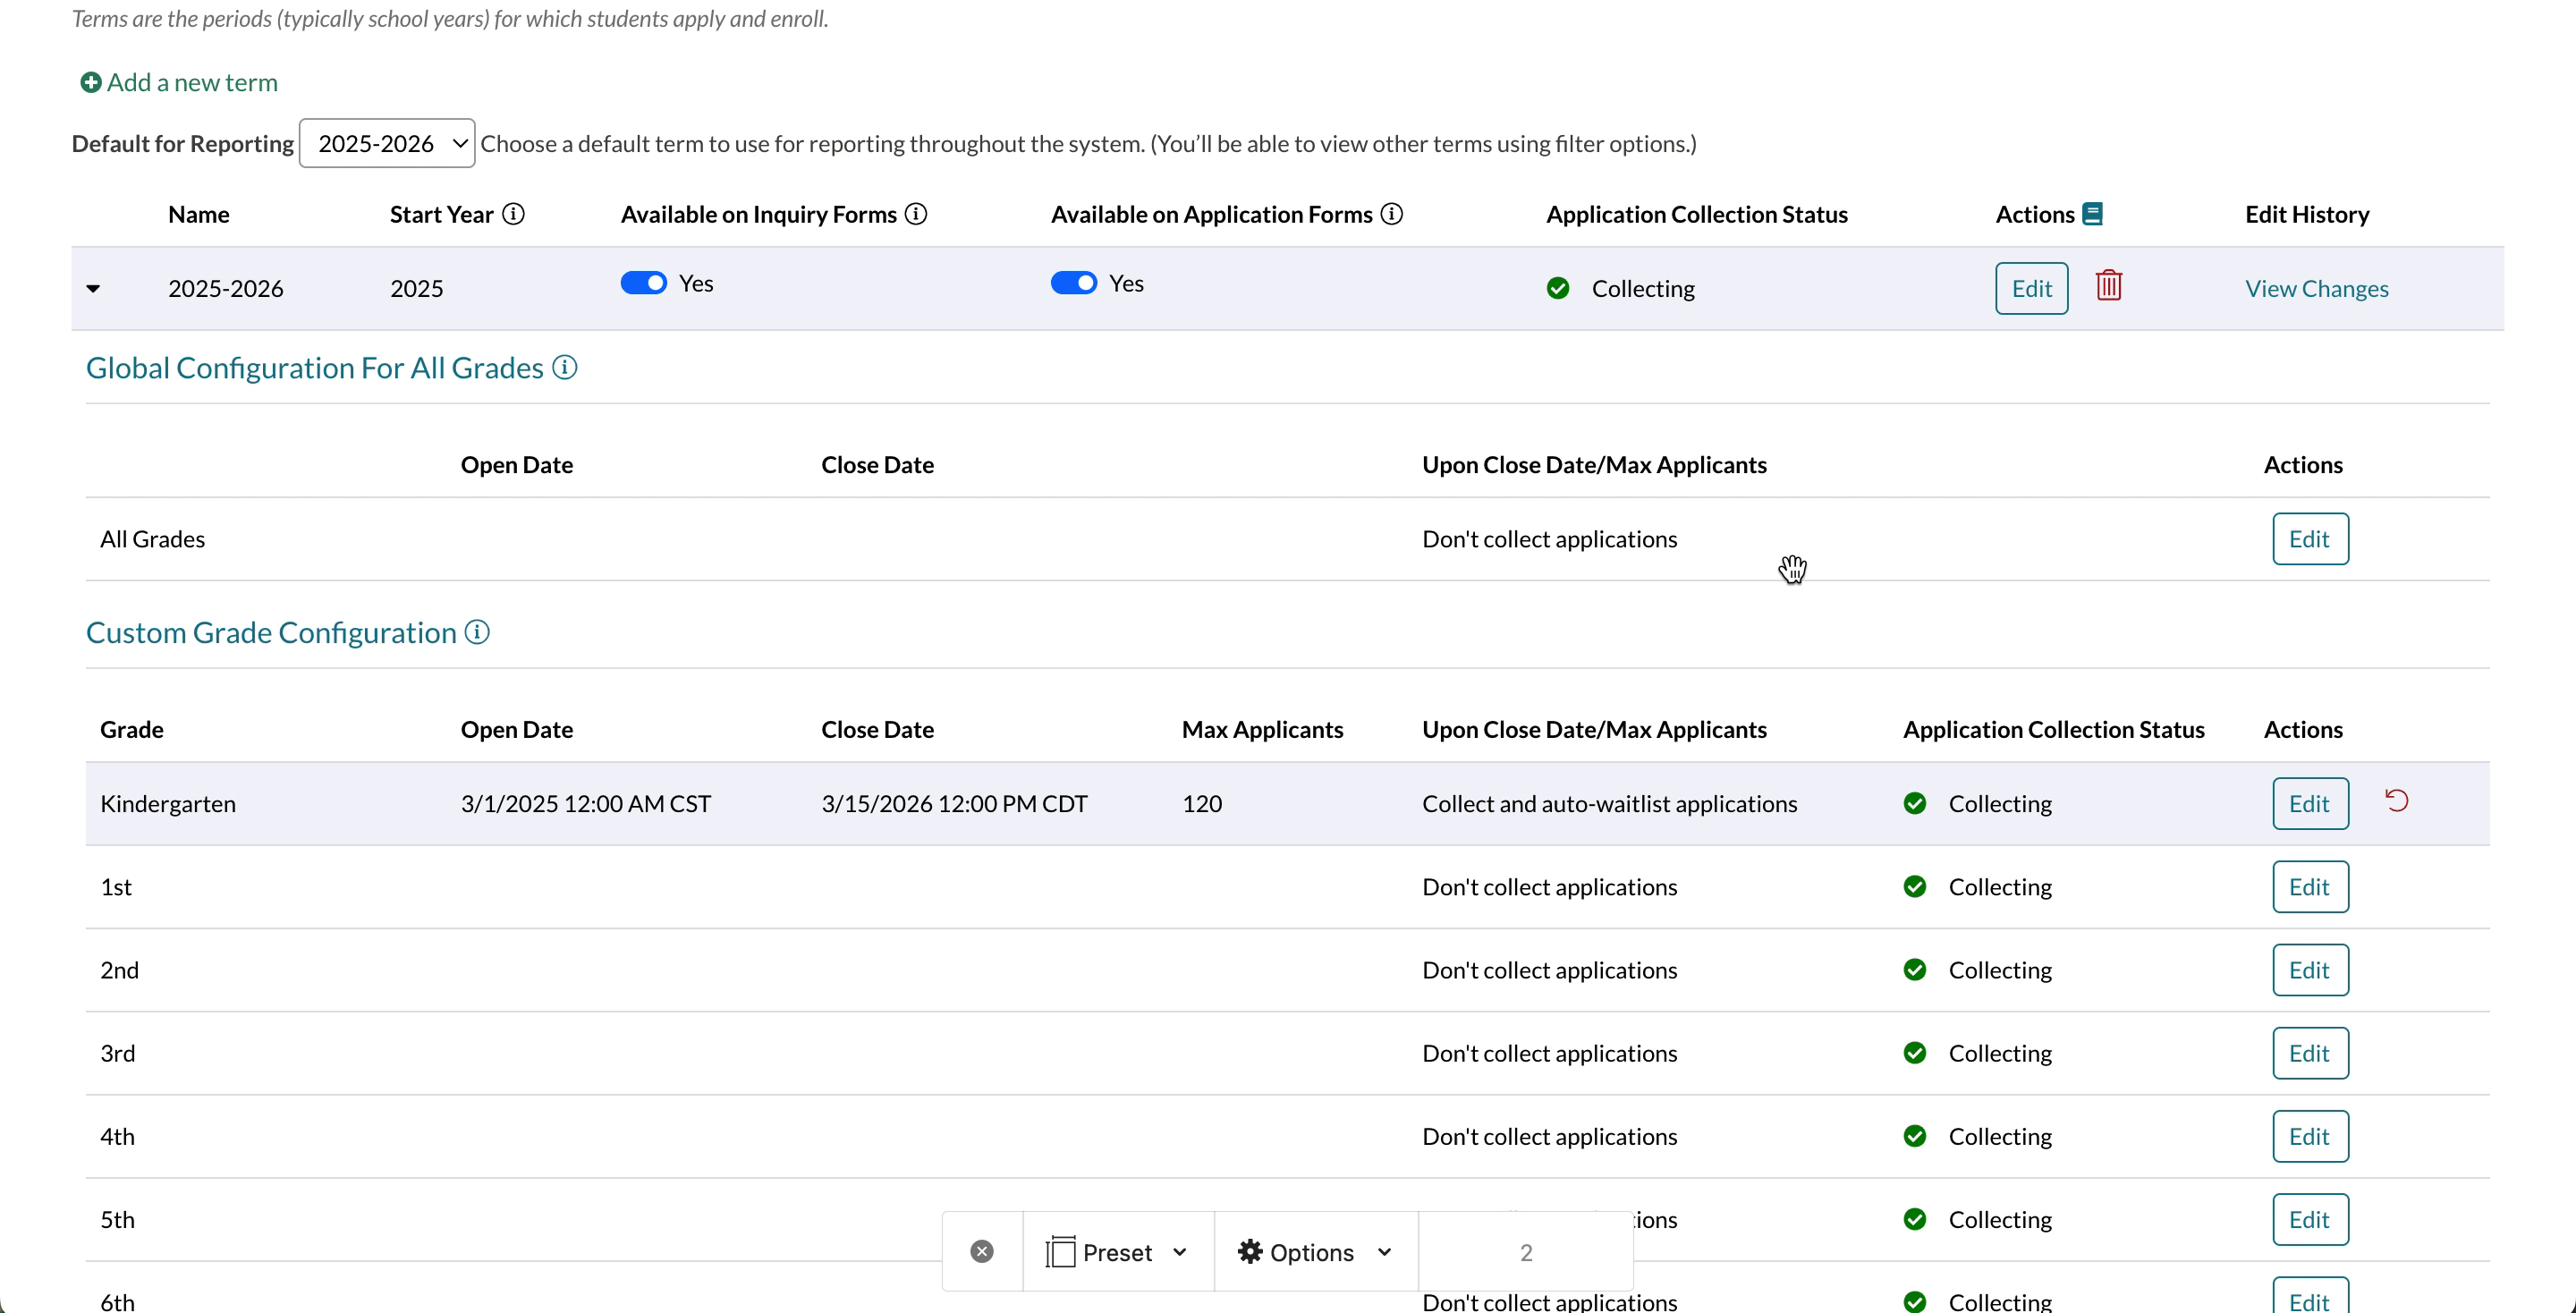
Under the Open Date and Close Date columns, set the date and time that you want the system to begin automatically waitlisting students.
Important note
You must set a Close Date for the action to trigger. If you do not set a Close Date, the setting will not take effect. Setting the open date/time here is optional.
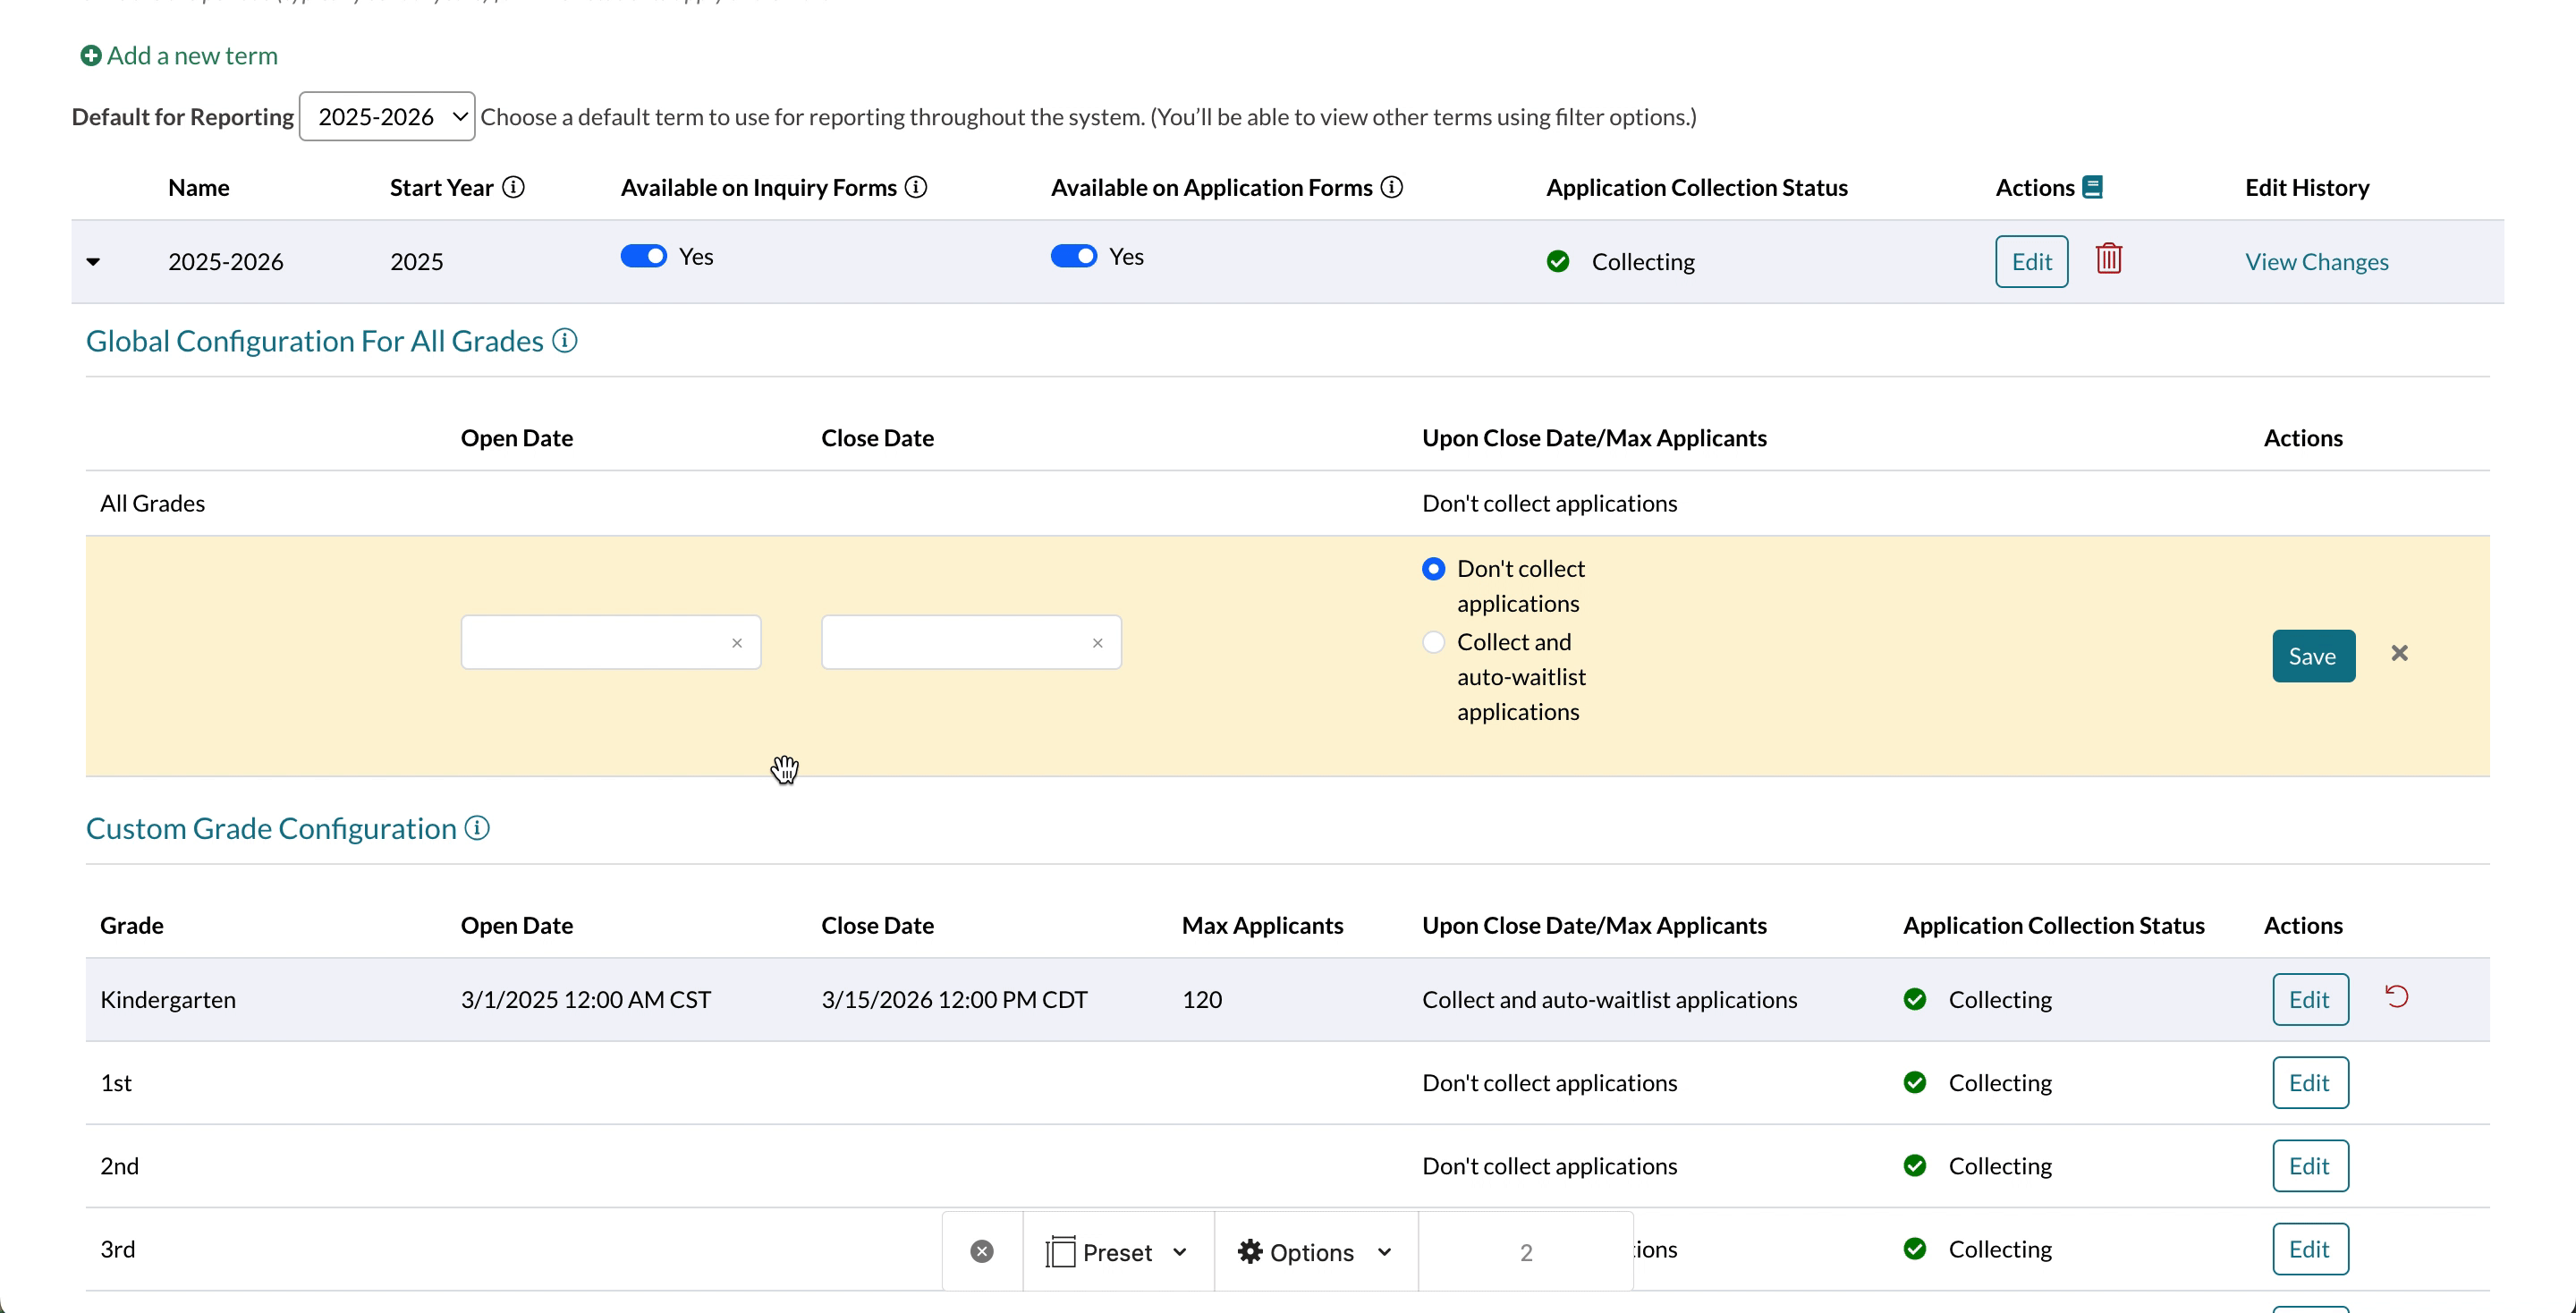
Under the Upon Close Date/Max Applicants column, select the Collect and auto-waitlist applications option and select Save.
Once the above settings are applied, your applicants in all grades that do not have a custom configuration set up will automatically be waitlisted when the close date/time is reached.
Global Settings vs Custom (per grade) settings
Custom settings override global ones.
If you have customized any grades to have a specific max cap or auto-open/close date within the Custom Grade configuration section, the custom setting will take precedence over a Global setting, if you have one in place.
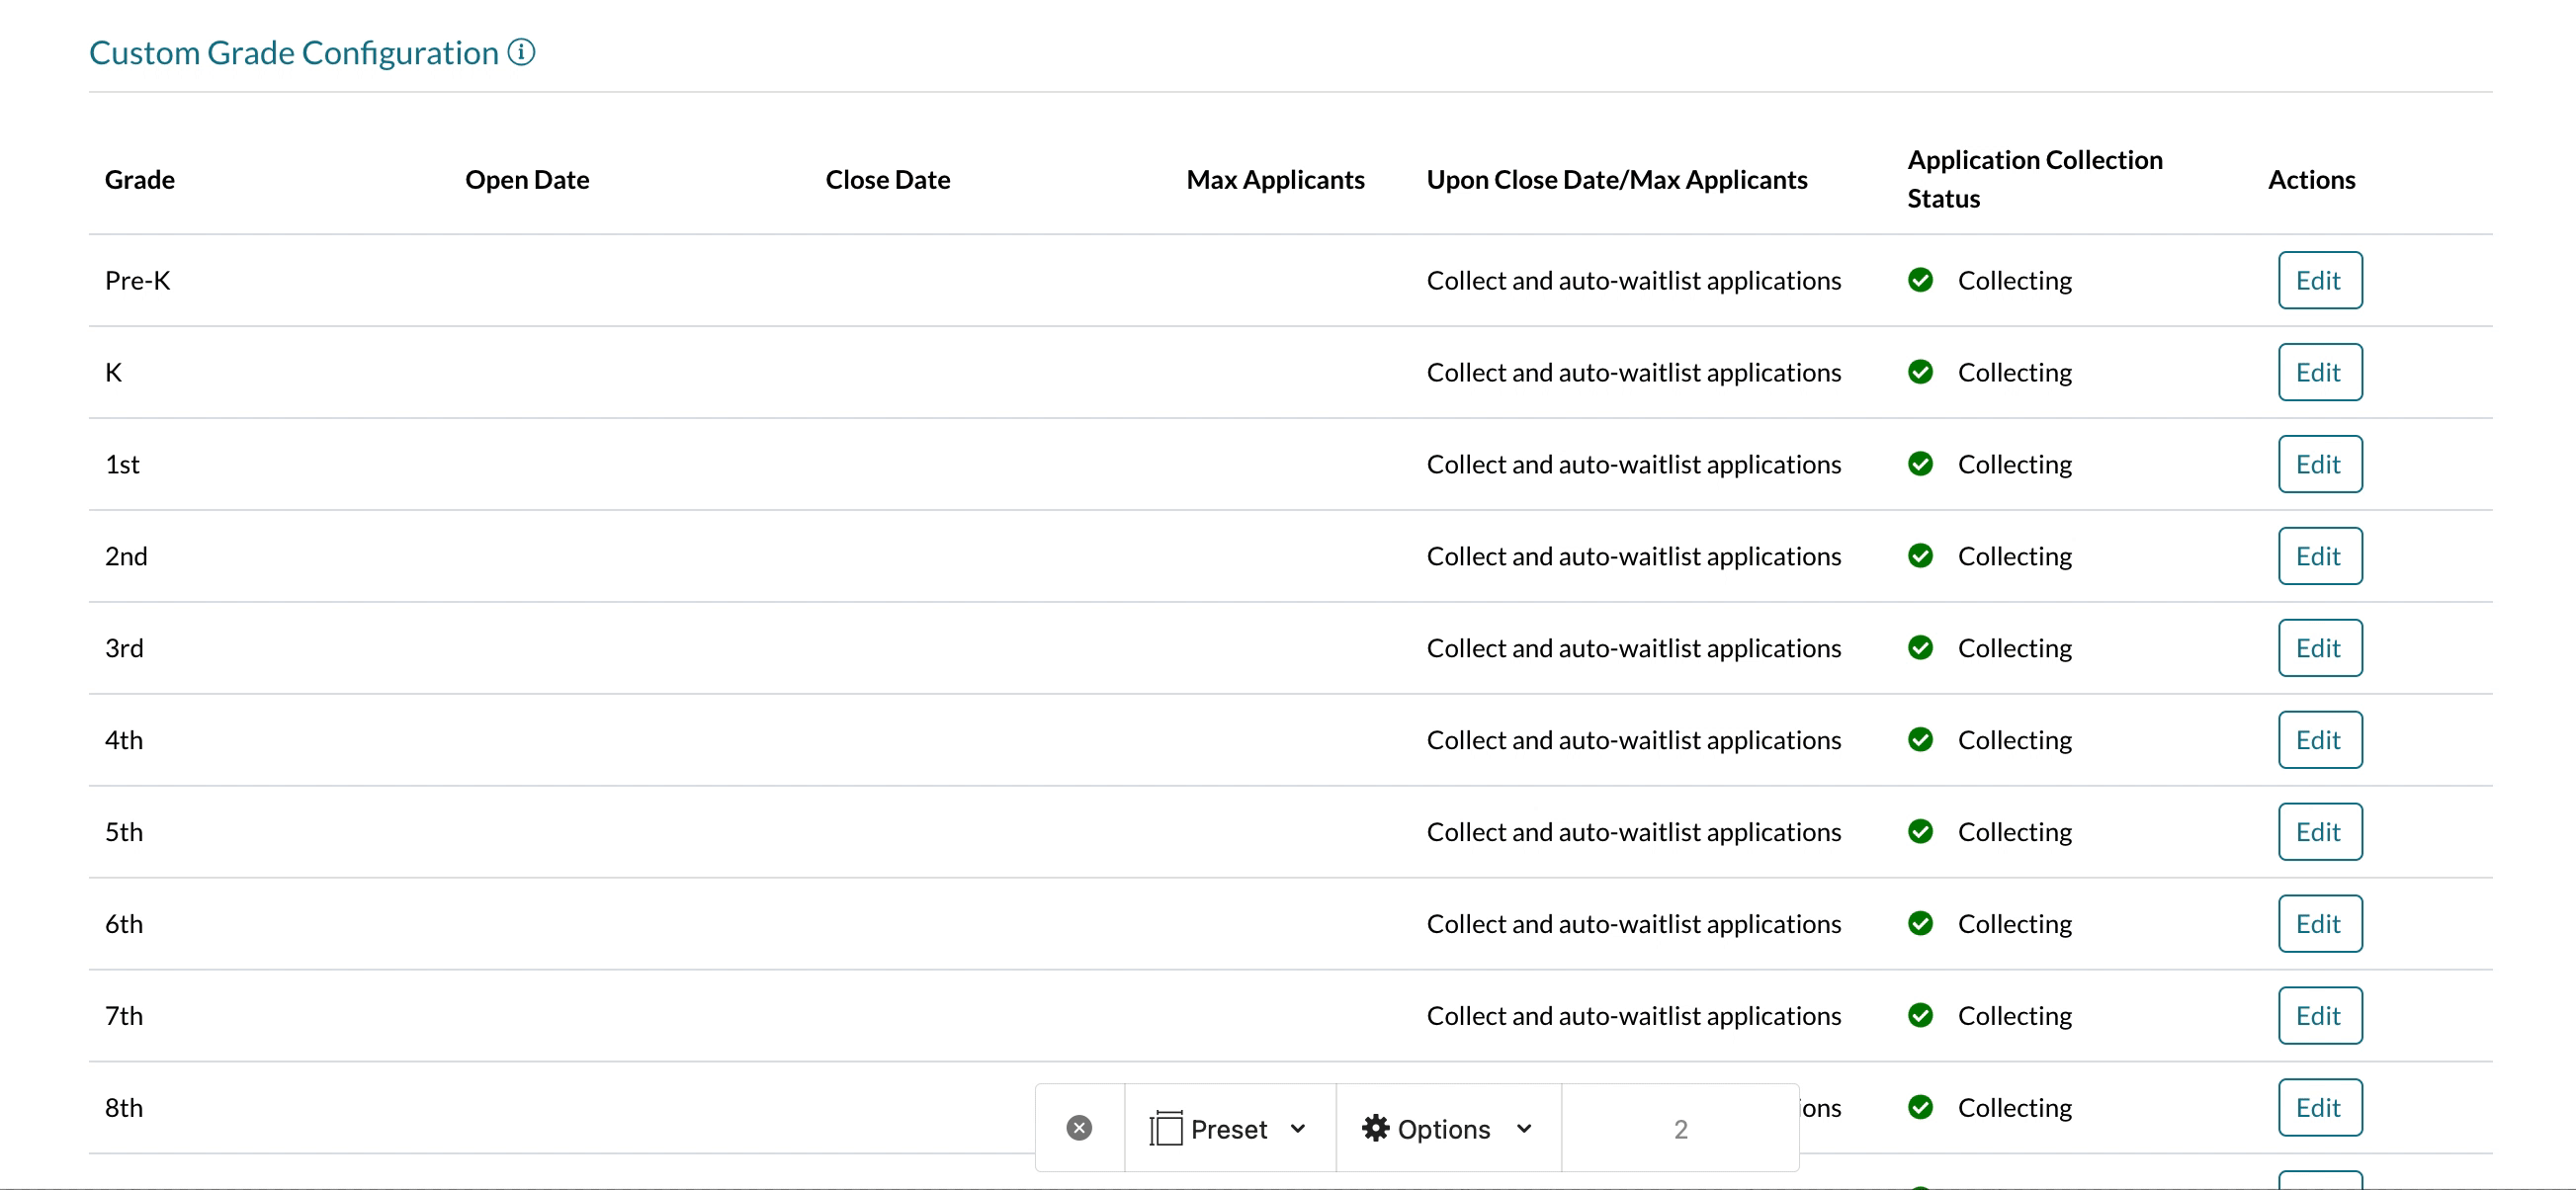
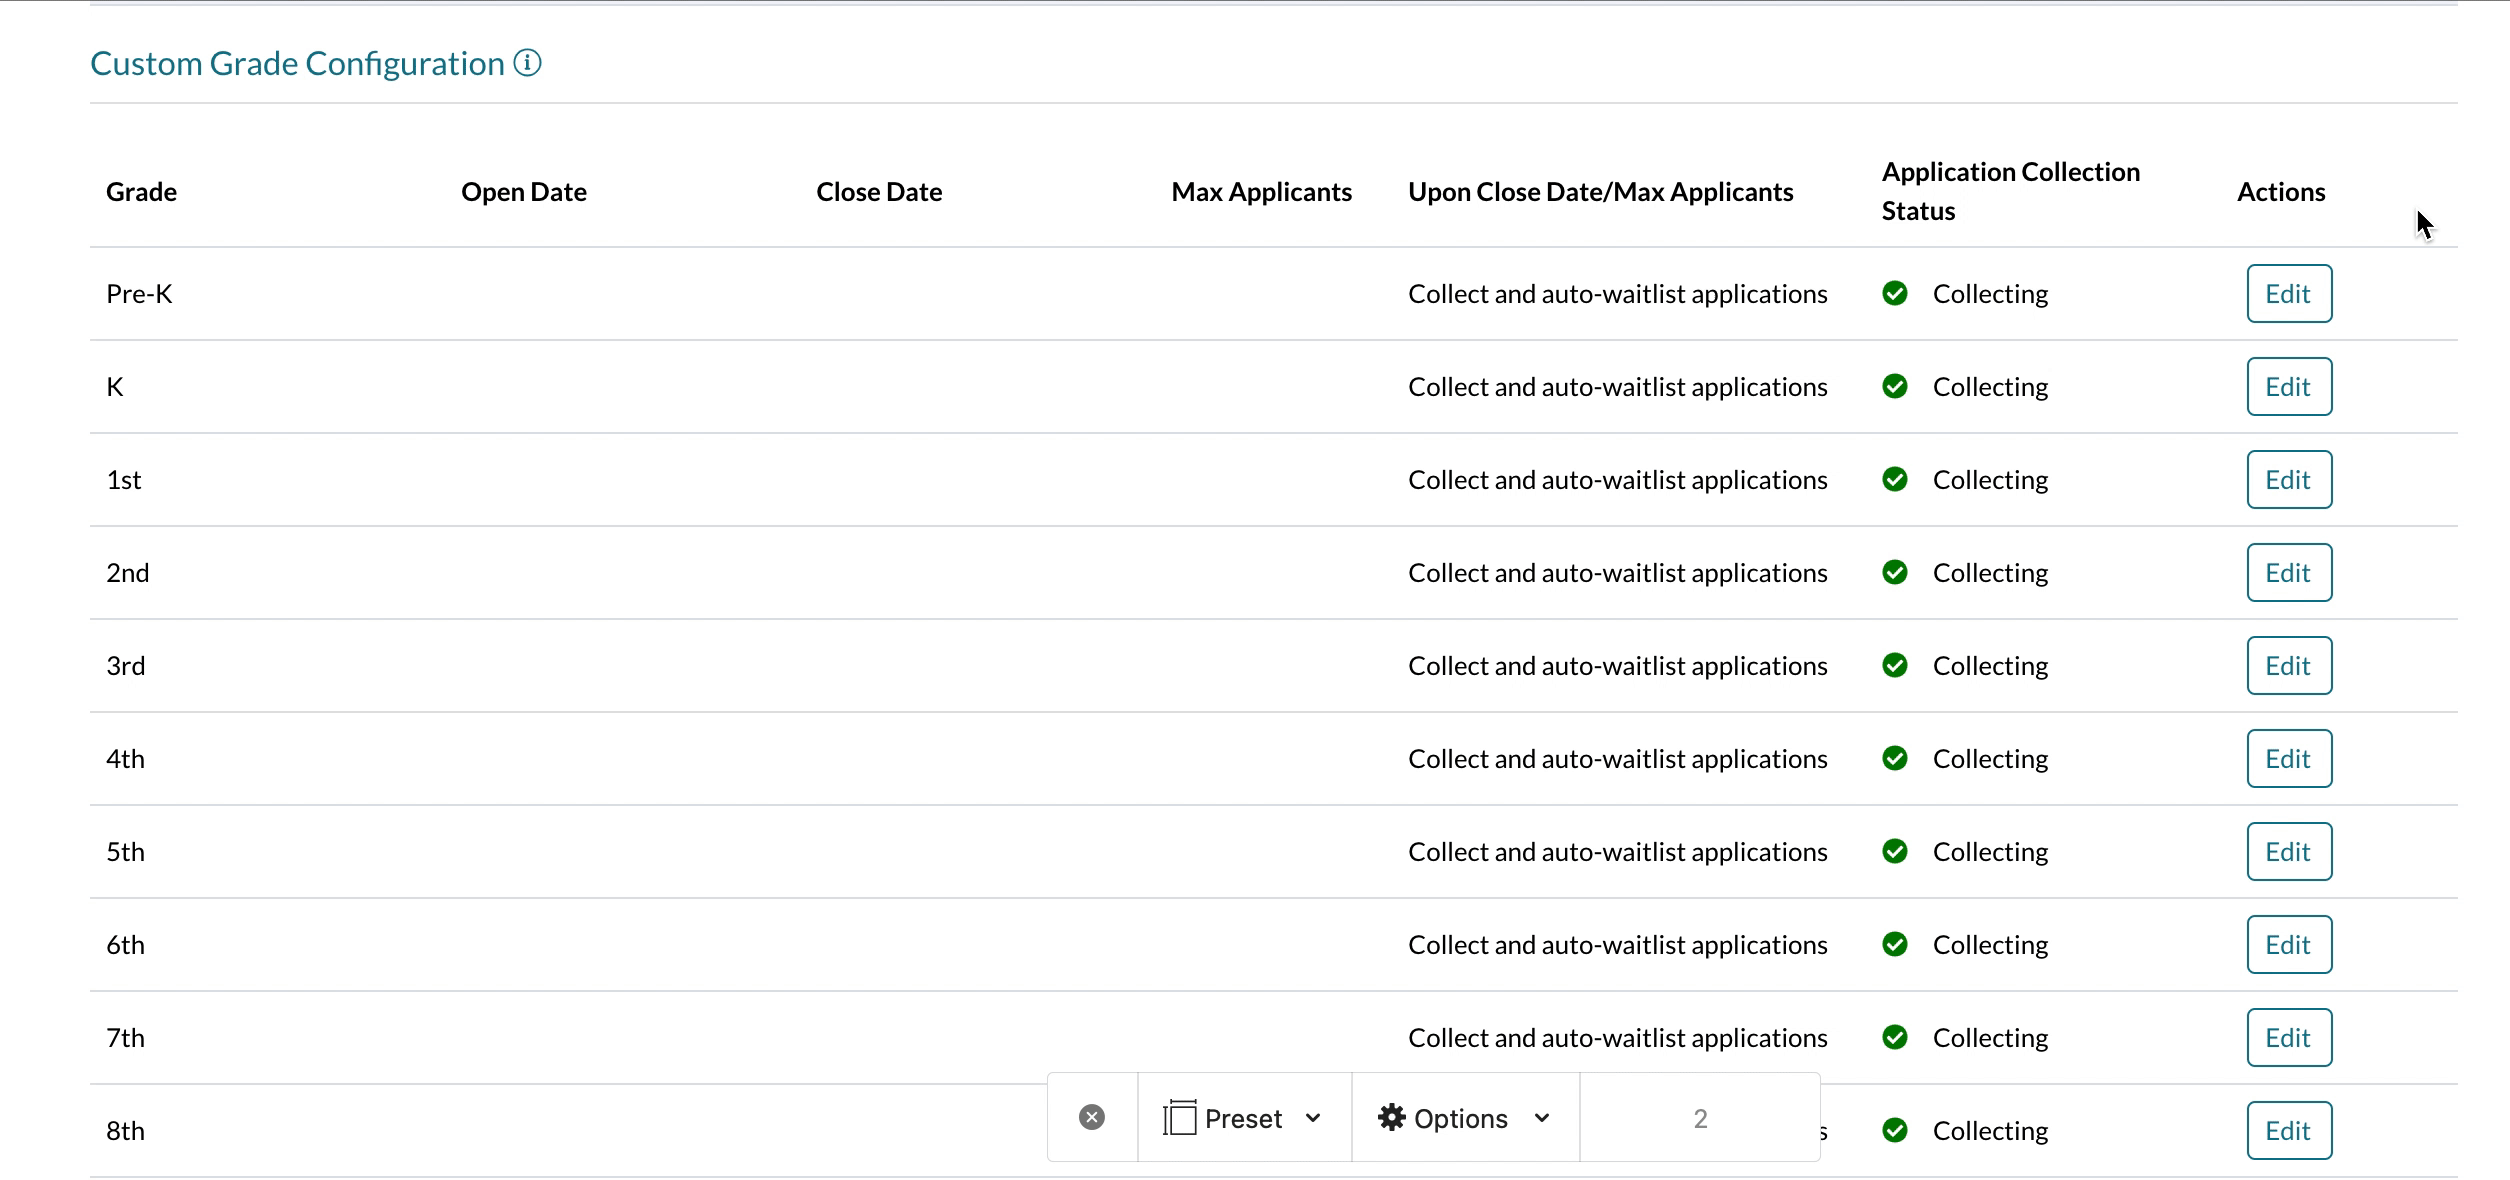
Waitlist specific grades in a term (Custom Grade Configuration)
Customization note
You can set up a specific grade to automatically waitlist students based on either of the following options, or a combination of them:
- Max applicants: when you receive this amount of applications, any additional applications to the grade/term will automatically be waitlisted.
- Open Date/Close Date: applications received outside of the open/close dates and time will automatically be waitlisted.
How to set a specific grade within a term to automatically waitlist applicants based on a specific date or once you've received a set number of applications:
From the Terms page (Settings > General > Terms), select the 'expand' icon on the left side of the page, the settings option for the term.
Within the Custom Grade Configuration section, click Edit within the actions column of the grade that you'd like to set up auto-waitlisting for.
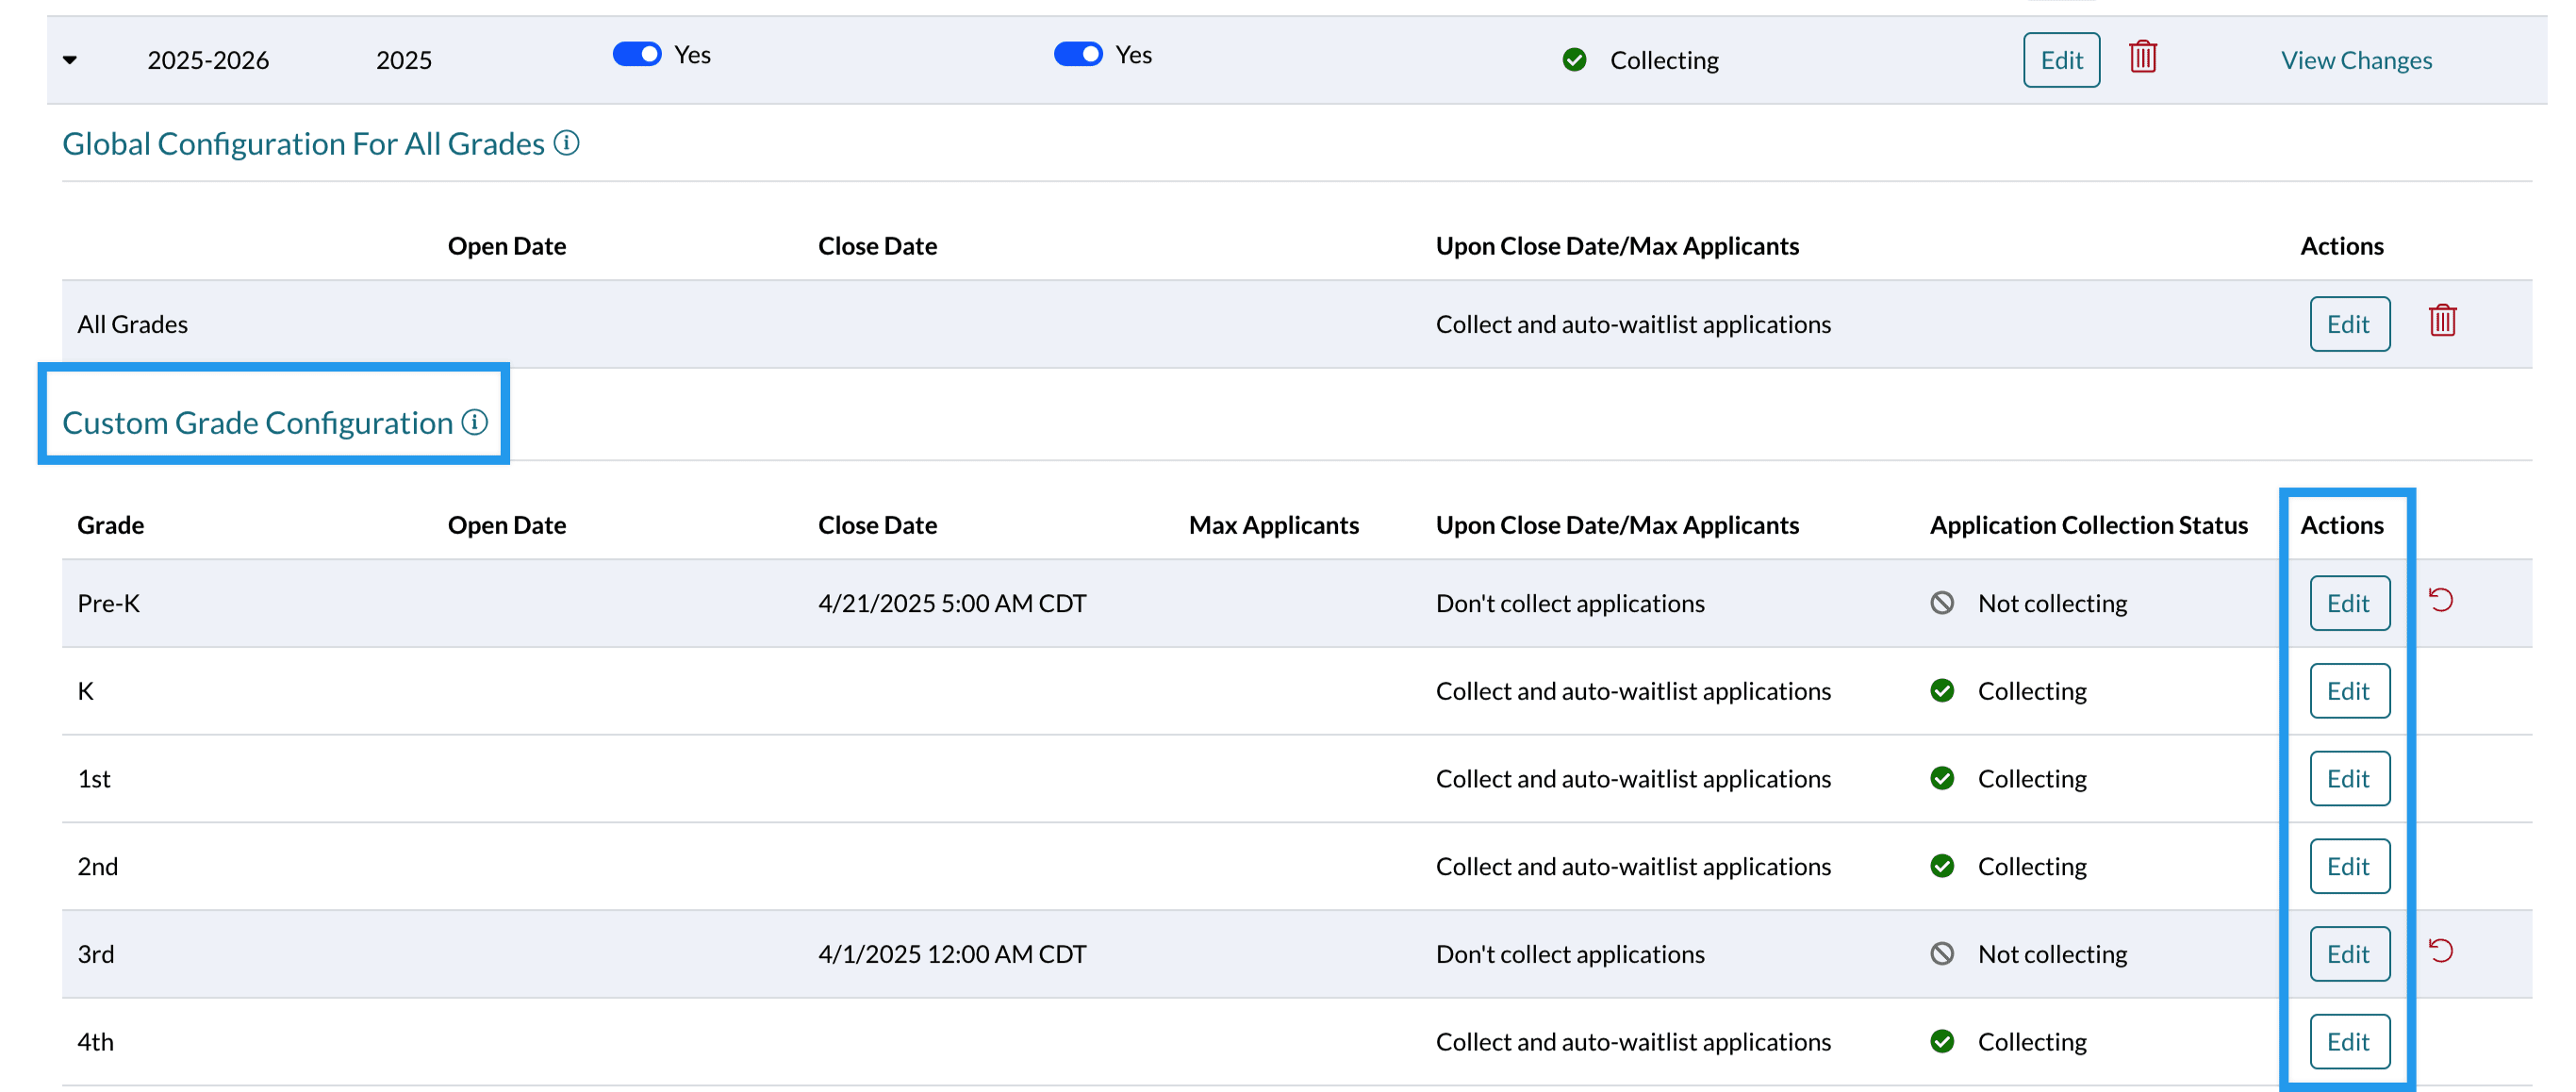
If you'd like to waitlist students in a specific grade based on a date/time, do the following:
- Under the Open Date and Close Date columns, set the date and time that you want the system to begin automatically waitlisting students.
- Under the Upon Close Date/Max Applicants column, select the Collect and auto-waitlist applications option.
- Select Save.
Important note
- You must set a Close Date for the action to trigger. If you do not set a Close Date, the setting will not take effect.
- Setting the open date here is optional.
- Setting the Max Applicant column is optional when setting a Close Date.
- You do not need to set a number in the Max Applicant column if you are closing the grade at a specific date/time. You can leave that box blank.
If you'd like to start waitlisting students in a specific grade after you've reached a maximum number of applicants:
- Under the Max Applicants column, enter the number of applicants that you would like to set as the capacity.
- Under the Upon Close Date/Max Applicants column, select the Collect and auto-waitlist applications option.
- Select Save.
Important note
- You must set a number in the Max Applicants column for the action to trigger. If you do not set a number in the Maximum Applicants column, the setting will not take effect.
- Setting the open/close date is optional when you set a number in the Max Applicants column. You may include an open/close date, but it is not a requirement as long as you have a number in the Max Applicants column.
Once these settings are applied, the applicants in the grade you edited will automatically be waitlisted once the maximum number of applications has been received or the closing date is reached (if one is set). Please note that custom settings take precedence over global settings.
Waitlist Status
The waitlist status is only visible on the Admin end. Parents still see the checklist and the "Applying for X Grade in [Term]" message and still have access to the student's checklist.
Admin Side:

Parent Side:

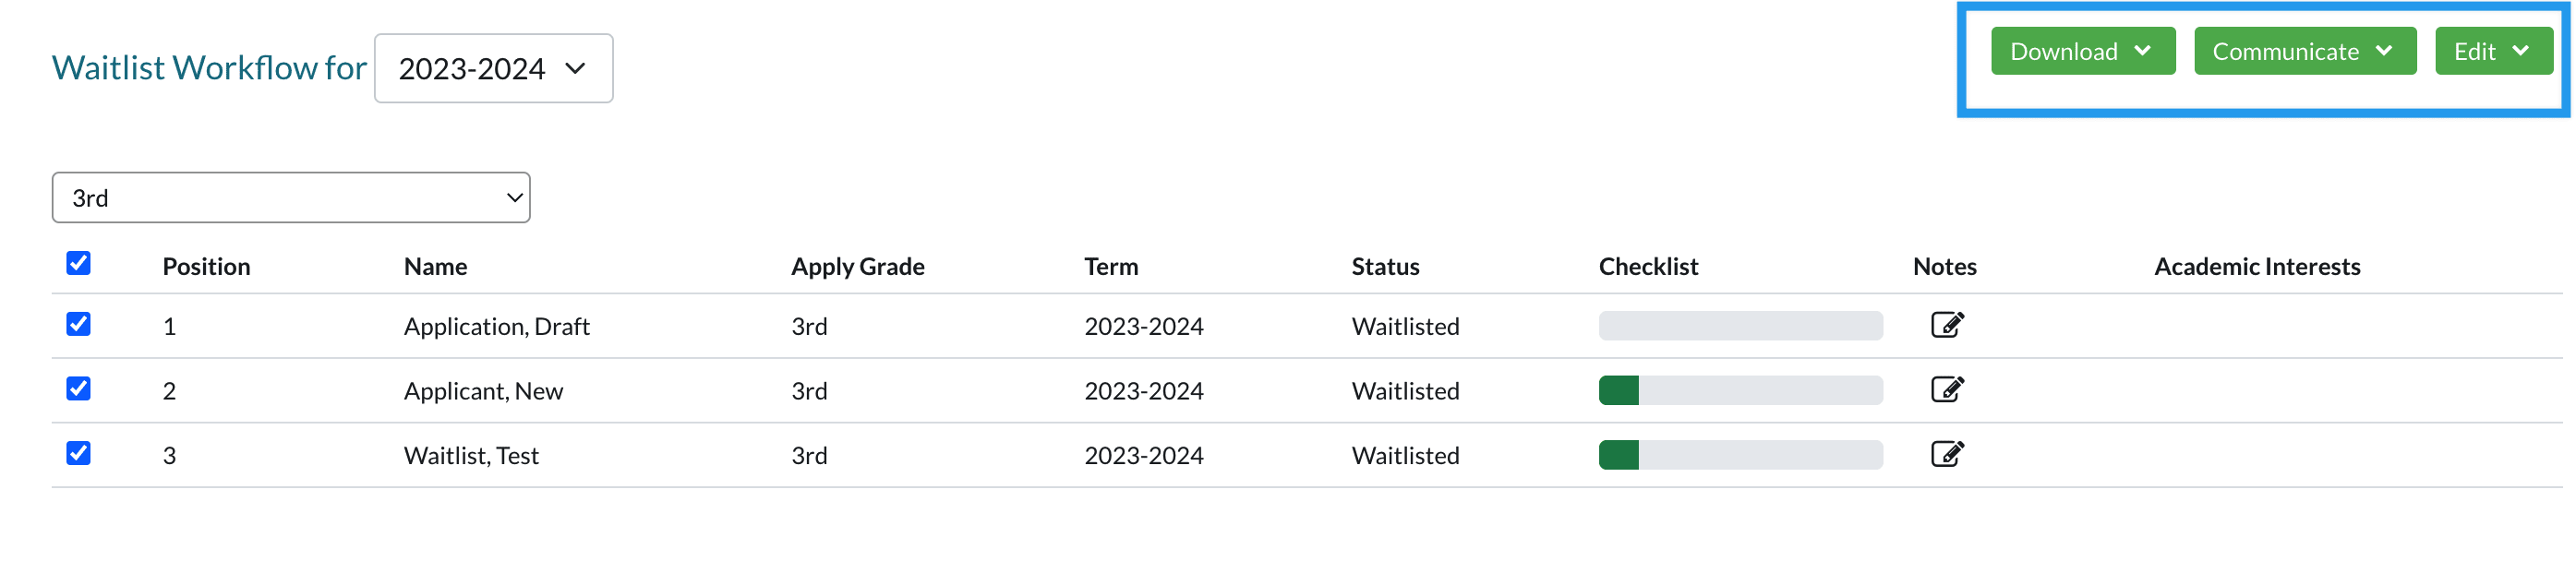
Waitlists Page
The Waitlist page (Admissions > Waitlists) is where you can view and manage your waitlisted students.
To view a waitlist, select a term and a grade.
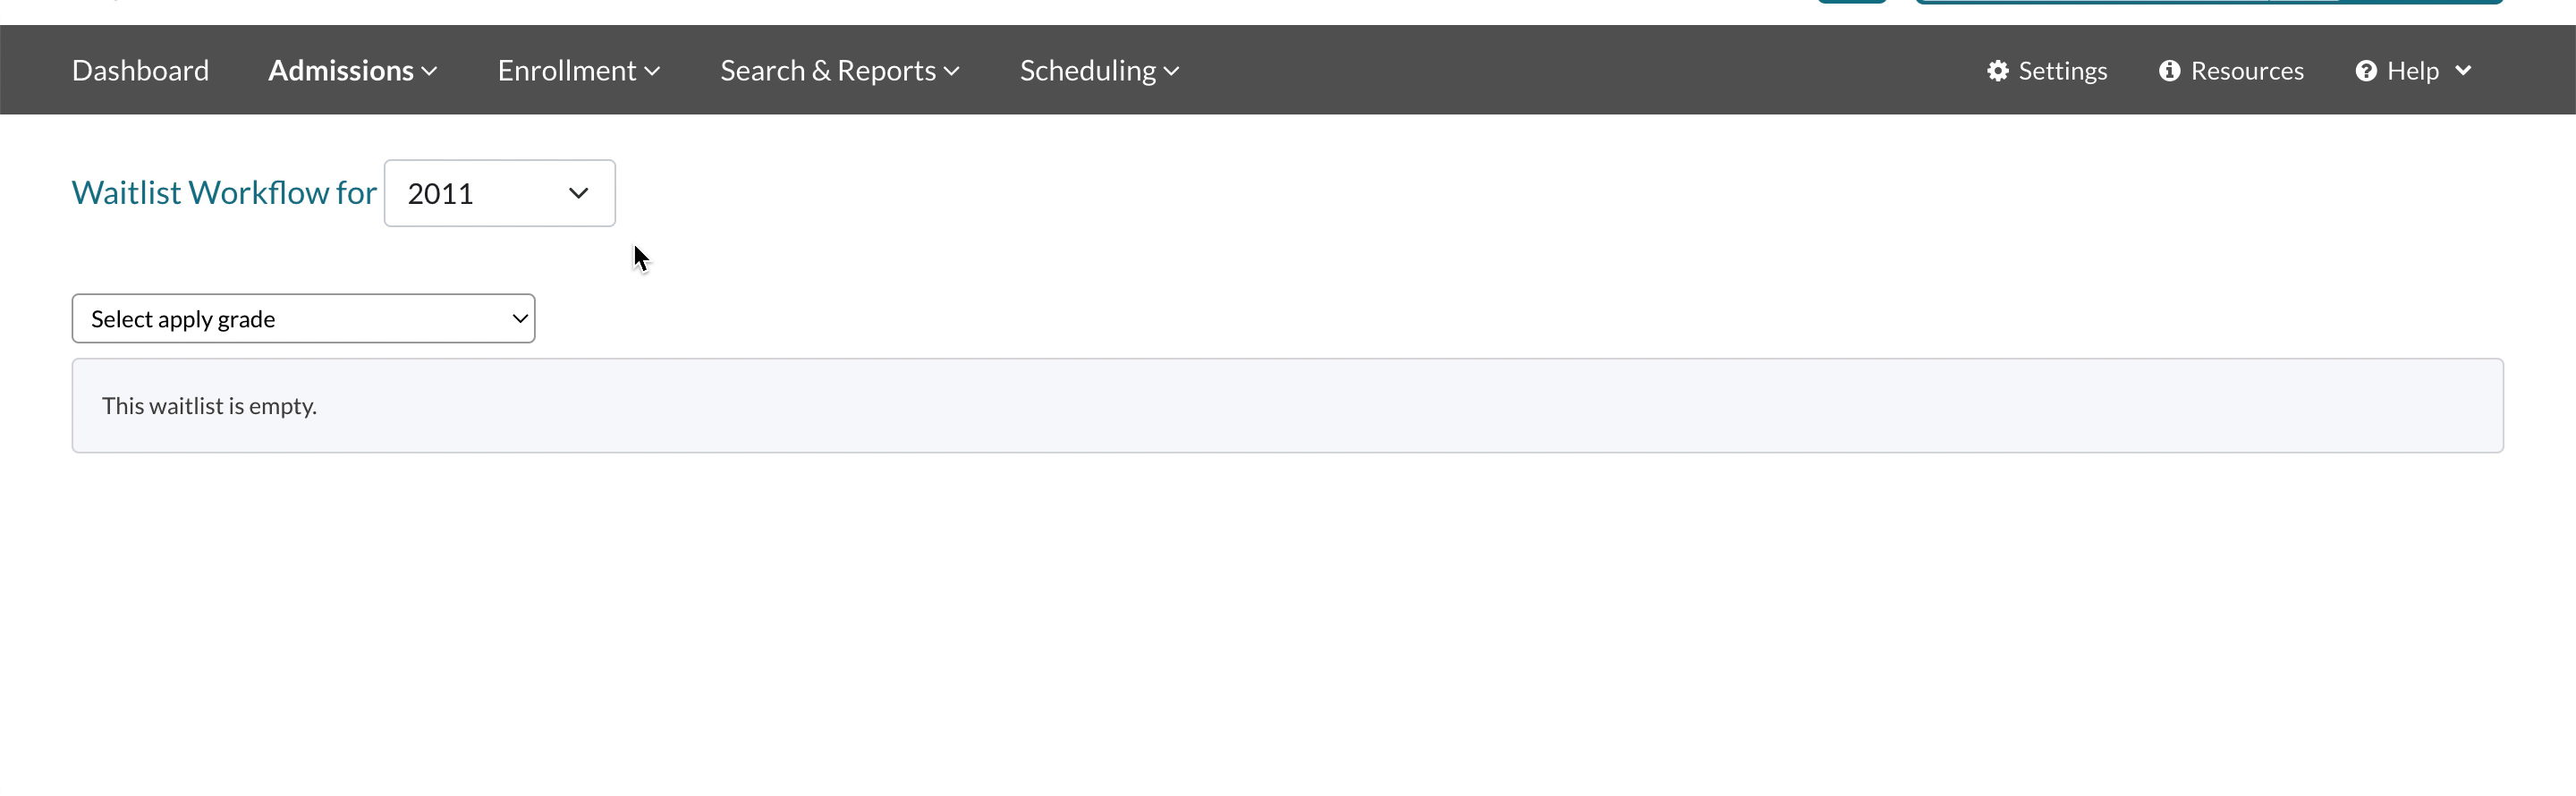
Students can be dragged and dropped to change their position on the waitlist.
Selecting one or more students in a waitlist opens the Download, Communicate, and Edit menus allowing for management options.
Other Ways Students get added to the Waitlist Page
Apart from parents/guardians submitting an Application for a grade that has been waitlisted, there are two other ways students will populate on the Waitlists page.
- Admin Entered Applications: If you internally submit an application for a student in a grade set to Auto-Waitlist, the student will automatically be added to the waitlists page.
- Manual Status Update: If you manually update a student's status to Waitlisted, they will also appear on the Waitlists page.
- Lottery: If your school utilizes the lottery feature, students who are not accepted when a lottery is run will be auto-waitlisted.
Ideas for Improving the Waitlist Experience
You may wish to consider the following when setting up grades to Auto-Waitlist students. If you have questions on how to implement any of the below options, please connect with our support team.
-
Application form: On the application you may wish to add language that will show if a waitlisted grade has been selected.
-
Important: you must remember to remove this from the application once the grade is no longer waitlisted.
-
Important: you must remember to remove this from the application once the grade is no longer waitlisted.
-
Application fee: Families that apply to waitlist grades still need to pay the application fee. Consider adding a rule to the Application Fee that will set the app fee to $0 for waitlisted grades.
- Our Support team will need to add this rule for you.
-
Important: You must remember to deactivate this application fee rule once the grade is no longer set to auto-waitlist.
-
Communicating: All applications submitted typically trigger the Application Thank You email. If you are auto-waitlisting grades you might consider setting up an alternate workflow to support communications with your waitlisted families.
- See the steps on setting this up in the Automated Communications for Waitlisted section below.
Automated Communications for Waitlisted
Steps to create an alternate workflow for automated communication for waitlisted families.
At a Glance
- Disable the automatic Application Thank You email.
- Build an Automated Communication Plan for non-waitlisted students.
- Build an Automated Communication Plan for waitlisted students.
Please note: This is only available to schools that have a Pro account with us.
-
Deactivate the automated Application Thank You system email: Uncheck it and Save the setting under Settings > Communication > Communication Setup.
-
Create a custom Application Thank You Email: On the System Emails page, copy the Application Thank You Email contents. Navigate to your Custom Emails page (Settings > Communication> Email Templates > Custom Emails) and paste the email into a new template. Save this email template with a recognizable name. You are going to use it to create an Automated Communication Plan email for non-waitlisted families.
-
Create a custom Waitlist Thank You Email: Create a new email template. In this template, craft an email to send to your waitlisted families. Save the template with a recognizable name so that it can be easily found and added to an Automated Communication Plan for your waitlisted families.
-
Set Up an Automated Communication Plan for your Non-Waitlisted Families: Under Settings > Communication > Communication Plan, on the Admissions tab, select Add a New Step.
Within the Edit box, set it up as follows:
Name: Application Thank You Email
Trigger: Select Checklist Item: Application Form
*Check your work: You should see the text "This step will trigger when the checklist item Application Form is completed" underneath the trigger section.
Additional Criteria: Apply Grade > is not > **select all waitlisted grades**
Perform Action: Send Email
At this time: Immediately
Send to: All Parents
Email template: **Find and select your custom application thank you email**
-
Set Up an Automated Communication Plan for your Waitlisted Families: Next, add a new automated plan. This one will be for your waitlisted families.
Within the Edit box, set it up as follows:
Name: Waitlisted Thank You Email
Trigger: Select Checklist Item: Application Form
*Check your work: You should see the text "This step will trigger when the checklist item Application Form is completed" underneath the trigger section.
Additional Criteria: Apply Grade > is > **select all waitlisted grades**
Perform Action: Send Email
At this time: Immediately
Send to: All Parents
Email template: **Find and select your custom waitlist thank you email**
Please keep this in mind.
- Please remember that you'll need to go in and adjust or deactivate these plans as needed when your waitlist changes.
- You can reactivate the automated Application Thank You email whenever you need on the Communication Setup page.
Comments
0 comments
Article is closed for comments.