Consent is usually achieved via an automatic pop-up that appears on a webpage, informing users of how their personal information will or will not be saved and used on that site. Users can click through a consent confirmation to indicate that they want to continue using the site.
Finalsite Enrollment utilizes Termly for consent management. Follow the directions below to access and create a consent banner code that you can add to your site.
Cookie Consent Banner
Here are step-by-step instructions on creating a Termly account and applying the banner to your Finalsite Enrollment Parent Portal.
Step 1: Creating a Termly Account
- Visit the Termly Website: Go to Termly's website.
- Sign Up: Click on the “Try for Free” button.
- Choose a Plan: Select a plan that suits your needs. Termly offers both free and paid plans with varying features.
- Fill in Details: Provide necessary information such as email, password, and website details.
Step 2: Setting Up the Cookie Consent Banner
1. Log In to Termly: Use your credentials to log in to your Termly account.
2. Select the "Consent Banner" option: You'll find this option when you expand "Consent Management"
3. Customize the Banner: within the Banner Settings.
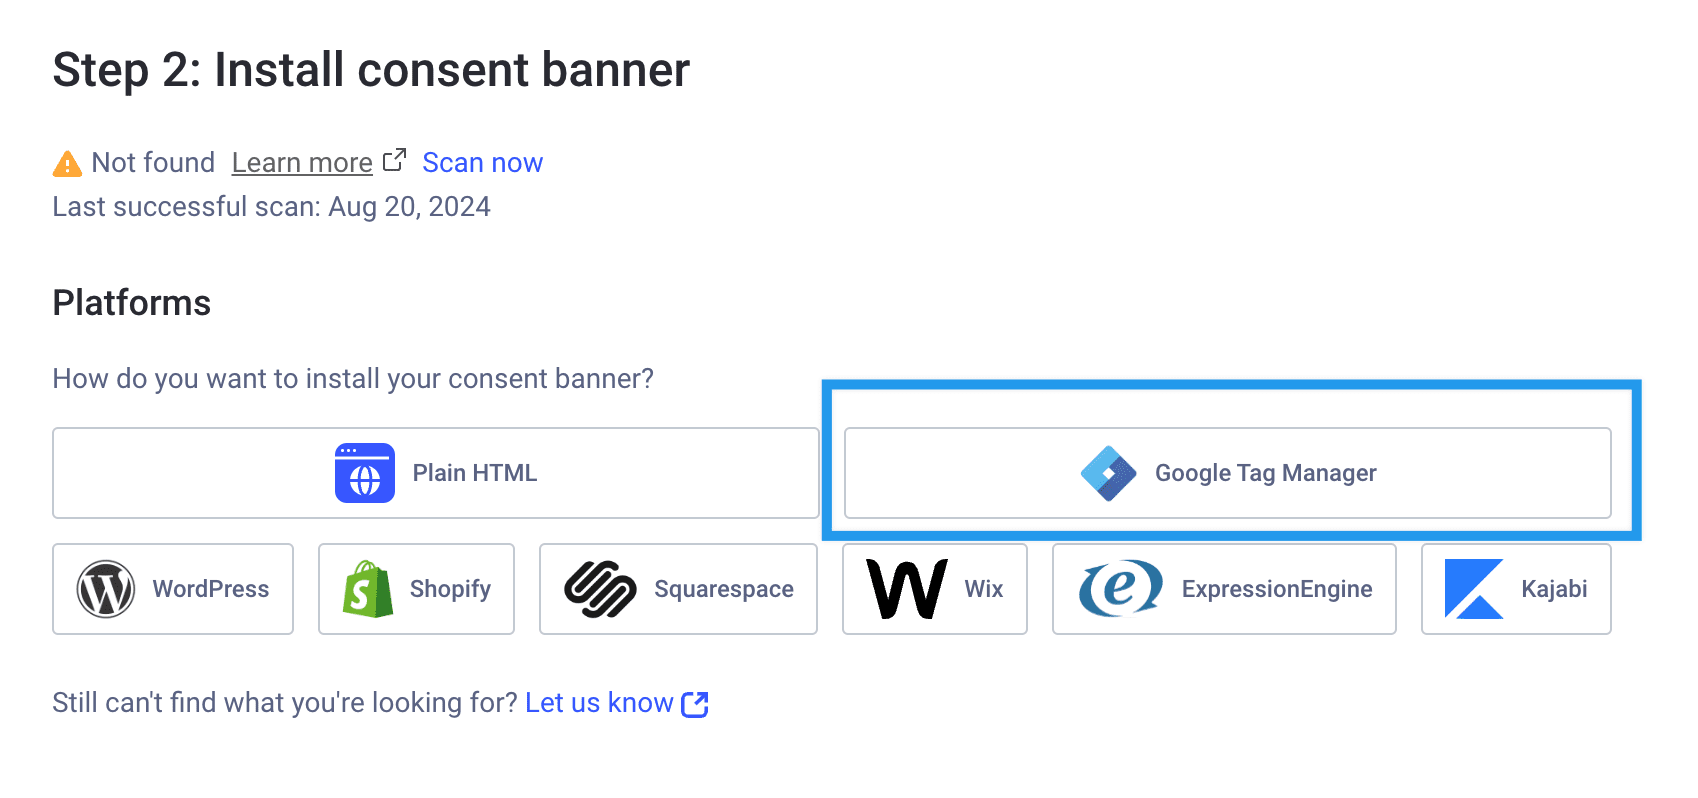
4. Install the Banner: Click Install and follow the steps in the pop-up. (Note: you do not need to complete Step 3: Embed preference center link)
5. Access the Code: Click Embed next to Step 2 and select the Google Tag Manager option.
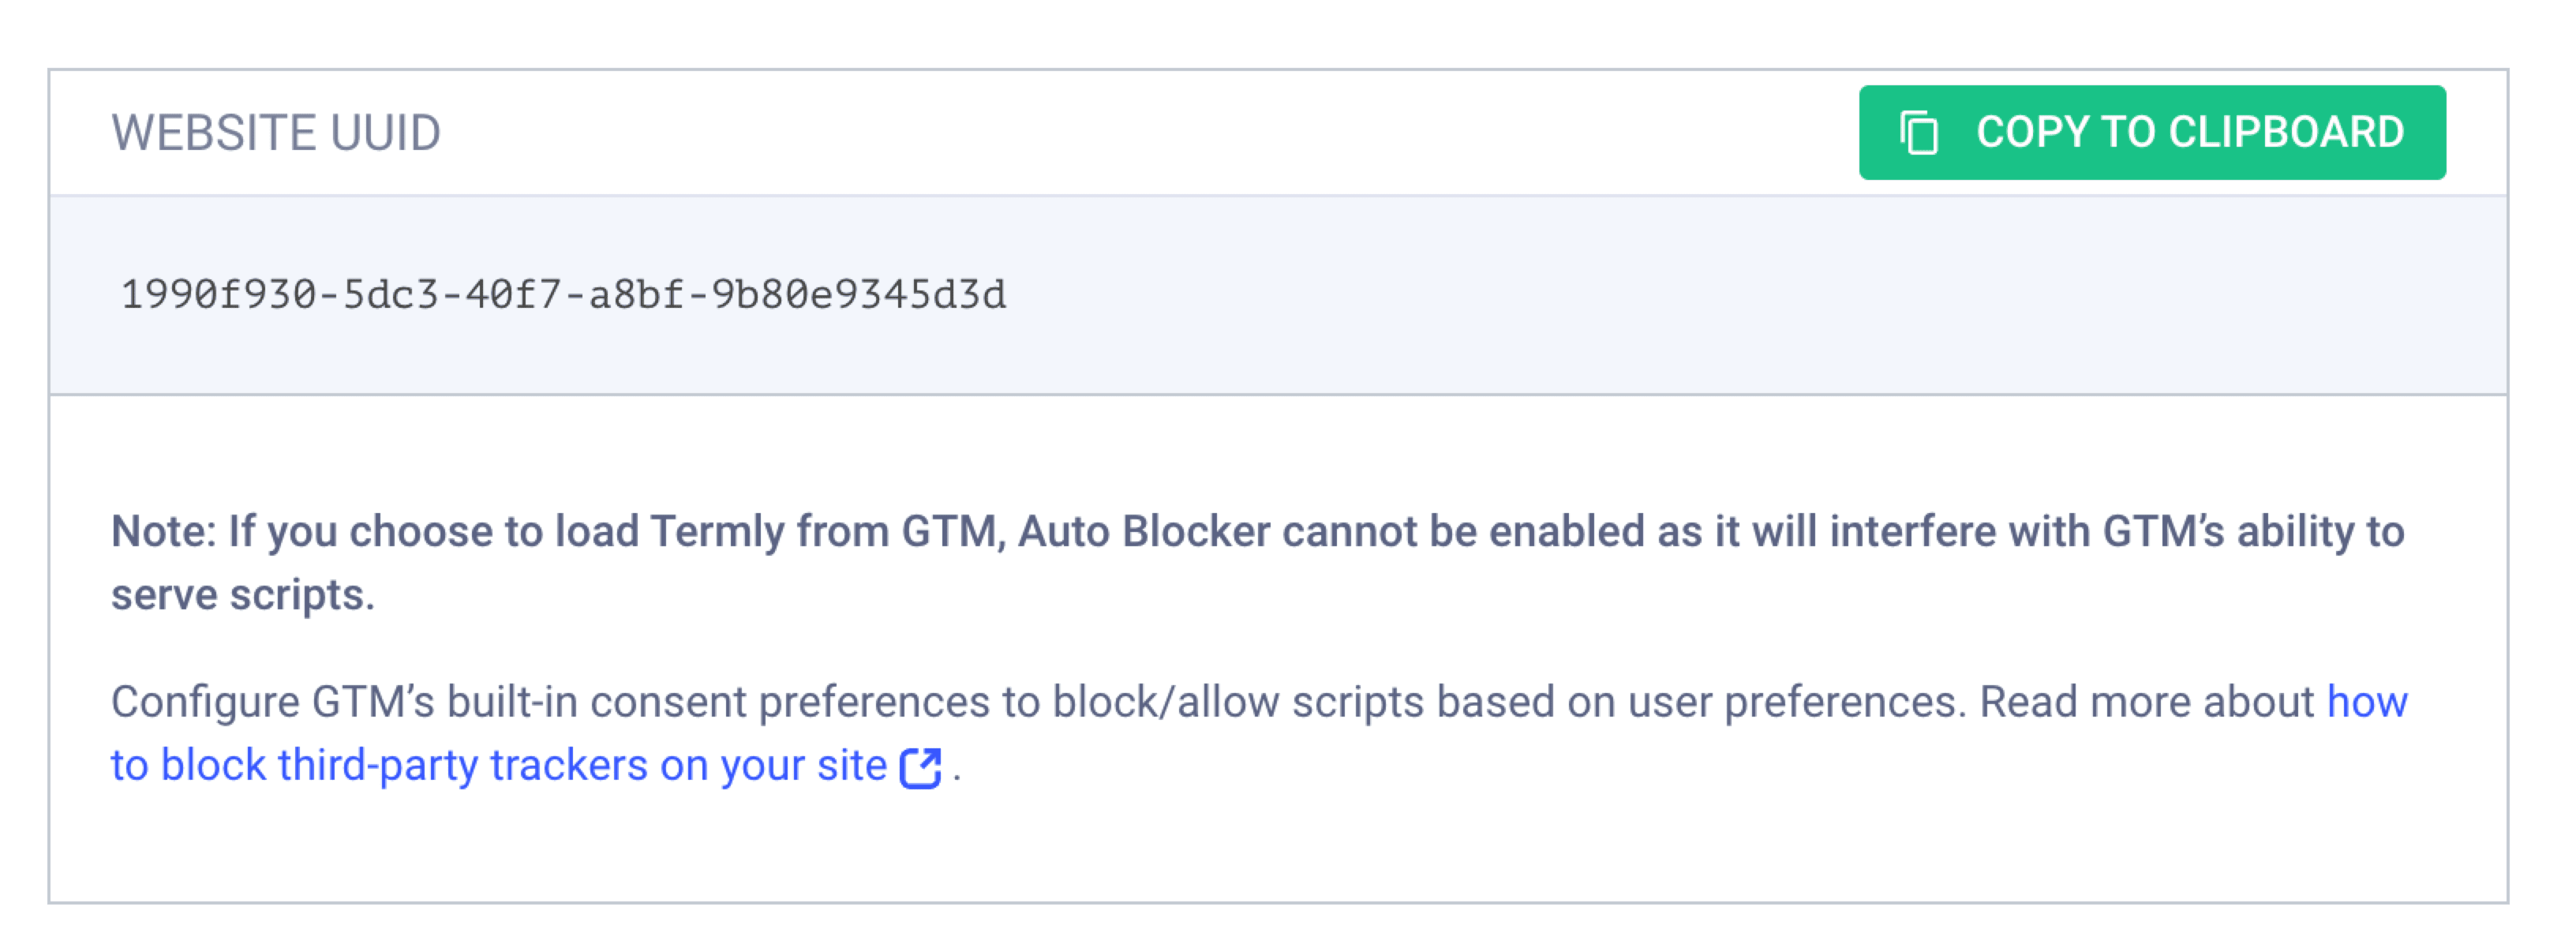
6. Copy the Code: Where it says Website UUID, copy the code that is listed. This is the Termly ID that you will add to Finalsite Enrollment.
Step 3: Implementing the Banner in Finalsite Enrollment
- Login to Finalsite Enrollment and open your Parent Portal Content page (Setting > General > Parent Portal Content).
-
Paste the UUID code within the Termly account field.
- Save your update.
- Test the Banner by navigating to the Parent Portal. You should see the consent banner displayed.


Comments
0 comments
Article is closed for comments.