
Use a Data Import to bulk-create brand-new contacts, students, parents, and households, from a CSV file built on one of Finalsite Enrollment's templates. This is for creating new records; updating existing contacts is a separate process.
💡Quick Answers
- Which template do I download? Use the Create Template for in-workflow contacts (Inquiry through Enrolled) or the Prospect Template for Prospects. In-workflow contacts are part of your funnel counts; Prospects, Parents, and Alumni are not.
- What's the required-fields baseline? For in-workflow students: child first/last name, grade, workflow year, status, one parent with name and relationship, one form of parent contact (email or phone), and a full address. For Prospects: child name, expected entry grade and year, and at least one form of contact.
- What formatting mistakes break imports most often? Boolean fields not written as TRUE/FALSE, dollar signs or negative signs in financial values, terms that don't match your Settings > General > Terms format exactly, grades that don't match the Abbreviation column in Settings > General > Grades, and partial addresses (you need the full address or none at all).
- How do I save the file? As a plain CSV (Comma Separated Values), not CSV UTF-8 (Comma delimited), which will cause the import to fail.
- Where do I actually run the import? Settings > Fields & Data > Import Data > Import Data. Choose your file, set Import Mode to Create, add a description, and click Validate & Import. Use Dry Run to test without writing data.
- What about the auto-generated IDs in the template? Don't delete them and don't remove the CHILD.external_id column, they're how the template links students, parents, and households together. If you're running with duplicate matching, remove the External ID columns before importing or it will fail. See Using the Import Data Tool.
- What if validation fails? Click View next to the failed row to see the error messages. The most common fix is correcting a term or grade format in the file to match your site, then re-importing.
In this Article
Import New Contacts in Bulk
The following steps outline the process of using our import templates to bulk-add students as well as their parents and households within your site.
Download the appropriate import template
Use the Create Template if you are importing in-workflow contacts, or use the Prospect Template if you are importing Prospects.
In-Workflow: This term means anyone that has a status in the system from Inquiry all the way to Enrolled. These are the contacts who are ready to move through your funnel, as opposed to someone you’d like to keep track of or that’s connected to an in-workflow contact. (e.g. your Prospects, Parents, Former Students, Alumni). Those contacts are considered ‘not in workflow’ as they are not included in your funnel counts.
Fill in the data for each column
Click into each cell to either paste or type in the information for each student or prospect you are importing.
Please note: The files have special columns within them that will automatically create ids for students, parents, and households. Once you start entering the name or household data, you will see the ID created. Do not delete the auto-generated IDs or remove the CHILD.external_id column.
- Boolean field values (yes/no fields) must be written as TRUE or FALSE in the import cell.
- Do not enter dollar signs ($) or negative signs (-) in front of financial values.
- Do not enter 'dummy data', such as giving all of the parents the same name or all students the same household address.
- The current term (CHILD.workflow_year in your create template and CHILD.prospect_entry_year in your Prospect template) must match the format of the terms in your site under ‘Settings’ → ‘General' → 'Terms.’
- For example, if your terms are set up as 2023-2024, you should follow that exact format and not a variation such as 23-24.
- For example, if your terms are set up as 2023-2024, you should follow that exact format and not a variation such as 23-24.
- Grades must also match the exact format of the grades listed under the ‘Abbreviation Column’ of your Finalsite Enrollment site within ‘Settings’ → ‘General’ → ‘Grades.’
- For example, if you have 8th grade listed in Finalsite Enrollment, your import must say 8th and not ‘8’.
- For example, if you have 8th grade listed in Finalsite Enrollment, your import must say 8th and not ‘8’.
- Field values must match exactly what you have in the field in Finalsite Enrollment.
- For example, if you have a value called ‘In-Person’, the value you list in the file can not be any other variation of this (ex. 'in person') in order for the import to work.
- For example, if you have a value called ‘In-Person’, the value you list in the file can not be any other variation of this (ex. 'in person') in order for the import to work.
- You can not import partial address data.
- For example, you can not enter just the City and State. You must either enter the entire address or leave it off of the import if it’s incomplete.
- You can add additional fields within either of these templates in order to import data to any custom field. The correct format for these additional custom field headers will always be: ENTITY.field_canonical_name.
- For example, if the canonical name of your field (as found under 'Settings' → 'Fields & Data' → 'Fields') is current_school, and you want to import that information for the student (aka the ‘CHILD’ entity in the system), your header would be CHILD.current_school. Click here for more details on adding headers to your imports.
- For example, if the canonical name of your field (as found under 'Settings' → 'Fields & Data' → 'Fields') is current_school, and you want to import that information for the student (aka the ‘CHILD’ entity in the system), your header would be CHILD.current_school. Click here for more details on adding headers to your imports.
- Both the ‘Create’ and ‘Prospect’ import templates can be used as-is ONLY if running the import without duplicate matching. When using duplicate matching, please remove any of the External ID columns (e.g. CHILD.external_id, HOUSEHOLD1.external_id) before running the import or it will fail. Click here to learn more about duplicate matching on imports.
- Student Name
- CHILD.first_name
- CHILD.last_name
- Student expected entry grade
- CHILD.prospect_entry_grade
- Student expected entry year
- CHILD.prospect_entry_year
- 1 form of contact (email/phone/address etc)
- CHILD.email
- Or, PARENT1.email
- Or, PARENT1.phone_1_number
- Student Name
- CHILD.first_name
- CHILD.last_name
- Student Grade
- CHILD.grade
- Student Term
- CHILD.workflow_year
- Student Status
- CHILD.status
- 1 Parent name
- PARENT1.first_name
- PARENT1.last_name
- 1 Parent relationship
- PARENT1.relationship
- 1 Parent form of contact (email/phone/etc)
- PARENT1.email
- Or, PARENT1.phone_1_number
- Full Address
- HOUSEHOLD1.address_1
- HOUSEHOLD1.city
- HOUSEHOLD1.state
- HOUSEHOLD1.zip
- HOUSEHOLD1.country
Save your file
Very important: Before importing, save your file as a CSV file (Comma Separated Values > .csv).Do not save with the CSV UTF-8 (Comma delimited) option in Excel or your import will fail.
*Pro tip: Give your saved file an easily recognizable file name so it’s easy to find for the import process.
Import your file
Navigate to ‘Settings’ → ‘Fields & Data’ → ‘Import Data’
Click on the ‘Import Data’ link as shown below.

This will open the ‘Validate and Import’ dialogue box as shown below.
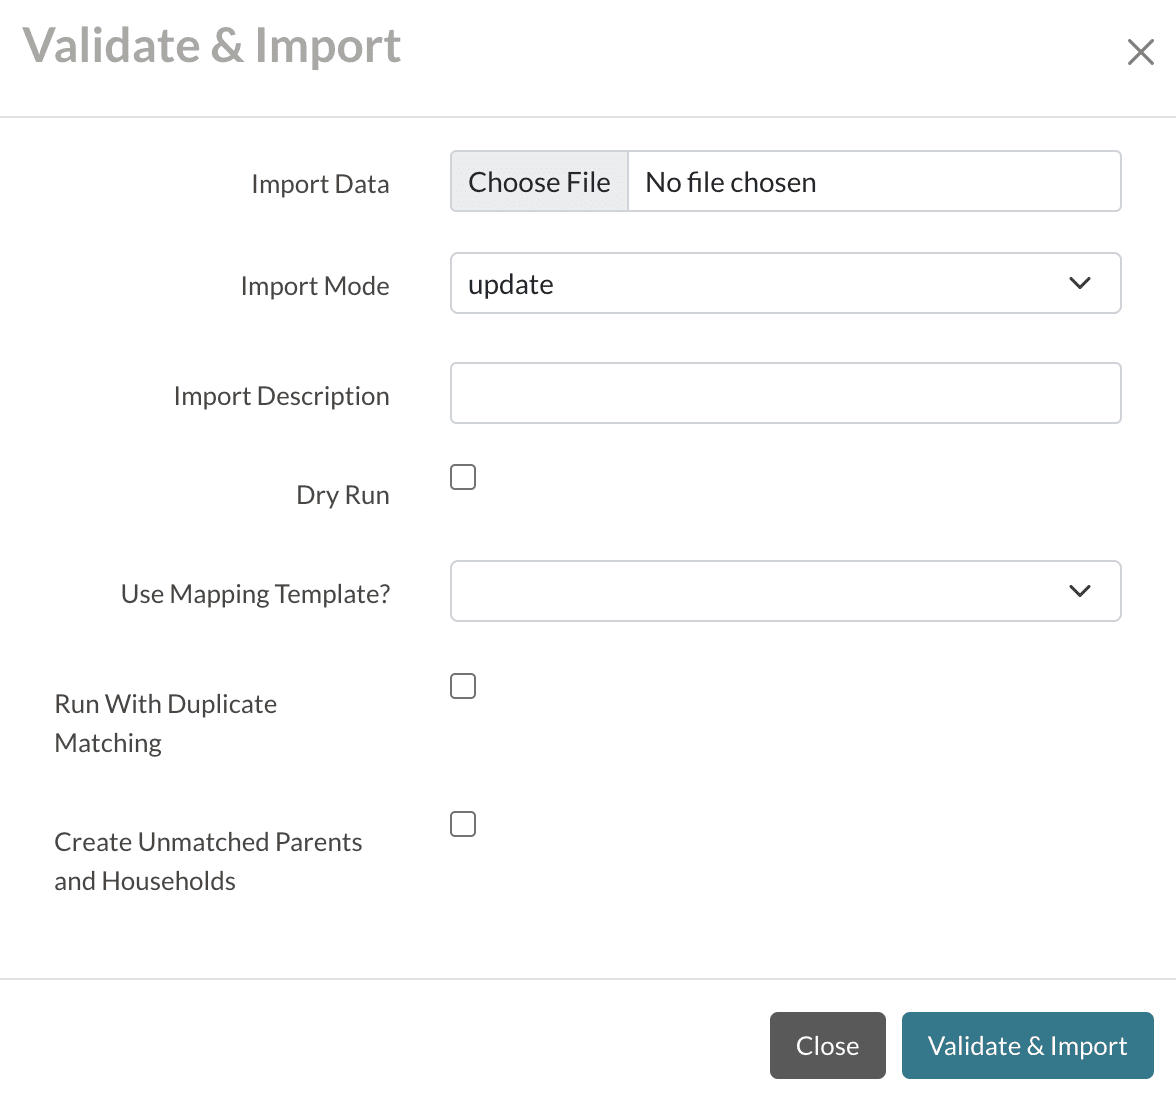
Validate and Import Details
- Import Data: Clicking the ‘Choose File’ button will open your computer’s file manager which will allow you to select the file you wish to import.
- Import Mode: Select ‘Create.’
- Import Description: Enter a description to help you identify the reason for the import.
- Dry Run: Selecting this option allows you to test the import. Even if the import is successful, the system will not import any of the data if you have this option selected.
There are a few options listed below that are not necessary to set when importing students. You can read more detail about what they mean here in the ‘Using the Import Data Tool’ article.
- Use Mapping Template
- Run With Duplicate Matching
- Create Unmatched Parents and Households
Click the ‘Validate & Import’ button at the bottom of the dialogue box.
If your import is successful, you will see 'Validation Succeeded' in the Import Status column.
If your import fails, you will see 'Validation Failed' in the Import Status column.
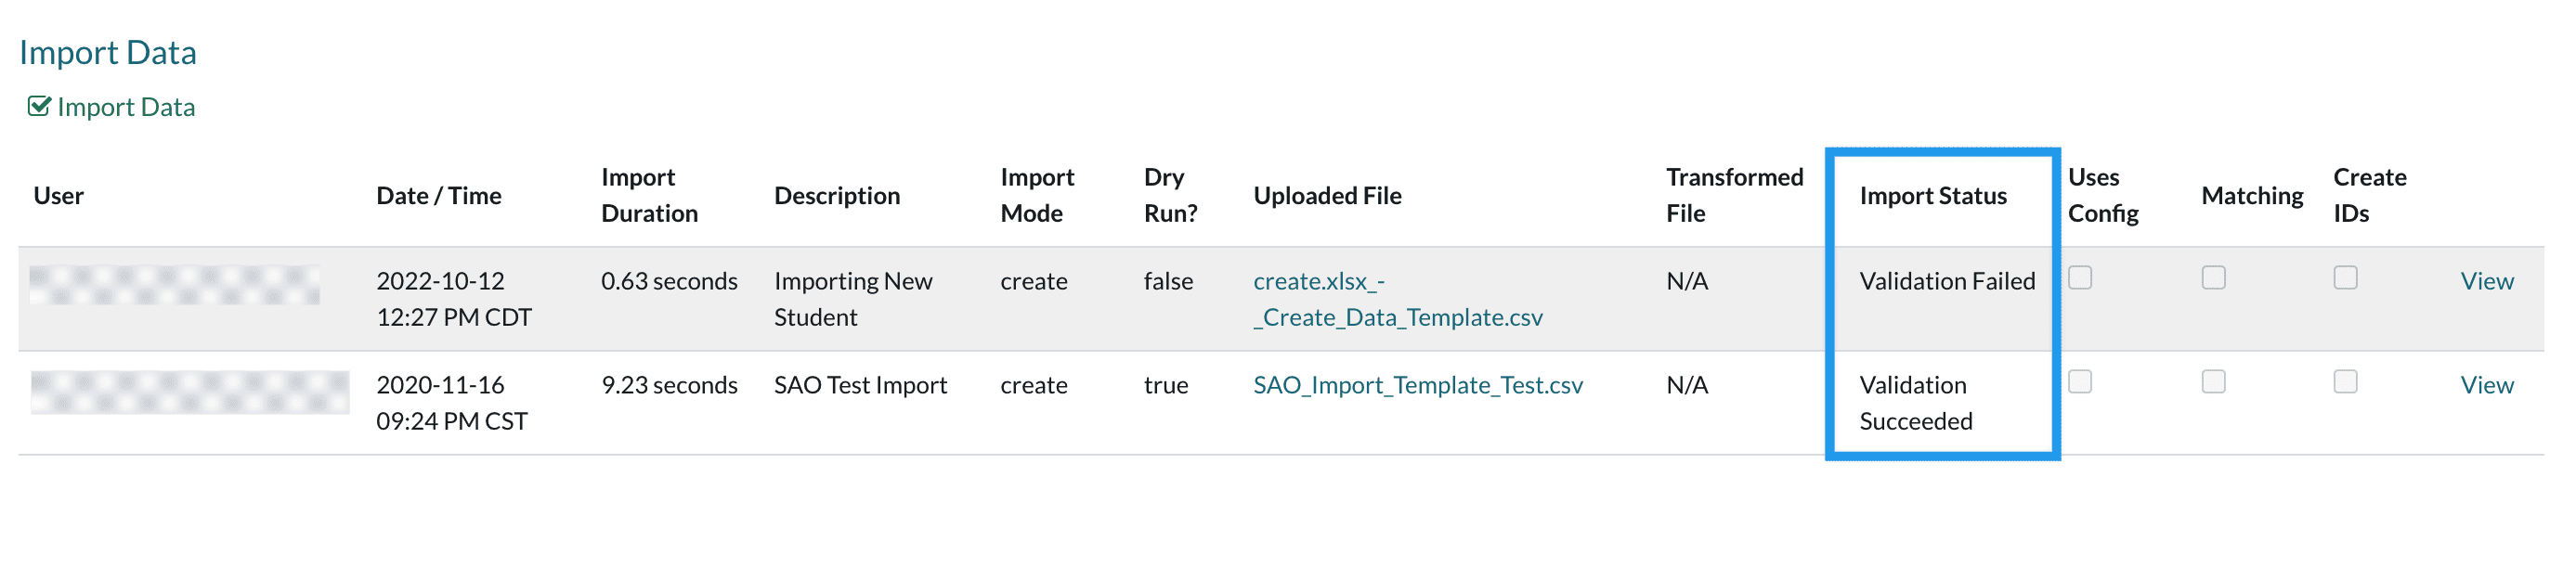
If your import does fail, you can select the 'View' link in order to view the error messages. You will need to interpret the errors > correct them within your file > and then reattempt the import again.
Below is an example of an error message on an import. This error is stating that the term used within the import file does not match the terms set within this Finalsite Enrollment site. In order to correct this, you would need to update the terms listed in the import file (under the CHILD.workflow_year or CHILD.prospect_entry_year columns, depending on your import template).
In this example, we used a test site where the term was formatted to YYYY-YYYY as opposed to YY-YY. Therefore, the system is not recognizing the term in this example '22-23'. To correct this, we went back into this import file and changed the term to '2022-2023', which corrected the error.

If you run into an error like this, simply go into 'Settings' > 'General' > 'Terms' to check how the term is formatted on your site and use that information to correct the format of the term within the import file before attempting to import again.
Should you run into any error that you do not know how to correct, please reach out to our support team and we will be happy to help!
Comments
0 comments
Article is closed for comments.