Overview
You can run events without having to bring families to campus by integrating a video conferencing software into your existing Finalsite Enrollment workflow. Most video conferencing programs offer various plans and pricing based on what you need. A couple of options are:
How-To
1 - Create Event in Zoom/Google Meet/Etc.
Inside your video conferencing software, create a new scheduled meeting or use your regular link and copy the link provided. This will be used later in Finalsite Enrollment.
2 - Create Calendar in Finalsite Enrollment
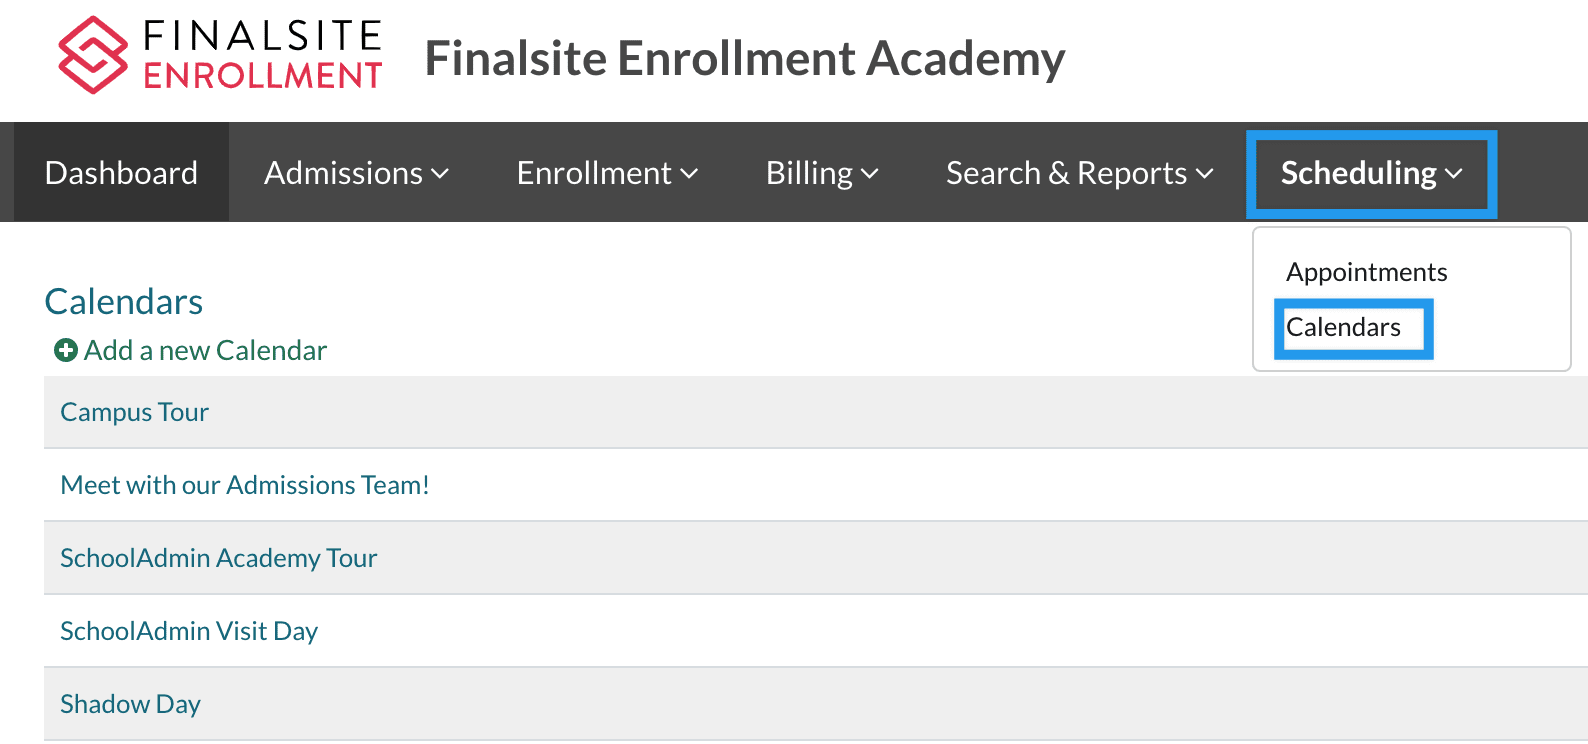
In Finalsite Enrollment, navigate to Scheduling > Calendars.
Click on Add a new Calendar to create a new calendar for your virtual event.
You can also click on an existing calendar to edit it.
After creating the calendar, make sure you have at least one date and time available for families to select. Learn more about creating appointment slots here.
3 - Add Event Link to the Calendar Schedule
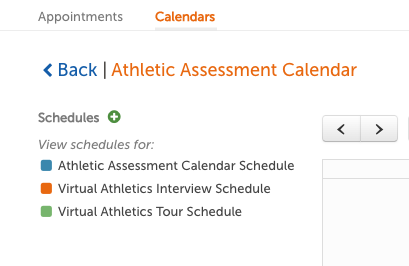
Once you've created your calendar, you'll need to add a new Schedule. You can also edit existing schedules that you've already created for a calendar.
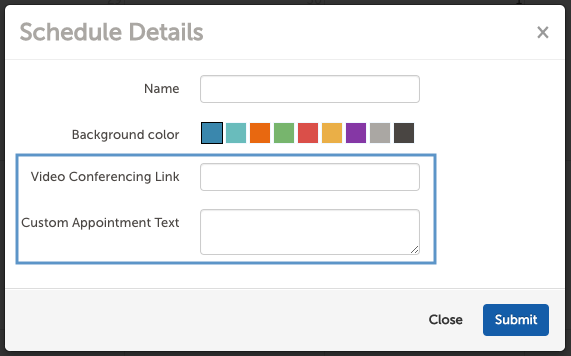
When creating or editing an existing schedule, you will have the option to add a video conferencing link and/or custom appointment text associated with that schedule. This is helpful if you have multiple people that will be conducting virtual interviews or meetings, and each needs to use their own video conferencing link. Click here for more information on schedules. Note: a best practice is to use an ongoing meeting link rather than a one-time link to ensure it will work for all attendees in the future.
4 - Update Calendar Emails
Next, click into 'Calendar Settings' - 'Edit settings'. From here, you can update the Confirmation Email Template with relevant details. Our recommended best practice is to let families know that they will receive a video conferencing link X days in advance of their appointment in a reminder email. This is to help prevent meeting interruptions or accidental logins by families prior to their assigned time slot.
When updating the Reminder Email Template, you can use the merge token for the video conferencing link #{{appointment.video_conferencing_link}} or custom appointment text #{{appointment.custom_schedule_text}} and add further instructions about the virtual event. This ensures that the family will have the details they need to join it later.
You can customize the text of the email template to your liking. Below is an example of a confirmation email template for a virtual event.
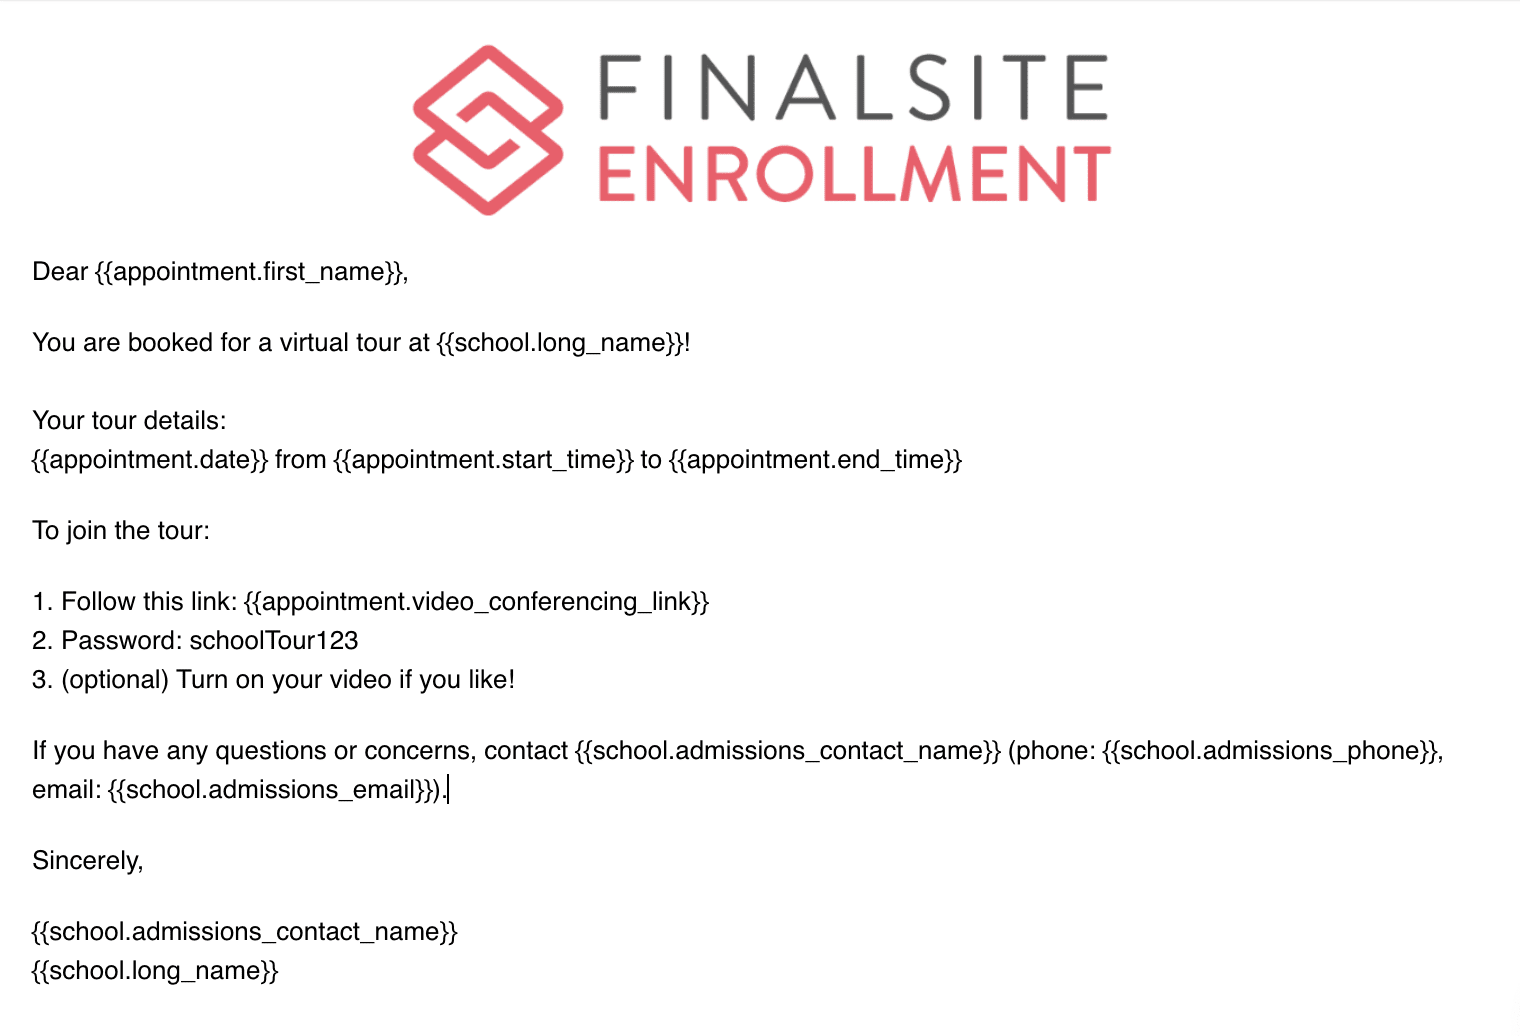
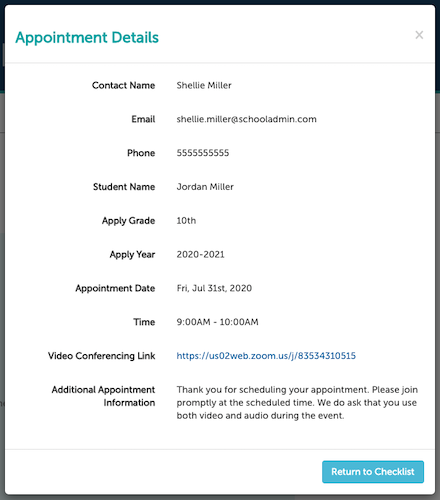
As a best practice, include this same information in the Appointment Reminder Email Template. Families are able to see the Video Conferencing Link and Custom Text, if used, by clicking the View Appointment button next to the associated calendar checklist item in the Parent Portal.
5 - Update Checklists/Forms
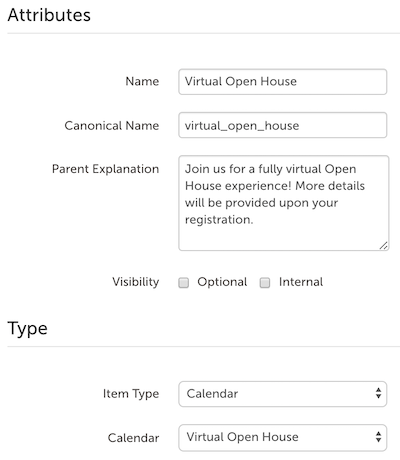
To allow students to sign up via the student checklist, make sure you have the 'Allow parents to book appointments via the checklist in the Parent Portal' option checked from your calendar settings. Then, navigate to 'Settings' - 'Checklists' and create a new checklist item for your virtual event. Click here for more information.
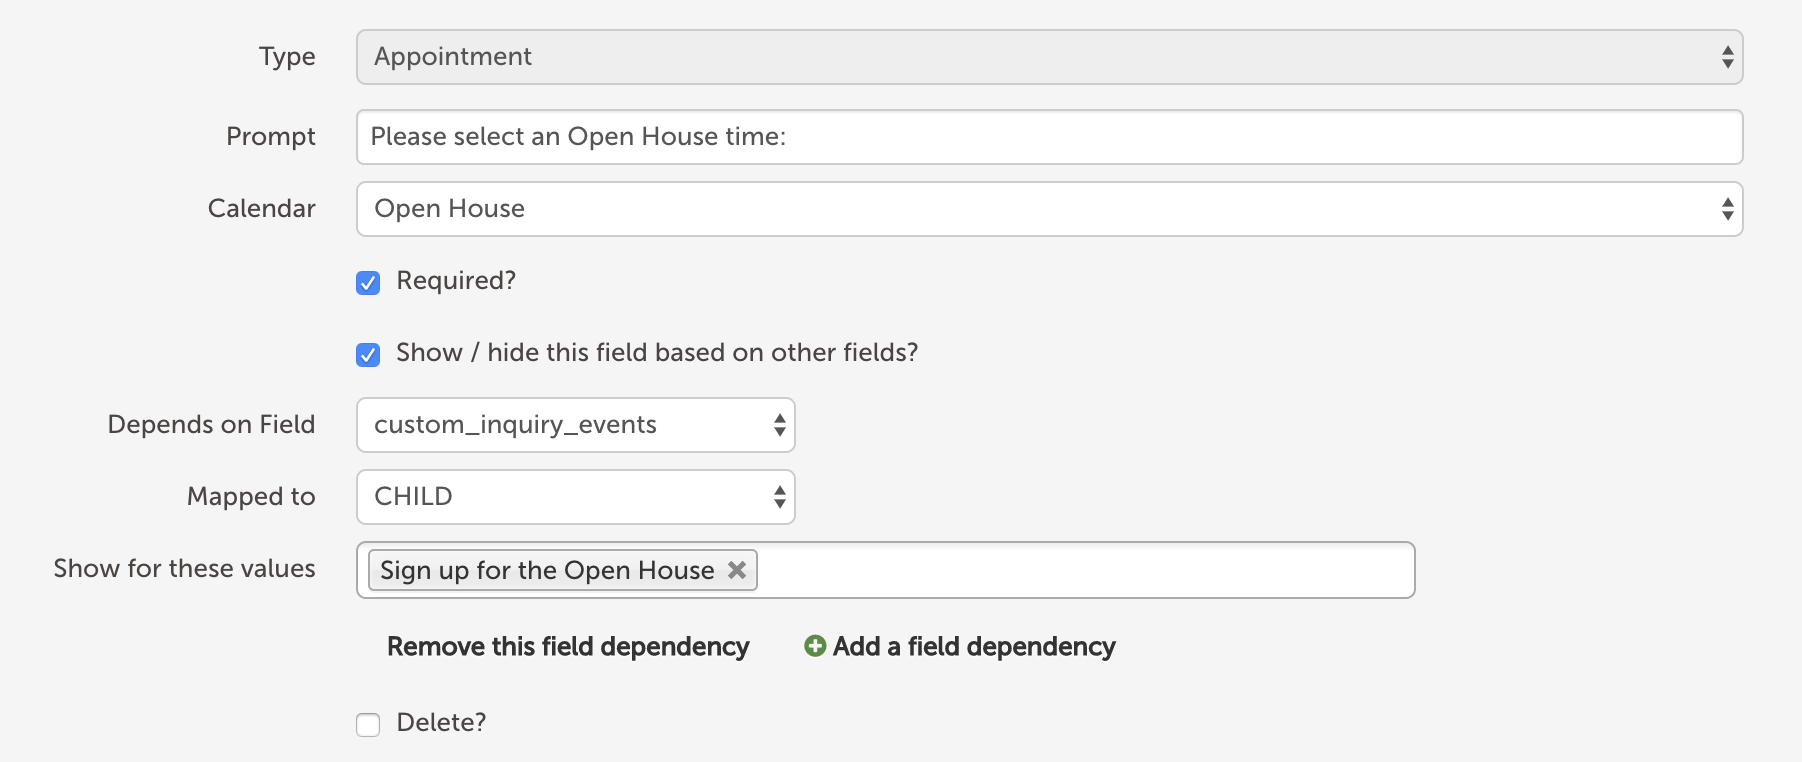
If you want families to sign up for the event on the Inquiry Form, you can set this up the same way you would any other calendar event, by using an 'Appointment' type field on the form. Click here to learn how to edit forms.

Comments
0 comments
Article is closed for comments.