
Your Finalsite Enrollment calendars can feed into Apple Calendar, Google Calendar, and Microsoft Outlook for Windows using the iCal format. Changes you make in Finalsite Enrollment flow into the external calendar; changes made in the external calendar do not flow back. Refresh rates differ by provider, and Outlook for Mac does not support iCal feeds at all.
💡Quick Answers
- Which external calendars work? Apple Calendar (Mac, iPhone, iPad), Google Calendar, and Microsoft Outlook on Windows (desktop and browser, both old and new versions). Outlook for Mac is not supported.
- How often does each calendar refresh? Apple Calendar defaults to weekly but can be set as frequently as every 5 minutes. Google Calendar refreshes once per day with no user control. Outlook for Windows typically refreshes every 3 hours but can take up to 24 hours.
- Where do I get the iCal subscription link? Scheduling > Calendars > select the calendar, then Calendar Settings > Sync with an outside calendar. Copy the link from the pop-up.
- How do I add the feed in Apple Calendar? Open Apple Calendar, choose File > New Calendar Subscription, paste the iCal link, click Subscribe, then set Auto-refresh to 5-15 minutes for the freshest data.
- How do I add the feed in Google Calendar? In Google Calendar, click + next to Other Calendars > Add by URL, paste the iCal link, click Add calendar. Note that Google only refreshes daily.
- How do I add the feed in Outlook for Windows? Open the Calendar view, click Add Calendar > Subscribe from web, paste the iCal link, name and color the calendar, then click Import or Save.
- Can I edit appointments in my external calendar and have changes flow back? No. The sync is one-way. All changes to appointments must be made in Finalsite Enrollment.
- What details show up in the synced calendar? The Finalsite Enrollment calendar name, number of students scheduled, schedule name, date and time, student name, and parent name and contact information.
- Can I get internal email notifications when appointments are booked? Yes, separate from the calendar feed. Go to Username Menu > User Notifications, find the Immediate Calendar notification section, and select the calendars you want notifications for. See User Notifications.
In this Article
- Calendar Feed Setup Instruction
- Apple Calendar
- Google Calendar
- Microsoft Outlook - Windows PC
- Microsoft Outlook - Mac
Calendar Feed Setup Instruction
Step 1: Locate the calendar feed URL
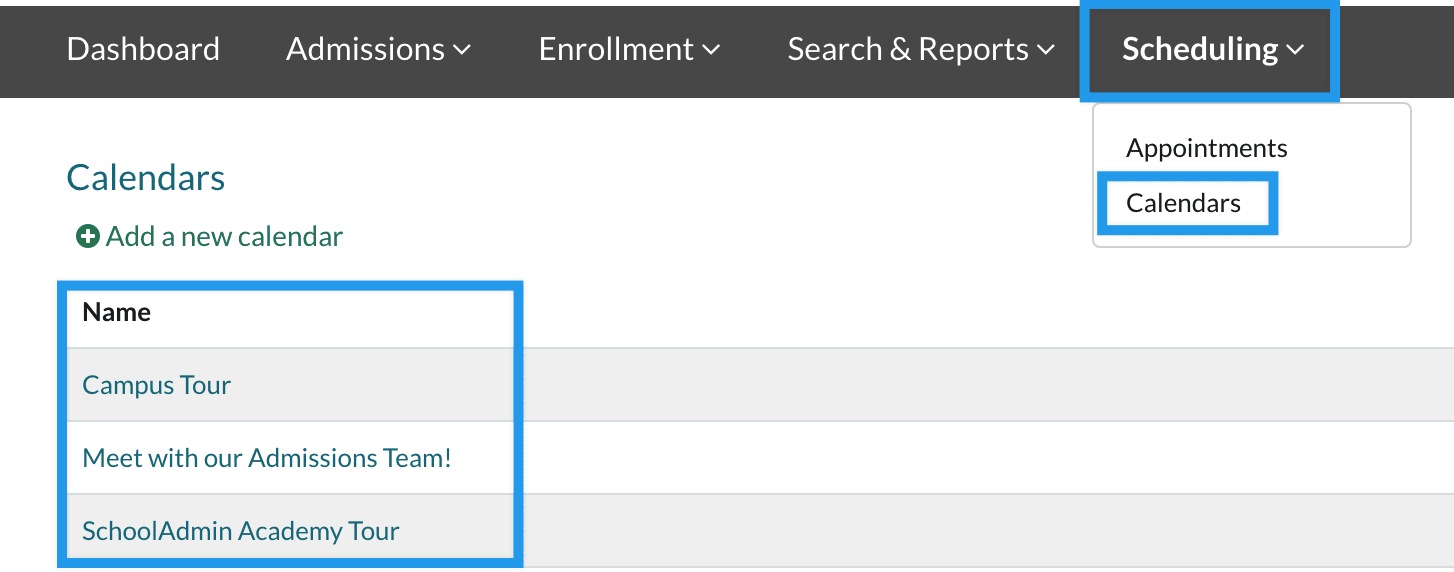
Within Finalsite Enrollment, click on Scheduling > Calendars and select the Calendar you wish to subscribe to.
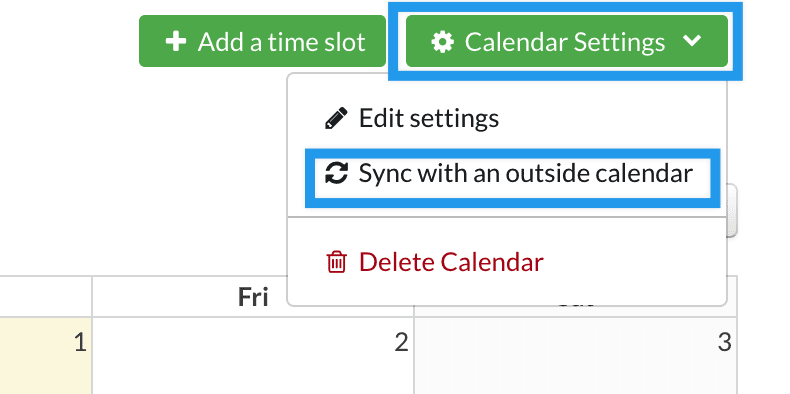
Step 2: Click Calendar Settings > Sync with an outside calendar
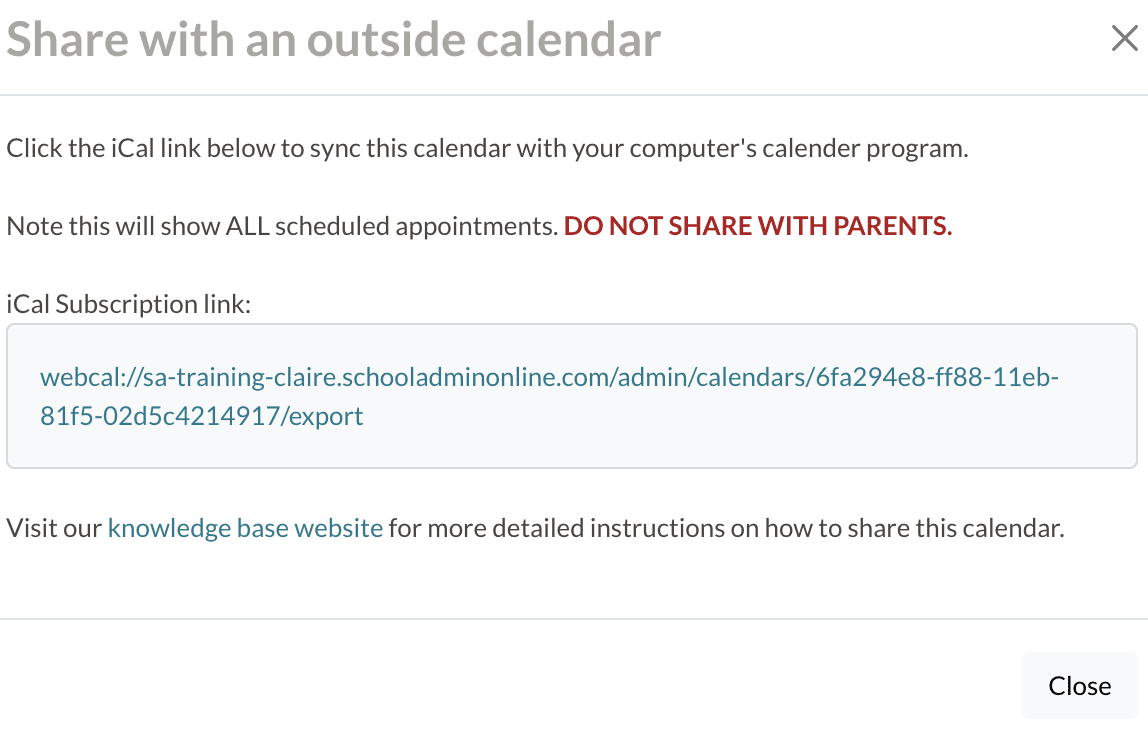
Step 3: Copy the iCal Subscription link
A pop-up dialog box will open with the iCal Subscription link. Copy the link shown.
Now that you have the iCal Subscription link, review the steps below based on the type of calendar you would like to sync with.
Apple Calendar
To set up a calendar feed in the Apple Calendar application, open your Apple Calendar and follow the steps below.
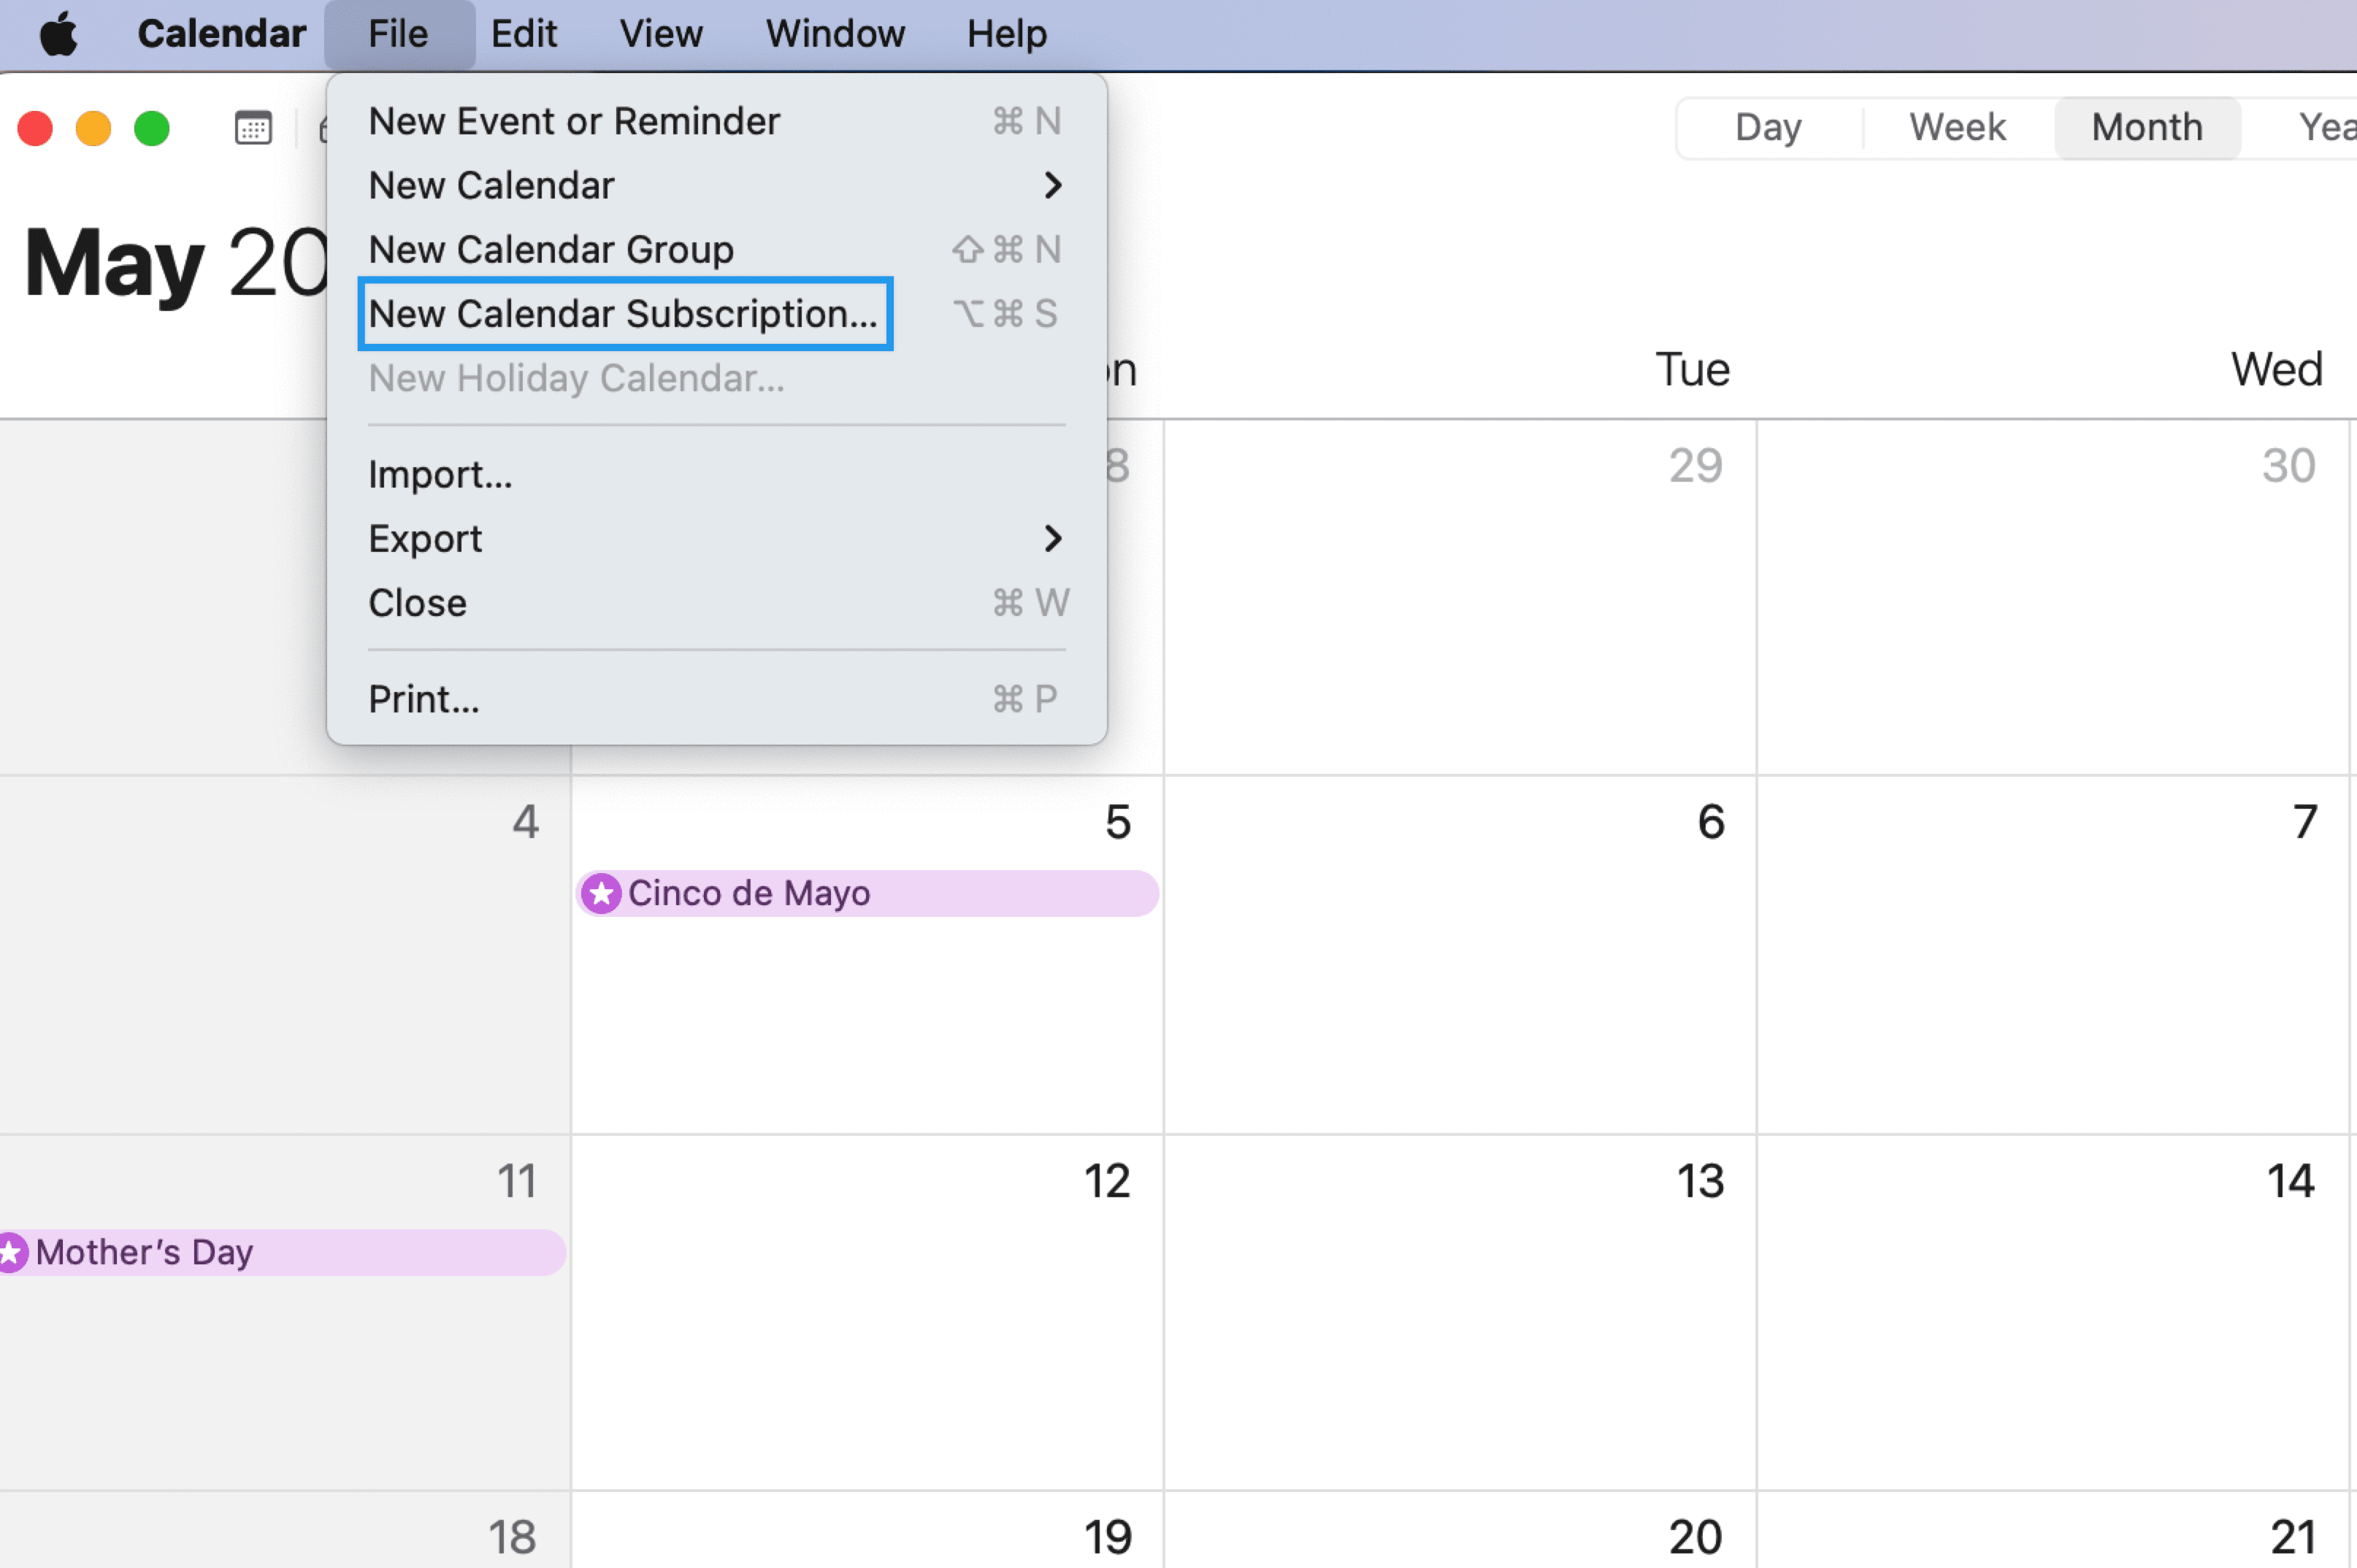
Step 1: Click File > New Calendar Subscription from Apple Calendar's menu bar
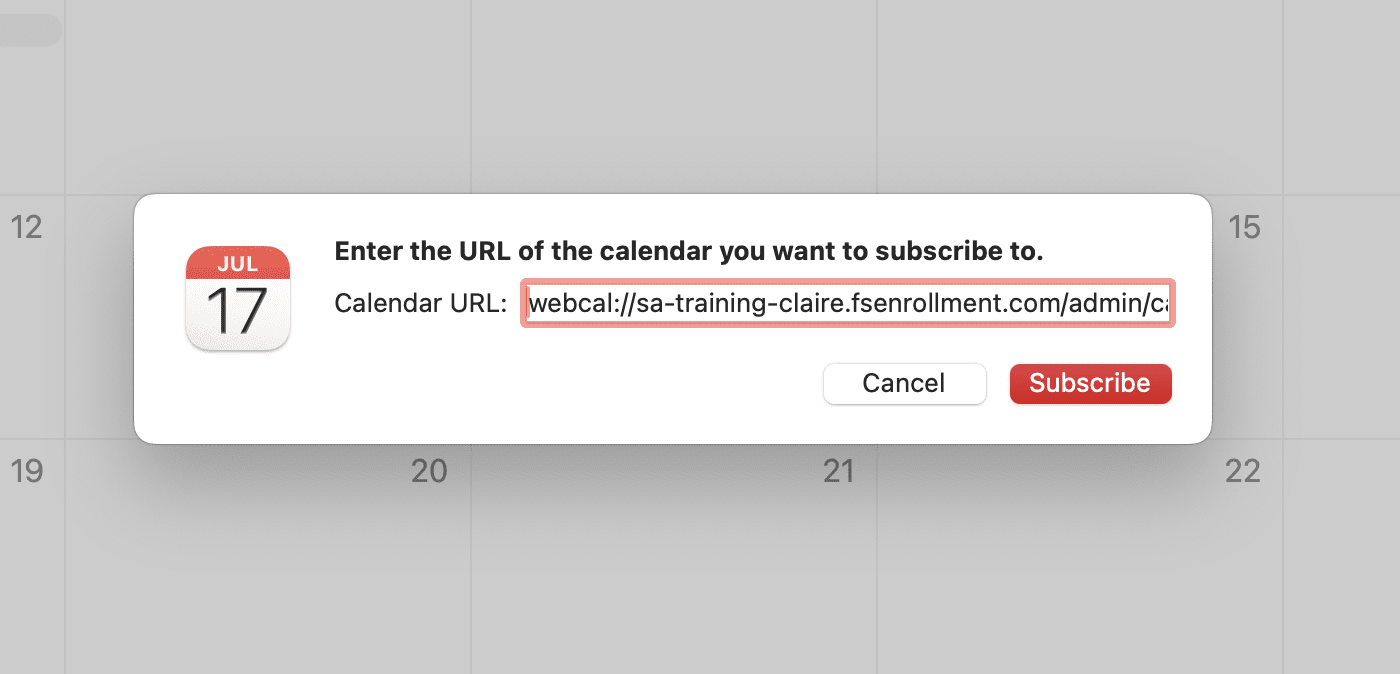
Step 2: Paste the iCal Subscription link & click Subscribe
In the pop-up dialog box, paste the Finalsite Enrollment iCal Subscription link in the Calendar URL field and click Subscribe.
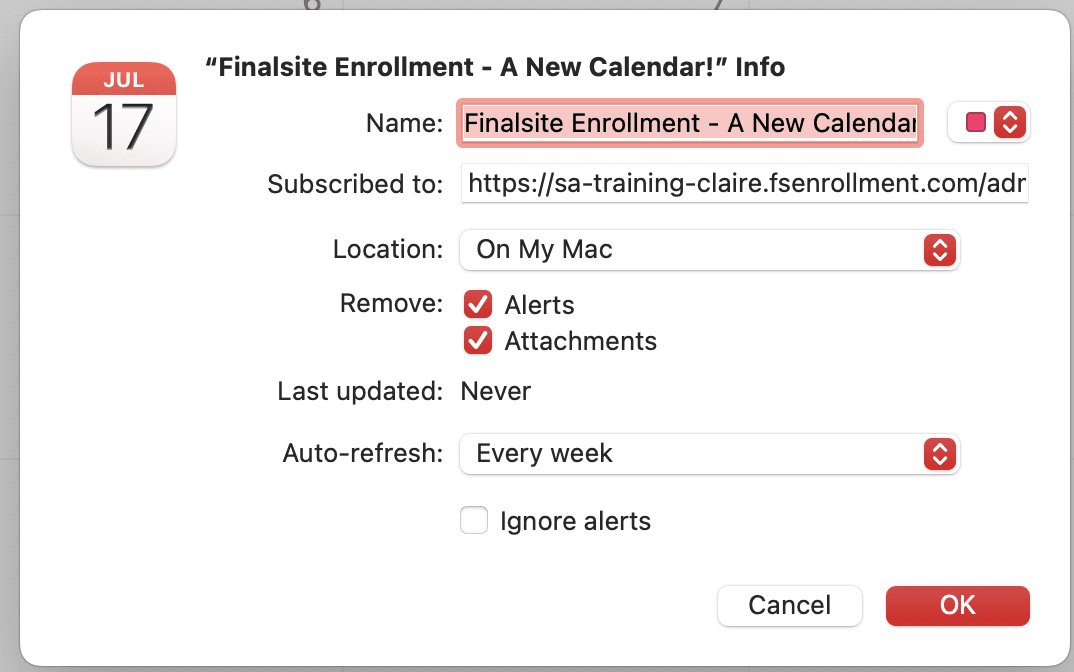
Step 3: Customize the calendar
Once the calendar is done processing, you can name the calendar, set the default location, set refresh dates, or remove alerts and attachments.
- For Auto-refresh, we recommend making the interval every 5-15 minutes so that you always see the latest changes.
Step 4: Click OK to save your changes & view scheduled appointments
Once you click OK, all of the scheduled appointments will show up on your calendar. The calendar will show the following appointment details:
- Finalsite Enrollment calendar name
- Number of students scheduled
- Schedule name
- Date and time of the event
- Student name
- Parent name and contact information
Google Calendar
To set up a calendar feed in Google Calendar, open your Google Calendar and follow the steps below.
Step 1: Click + Add other calendars > Add by URL
Along the left of the page, select the plus + sign next to the Other Calendars section and then select Add by URL.
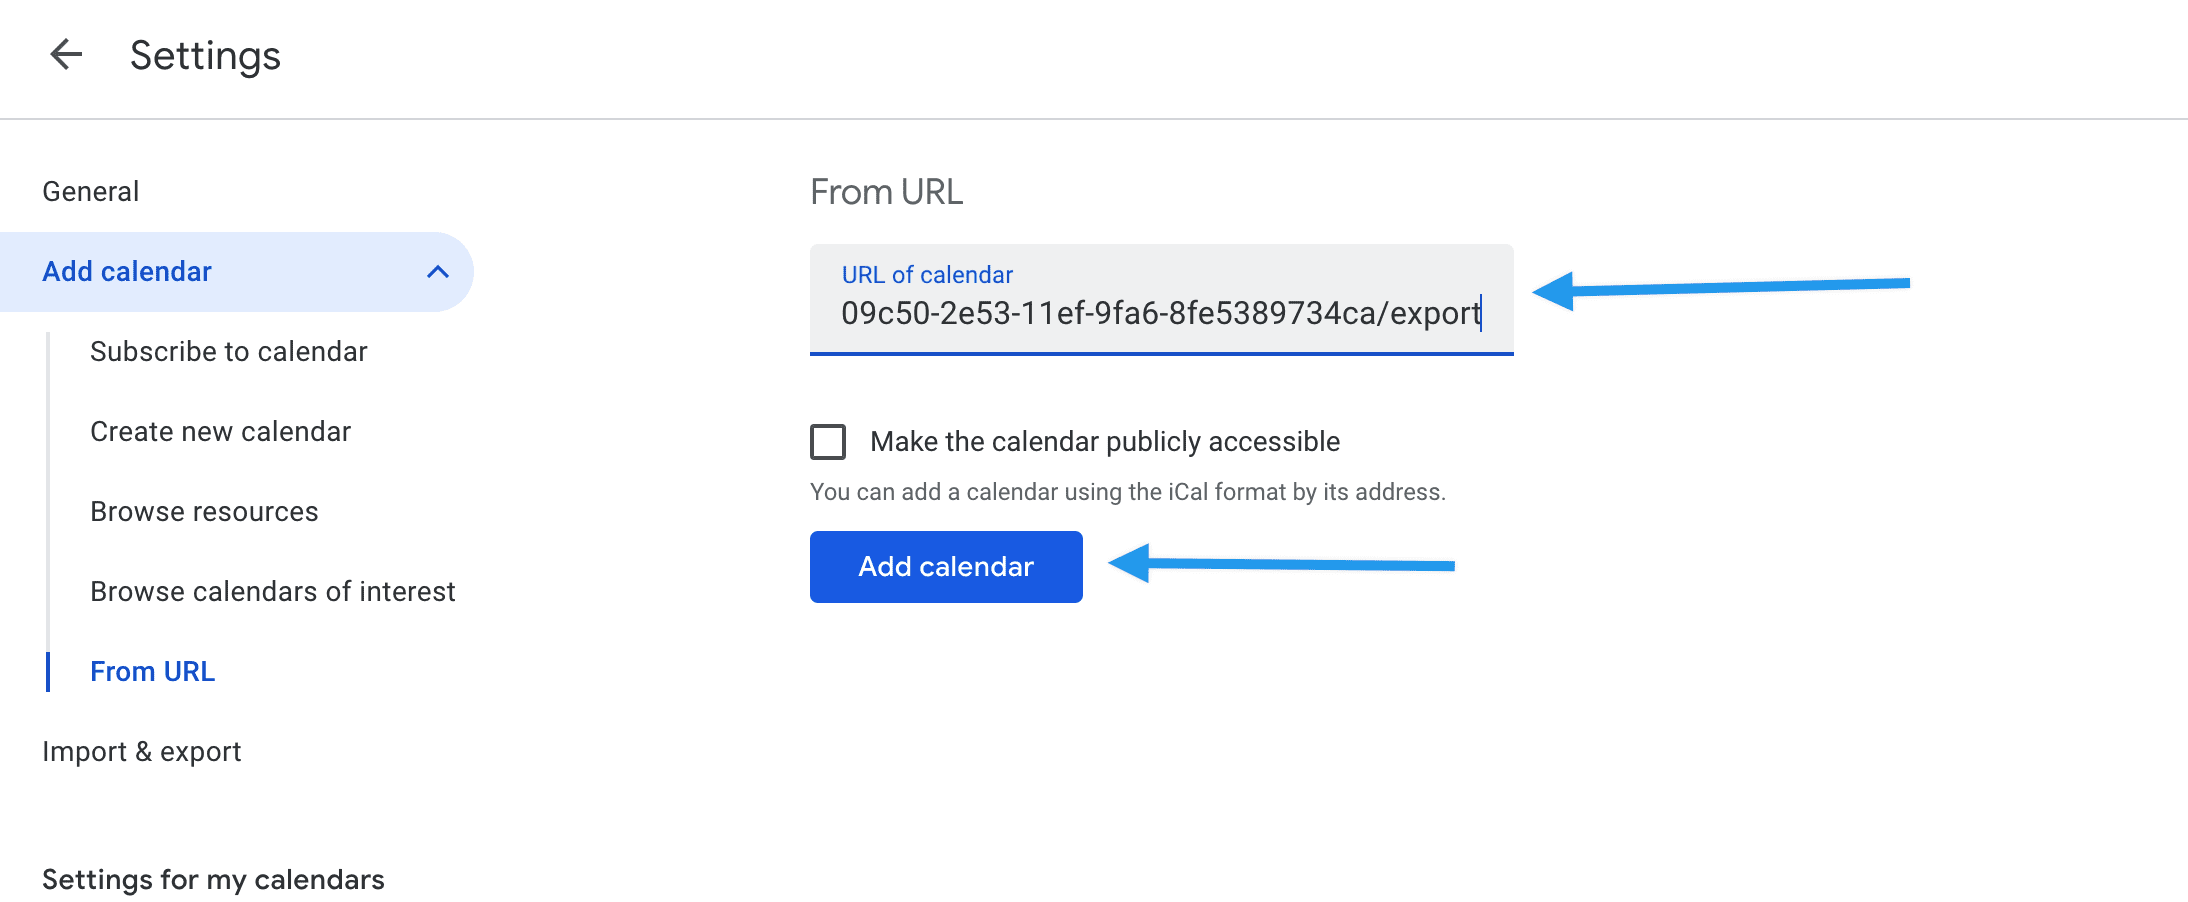
Step 2: Paste the Finalsite Enrollment iCal Subscription link into the URL of calendar field
Syncing with other calendars
If you plan to sync your Google Calendar with another calendar, like Outlook, be sure to select the Make the calendar publicly accessible option before adding the calendar. This will allow the Finalsite Enrollment calendar events to be displayed in the calendar outside of Google.
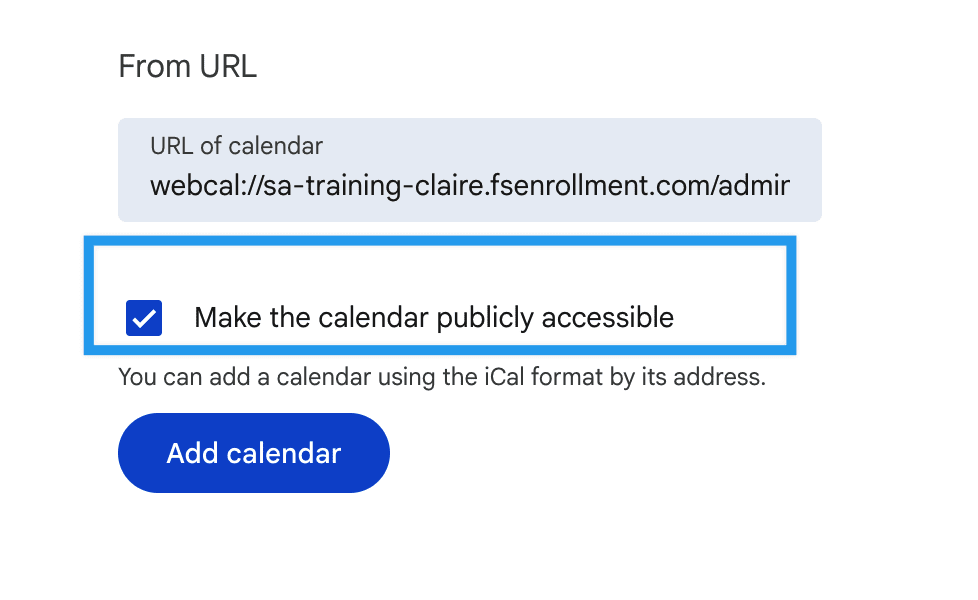
Step 3: Click Add calendar & view scheduled appointments
Google will now grab the names and dates out of the calendar feed. The calendar will show the following appointment details:
- Finalsite Enrollment calendar name
- Number of students scheduled
- Schedule name
- Date and time of the event
- Student name
- Parent name and contact information
Important Note on Google Calendar Refresh Settings
Google Calendar does not provide user control over the refresh setting like many other calendar programs do (for example, Apple Calendar). This means the calendar feed will only update once per day with new appointments or changes to existing appointments.
Microsoft Outlook - Windows PC
You can use the steps below to add your Finalsite Enrollment calendar to Outlook.
Syncing with Outlook
- This works in both the new and old versions of Outlook and works in both desktop and browser versions. The only difference you should encounter is the location of the Add Calendar option.
- Only dates that have someone registered will appear on the calendar in Outlook.
- It's a one-way sync. Nothing you add in Outlook will pass to Finalsite Enrollment.
- Typically, the calendar will refresh to pull in your Finalsite Enrollment signups every 3 hours, but it's possible that it could take 24 hours for the calendar to sync when new sign-ups are added.
Step 1: Open Outlook
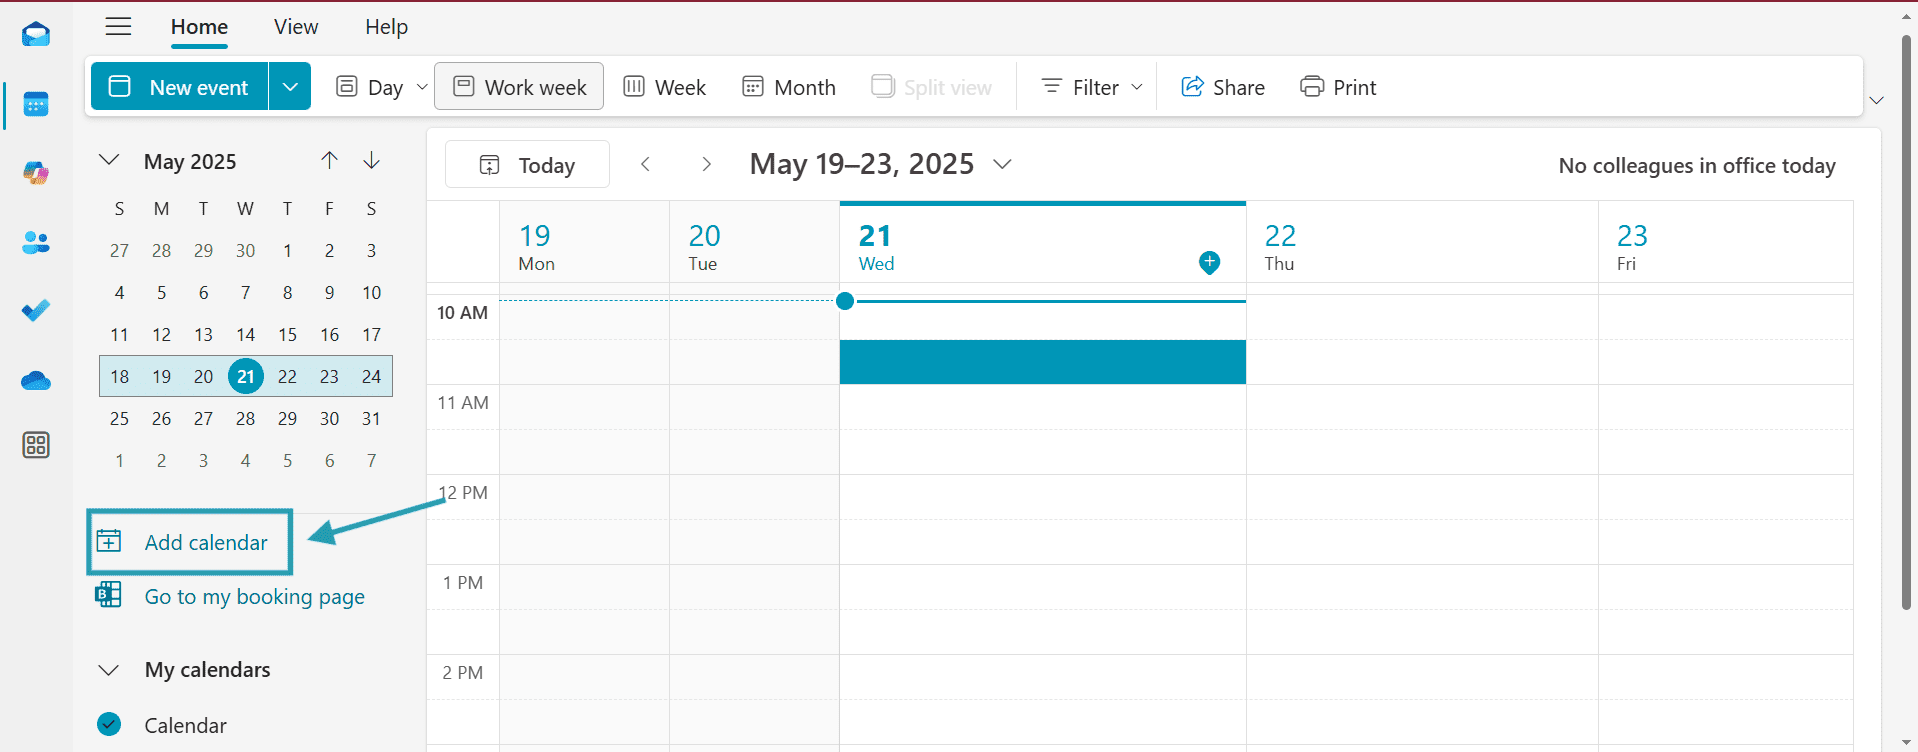
Step 2: Go to the Calendar view and click Add calendar
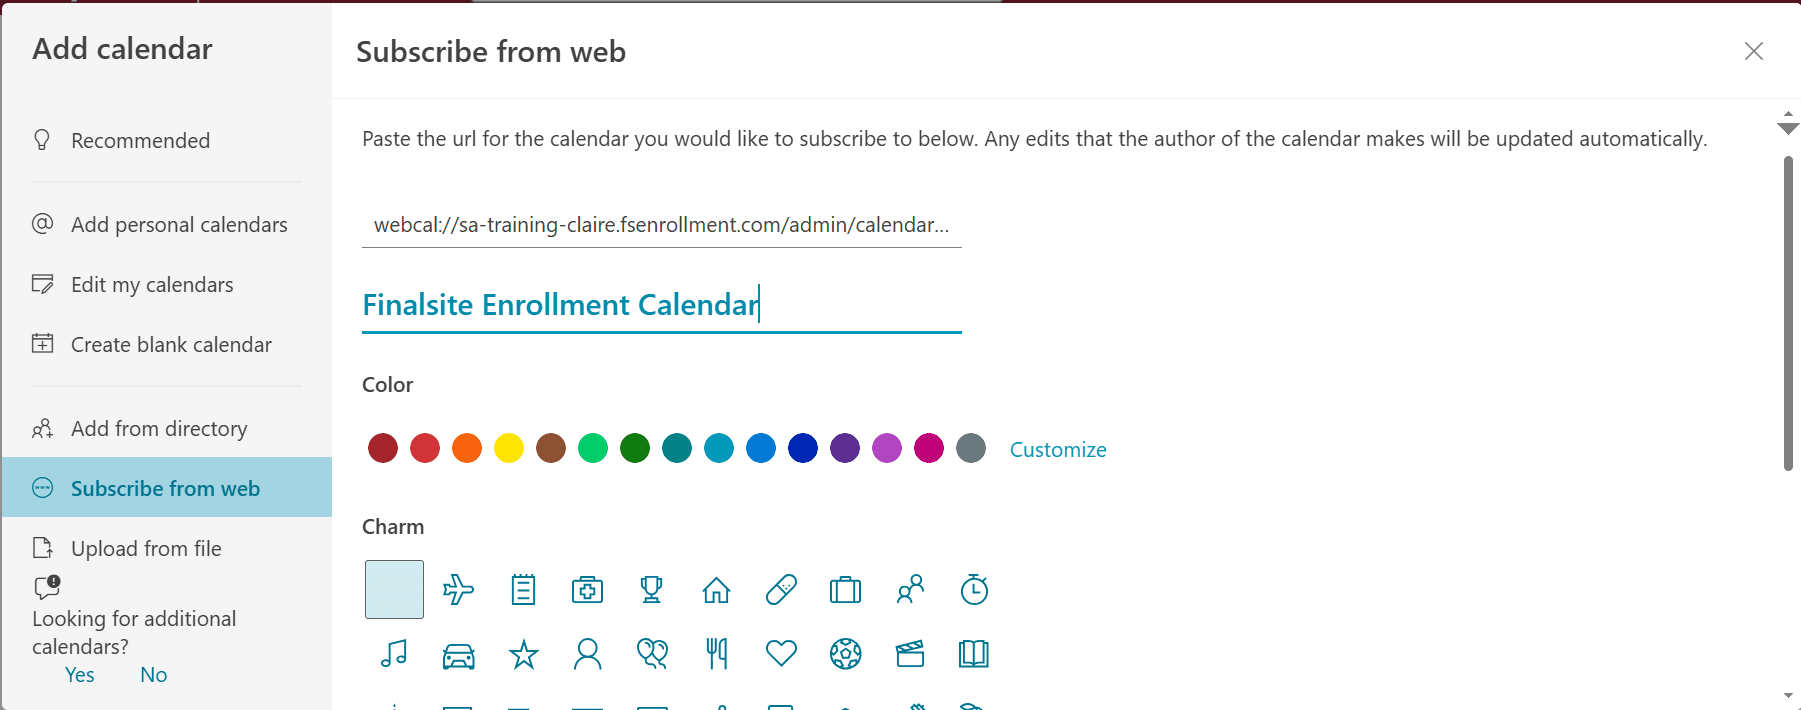
Step 3: Select Subscribe from web and paste the iCal Subscription link
You can give the calendar a name and choose a color for it.
Step 4: Click Import or Save.
You'll see a success message pop up to show that it's been successfully synced.

Your Finalsite Enrollment calendar should now appear in your Outlook calendar view. Only appointments that families have booked will appear in the calendar view.
The calendar will show the following appointment details:
- Finalsite Enrollment calendar name
- Number of students scheduled
- Schedule name
- Date and time of the event
- Student name
- Parent name and contact information
Microsoft Outlook - Mac
Microsoft does not support subscribing to WebCal standard feeds in Outlook for Mac.
A quick note about internal email notifications
If you would like to receive internal email notifications for when an appointment is booked or rescheduled within a calendar, navigate to your User Notifications page (Username Menu > User Notifications) and, under the Immediate Calendar notification section, select the name of the calendar you wish to enable notifications for. Read more within this article: User Notifications
Comments
0 comments
Article is closed for comments.