
Shared Access lets a parent or billing account holder grant another person the ability to make one-time payments on the student's account. Admins enable Shared Access from the student record's Billing tab; parents can also enable it themselves from the Parent Portal.
💡Quick Answers
- How do admins grant Shared Access? On the student record's Billing tab, click Add additional Contact, pick the contact from the dropdown, and click the checkmark in the View Changes column to save.
- Can a shared account use Autopay? No. Shared accounts can only make one-time payments. Autopay is restricted to primary billing accounts.
- Which relationship types can be granted ledger access? Parent, Guardian, Consultant, Mother, Father, Stepmother, Stepfather, Grandmother, and Grandfather.
- What if I don't see the contact I need to add? Add them as a related contact first via Contact Record: Related Contacts. They also need an email address on file.
- Do shared-access contacts get billing communications? Yes by default. Toggle the Notification column off to suppress them. Parents cannot enable or disable this on their end; admins control it.
- How do I revoke Shared Access? Click the X next to the contact on the student's Billing tab and confirm the change.
Pop some Popcorn!
If you'd prefer to watch our video on this, check out the following videos:
Also, we have a video in the parent help center that was designed specifically for parents:
In this article
How to Grant a Parent/Guardian Shared Access
You can add a Shared Access contact from the Student's record on their Billing tab by selecting Add additional Contact.
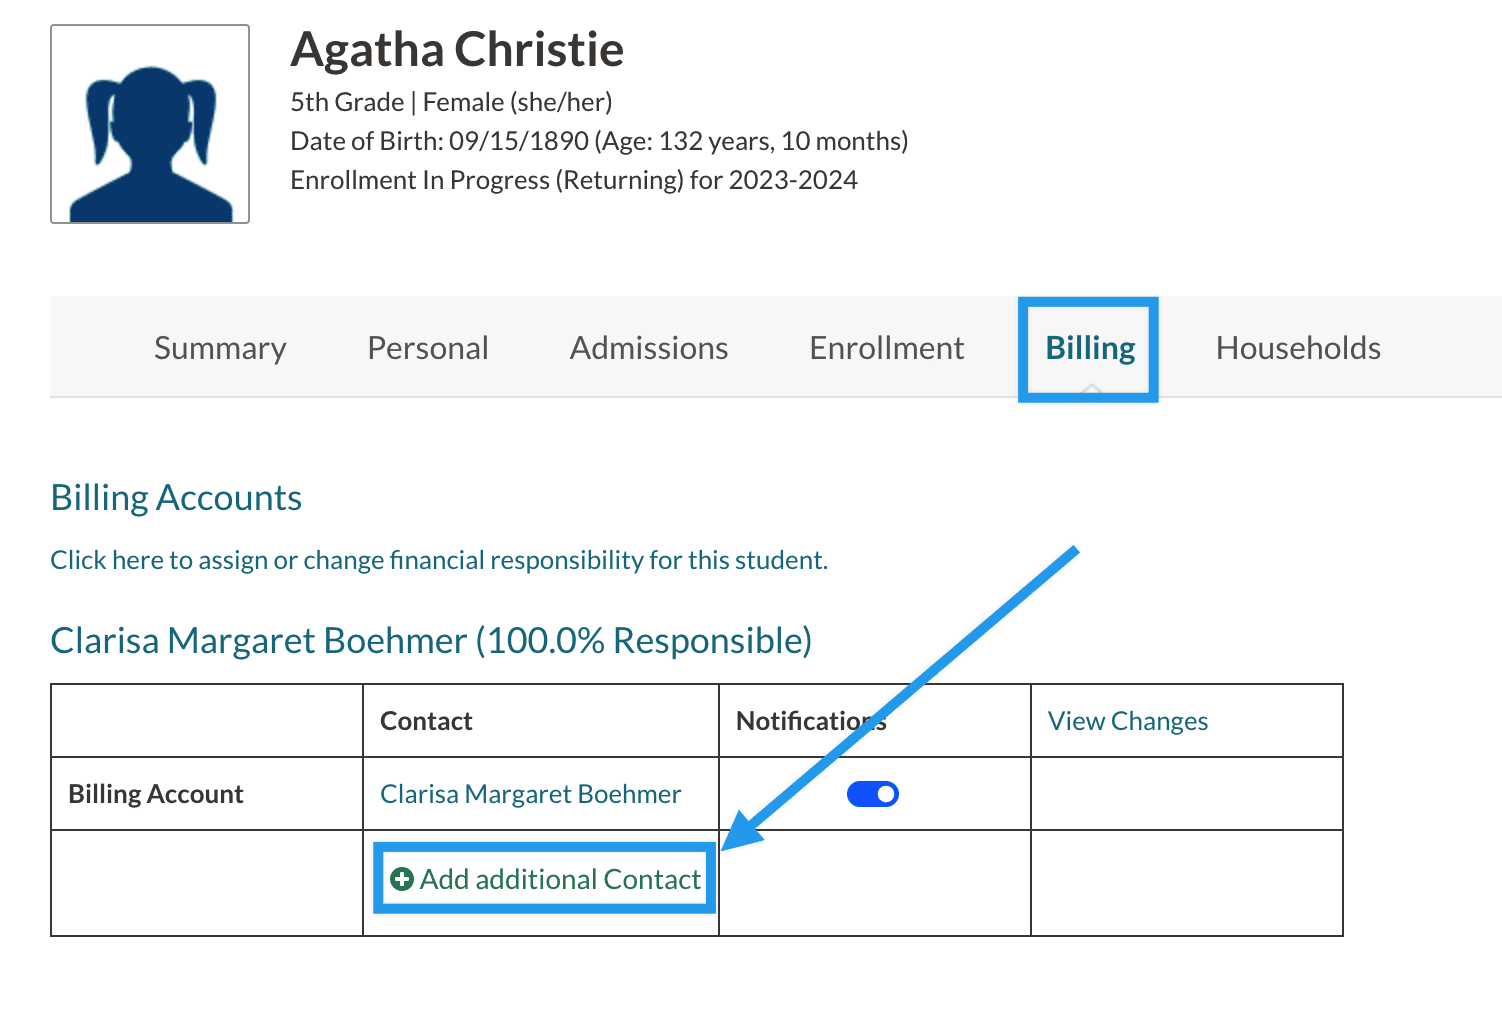
- Select the contact name from the drop-down.
- Click on the checkmark that appears in the View Changes column to save and set the shared access.
Important Notes
- Shared accounts can only make one-time payments, as Autopay is only available to primary billing accounts. Although the Autopay option displays, it will not be saved for a shared account.
- Only the following relationship types can be granted ledger access: Parent, Guardian, Consultant, Mother, Father, Stepmother, Stepfather, Grandmother, and Grandfather.
- If you do not see the name of the contact you're looking for, learn how to add an additional contact with the Contact Record: Related Contacts article.
- The contact should have an associated email address to be added successfully. To add an email address to the contact, navigate to the contact's record and enter it under their name in the upper right.
- Parents can also add shared contacts on their end. To learn about their process of setting up a Shared Access account and what it looks like on their end, check out our Parent Billing Workflow article.
Notifications for Contacts with Shared Access
When adding a contact with Shared Access, notifications are automatically turned on (as long as the contact has an email address associated with their account.) To disable notifications, toggle them off in the Notification column.
- If notifications are on, the contact will receive all billing communications.
- If notifications are off, the contact will receive no billing communications.
- The parents/guardians can not enable or disable billing communications on their end. (Only admins have the ability to toggle on/off communications for parents with shared billing access.)
- Read more about communications within our Billing Communications article.
Remove/Revoke Shared Access
If you need to remove or revoke shared access, click on the 'x' next to the contact you'd like to remove.
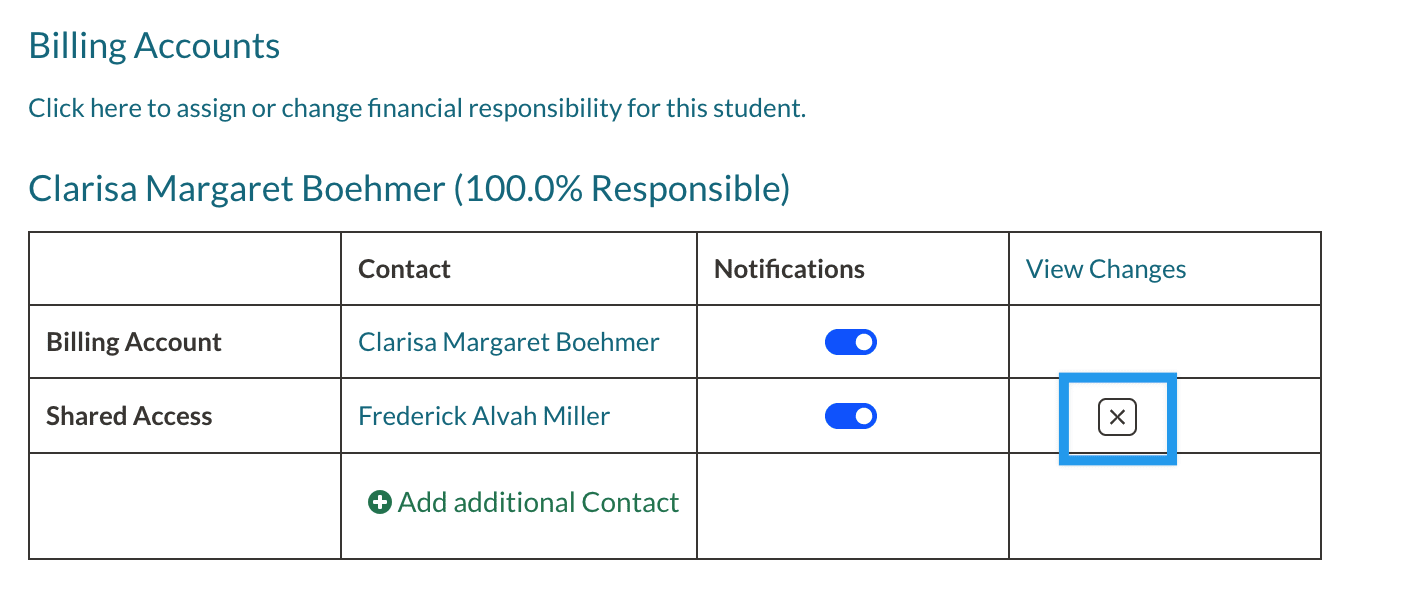
You'll be asked to confirm this change before it takes place.
Comments
0 comments
Article is closed for comments.