Overview
Shared access allows a parent or billing account holder to grant access to another individual for making one-time payments on an account.
Pop some Popcorn!
If you'd prefer to watch our video on this, check out the following videos:
Also, we have a video in the parent help center that was designed specifically for parents:
In this article
- Important Notes
- Parent/Guardian Process for Granting a Contact Shared Billing Access
- Experience of a Shared Billing Access Contact
- Billing Communications for Shared Access
- FAQs
Important Notes
- Shared accounts can only make one-time payments, as Autopay is only available to primary billing accounts. Although the Autopay option displays, it will not be saved for a shared account.
- Only the following relationship types can be granted ledger access: Parent, Guardian, Consultant, Mother, Father, Stepmother, Stepfather.
- If a parent would like to add a shared contact but doesn't see their name, it's because they are not connected to the student as a related contact in Finalsite Enrollment. You can add the new person as a related contact on the student and then the parent will see them in the shared access dropdown.
Parent/Guardian Process for Granting a Contact Shared Billing Access
- Parents/Guardians can add a contact for shared billing access within their Parent Portal > Billing Management tab.
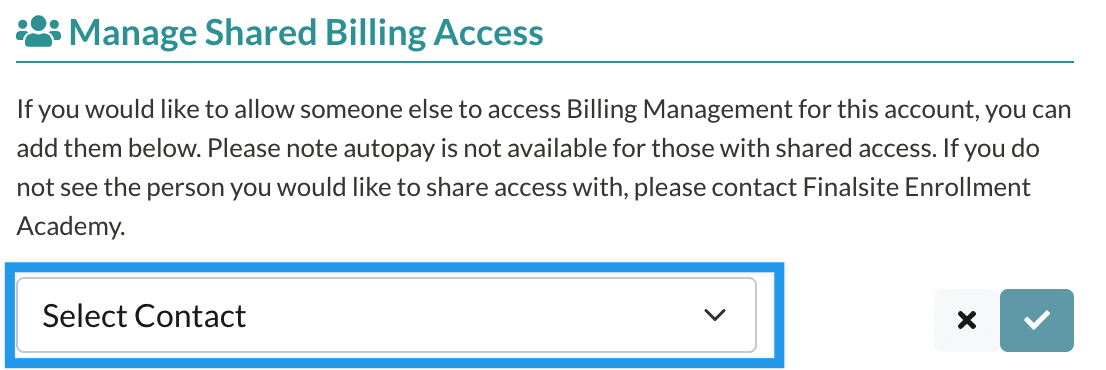
- On the right side of their page, parents will see a section titled Manage Share Billing Access.
- To add a contact, they will select the Add Additional Contact button.
- Once they click the button a dropdown opens, allowing them to select a contact.
- When they have selected a contact from the dropdown, they will be able to select the "check" button to confirm the addition.
- The shared account will receive an email (so long as there's one on file within the system) with instructions and a link to access the account.
Experience of a Shared Billing Access Contact
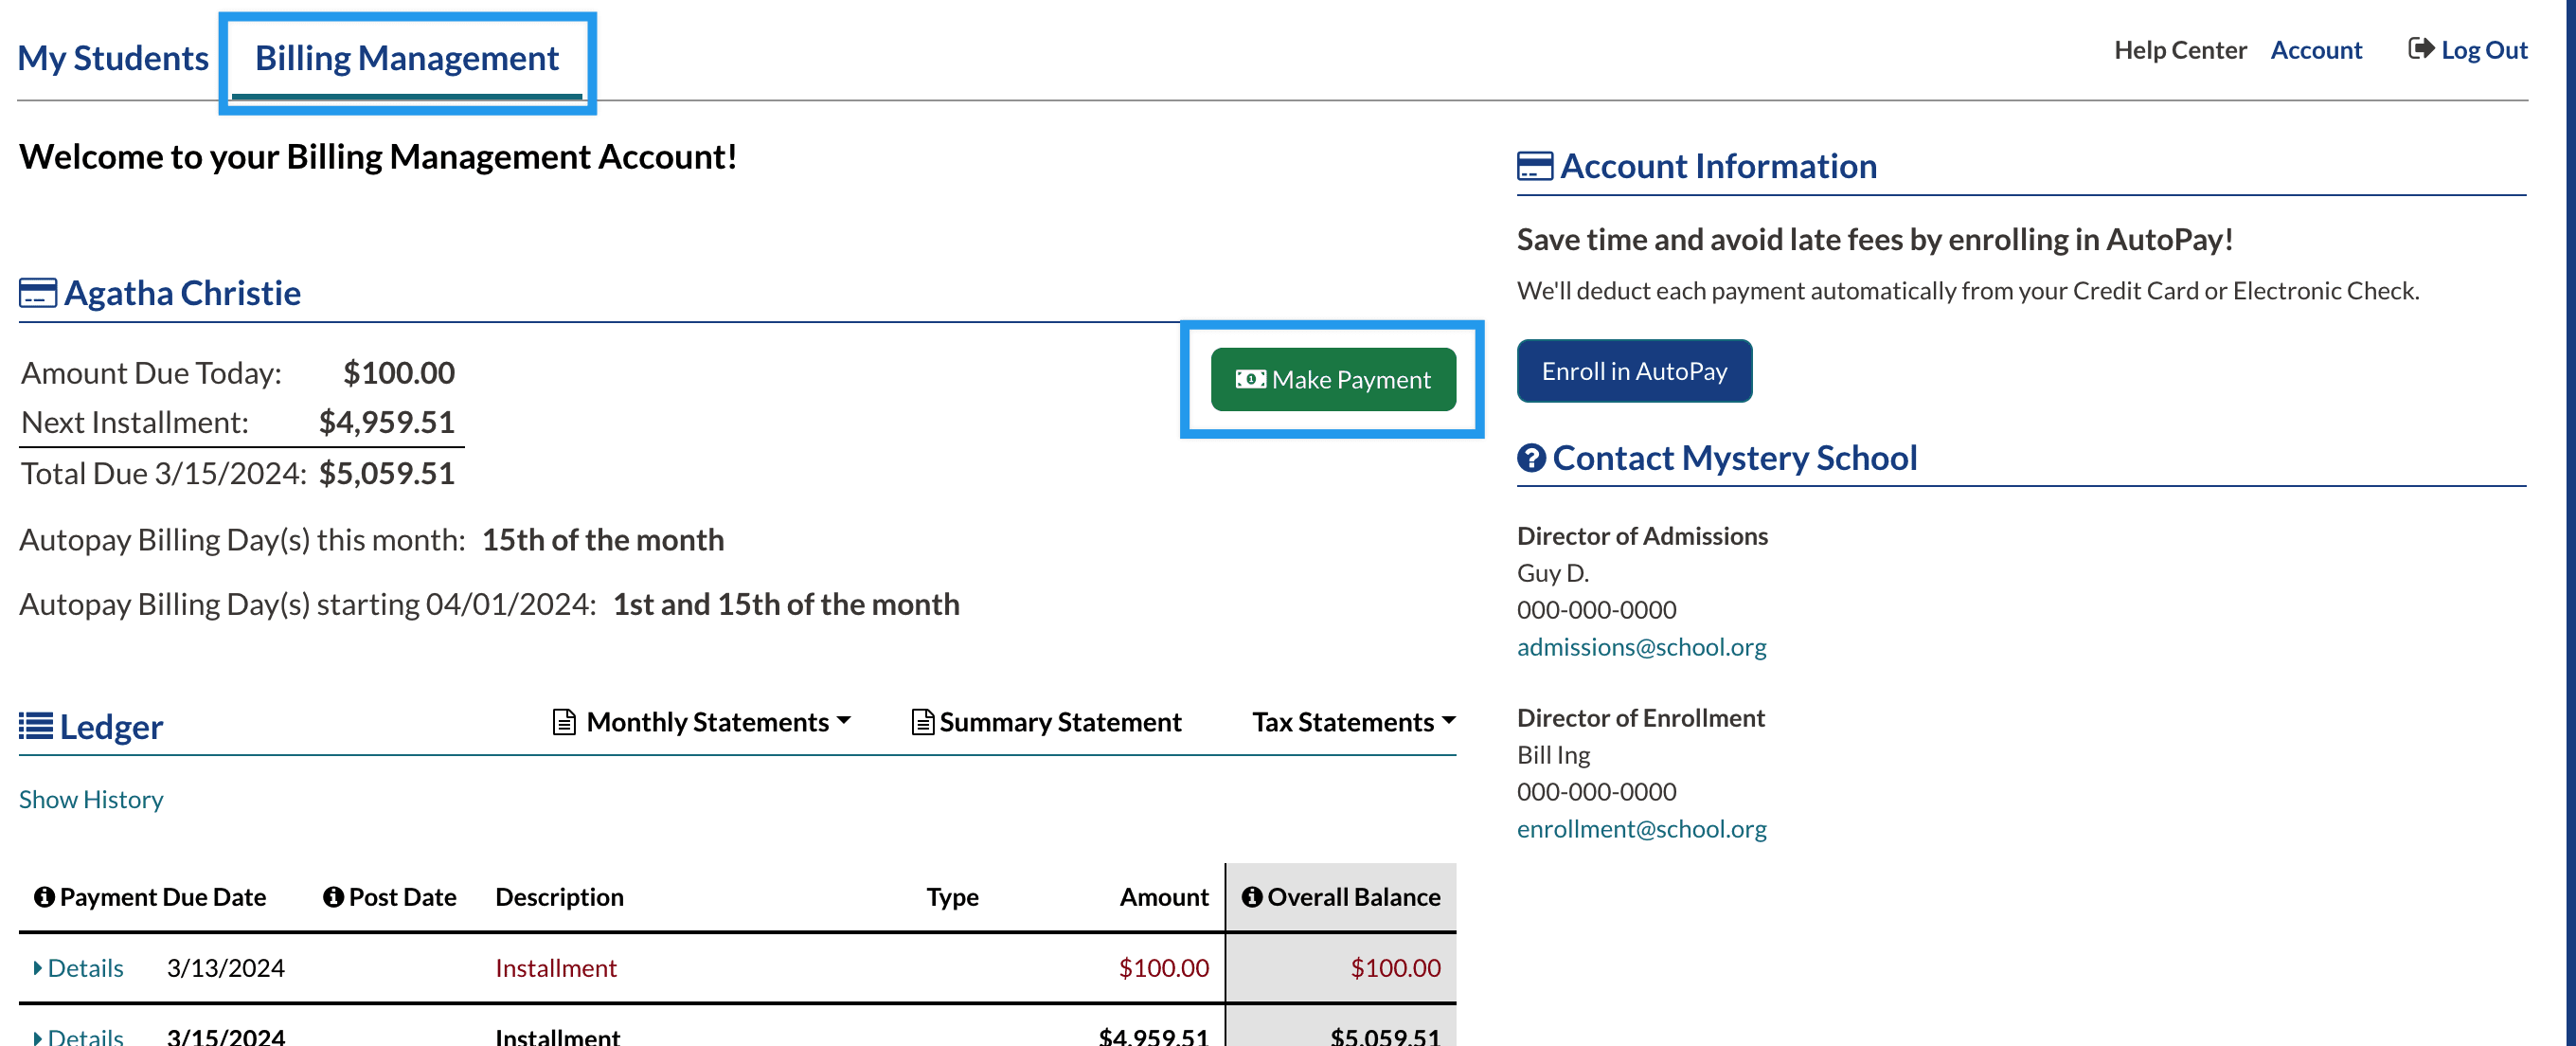
- Shared accounts can log into the Parent Portal and click on the Billing Management tab at the top.
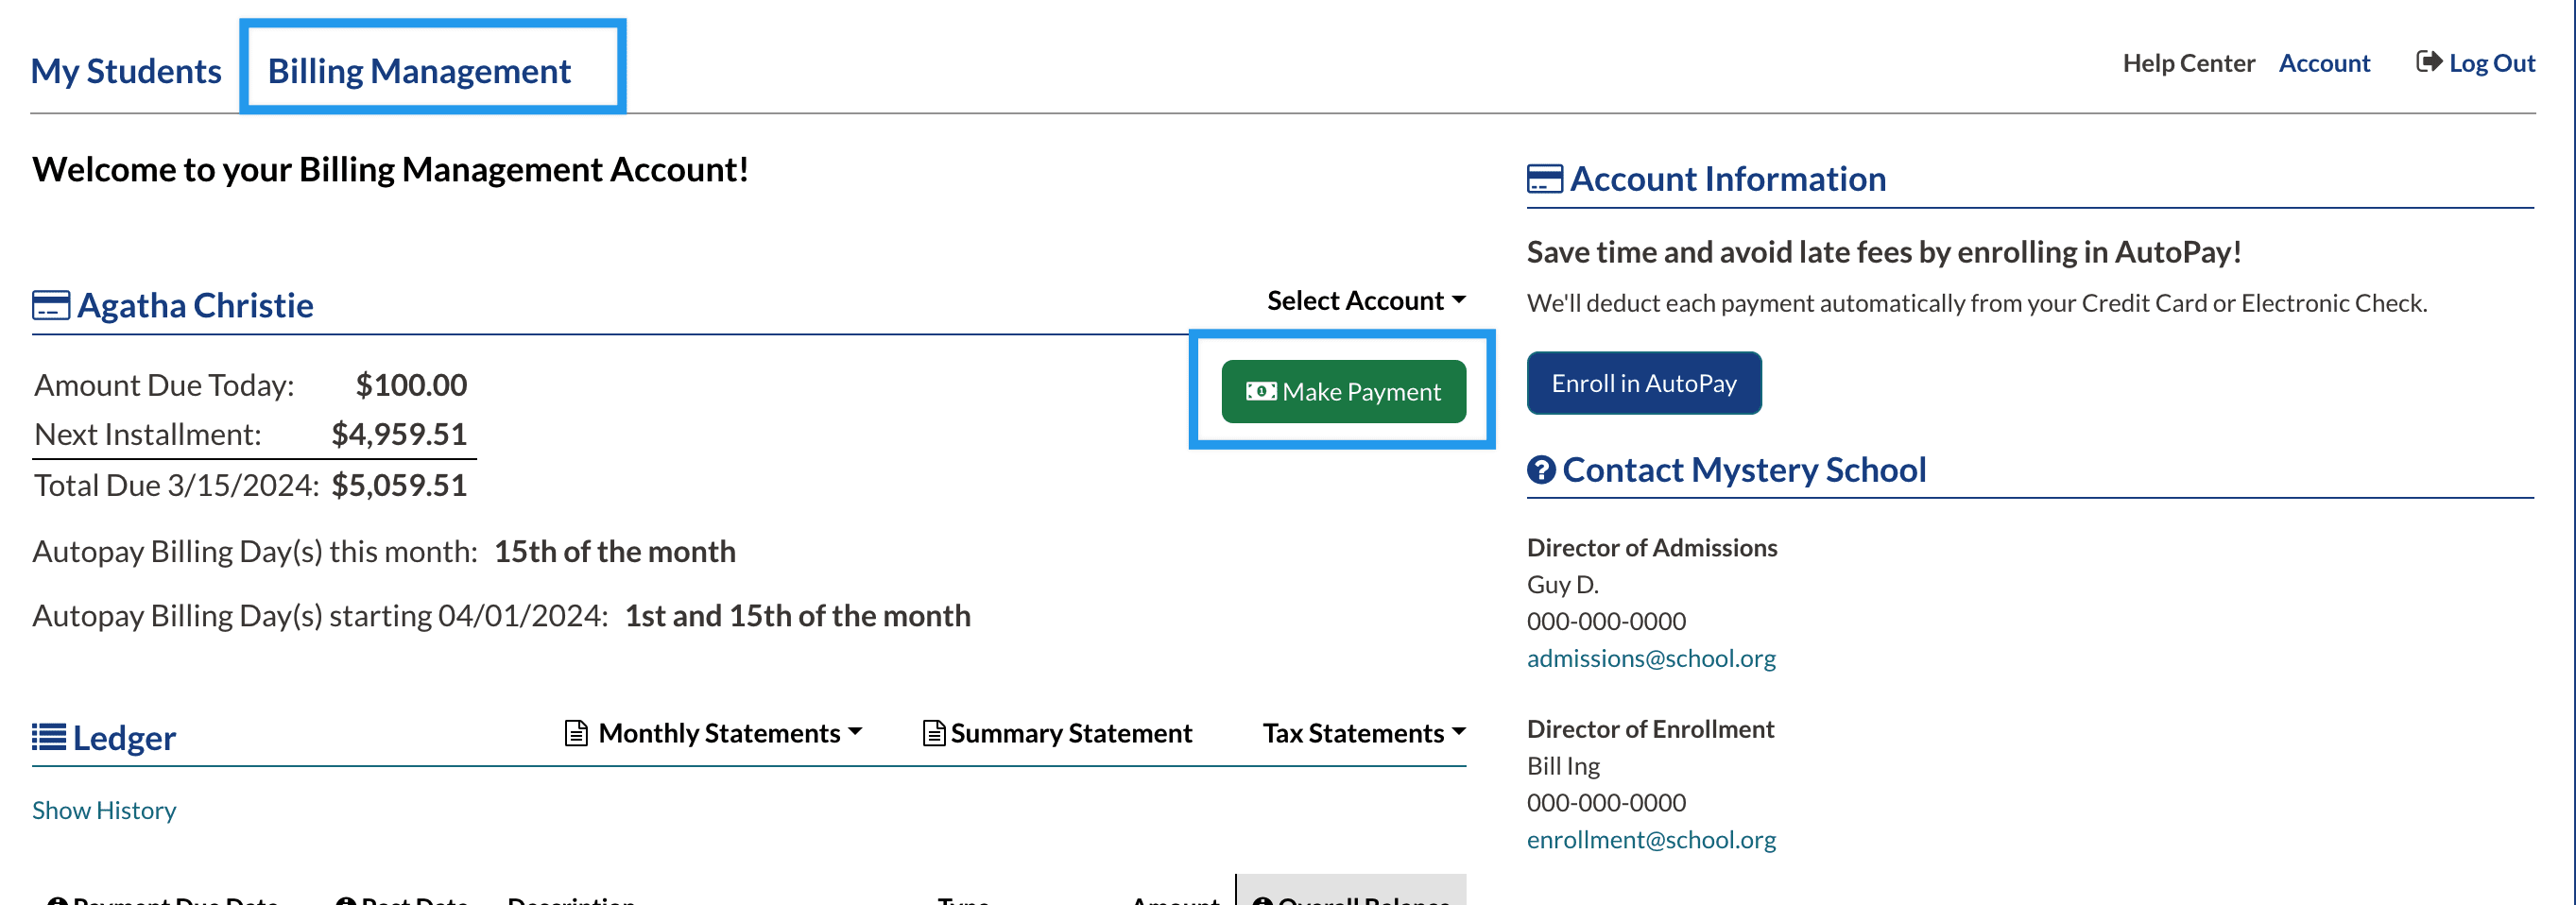
If the shared access contact only has access to one contact, when they select the Billing Management tab, they will see the parent/guardian's ledger that added them as a shared contact and they will have access to the Make a Payment button.
Example Scenario: Rosalind's grandmother would like to occasionally help with her tuition payments. Rosalind's mother, Agatha, adds the grandmother (Bernice) to Shared Billing Access. When Bernice logs in and navigates to the billing management tab, she'll see a view of Agatha's ledger and the Make a Payment button. Bernice can use that to make one-time payments on behalf of her granddaughter.
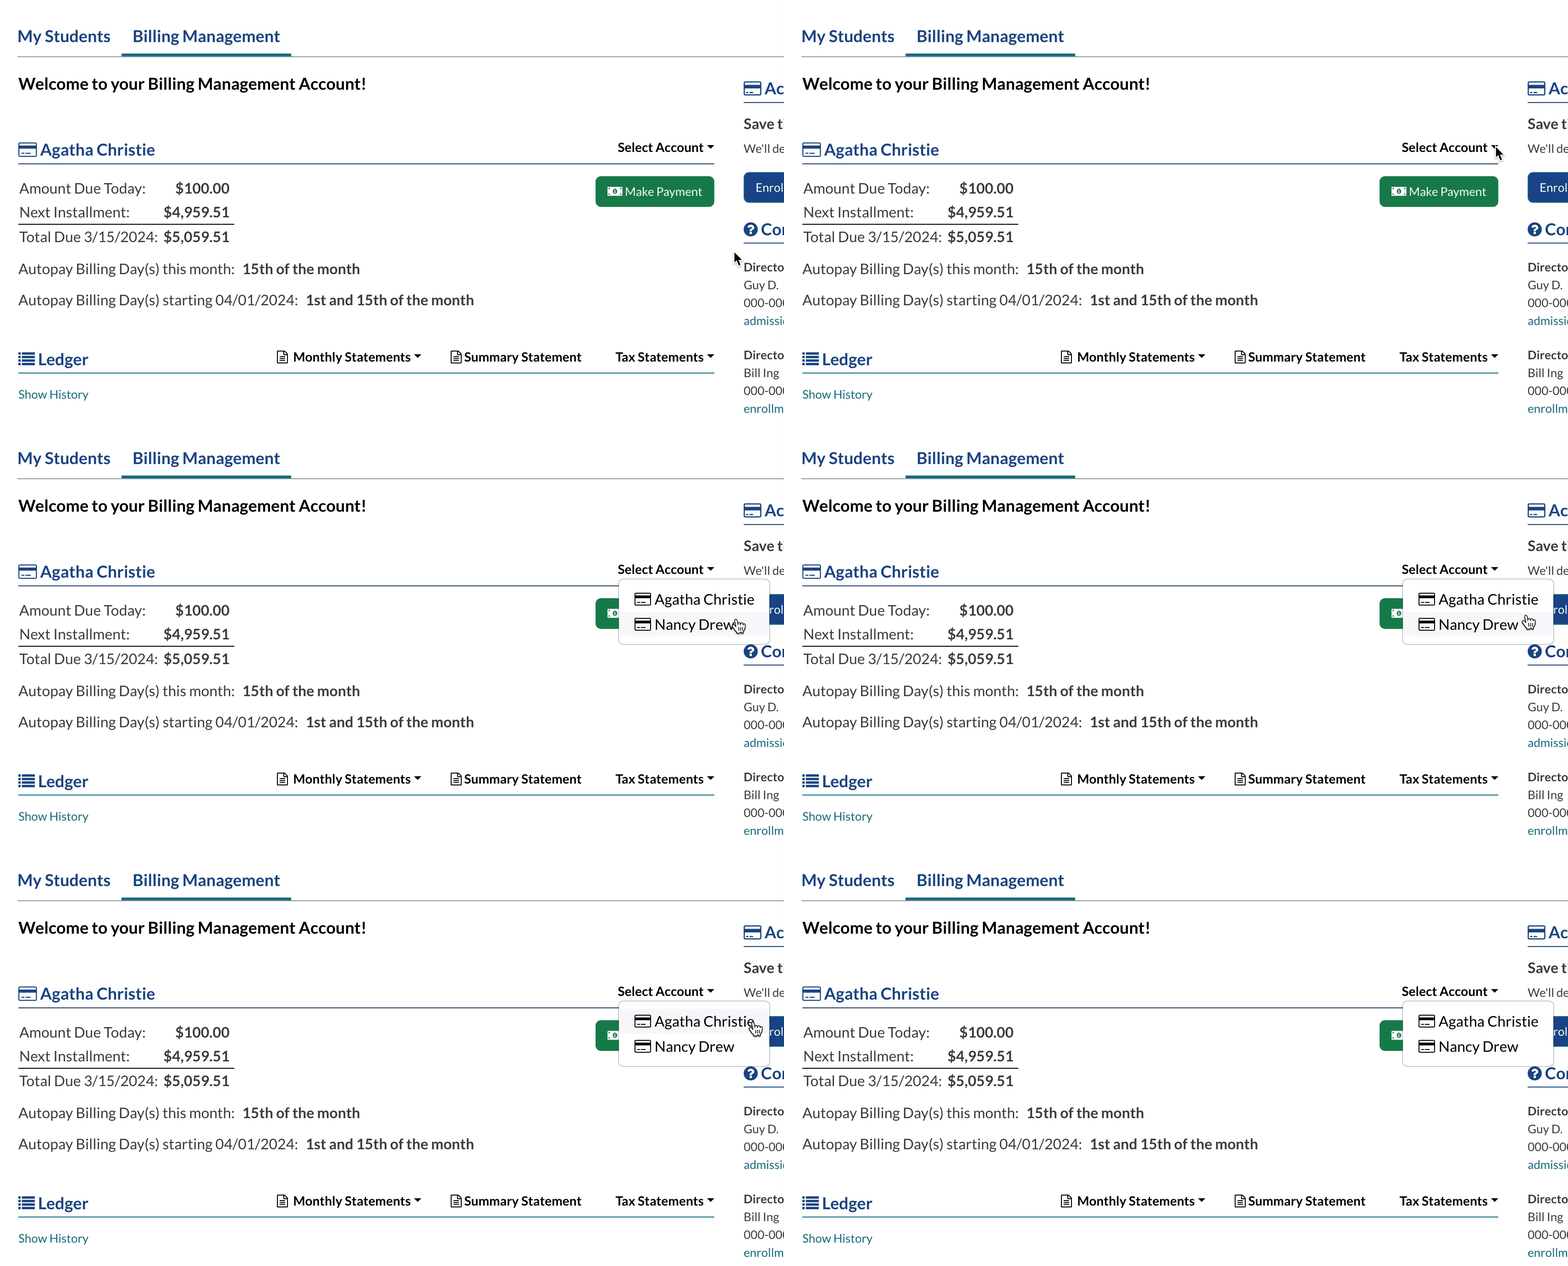
If the shared access contact has been granted access to more than one account or they have their own ledger in addition to one shared with them. They will see a Select Account dropdown above the ledger. This will allow them to switch to whichever account, they'd like to make a payment on.
Billing Communications for Shared Access
IMPORTANT: If a parent adds a contact for Shared Access, they will not be automatically set up to receive automatic billing communications. These must be enabled by the admin.
How to enable Auto Billing Communication for parents with shared access
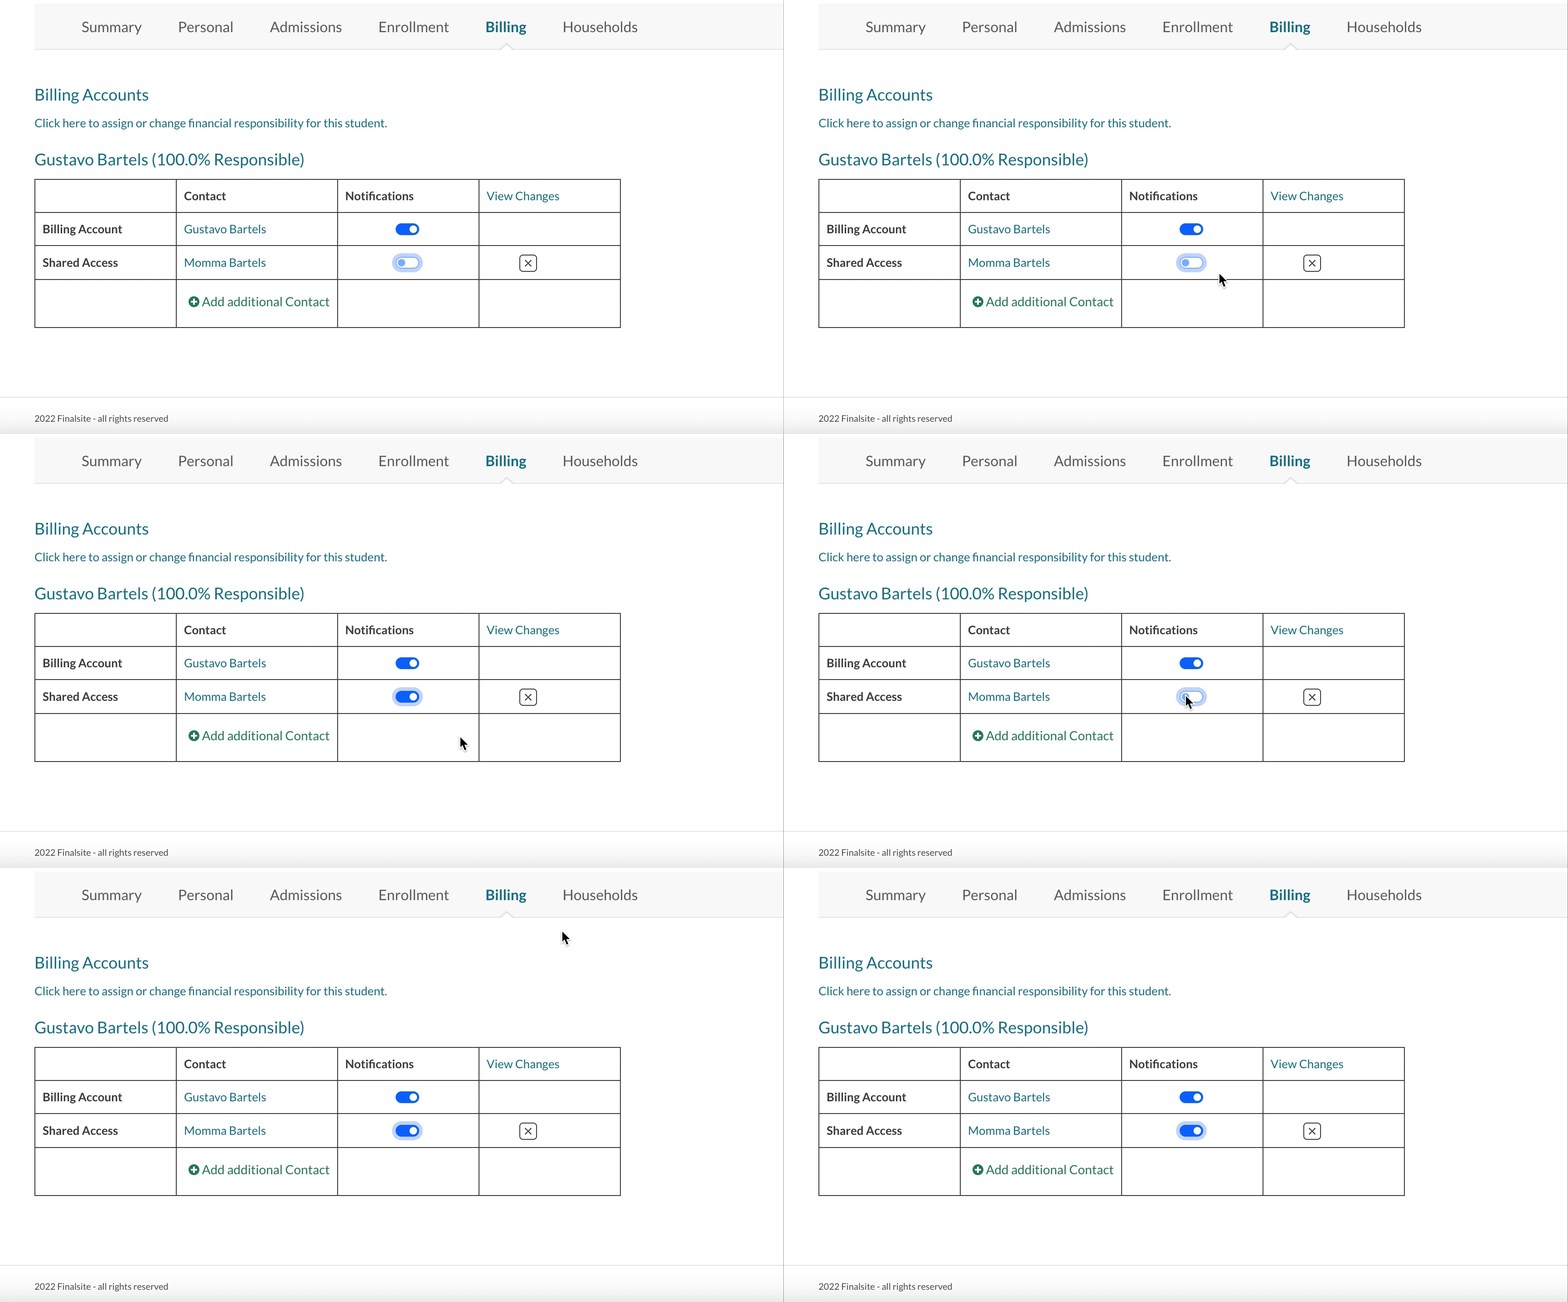
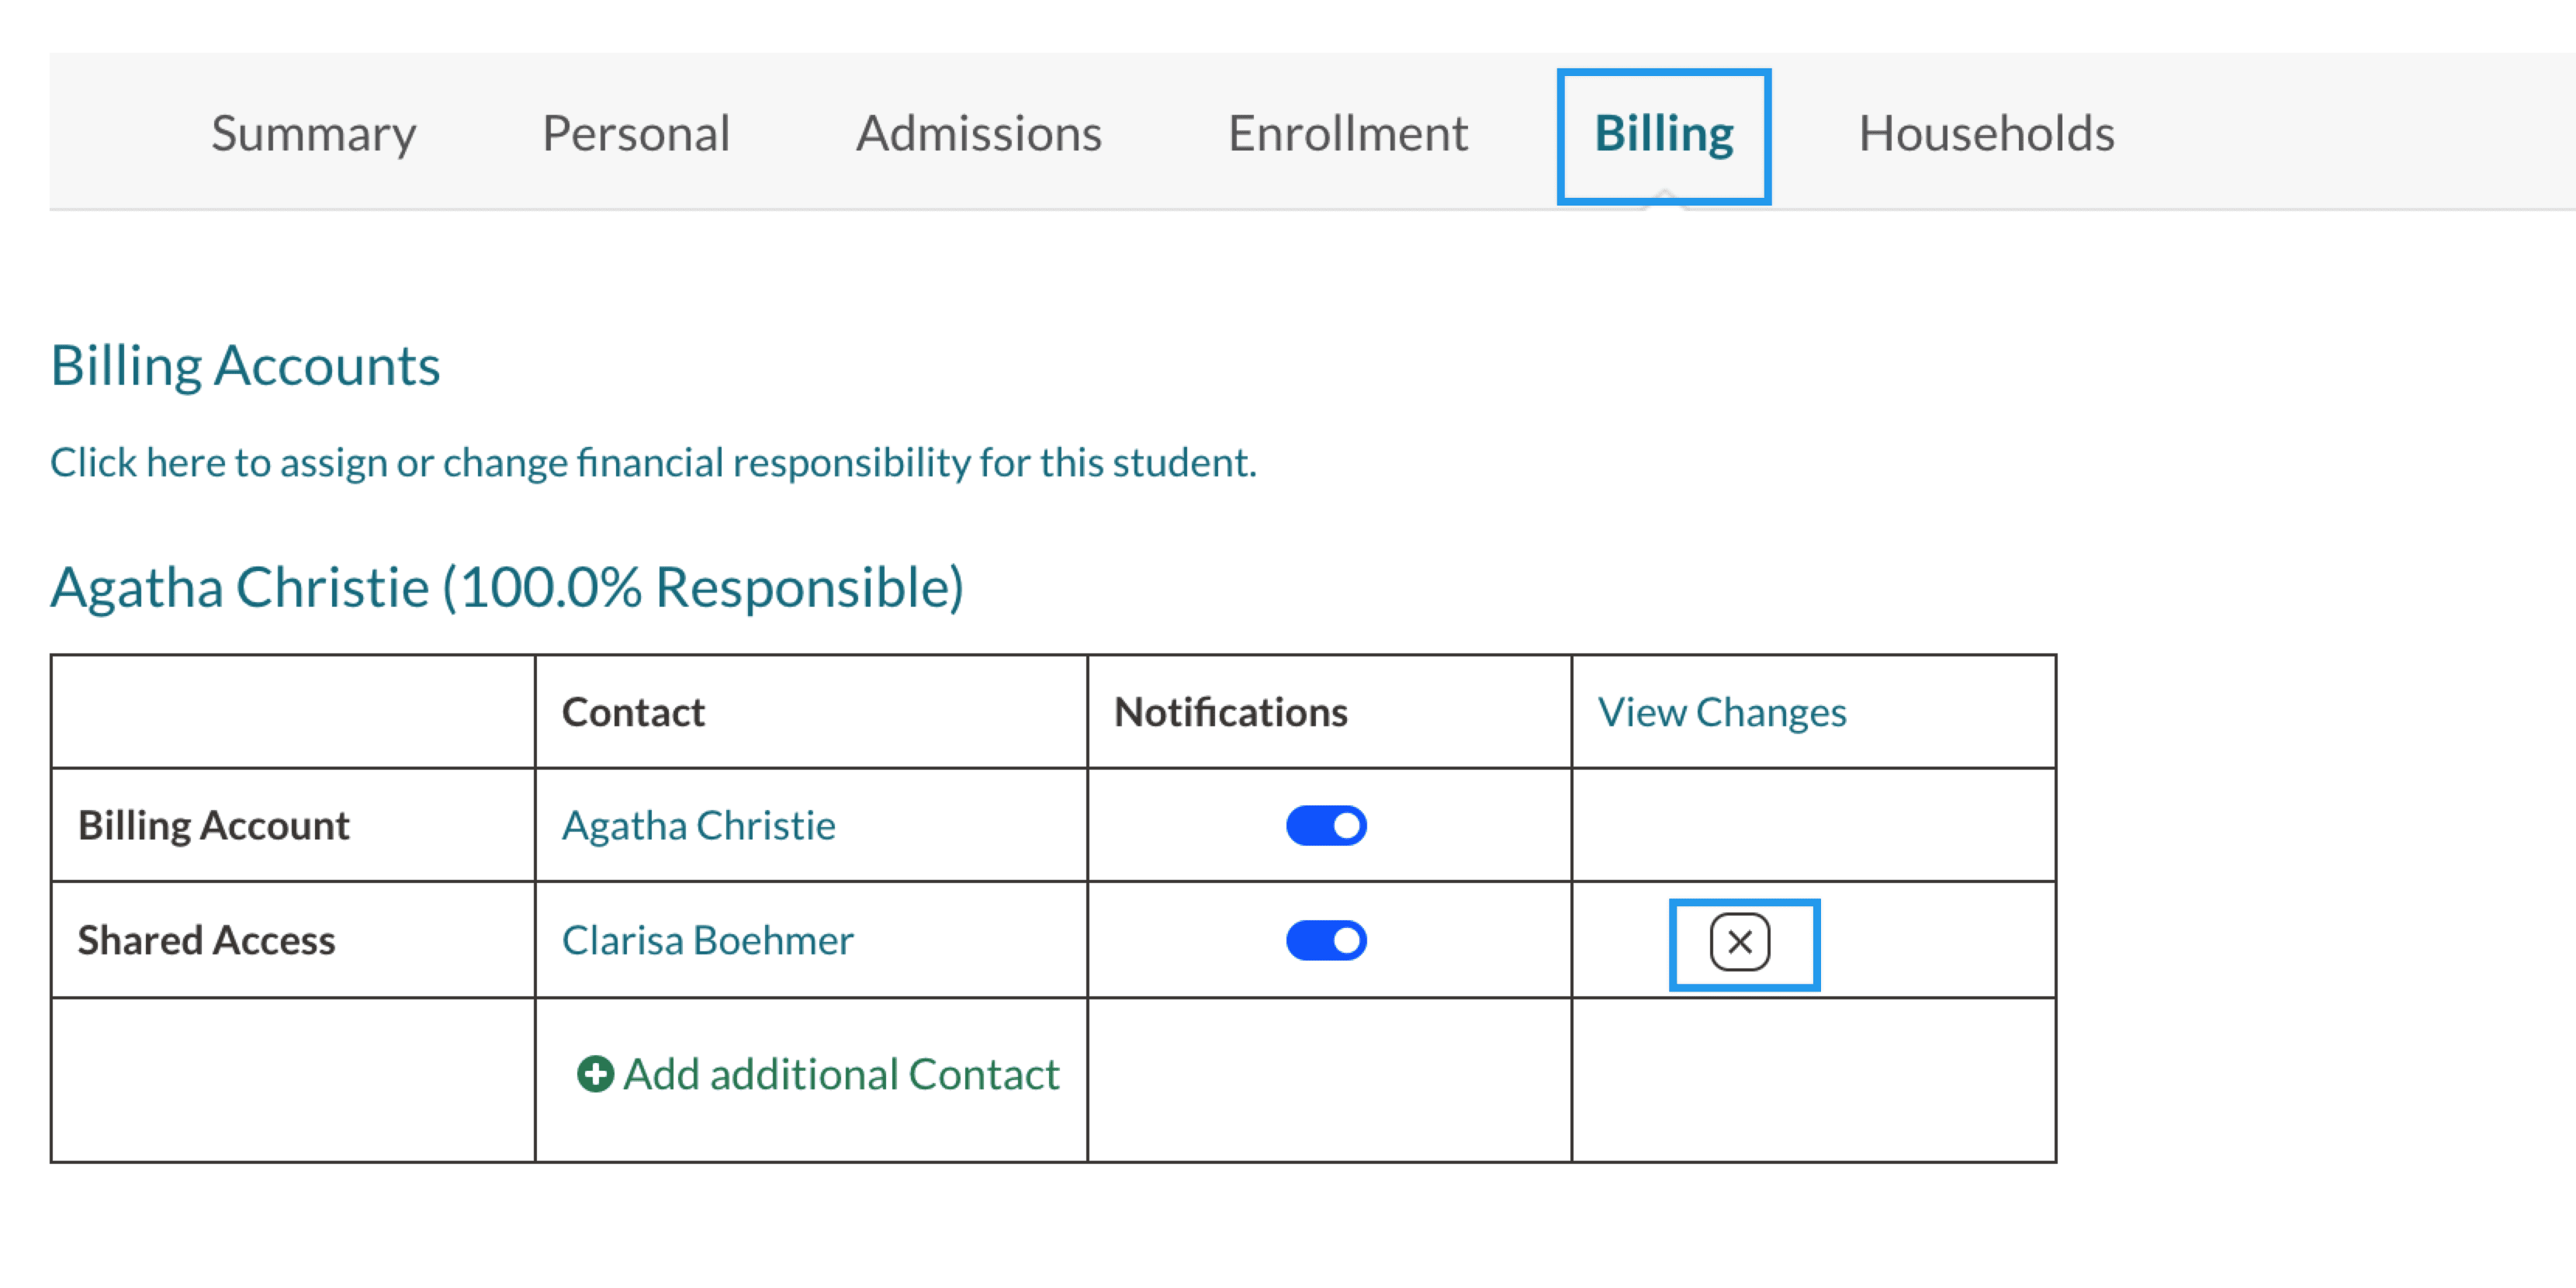
- On the student's record, select the Billing Tab.
- Within the Shared Access box, toggle on communications within the 'Notifications' column
- Toggling it on auto-saves the selection and locks it in place.
FAQs
Shared accounts can only make one-time payments, as Autopay is only available to primary billing accounts. Shared accounts can click on the 'Billing Management' tab along the top and then click on the ‘Make Payment’ button.
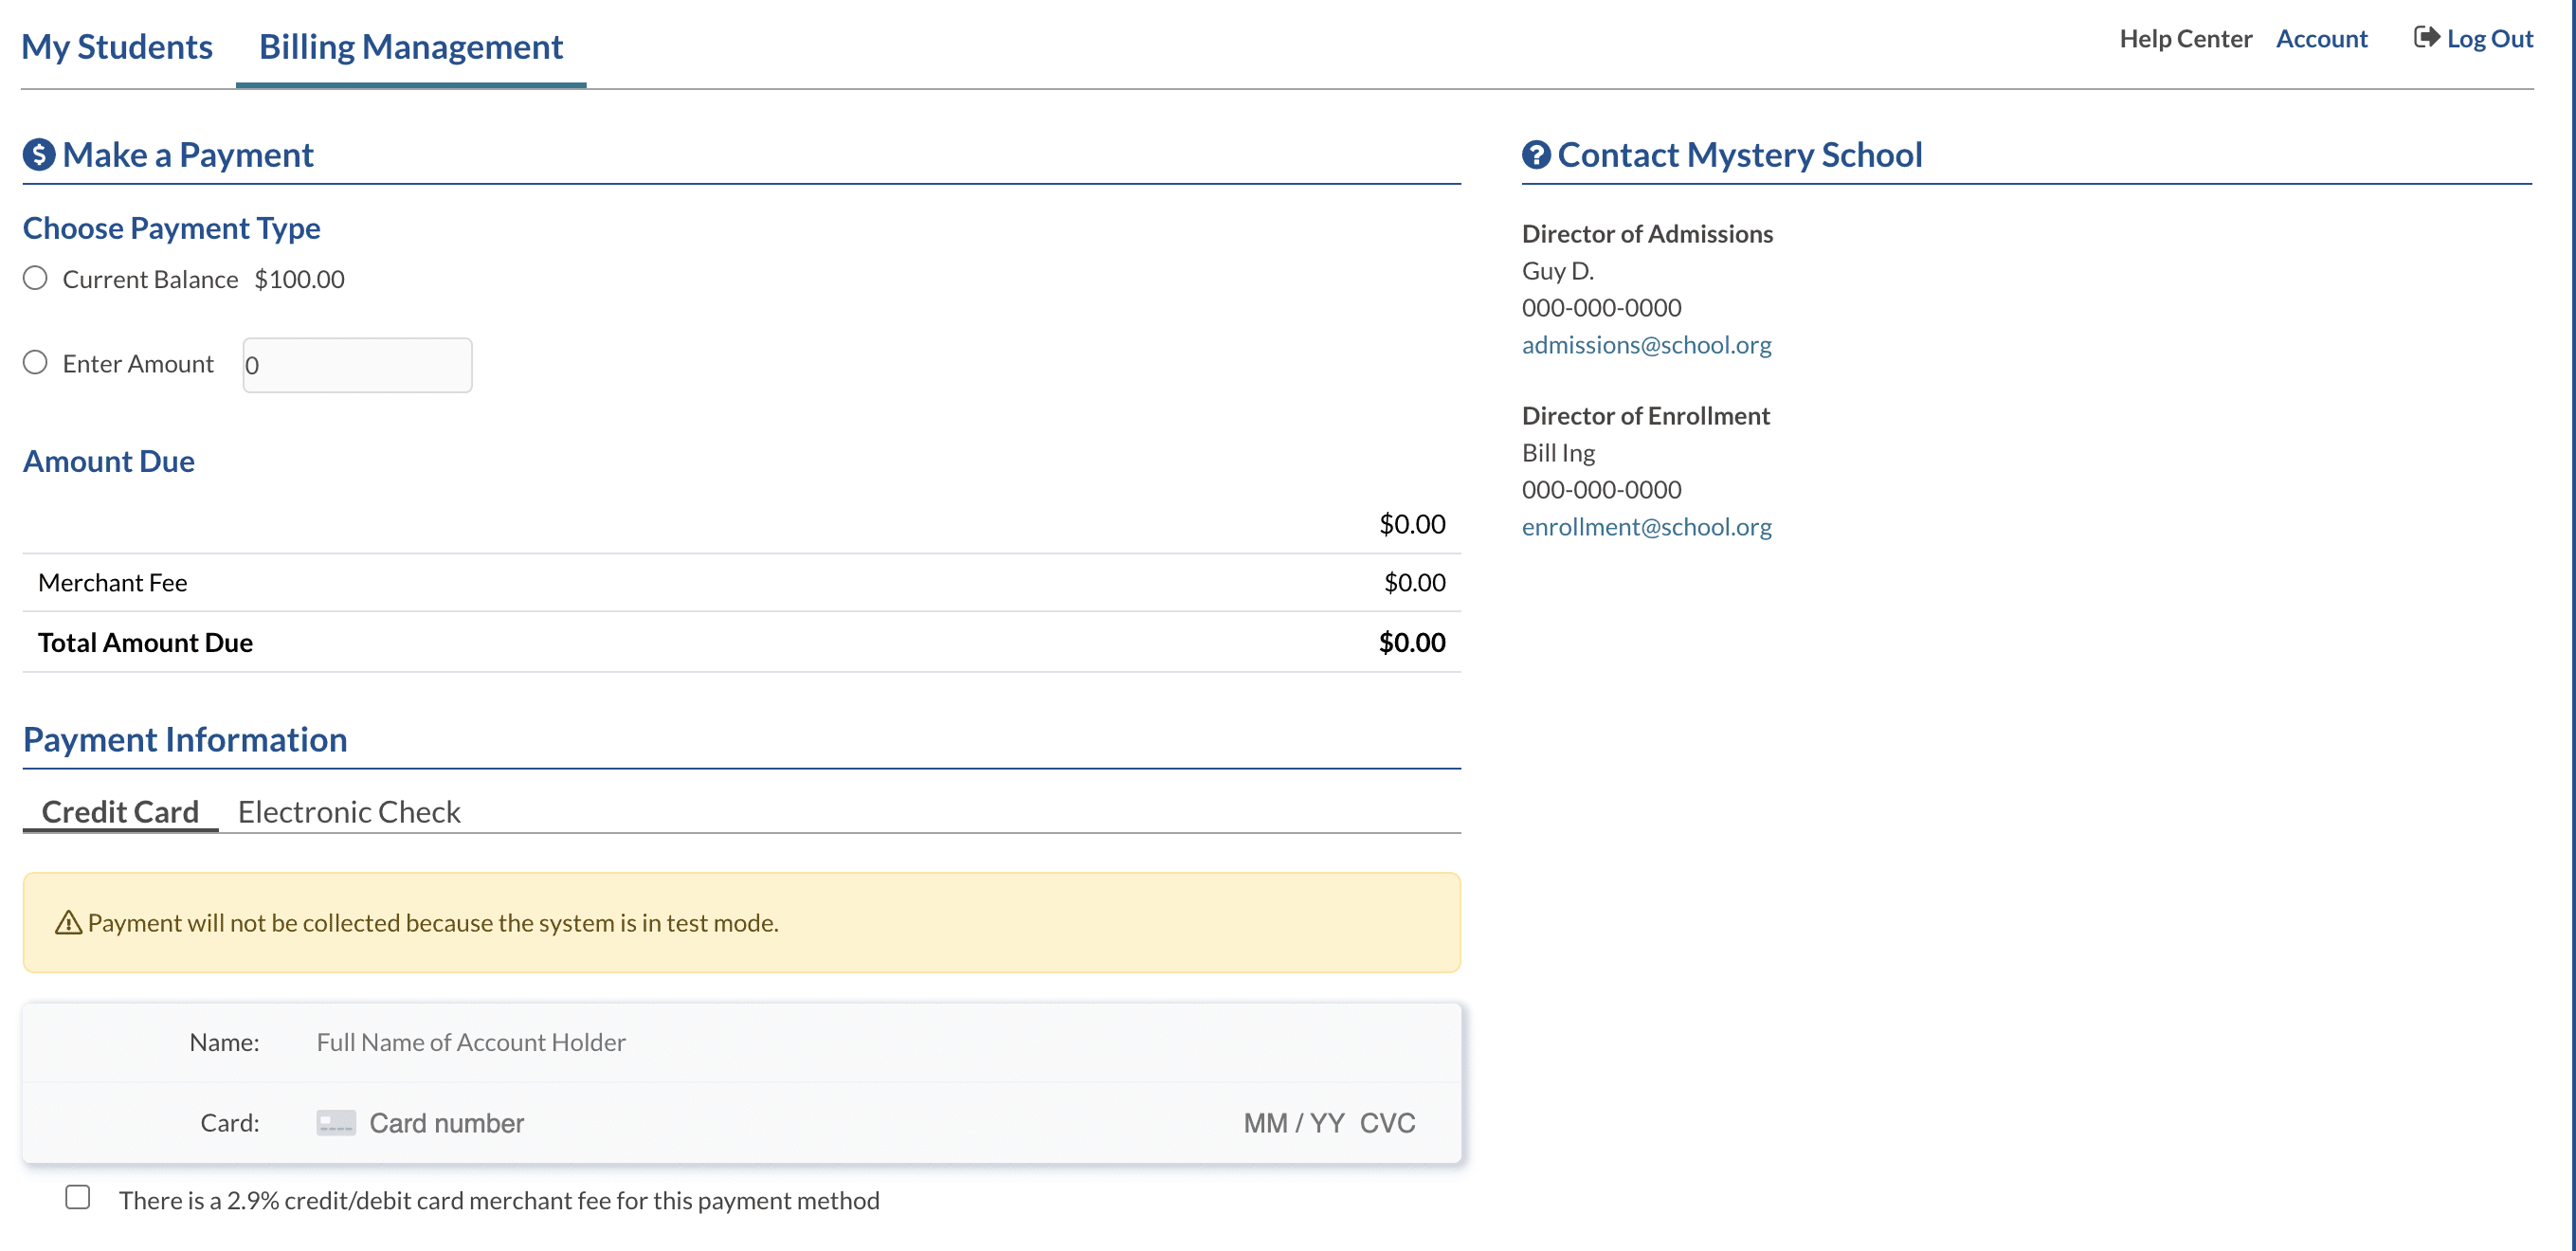
The shared account will be asked to enter the payment amount, and then they’ll enter either their credit card information or electronic check details. Please note, that a shared account will not be enrolled in Autopay.
If you’d like to remove or revoke access to the billing management tab for a shared account, click on the red ‘x’ next to the contact's name within the 'Billing' tab of the student's record. Please note, that parents can also remove/revoke access to shared accounts within the Parent Portal.
A confirmation message will display. Click on the ‘delete contact’ button to complete this action. The shared account will no longer have access to the billing management tab unless you decide to reassign them at a later point in time.


Comments
0 comments
Article is closed for comments.