Overview
Welcome to our series of DIY Forms articles!
Other articles in this series:
Pop some Popcorn!
Be sure to check out our collection in the Video Library to learn the basics of form edits!
A couple of reminders before we jump in
- Only System Admins and Admins (with any permissions) can access the Forms pages.
- Forms are located within the Settings > Forms menu.
- The following steps must be accomplished within the Advanced Form Editor.
- Once you make a draft of a form, select Go to Advanced Form Editor from the menu in the Actions column.
Adding text to your forms (sections, subsections, and headers)
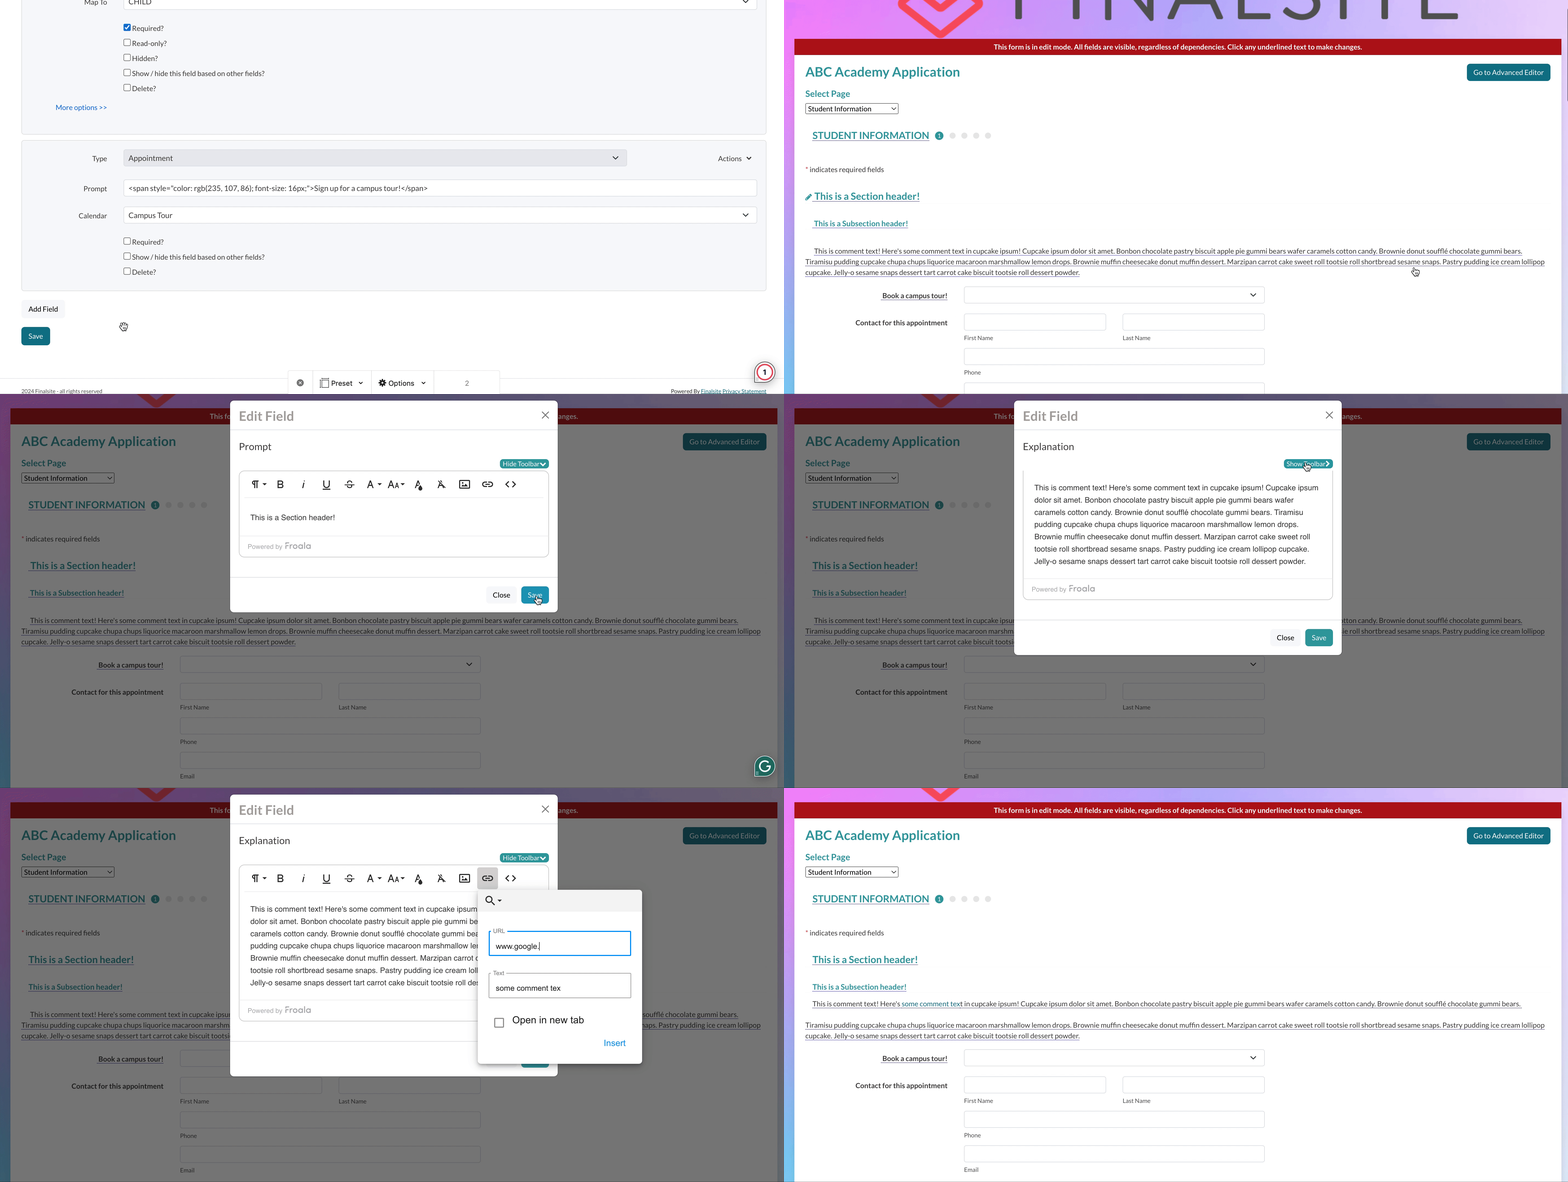
You can add sections, subsections, and comments within your form. While you need to accomplish this in the Advanced Editor, we recommend that you use the Basic Editor to make adjustments to the style of the text as it will make it much easier to edit the color, size, add links, etc.
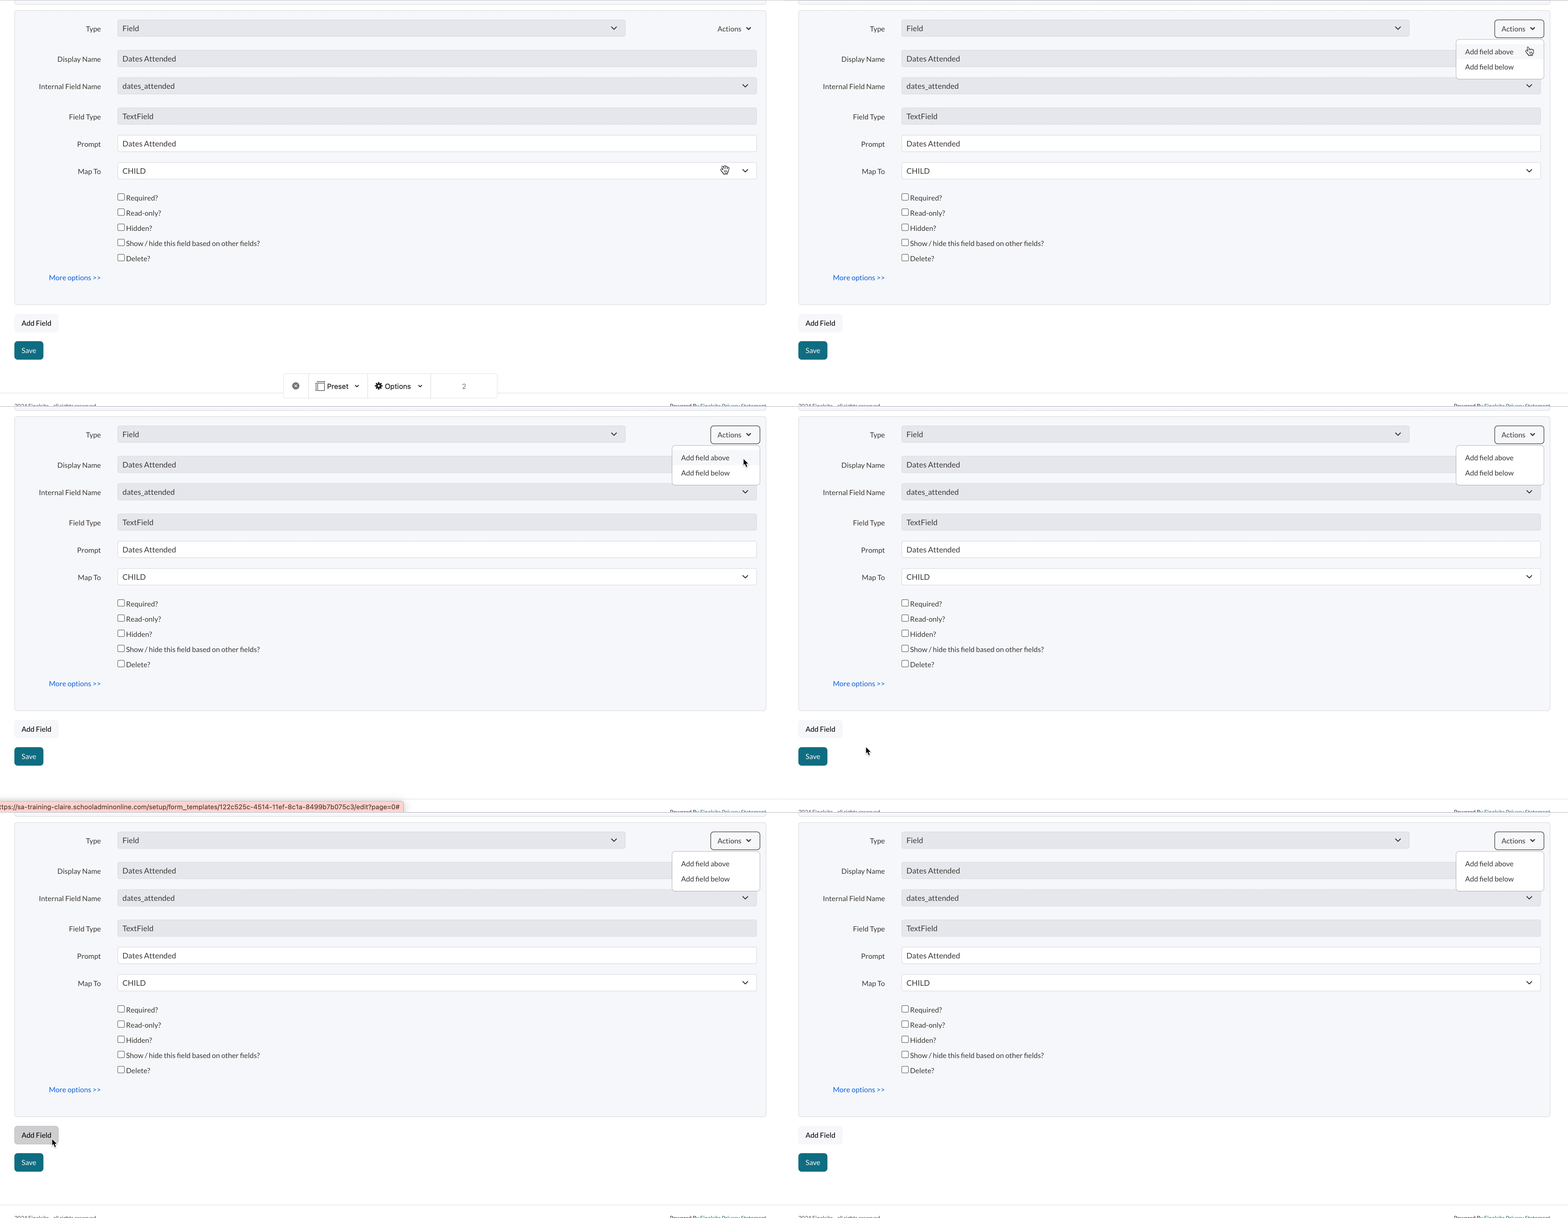
Step 1: Within the Advanced Editor, select to add a field from the Actions column, or at the bottom of the page.
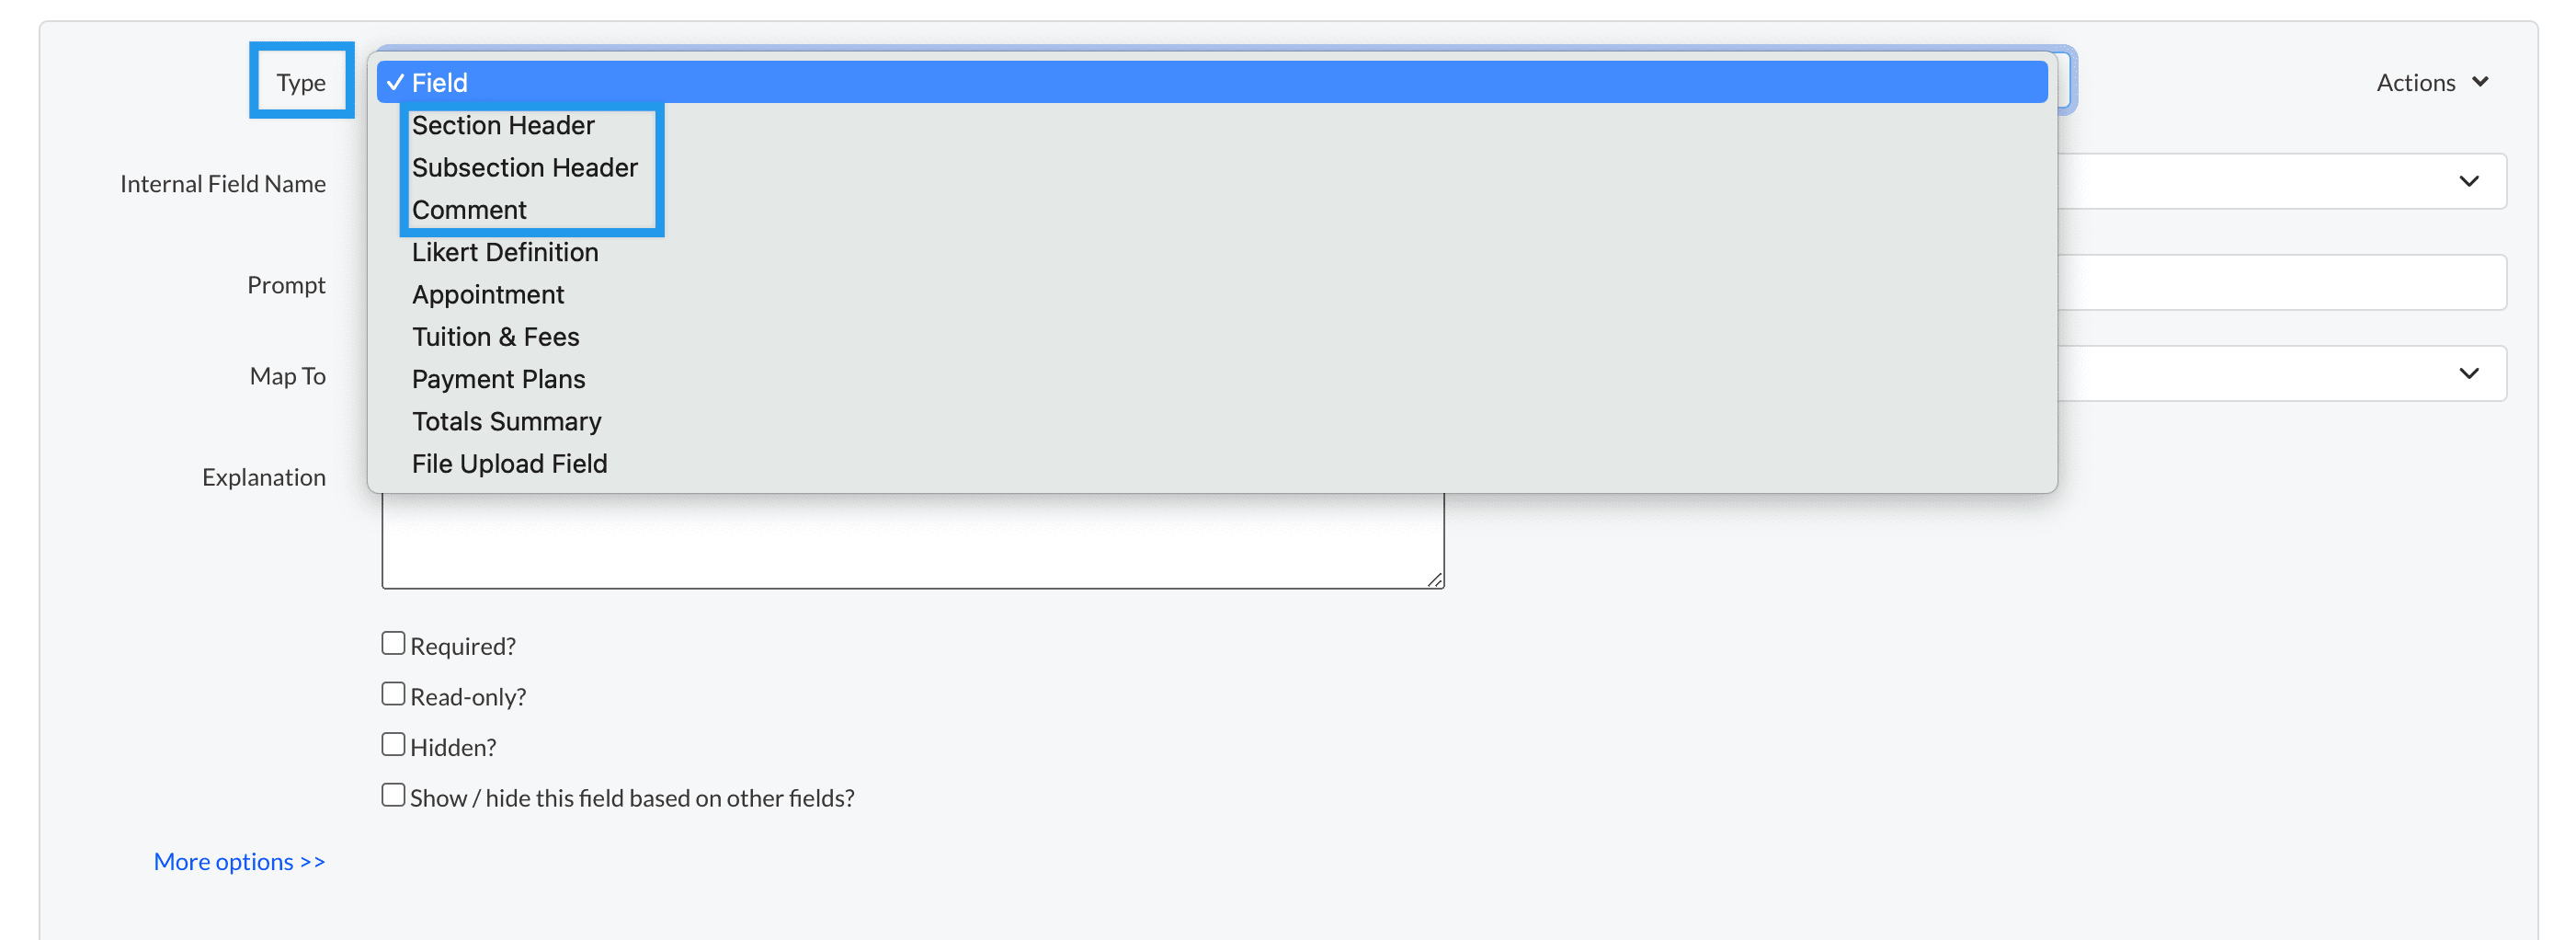
Step 2: In the Type dropdown, select one of the text addition options: Section Header, Subsection Header, or Comment.
Step 3: In the Prompt or Comment Section, add the title of your header or the comment text you are adding.
- If you select to add a Section or Subsection, you will see a Prompt box where you can add the header text.
- If you select Comment, you will see a Comment box that is a little bit bigger so that you can add paragraph text within it. You can expand that box to make it bigger if you need.
Optional: You can select "Show/hide this field based on other fields?" if you'd like to add a dependency.
It means that whether the question appears on the form depends on the answer given in another field. A common use case of this is the grade field. For example, when adding a question (field) to ask which preschool program families are interested in, you would select this option and then isolate the preschool grades so that the option only shows to the relevant families. We have a whole article on dependencies and filter options that we recommend you check out.
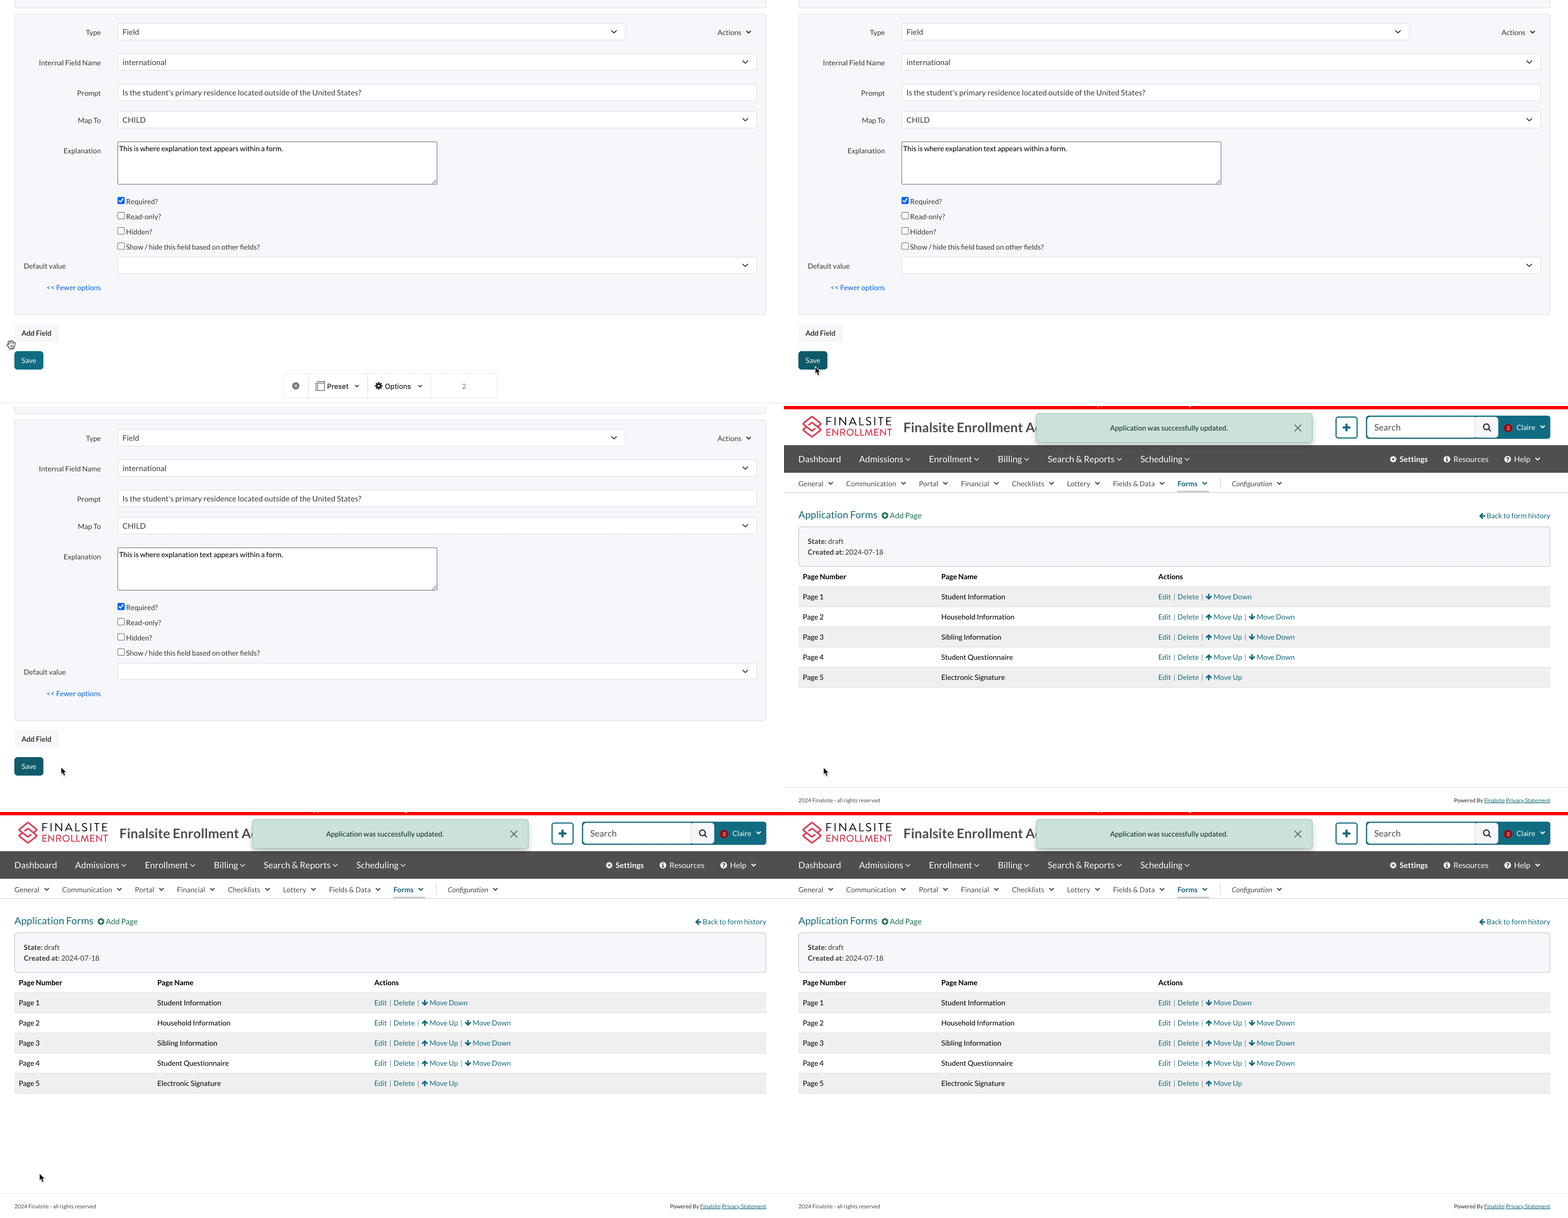
Saving your Work
Remember to save your changes before exiting the Advanced Editor!
Errors
If you see a red banner at the top of the page it means that there is an error on the page. The error will be described within the message. If you are unable to resolve the error on your end, please connect with support who will be able to guide you.
Making Simple Text Edits
After you save your changes, go to the Basic Editor to preview your addition and make simple text edits to the prompt and any other text.
Good to know: Edits made in the Basic Editor save automatically. You won't find a save button in that editor.
Publishing
Your changes will only be live when you publish the form. You can do so from the page where you've made your draft. In the actions column, select the Publish (Make Active) option.
Additional Resources
- Office Hours & Past Session Recordings
- Forms DIY: Add a calendar to a form
- Forms DIY: Add a question or prompt to a form (adding fields)
- Be sure to check out our collection in the Video Library to learn the basics of form edits!


Comments
0 comments
Article is closed for comments.