
This DIY article walks through adding a calendar appointment option to the Call to Action (CTA) section of your Inquiry form so families can schedule a visit or event directly when they inquire.
💡Quick Answers
- What is the Call to Action section of the Inquiry form? The top section that offers families ways to engage, such as scheduling a campus tour or asking a question; it can be customized to add or remove calendar options.
- What are the key steps to add a calendar to the CTA? Create a draft of the form, add an Appointment field linked to your calendar in the Advanced Form Editor, add the corresponding option to the CTA field on the Fields page, then publish.
- What must exist before adding a calendar to the CTA? An existing calendar in Finalsite Enrollment with available appointment slots.
- Who can edit Inquiry forms? Only System Admins and Admins with any permissions can access forms under Settings > Forms.
In this Article
- Overview of the Steps Involved In Adding a Calendar to the Inquiry form
- Try It Yourself: Add a Calendar to the Inquiry Form
Overview of the Steps Involved in Adding a calendar to the Inquiry Form
Please note that these steps are only a high-level overview of what's required. Check out the tutorial in the "Try it yourself: Add a calendar to the Inquiry form" section at the bottom of the article to walk through the process step-by-step.
Step 1: Add the New Option to the Call-To-Action (Inquiry Events) Field
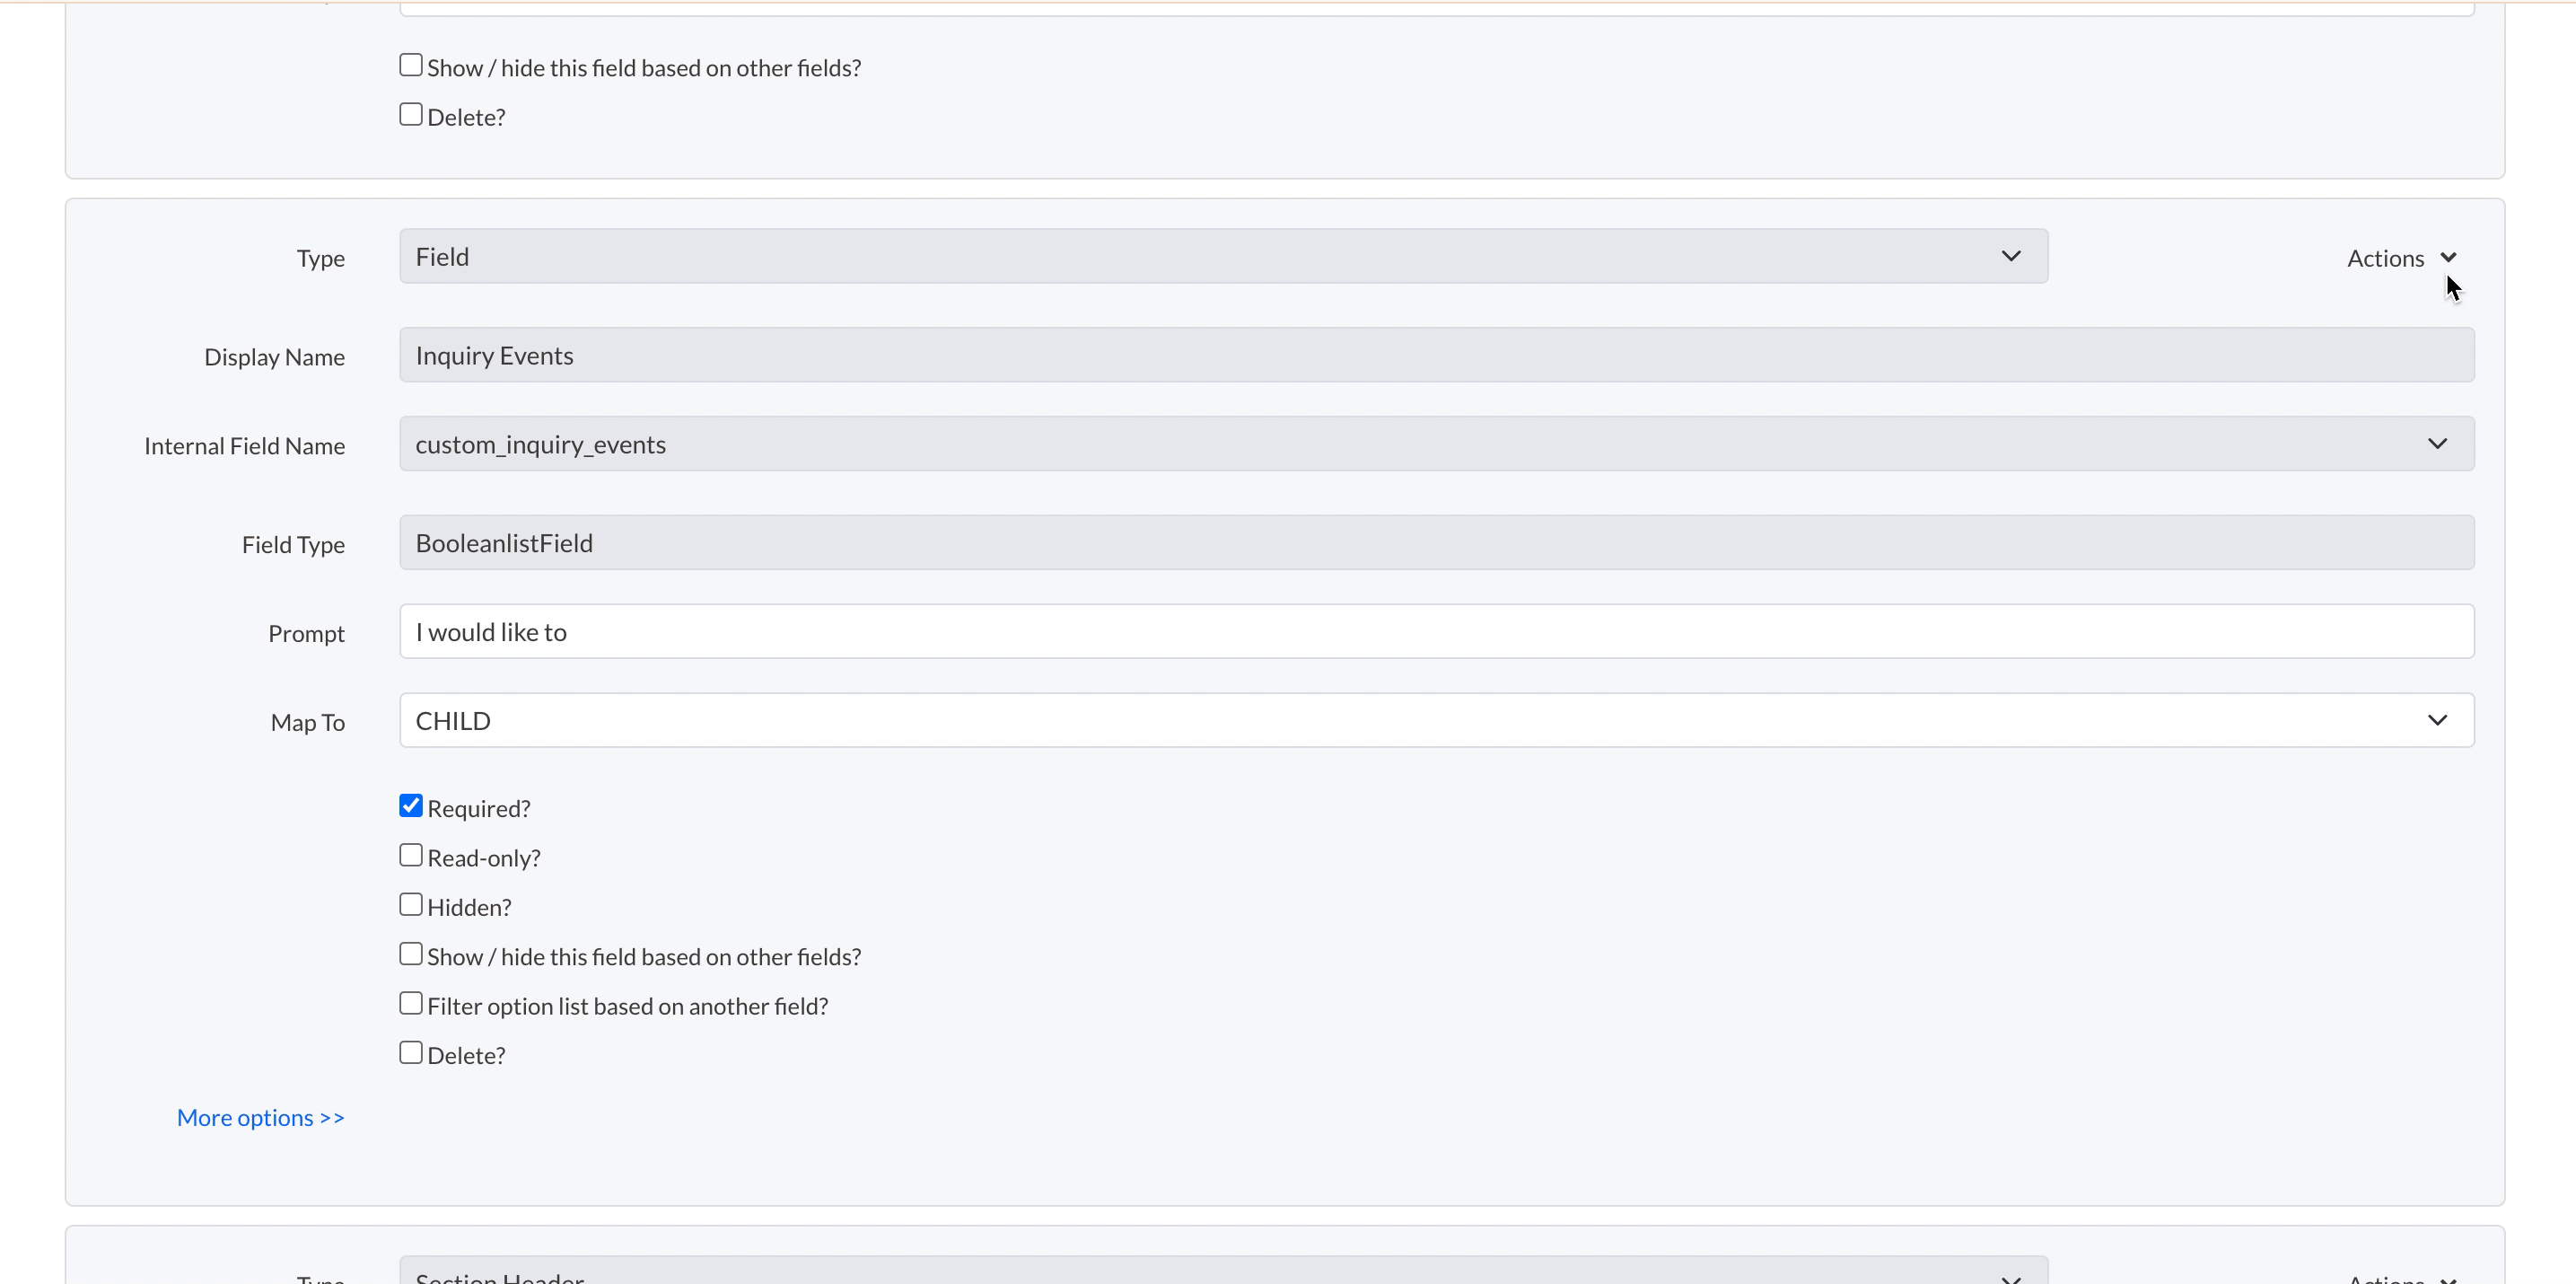
To begin, you will need to edit the field that holds the call-to-action options in your Inquiry form. In this practice scenario, we've added an option to Schedule a Tour.
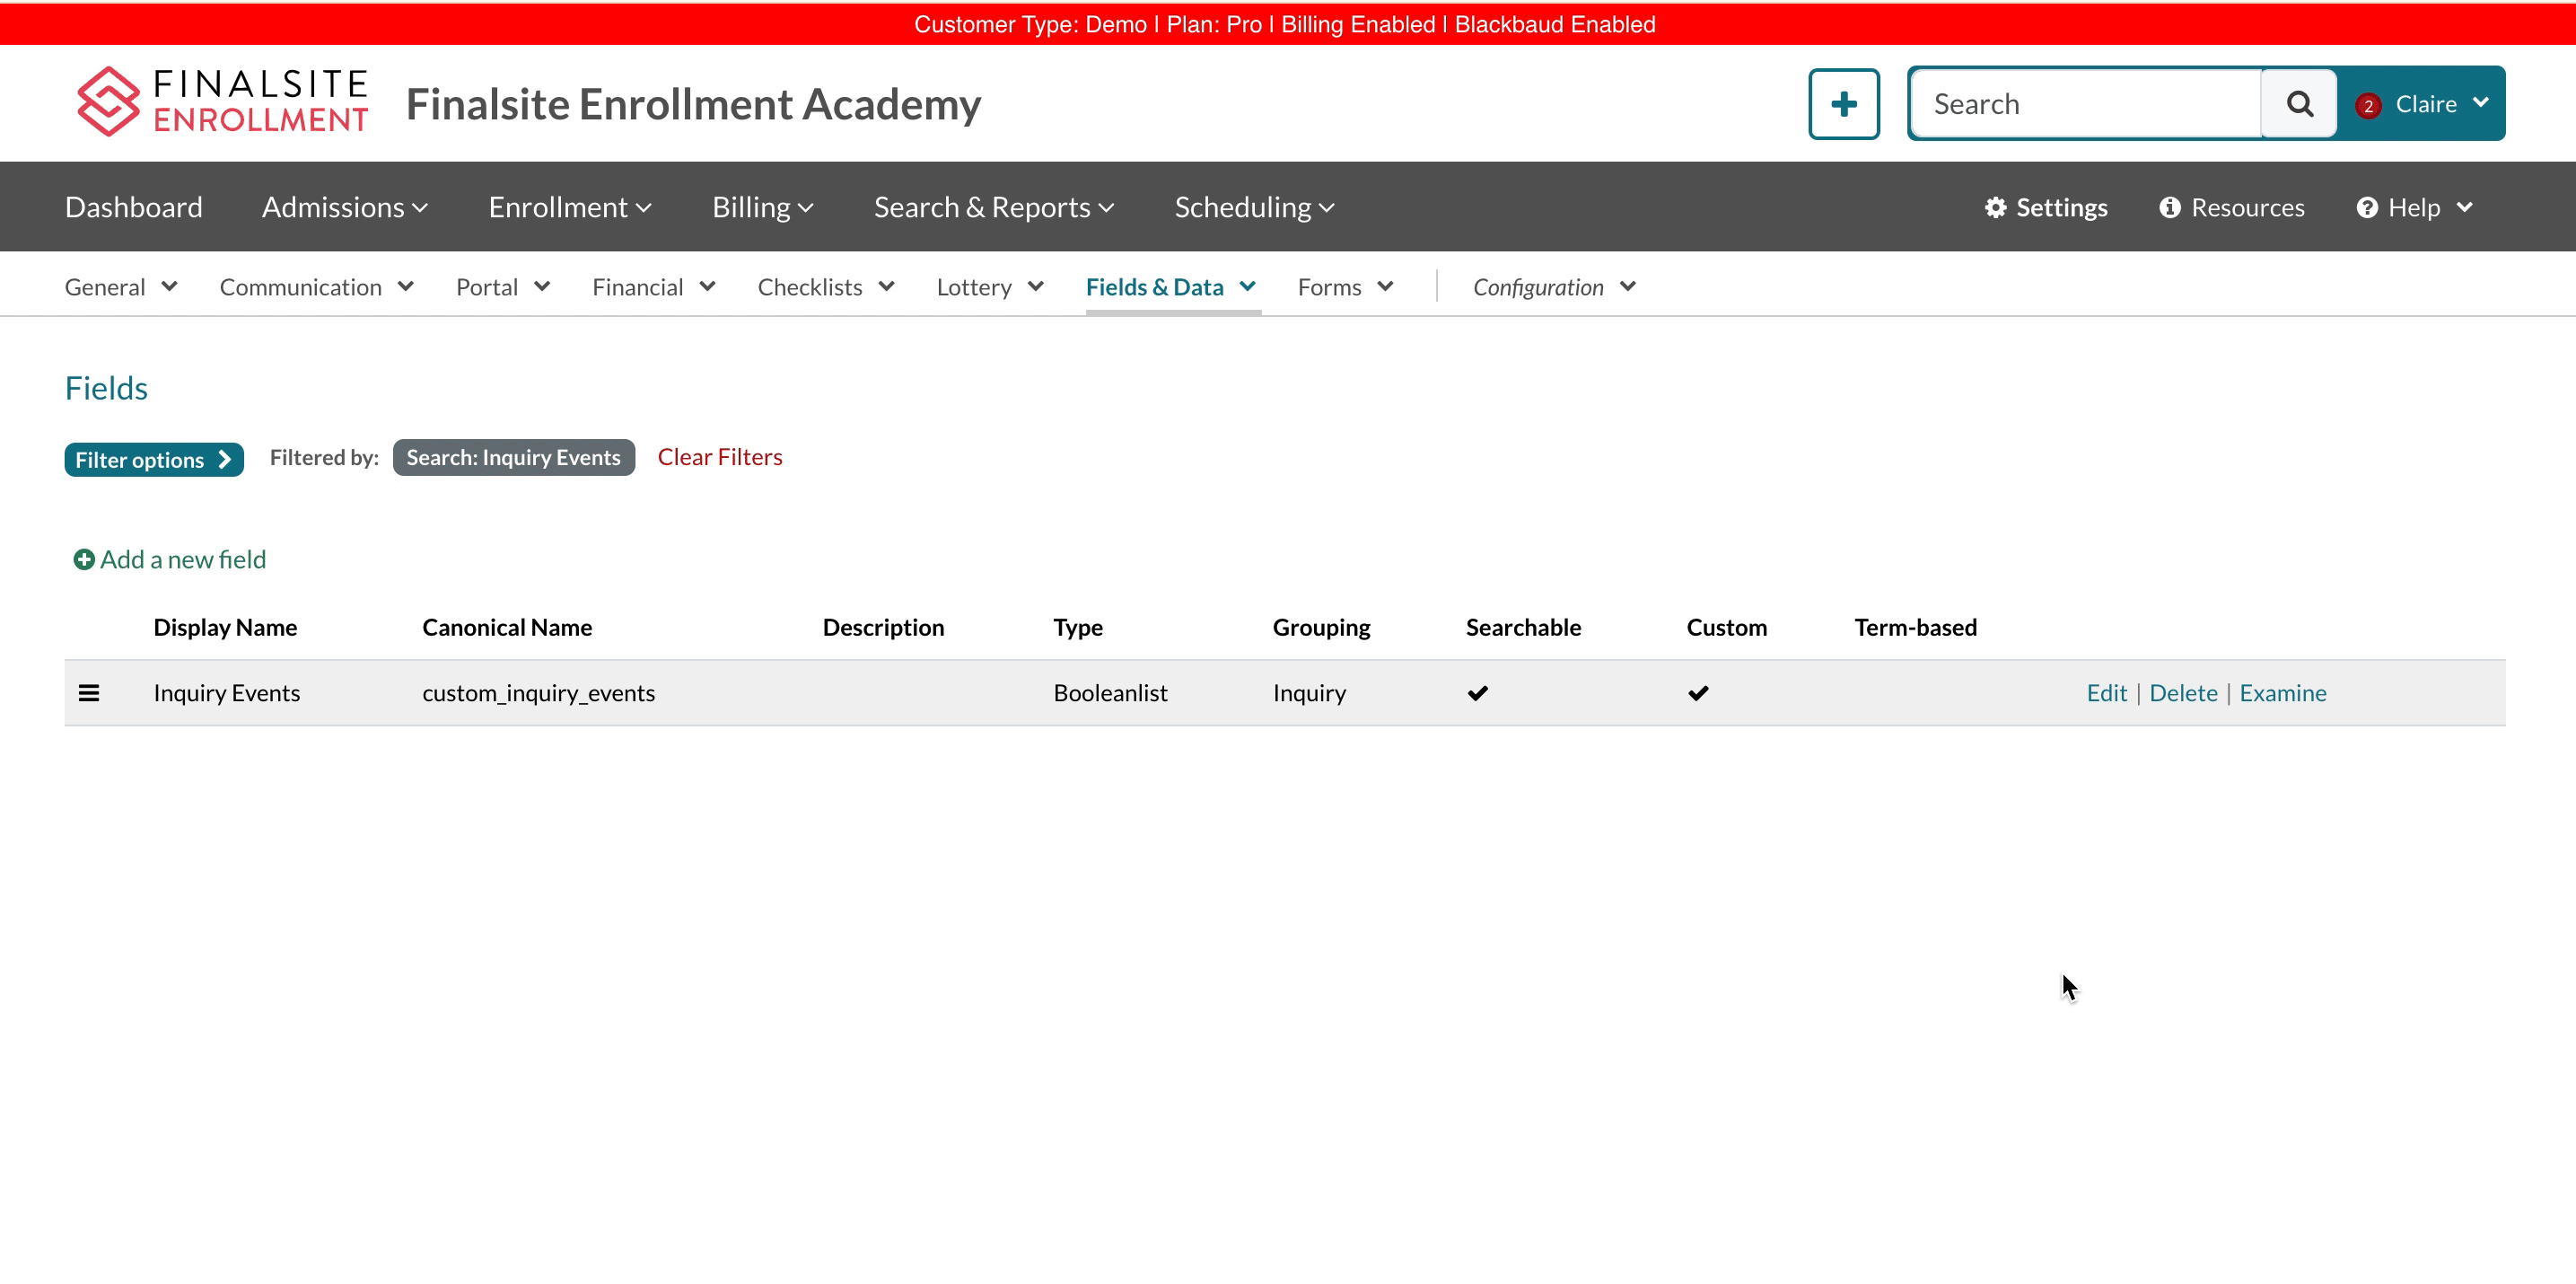
- Note the name of the call to action field by locating it within the backend of the inquiry form. (These fields are typically called something like "Inquiry Events.")
- Search for the field in your fields page (Settings > Fields & Data > Fields)
- Edit the field to add the name of the new option for the calendar sign-up.*
*Once added, the new option will immediately appear in your inquiry form, so it's important to complete the whole process, including edits to the form itself, in one sitting.
Step 2: Add the Calendar to the Inquiry Form
Next, you'll edit the inquiry form to include the calendar that you'd like to appear when the parent selects the new option you added to the call-to-action section.
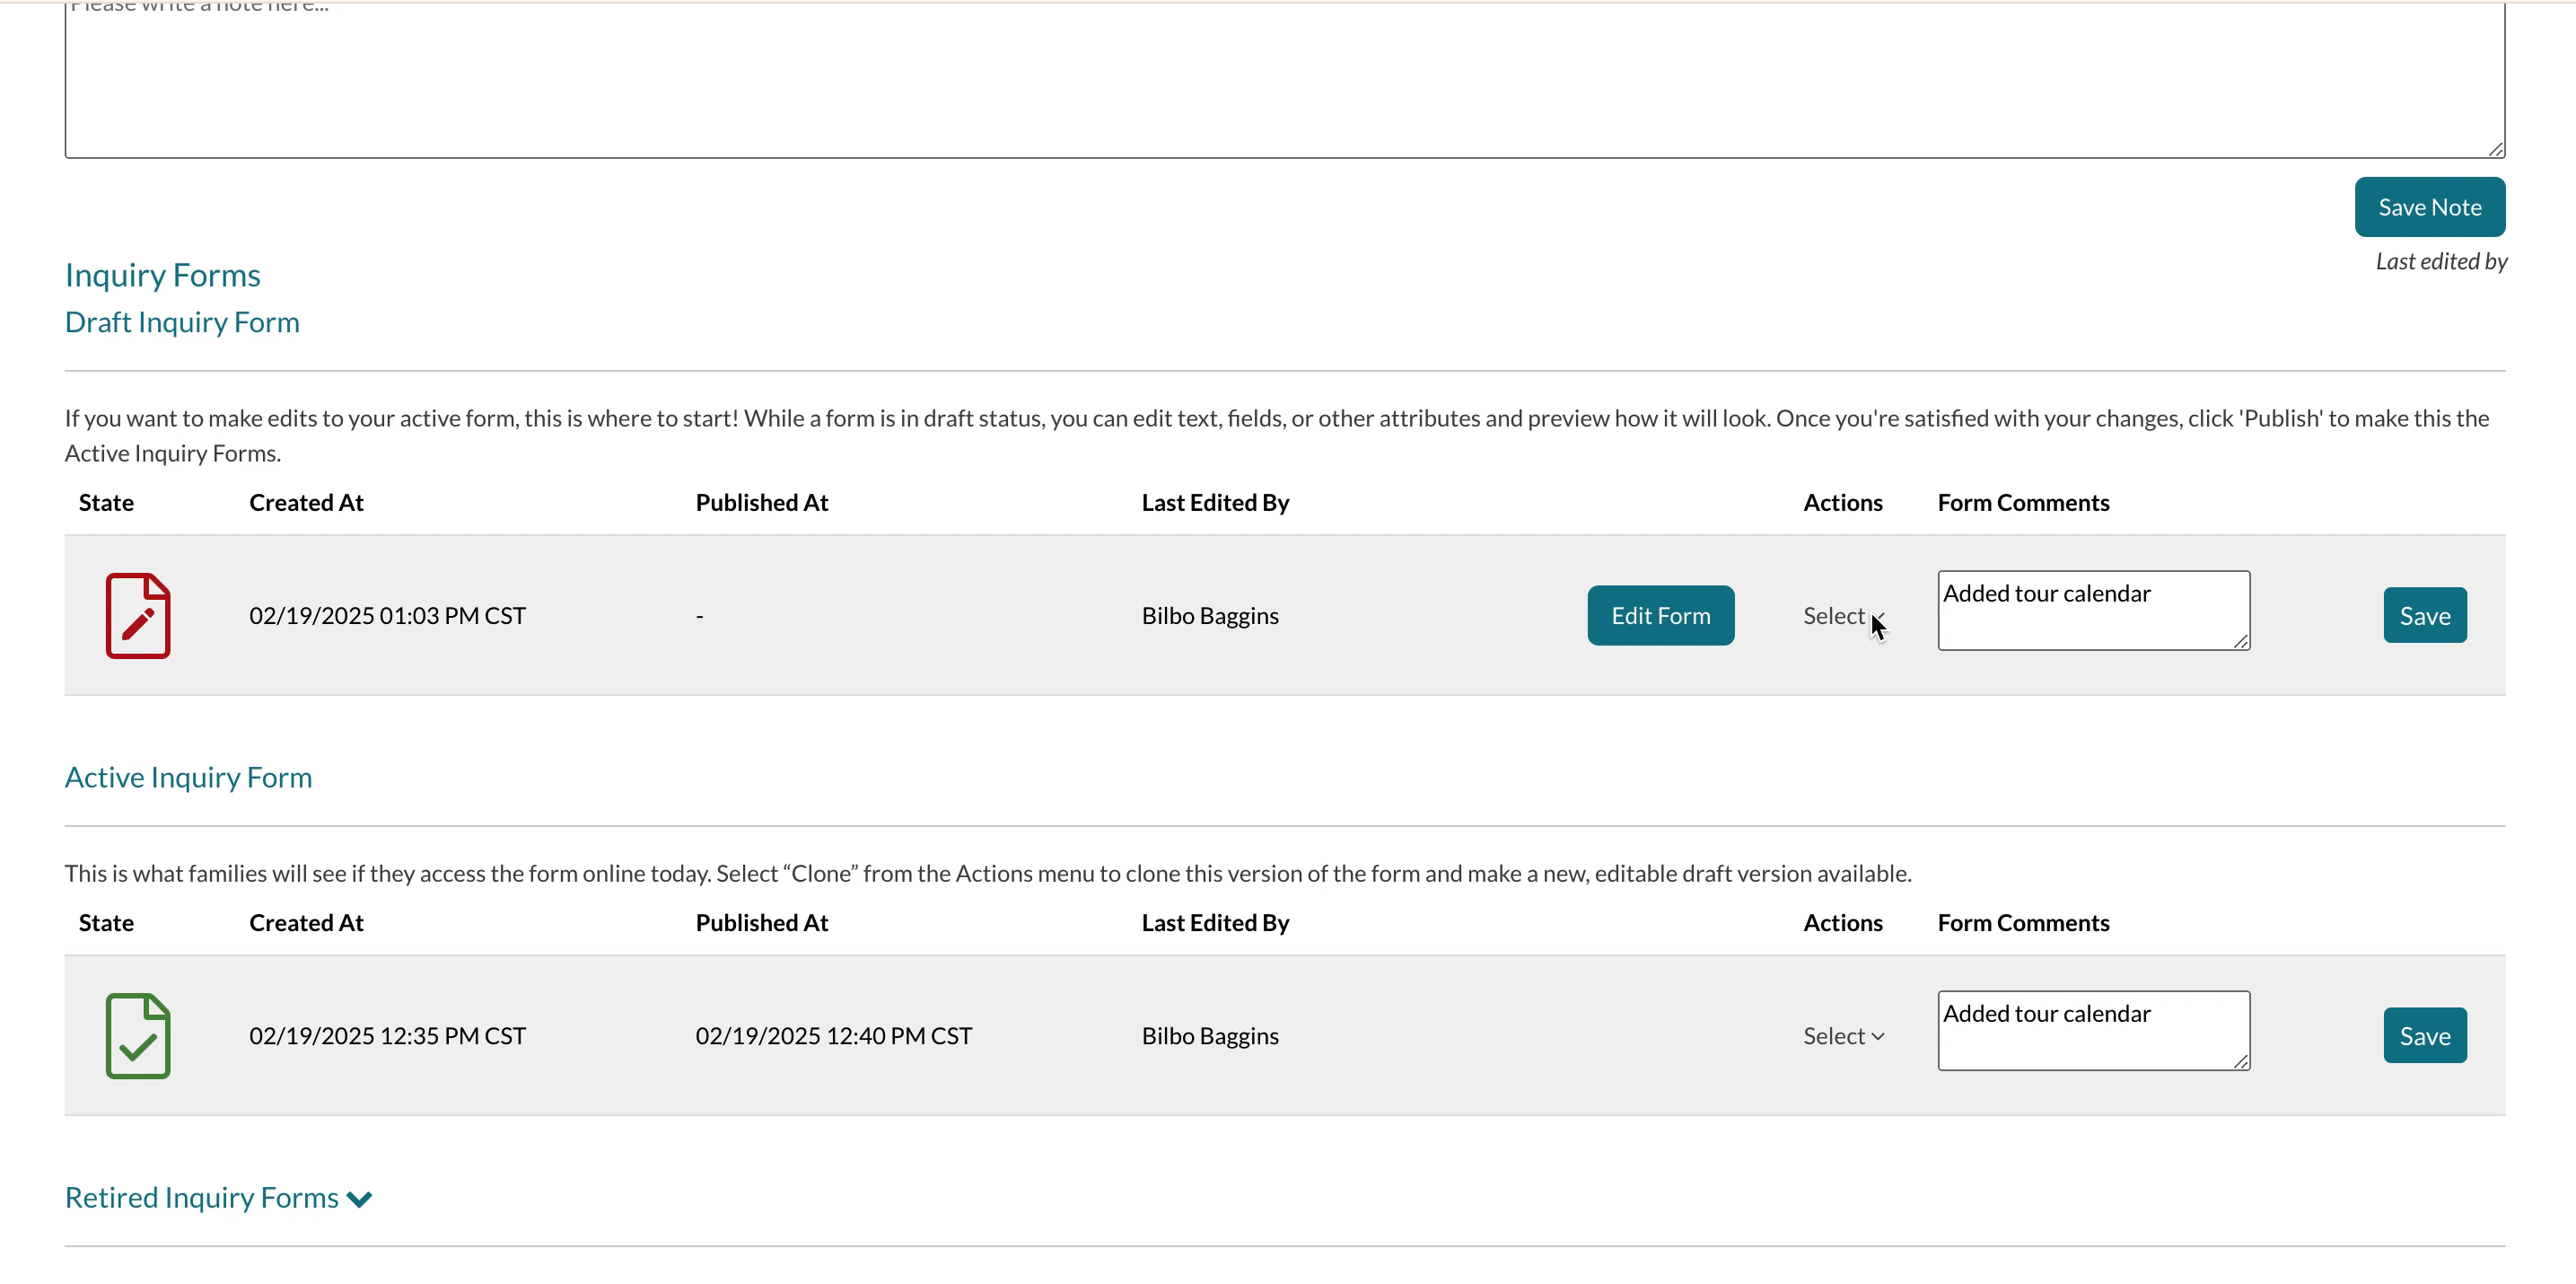
- Make a draft and edit of the inquiry form.
- Enter the backend (advanced form editor) of the form.
- Under the call to action field, select to add a new field below the current one.
- Add a section header to introduce the calendar and make the header dependent on the new option in the call to action section of the form.
- Add a comment field to provide additional information about the event and make this field dependent on the new option in the call to action section of the form.
- Add an appointment field to officially attach the calendar to the form and make this field dependent on the new option in the call to action section of the form.
- Finally, save these adjustments!
(Remember, a more in-depth, step-by-step walkthrough of the process can be found in the interactive tutorial at the bottom of this article.)
Step 3: Publish Your Form
Next, publish the form to make the changes live.
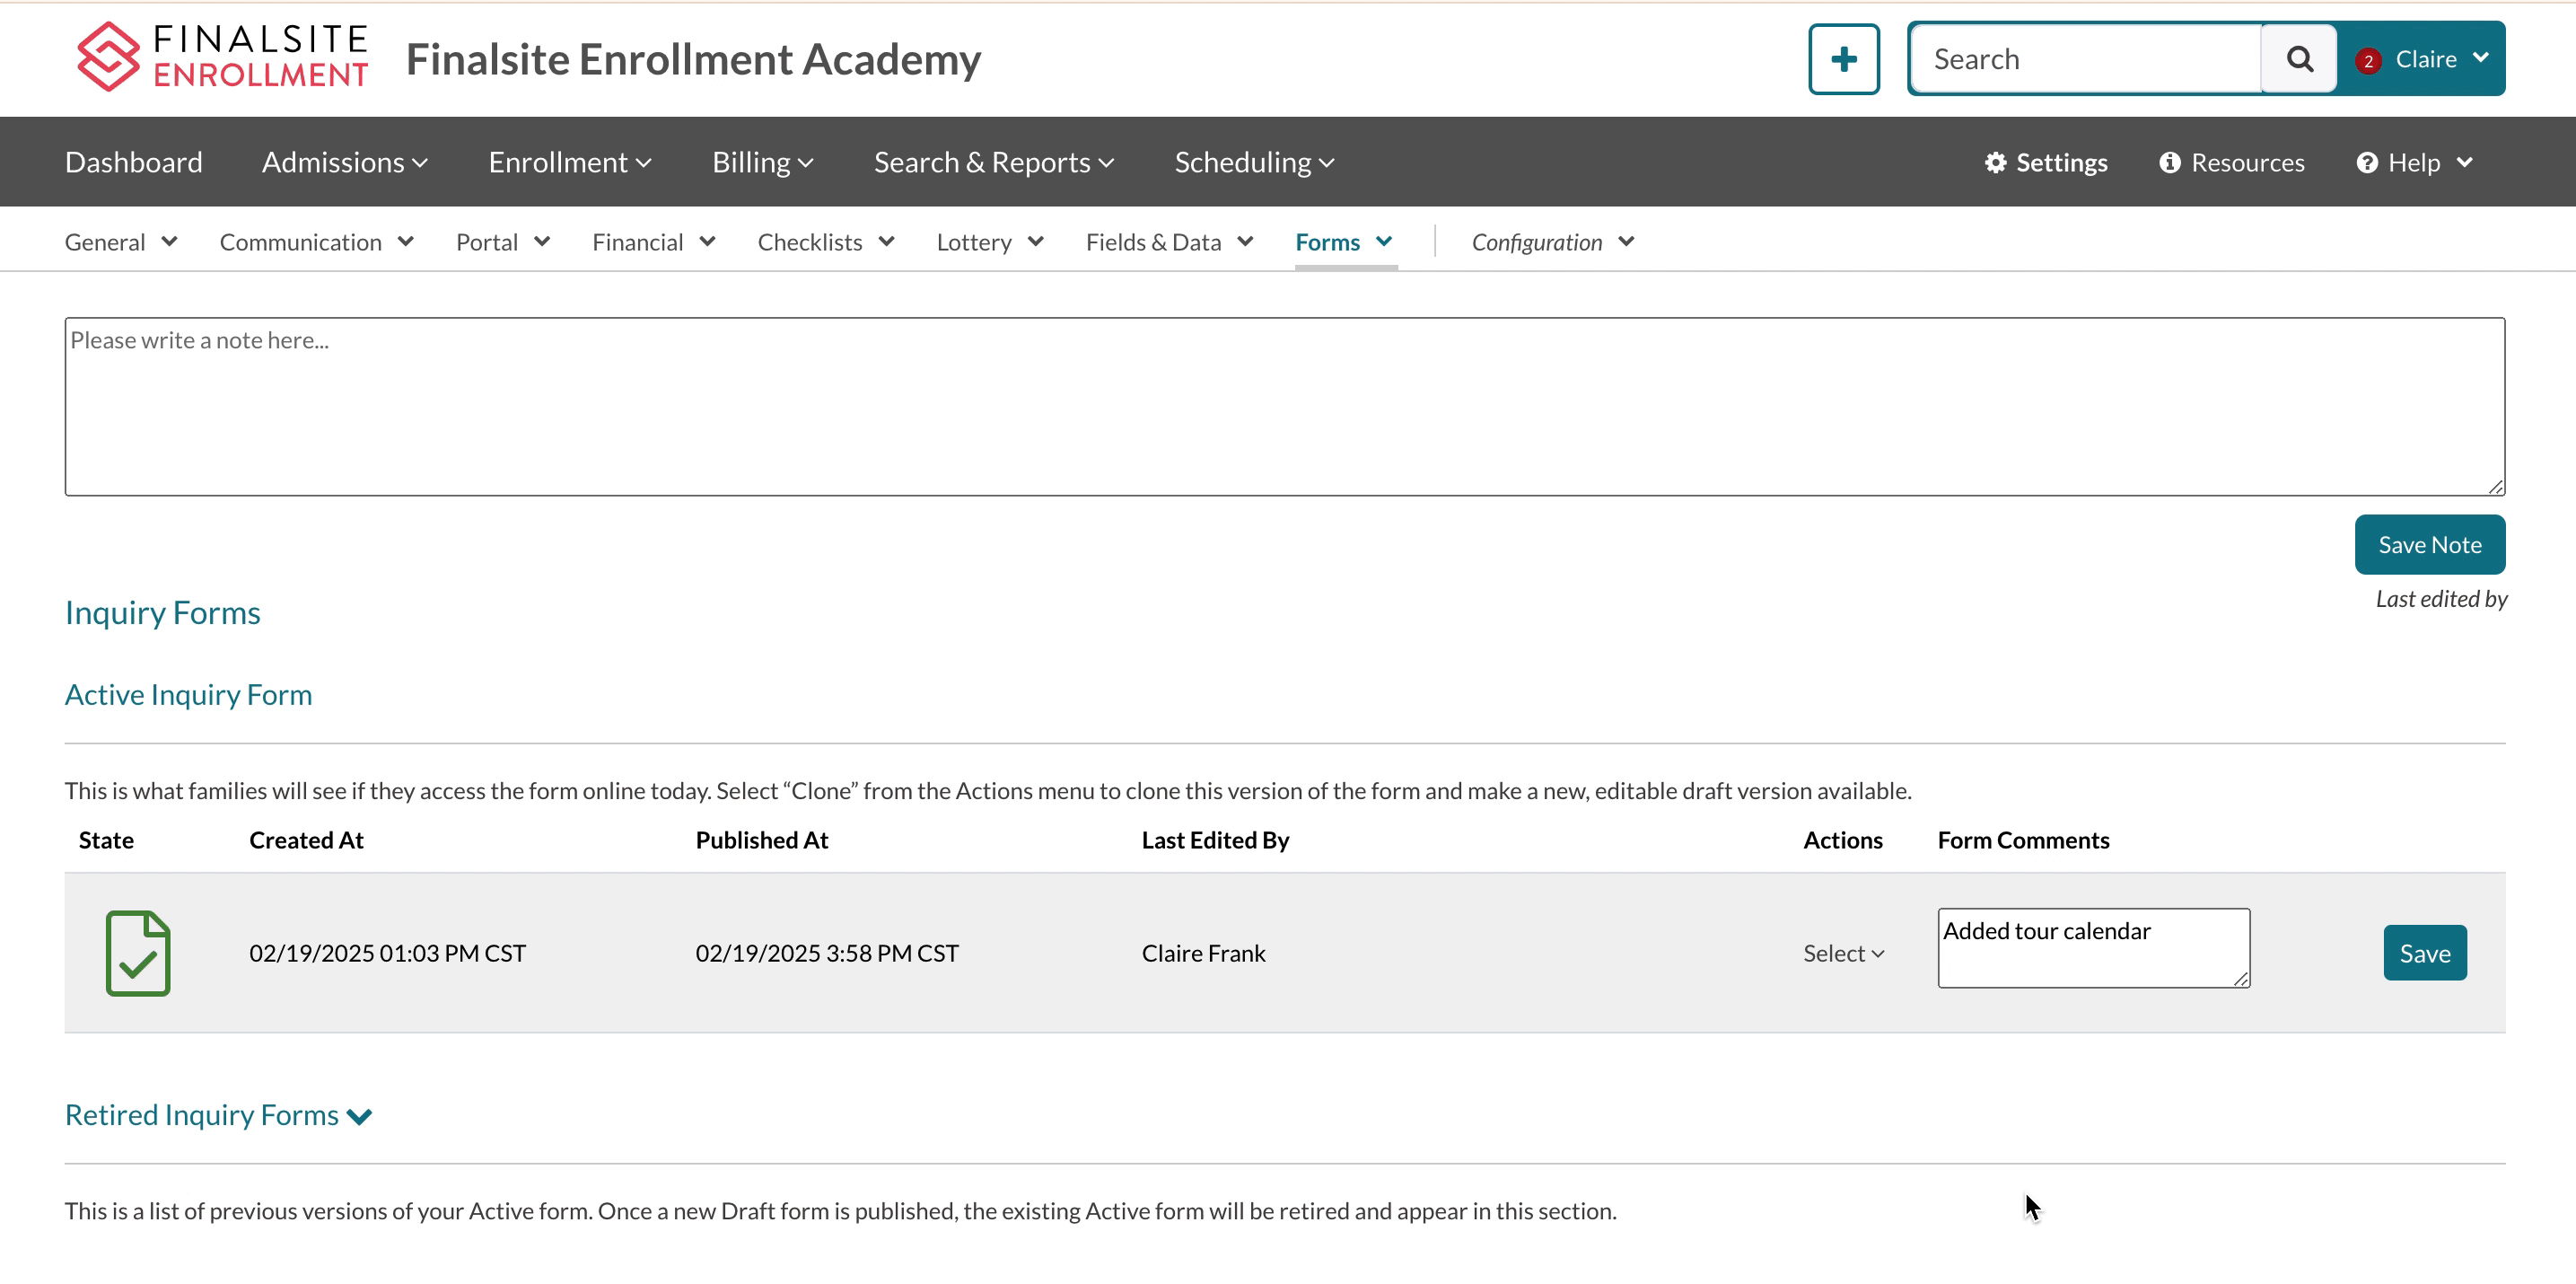
- Within the form edit page (Settings > Forms > Inquiry Forms), open the Select menu in the Actions column on the draft and select the Publish (Make Active) option.
- It's also a good idea to save a note on the form to record what adjustment was made to the form.
Step 4: Check Your Work
Finally, you want to be sure to preview your form to confirm that the CTA option and its associated sections are working as expected.
- Within the form edit page (Settings > Forms > Inquiry Forms), open the Select menu in the Actions column and select Preview to open a preview of the Inquiry form.
Try It Yourself: Add a Calendar to the Inquiry Form
Here's an interactive tutorial
** Best experienced in Full Screen (click the icon in the top right corner before you begin) **
If you have any questions or require assistance, submit a request to the support team.
Comments
0 comments
Article is closed for comments.