
Adding a new staff member to Finalsite Enrollment is a System Admin–only task done from the Admin Portal Accounts page. The exact steps for setting up access depend on which login method your school uses (Connected SSO, legacy SSO, or non-SSO).
💡Quick Answers
- Who can create admin accounts? System Admins only. Other account types, Admins, Users, Limited Users, cannot access the Admin Portal Accounts page.
- Where do I add a new admin? Settings > Portal > Admin Portal Accounts > + Add a new admin.
- Do I need to set a password for the new user? Only for non-SSO (legacy) schools, you'll enter a temporary password and share it with the user. For Connected SSO and legacy SSO schools, the user sets their own (or signs in via Google/Microsoft).
- How do I control what the new admin can access? Use the Type field to pick an account level (System Admin, Admin, User, Limited User), assign a Permission Group, and check individual Permissions as needed. See Admin Roles and Permissions for what each option allows.
- What if my school has a Supersite/Subsite setup? On a Supersite, use the Schools drop-down to pick which Subsites the user can access, All Schools, individually selected, or none. Subsite-created accounts are limited to that single site.
- Will the new user be notified automatically? No. Finalsite Enrollment does not send any notification when you create the account. Tell them yourself, and include the temporary password if your school is non-SSO.
In this Article
Add a New Admin User
To get started, navigate to Settings > Portal > Admin Portal Accounts and click + Add a new admin.
User Identification
Enter the user's School Email, First Name, and Last Name.
Password & Account Activation
The way your user first accesses the system depends on whether your school has transitioned to the Connected SSO experience:
- Connected SSO (new): You do not need to set a password. After clicking Save, the new user will go to the admin portal to create an account, set a password, and verify before logging in. Learn more about this process in the article “Log in to Finalsite Enrollment: The connected SSO experience.”
- Non-SSO (legacy): You must manually enter a temporary password in the Password field and provide it to the user. They will use this for their first login.
- SSO (legacy): You do not need to set a password. After the account has been created, the user will use either Google or Microsoft SSO (depending on which your school has enabled) to log into their new account.
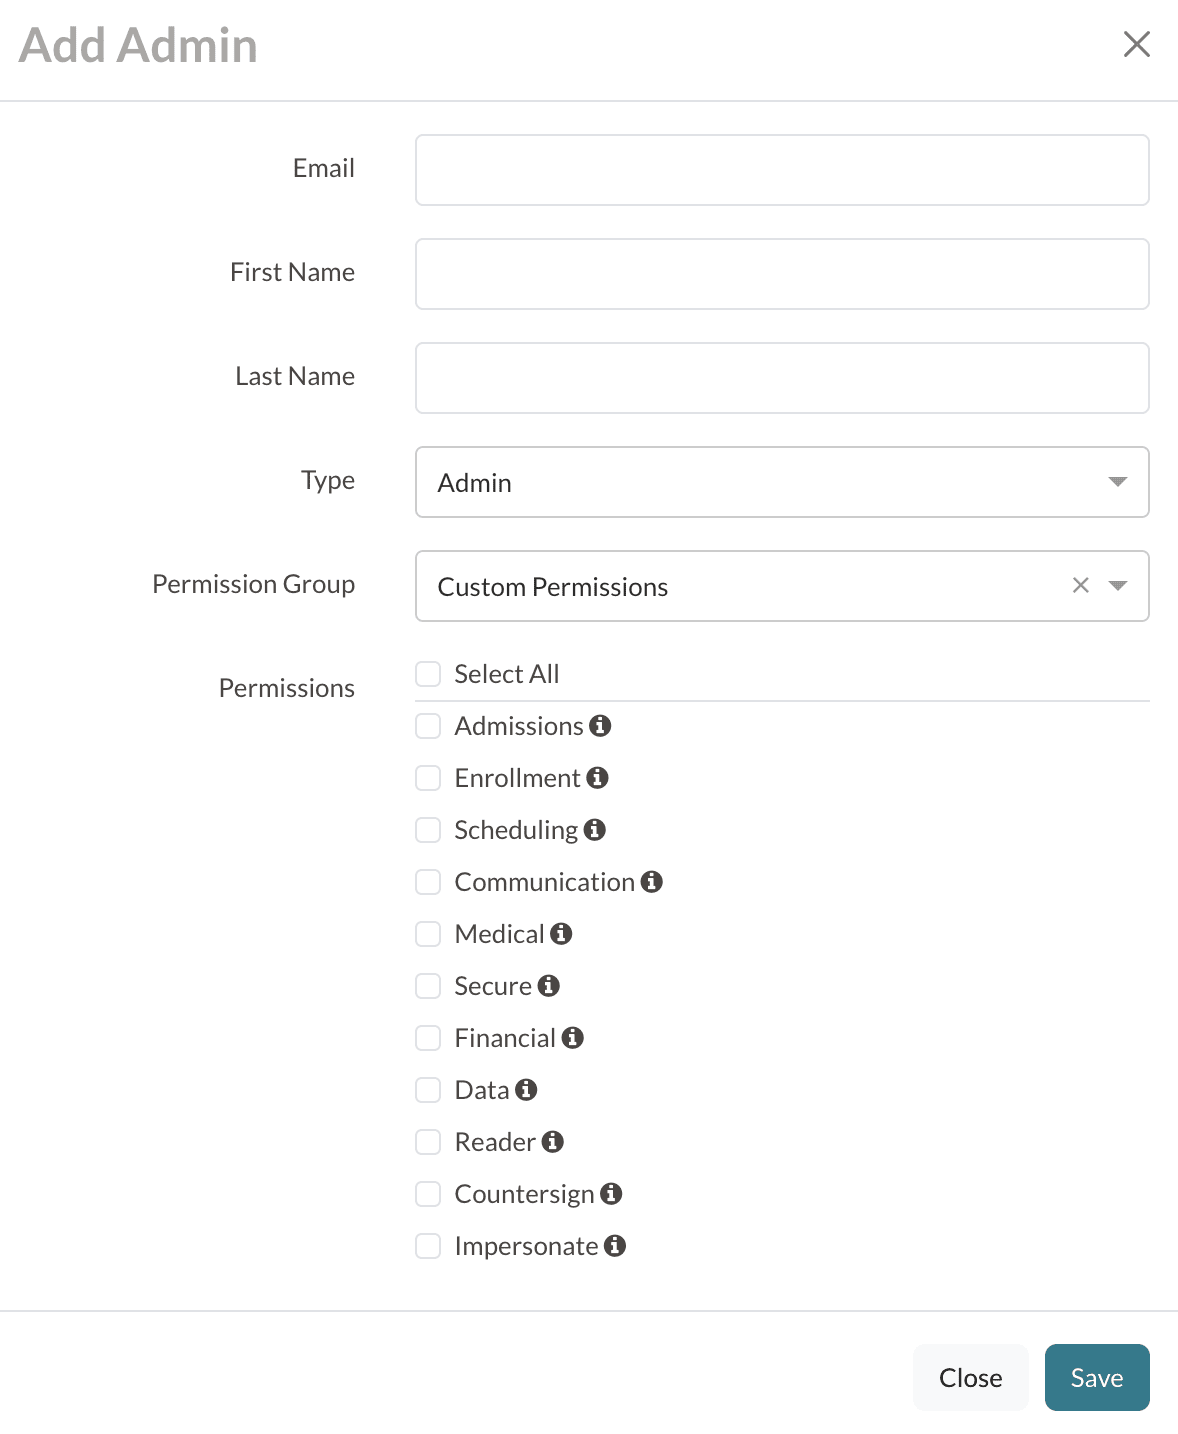
Account Type & Permissions
- Type: Select the specific level of access to manage system actions within your Finalsite Enrollment site. Visit the article “Admin roles and permissions” to learn more about each account type.
- (Optional) Permission Group: Select a pre-defined group of permissions created on your Admin Permission Groups page (Settings > Portal > Admin Permission Groups). Visit the article “Managing Admin Permission Groups: Creating New Groups and Adding Users to Them” to learn more.
- Permissions: Use the checkboxes to select the new user’s permissions, which control which fields and pages the admin/user can view throughout the system. Visit the article “Admin roles and permissions” for details on what access each permission provides.
Site Access (Supersite vs. Subsite)
If your school is part of a multi-site group (e.g., a District or Diocese):
-
Supersites: When creating an account on a Supersite, use the Schools drop-down menu to assign which school(s) the user will have access to.
- Select All Schools if the user should be visible on all Subsites.
- Individually select schools using the checkboxes
- Uncheck all boxes if they should not have access to any Subsites at that time.
- Subsites: Users created at the Subsite level are restricted to the specific school site where their account was made.
Important: New Account Communication
When you create a new admin account, the user will not receive any communication to alert them that their account has been created, so be sure to alert new admin users that you've created an account for them.
If you are not utilizing Connected or Legacy SSO for admin login, be sure to include the password you've set up for them in your communication.
Comments
0 comments
Article is closed for comments.