
Admins can upload files directly to any form-type checklist item (applications, custom forms, online recommendations) when documents come in via paper, PDF, or sources like EMA's SAO. This avoids creating duplicate checklist items for different intake formats. Requires Admissions or Enrollment permissions for the relevant checklist.
Who has access to this page?
Types: System Admin, Admin, User
Permissions: You have to have Admissions and/or Enrollment permissions to have access to those checklists on the student record.
💡Quick Answers
- Who can upload files this way? System Admins, Admins, and Users with the relevant Admissions or Enrollment permissions.
- Where do I upload? On the student's contact record, find the form checklist item and click Upload next to it.
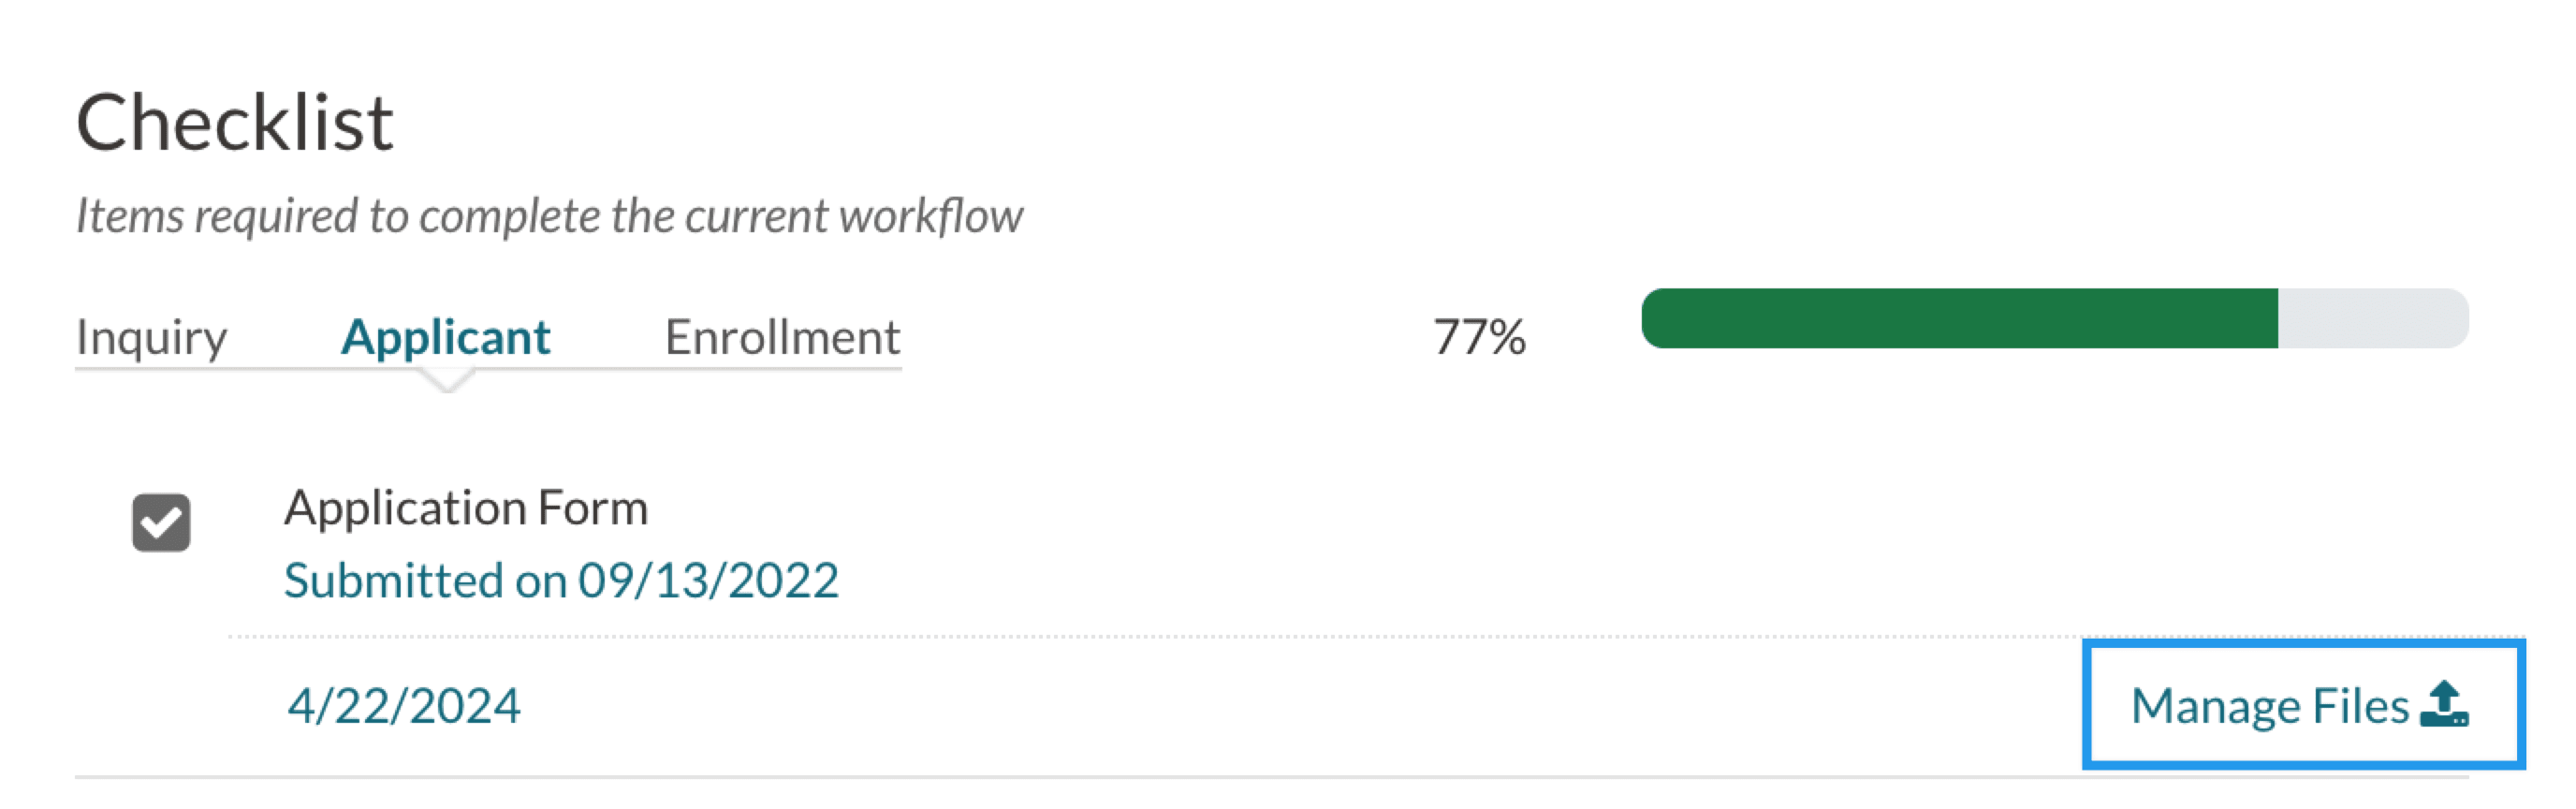
- What happens after I upload? The checklist item is marked complete from both the admin and parent sides. Upload becomes Manage Files, which lets you replace, rename, delete, preview, or download.
- Can parents upload to form checklists this way? No. Parents fill out the form itself. Only admins can upload files to a form-type checklist item.
- Which file types can I preview? PDF and image files only. They open in a new tab. Other types (Doc, Excel) must be downloaded to view.
- Does this work with bulk uploads? Yes. The Bulk File Upload tool supports the same workflow for many students at once.
In this Article
How-To: Upload Files to Form Checklist Items
All form-based checklist items (e.g. applications, custom forms, online recommendations) include the ability for admins to upload a file to that checklist item. This option is only available on the admin portal - parents/students will not be able to upload files to an online form-type checklist item.
To do this, first, navigate to the contact record of the student for whom you want to upload files. Once you are on their record, find the item on their checklist and click the Upload text to the right of it.
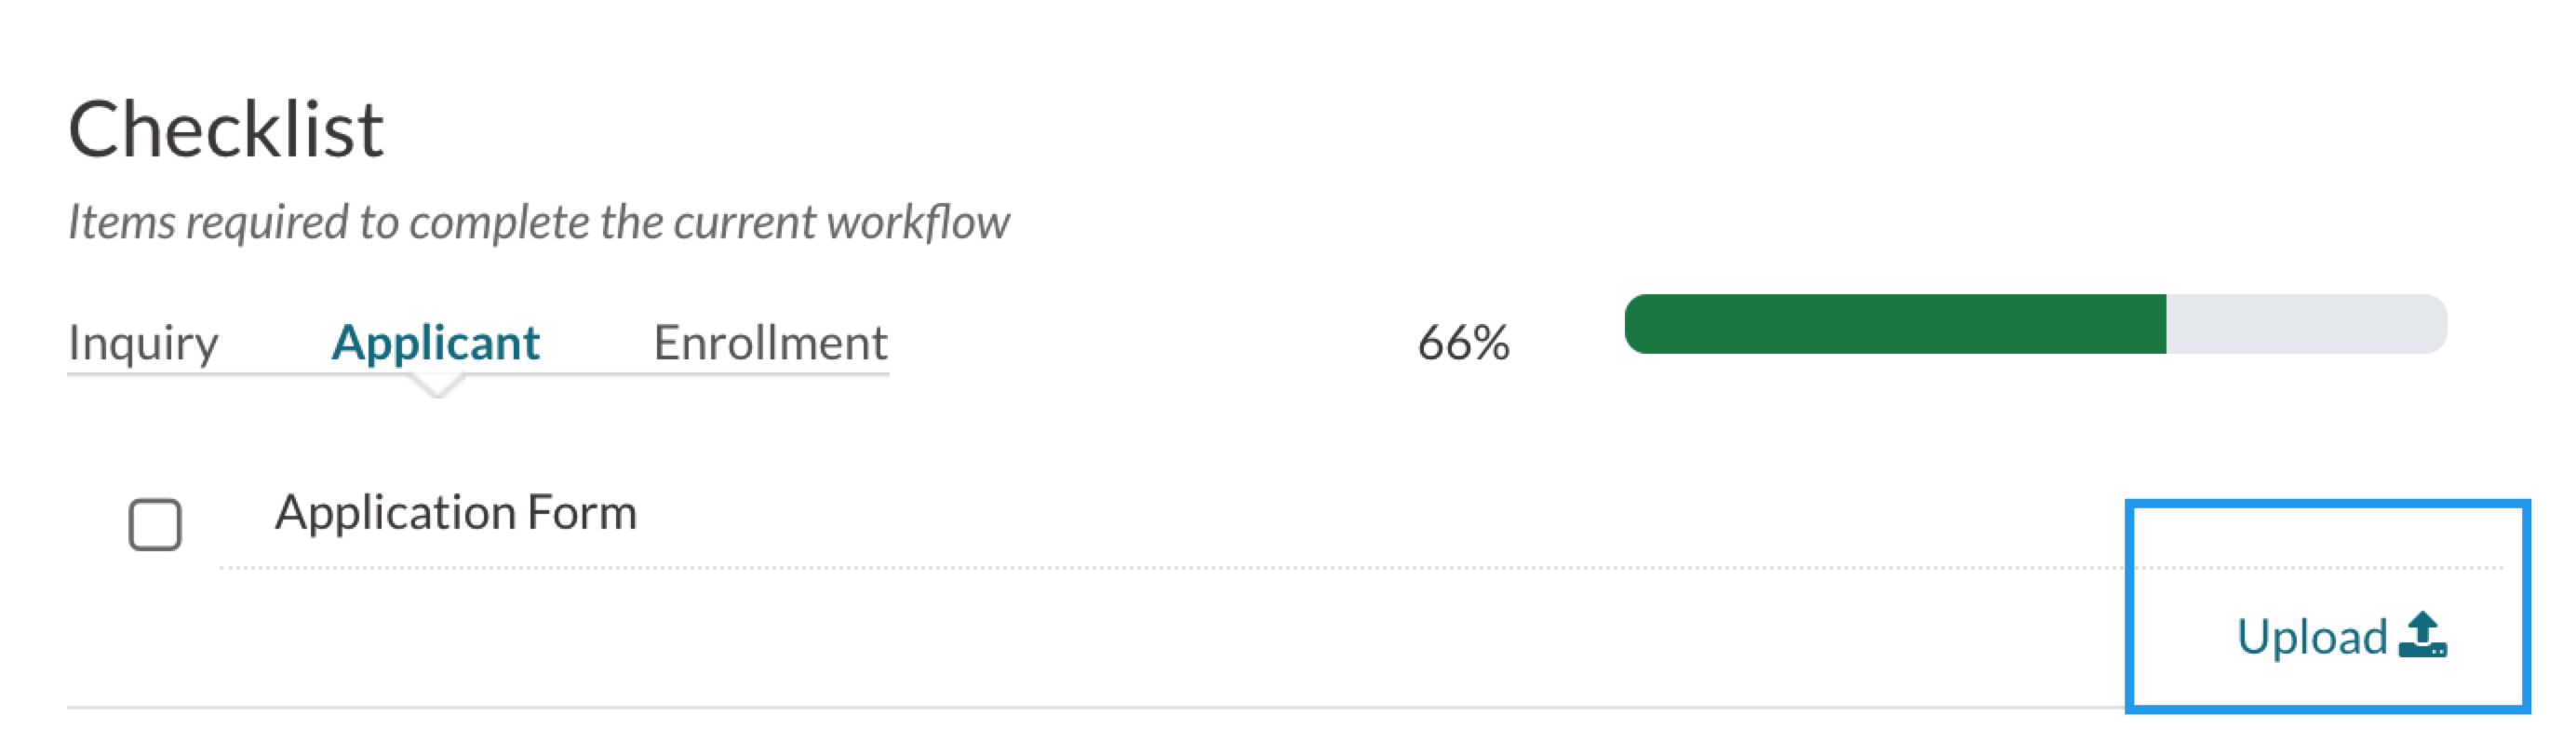
After selecting and uploading the desired file, the checklist item will be marked as complete from the admin and parent portal side.
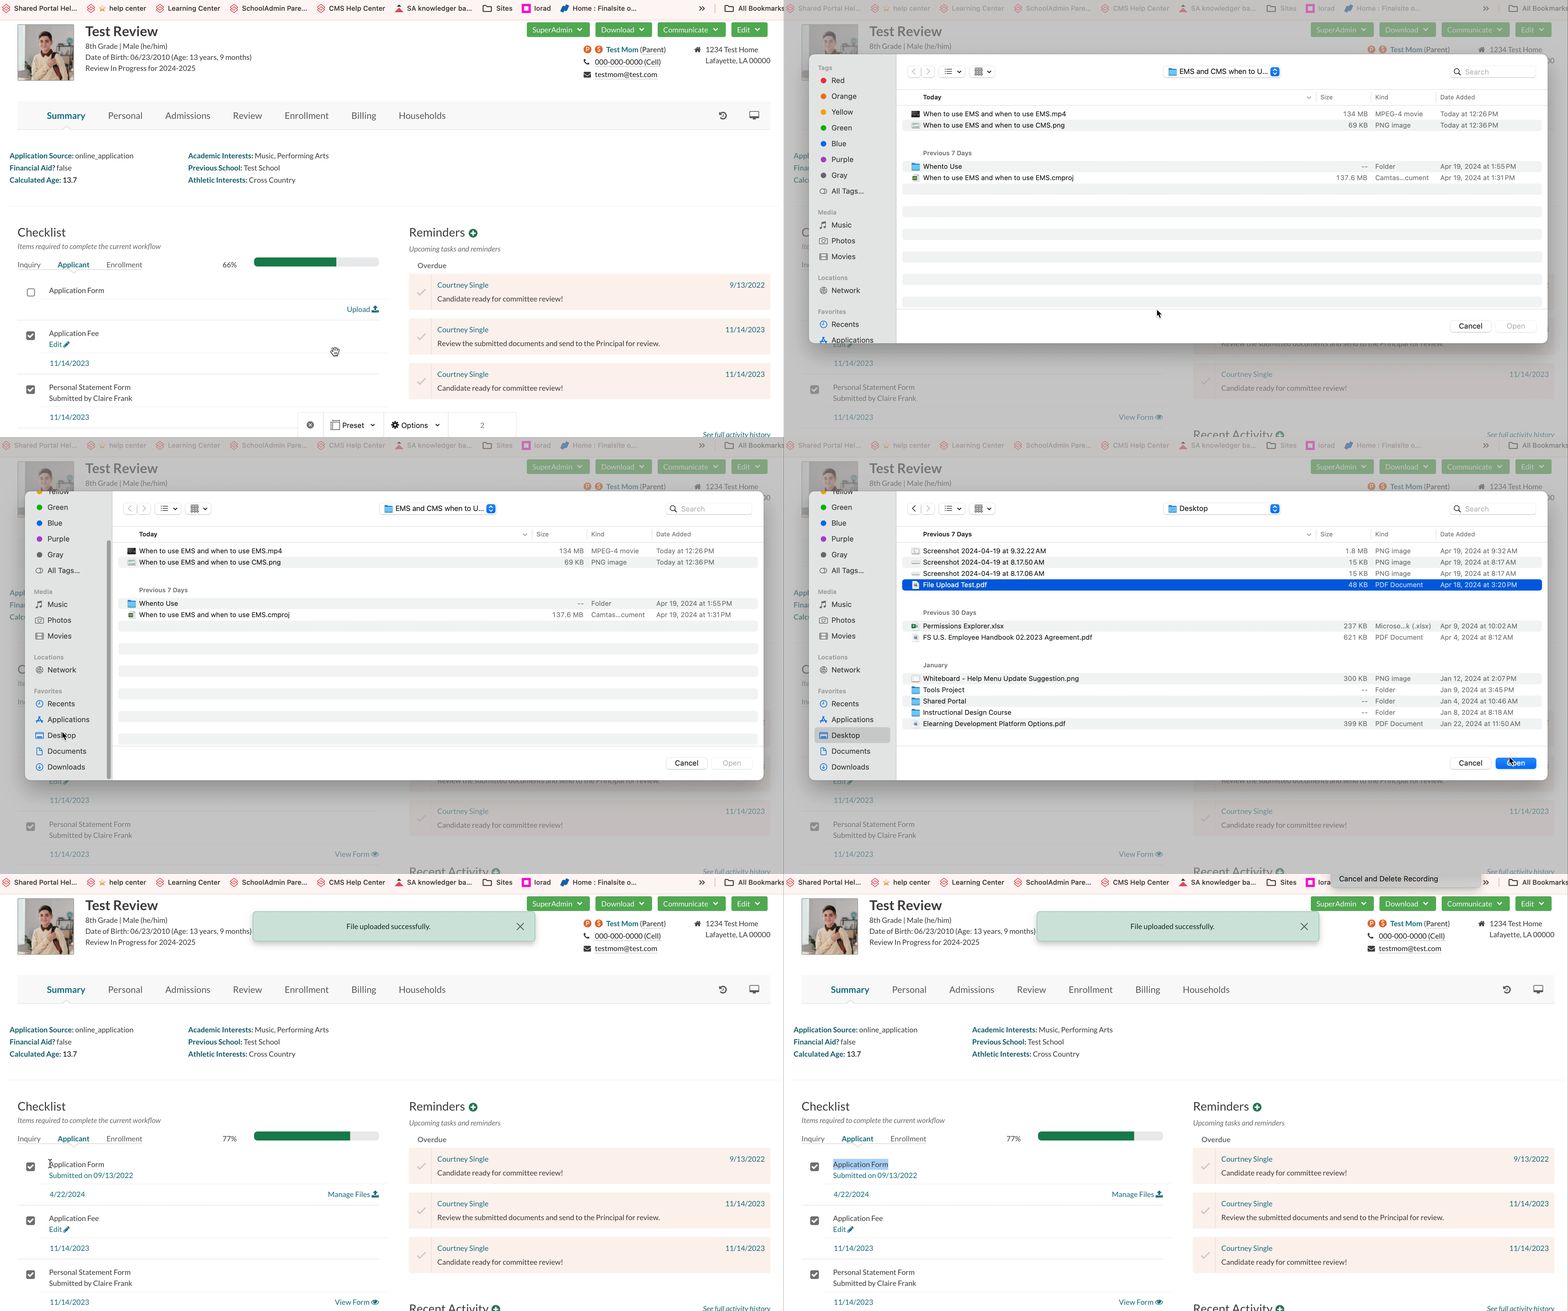
Once you've uploaded a file you will see Manage Files instead of Upload. Selecting this will give you the additional option of:
- Uploading a new file
- Editing the file name
- Deleting the file
- Previewing the file (for PDF and image files only)
- Downloading the file
Previewing uploaded files
The Manage Files menu allows admins to preview uploaded PDF and image files only. These files will open in a new browser tab. The preview option will not work for other file types, such as Doc or Excel files.
Additional Notes
- If you have several files for different students to upload, this functionality is also available via the Bulk File Upload tool as well.
- If this checklist is used in the Online Review process, the uploaded file will appear there for your readers to review.
Comments
0 comments
Article is closed for comments.