Overview
Within the Search & Reports tab, you can create a variety of custom searches and reports, each of which can be saved for repeated reference at various points in your process to get the most up-to-date metrics. When saving a search, the results will update each time you refer back to it. A few useful examples of saved searches include admissions or enrollment counts, event registration, custom financial reports, and directories.
How-To: Save a Search
Once you've entered your search criteria, set your reporting view, and added any other data columns to your report, you can click on the Save button in the upper right.
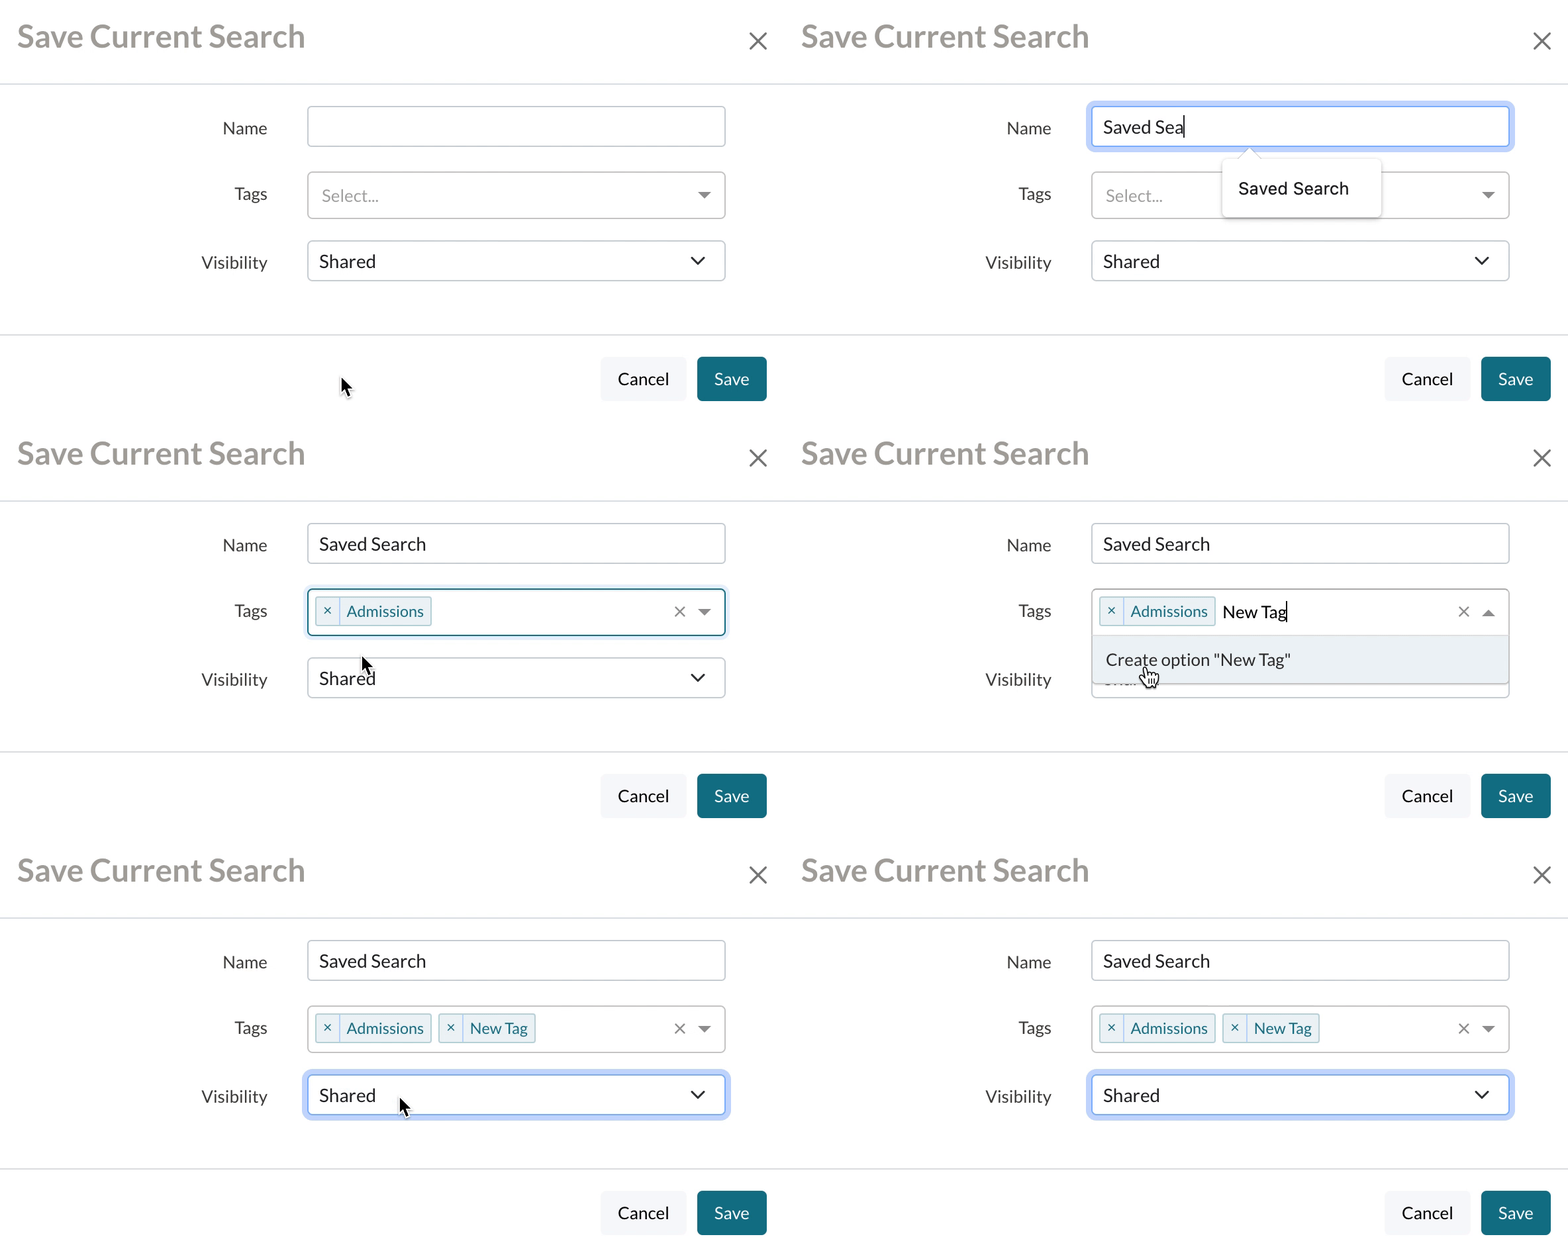
In the Save Current Search window that appears, you will be asked to:
- Enter a Name for the search.
- (Optional) Tag the search.
- You can read more about Tags, here.
- Set the Visibility:
-
Shared: The search is visible on the Saved Searches page to all admin accounts that are set up in Finalsite Enrollment (except for Limited Users).
-
Private: The search is visible on the Saved Searches page ONLY to the person who saves the search. No other users will be able to see the search unless the visibility is changed to Shared.
-

Once you have set the name, tags, and visibility for your search, click on the blue Save button to confirm. Your search will be accessible within the Saved Searches sub-tab moving forward.
How-To: View & Edit a Saved Search
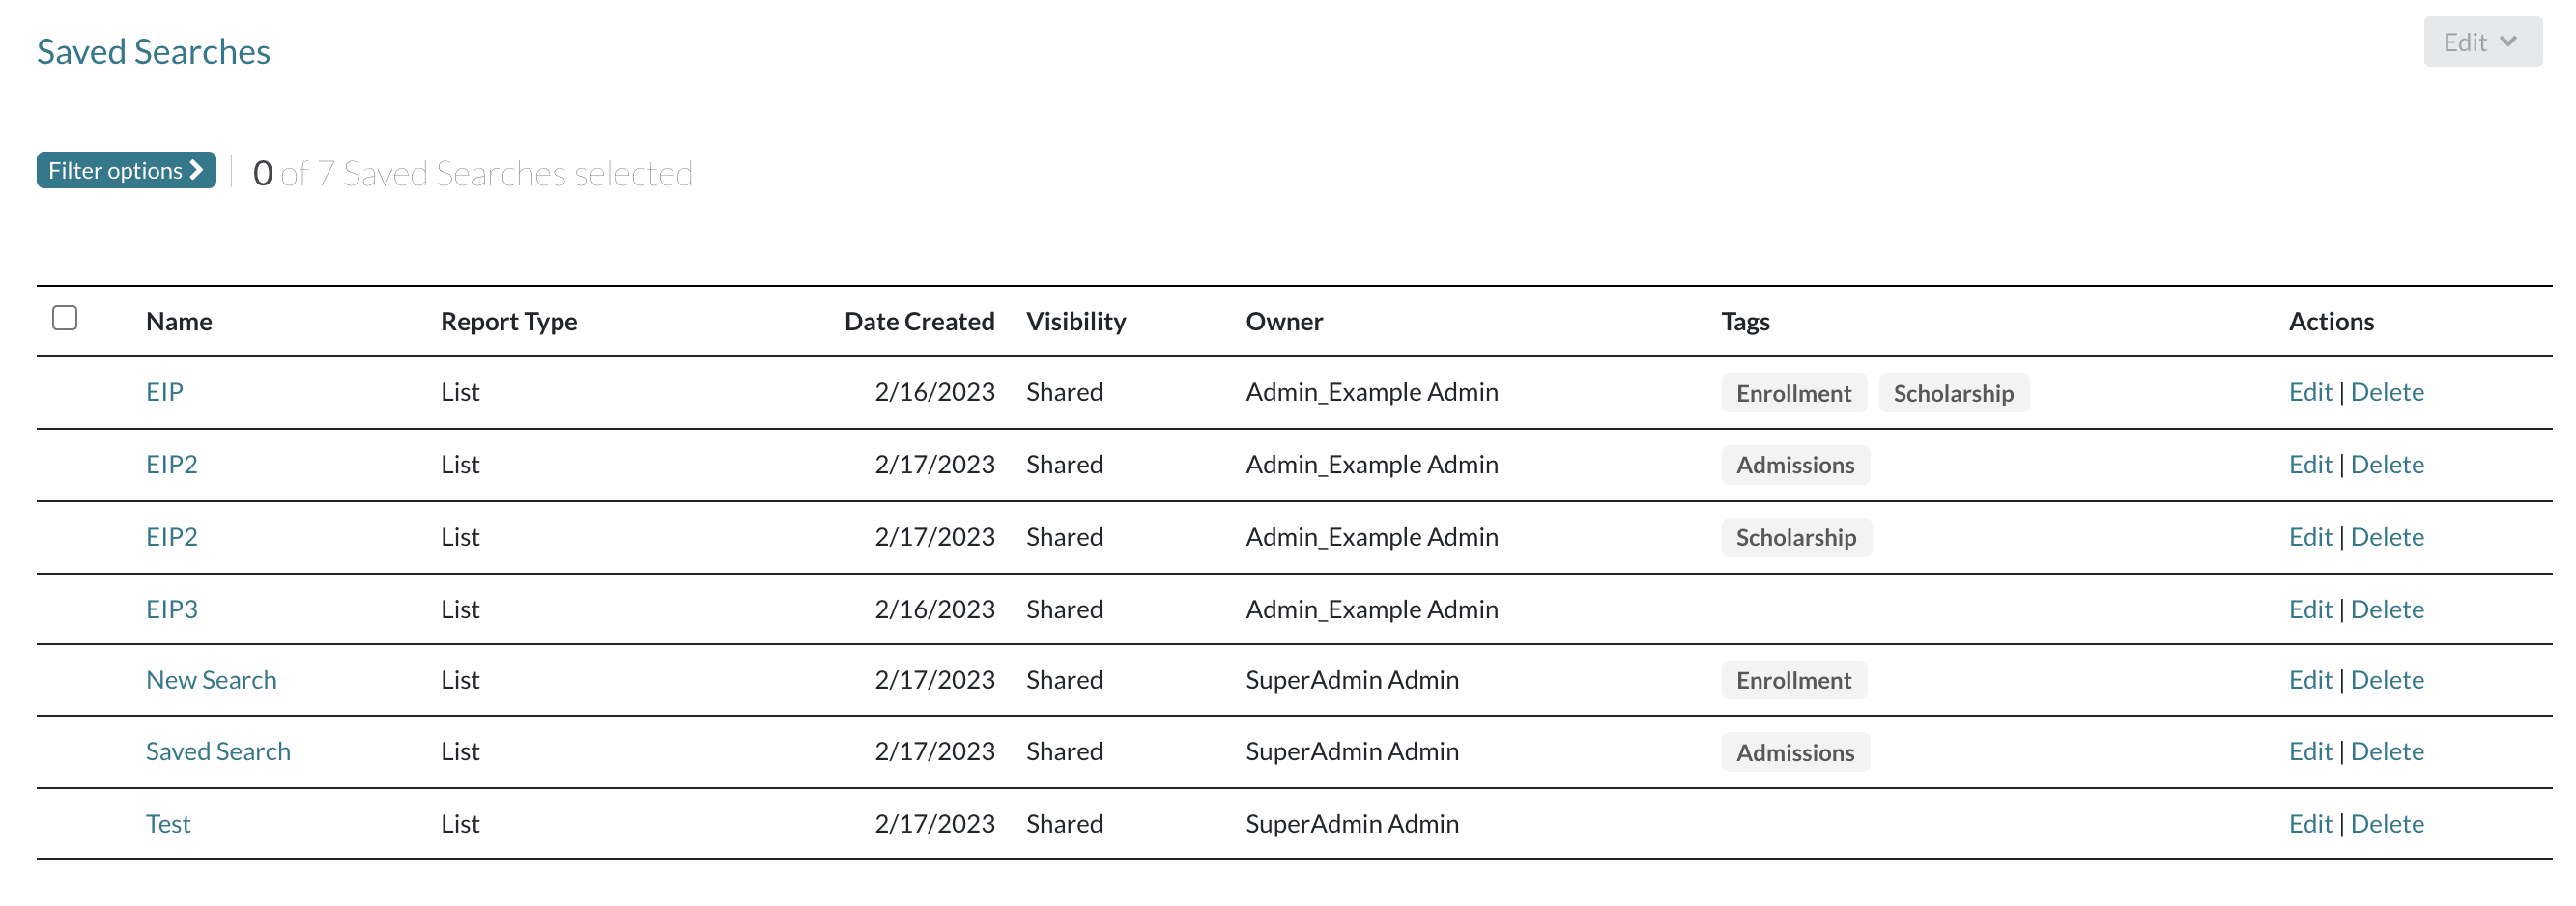
To view one of your existing saved searches, navigate to Search & Reports > Saved Searches.
Within this page, you have the following columns:
Name: This is the name of the saved search. You can open the search by clicking on the name.
Report Type: This is the reporting view of the saved search (i.e. list, list with grouping, summary, or graph).
Date Created: This is the date on which the saved search was created.
Visibility: This will indicate if your search is private (visible to your admin account only) or shared (visible to all Finalsite Enrollment admin/user accounts).
Owner: This is the name of the person who created or last updated the saved search. If the admin account associated with the person who created or last updated the saved search has been deleted, the owner column will say 'User deleted'.
Tags: This column lists the name of the tags that are applied to the Search. You can read more about adding tags to searches and templates, here.
Actions: Here you have two options:
-
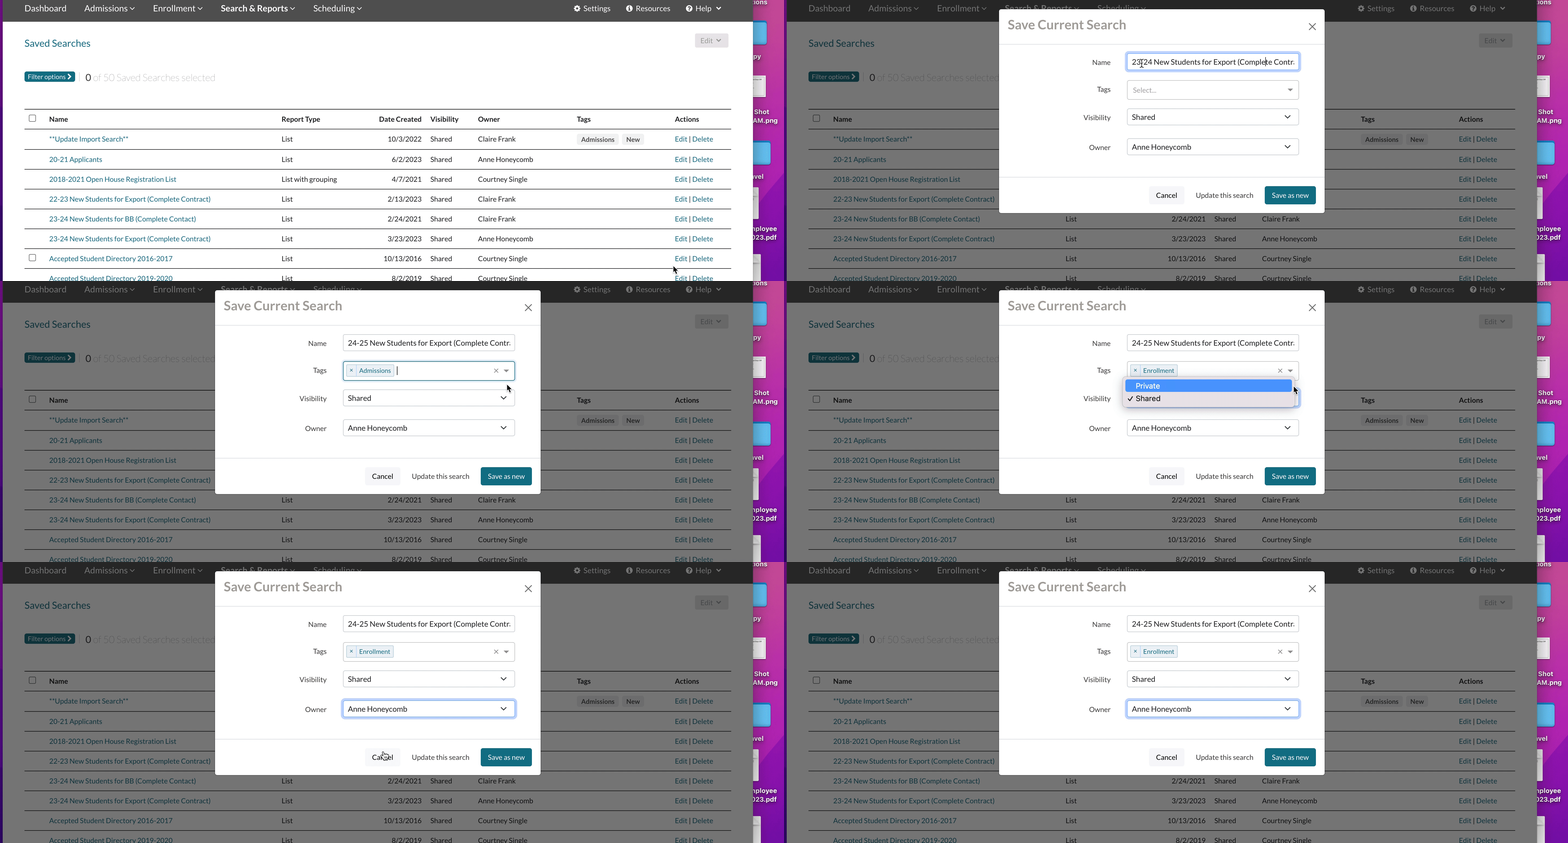
Edit will allow you to edit the search criteria, add/remove columns and change your reporting view. Once you update your search and click the save button, you can update the name and visibility of the search. You also have the option to update the current search or save it as a new search. 'Update this search' will write over the current search and save it. 'Save as new' will create another version of the search and the old version will remain the same. Make sure you rename your search to something unique if you use the 'Save as new' option.
-
Delete will permanently delete the saved search. You will be asked to confirm that you wish to delete the saved search. This action cannot be reversed.

Filter Options
You can use the filter options menu within your Saved Searches page to filter by tags or to search the page by the name of your saved search.
- You can also filter by 'Blank' to see any saved searches that don’t yet have a tag.
- Using Filter by Name allows you to search for templates based on their name.
How-To: Export Search Results
To provide more flexibility with search results, you can export a current or saved search by clicking on the green Export button in the upper right of the page. You have several export options, as described below.
-
Export raw data to CSV: Exports your search data to a .CSV file.
-
Export raw data to Excel: Exports your search data to a .XLS file.
-
Export as import template: Exports your search data in a format that can be used to import back into Finalsite Enrollment (using the contacts' unique Finalsite Enrollment IDs). Click here to learn more.
-
Export as Billing import template: Exports the students in the search in a format that can be used to import Billing transactions back into Finalsite Enrollment. This option is ONLY available to schools using the Finalsite Enrollment Billing module. Click here to learn more.
After selecting an export option, the Export window will appear and you'll be notified that your results are being processed. During this step, you can click Cancel Export or the X button in the upper right of the window to stop exporting the data.
Once the export has been processed, you'll be notified that your export is complete with a hyperlink to click and download the file.


Comments
0 comments
Article is closed for comments.