
The Add Credit button on a parent's billing ledger is used to apply scholarship or financial aid amounts to an account. It should not be used to reverse charges; use a negative charge for reversals instead.
💡Quick Answers
- When should I use Add Credit? Use it to apply scholarship or financial aid to a ledger; do not use it to reverse a charge (add a negative charge via the Add Charge button instead).
- What information is required to add a credit? A description, distribution method (almost always Manual Splits), billing category, student contact and term, and the credit amount.
- Can I split a credit across multiple categories or students? Yes, use the Add Split button to divide the credit among multiple categories, students, or amounts; splits across payers must be added to each payer's ledger individually.
- Can I spread a credit across multiple months? Yes, select Evenly Across Months in the Posting Options and specify the start month, start year, and number of months; items post according to the account's billing day.
When should you use the Add Credit button?
You can use the Add Credit button for applying Scholarship or Financial Aid to a student but you shouldn't use "Add Credit" to reverse or remove a charge.
If you need to reverse an existing charge, rather than using the Add Credit button, you should add negative Charges instead. For more on Charges, please refer to our Billing: Add Charge article.
Add a Credit
To add a credit to the ledger, start by navigating to the parent/payer's billing ledger and selecting the Add Credit button.

This will open the Credit Details pop-up.
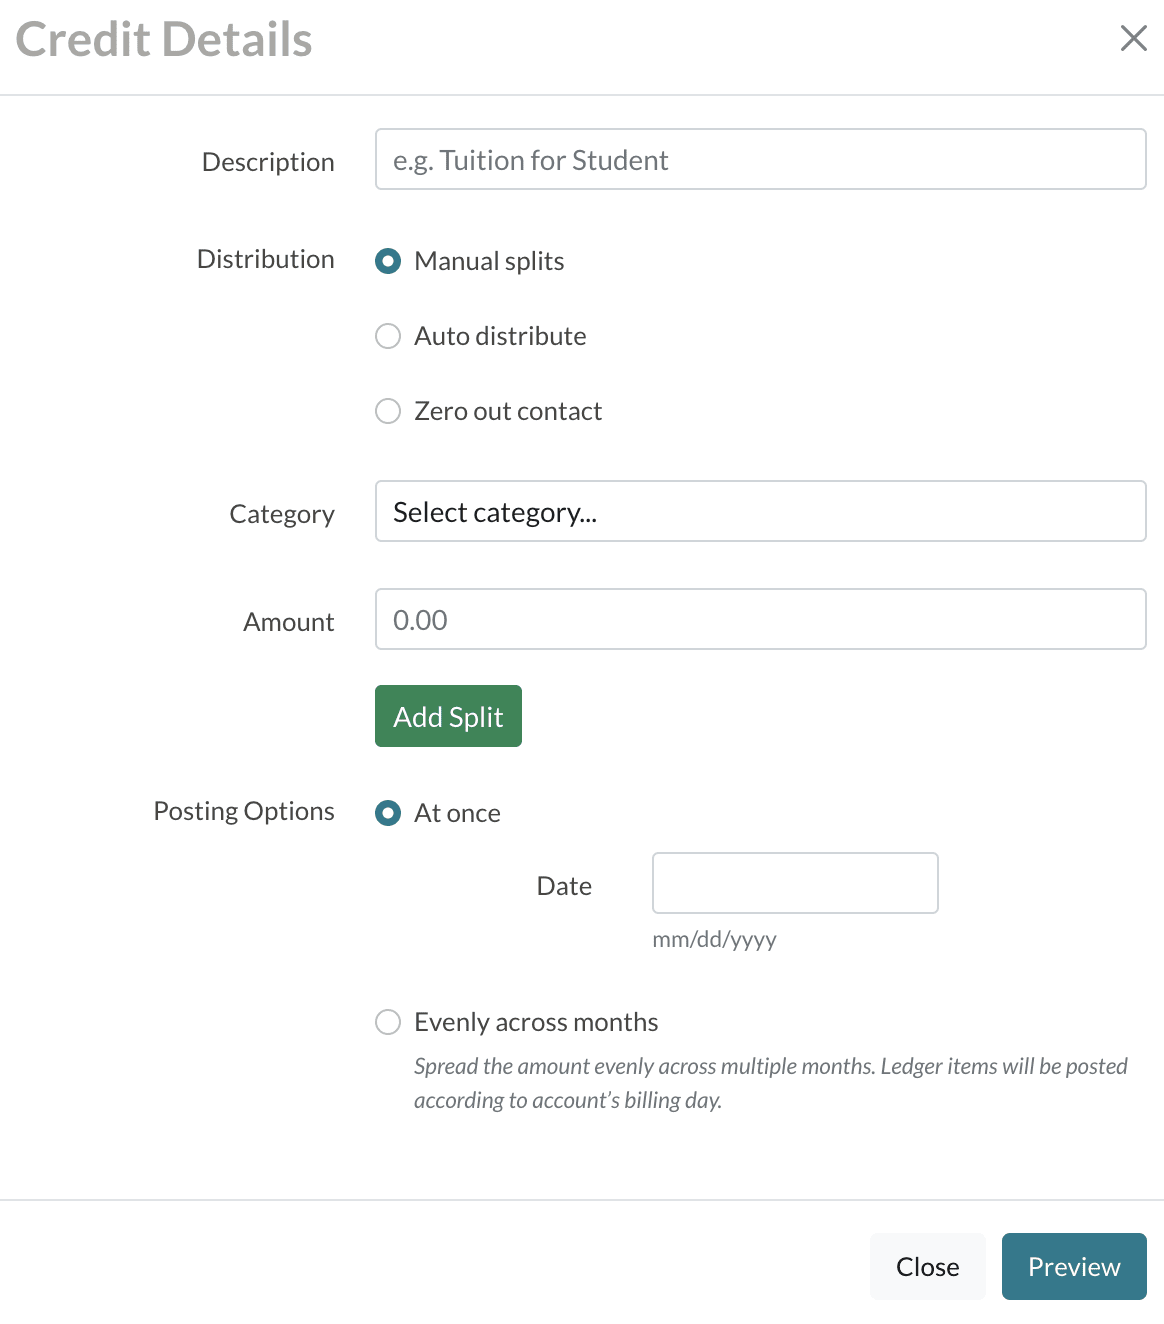
Complete the following within the window:
-
Description
- Describe what the credit is for. This will also show on the parent end when they view their ledger.
- Describe what the credit is for. This will also show on the parent end when they view their ledger.
-
Distribution:
- Select the distribution. You will almost always select Manual Splits here. Read more about the other options below.
-
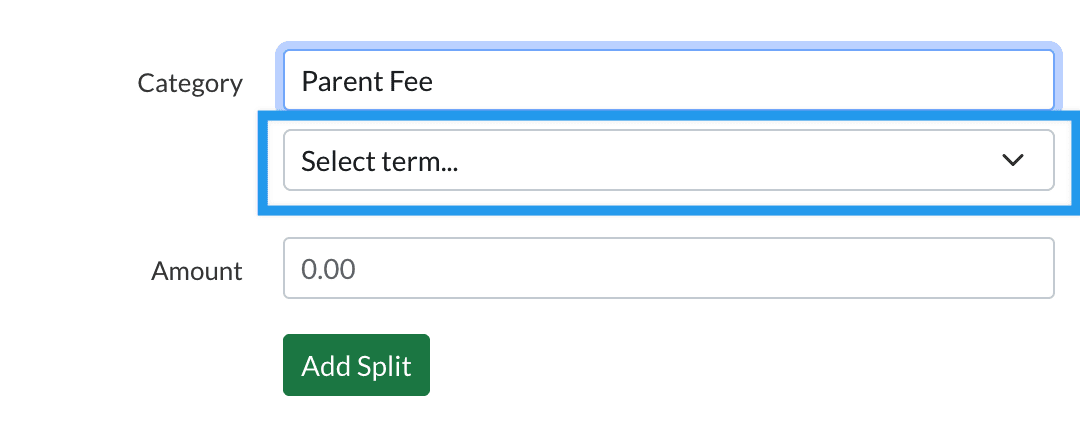
Category
- Set the billing category to which the credit should be applied.
- If you select an account-level category here (like for a Late fee or NSF fee), you'll be asked to select the term (rather than the contact). If you do not select a term, the term listed on your Billing Setup page (Settings > Financial > Billing Setup) will be listed here by default.
-
Contact
- Select the student and the term that the credit belongs to.
- Select the student and the term that the credit belongs to.
-
Amount
- Enter the amount of the credit.
- Enter the amount of the credit.
-
Add Split
- If splitting the credit among more than one student, amount, or category, select this button.
- Select the category and contact and enter the amount.
- If you need a credit to be split amongst payers, you can do so on an individual payer basis and assign the divided amount to each payer's ledger in their record.
-
Posting Options:
- At Once: You can post the full credit amount at once on the date selected.
-
Evenly Across Months: Spread the amount evenly across multiple months. Use this option to spread Credits across a payment plan. Ledger items will be posted according to the account’s billing day.
- Select the start month, start year, and the number of months to spread the credit across.
Distribution Options
Manual Splits: This option allows you to manually select the Billing Categories to which the credit should apply. You can also manually split the credit so that it applies to multiple categories, students, and amounts.
Auto Distribute: The Auto Distribute button is for charge reversal. You should not use this option if you are adding Credit to a ledger.
Zero Out Contact: This option is used to zero out the balance of an account. When adding a Credit, you can disregard the Zero out Contact option.
Comments
0 comments
Article is closed for comments.