Overview
In some cases, it is necessary to regenerate a contract in order to adjust past charges on a parent/payer's ledger. There are different ways to accomplish this, depending on certain scenarios. This article will outline the different use cases and approaches to contract regeneration for plan adjustment.
Use Cases/ Examples
- Parent signs and submits their contract but later needs to adjust the financial split.
- A payment plan change is needed on a ledger with multiple payers.
- Change is necessary on the full payment plan schedule (including past charges).
If you only need to make changes to future charges on a ledger, you may opt to use the 'Rearrange Installments' feature. You can read more about it here.
Important Points to Consider
When you need to adjust past charges, there are two options explained below:
-
Regenerate the contract with the parent's signature. Choose this option If you need a signed contract that matches the payment plan on the ledger. This option will require the parent(s) to re-sign and submit the form.
-
Regenerate and submit the contract internally. Choose this option if you don't need a signed contract that matches the payment plan on the ledger. With internal contract regeneration/submission, you'll still retain a copy of the contract internally, however, the payment plan portion will not match the ledger and the contract will no longer be visible in the Parent Portal.
- The benefit of internal contract regeneration/submission is that it doesn't require the parent's signature. In other words, the entire process can be managed internally.
VERY IMPORTANT: If you are regenerating a contract after the first billing cycle has passed (therefore needing to adjust past charges), you should have a non-cascading payment plan set up prior to regenerating the contract. Having this type of plan set up will adjust the ledger appropriately.
For example: If it's currently September and you need to adjust the schedule of a plan that started in July, this would require the setup and use of a non-cascading payment plan.
Read more about how to set up a non-cascading payment plan here (scroll to the bottom of the article).
Process: Regenerate the contract with the parent's signature
- First make sure that you have a non-cascading payment plan set up and activated under Settings --> Financial --> Payment Plans. Click here to learn more.
- Next, regenerate the contract from the edit menu of the student's record. Click here to learn how and view the section titled, 'How-To: Regenerate Contracts.'
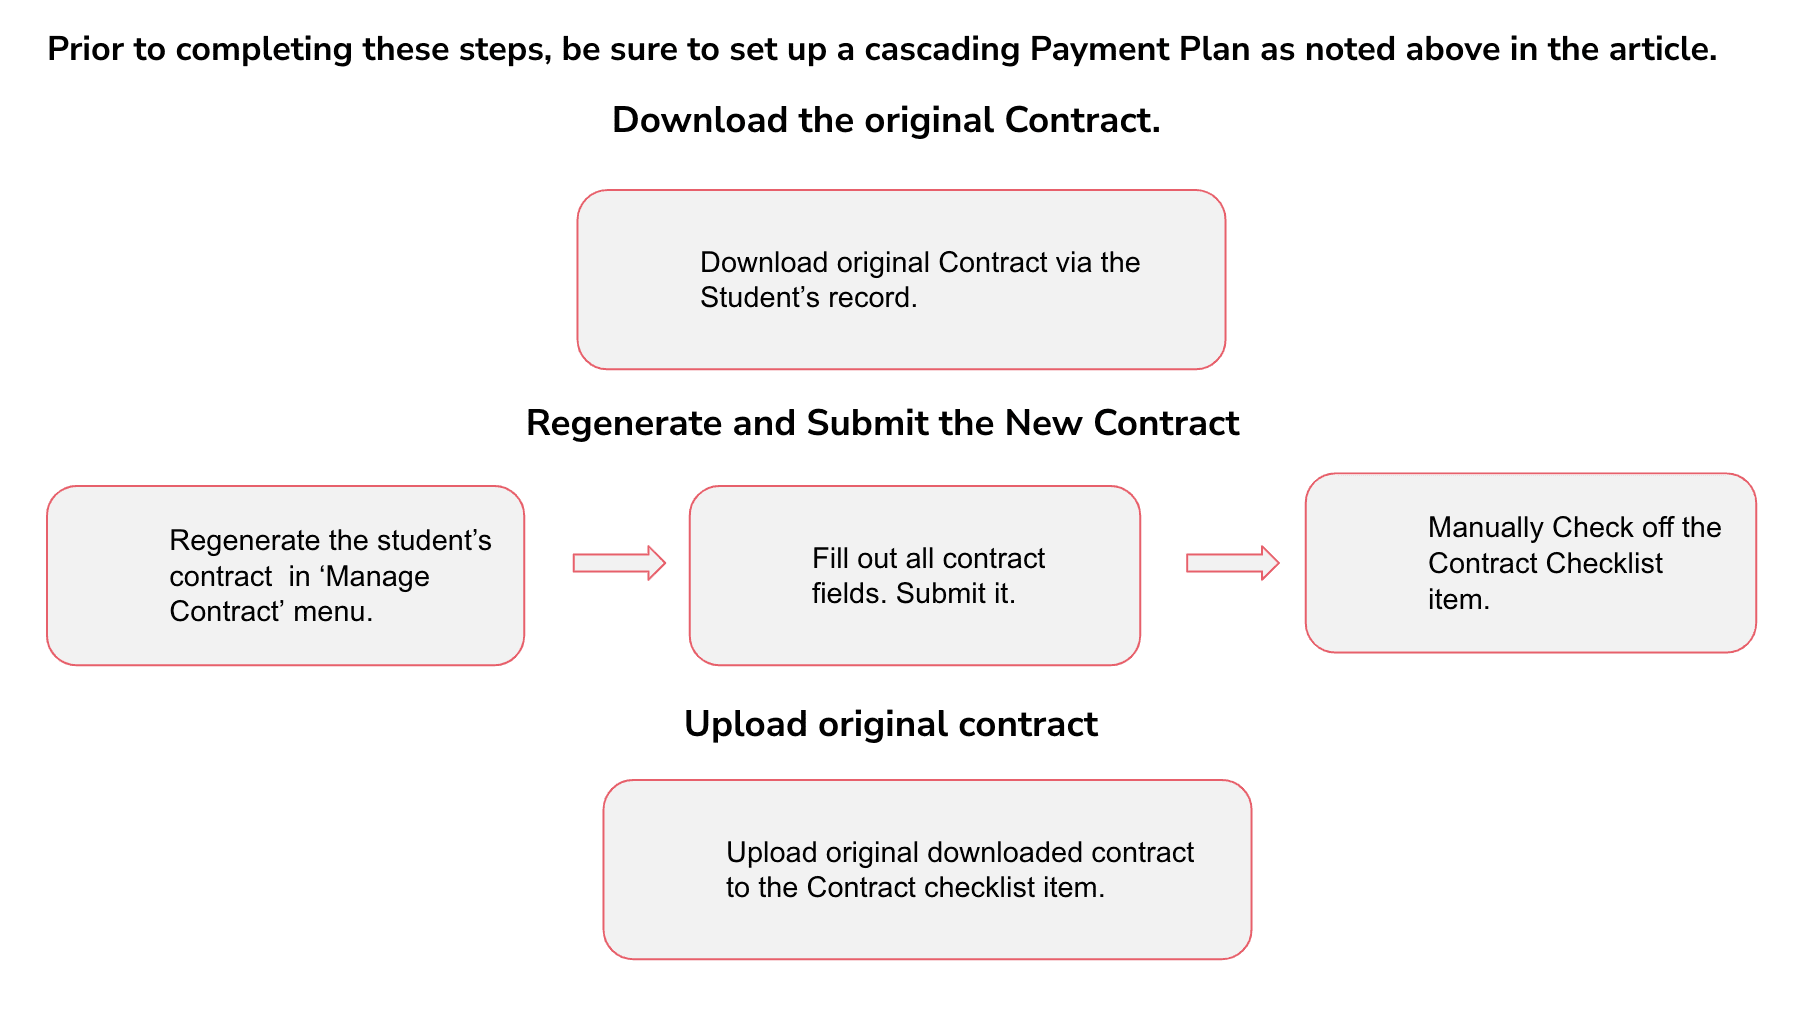
Process: Regenerate and submit the contract internally.
Important: First make sure you have a non-cascading payment plan set up and activated under Settings --> Financial --> Payment Plans. Click here to learn more.
On the student's record:
1. Download the contract.
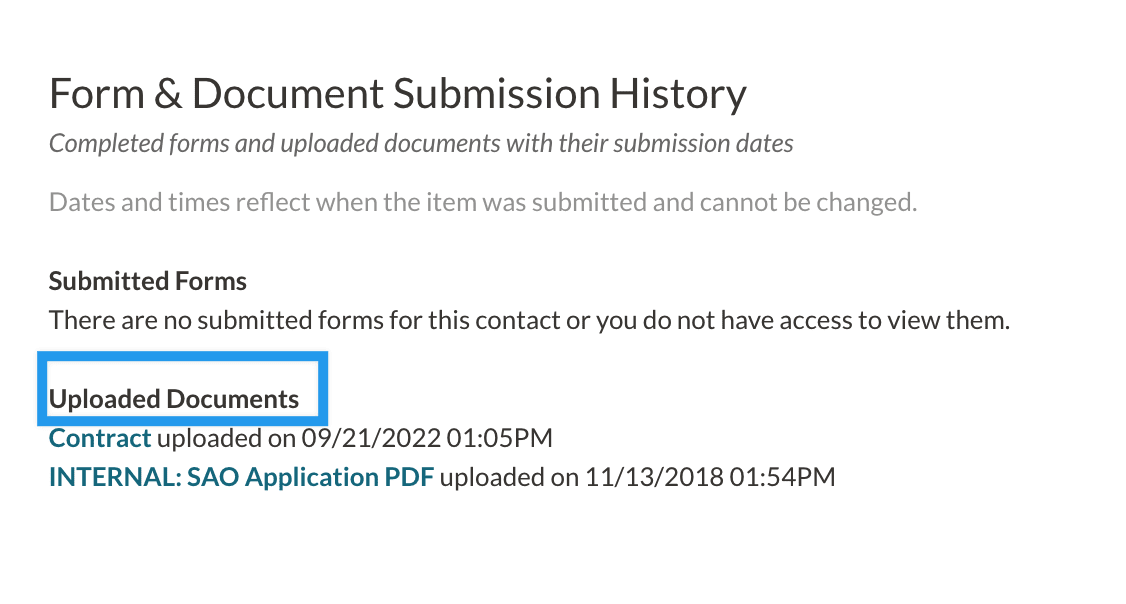
- Under the 'Form & Document Submission History' section on the lower right side of the record within 'Submitted Forms.' Important: This step is required to maintain a copy of the existing contract so you can reference it in the future.
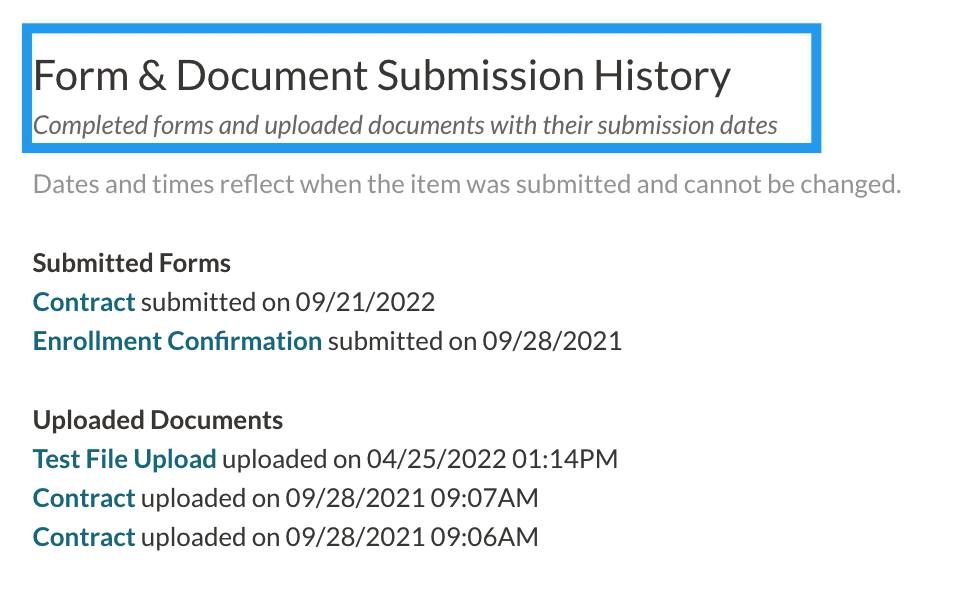
- This will open a new browser window with the pdf of the contract. In this window, your browser will give you an option to download the file. Please note, based on your browser, the download button in the pdf might look different.
- Pro Tip: Rename the file to make it easier to find.
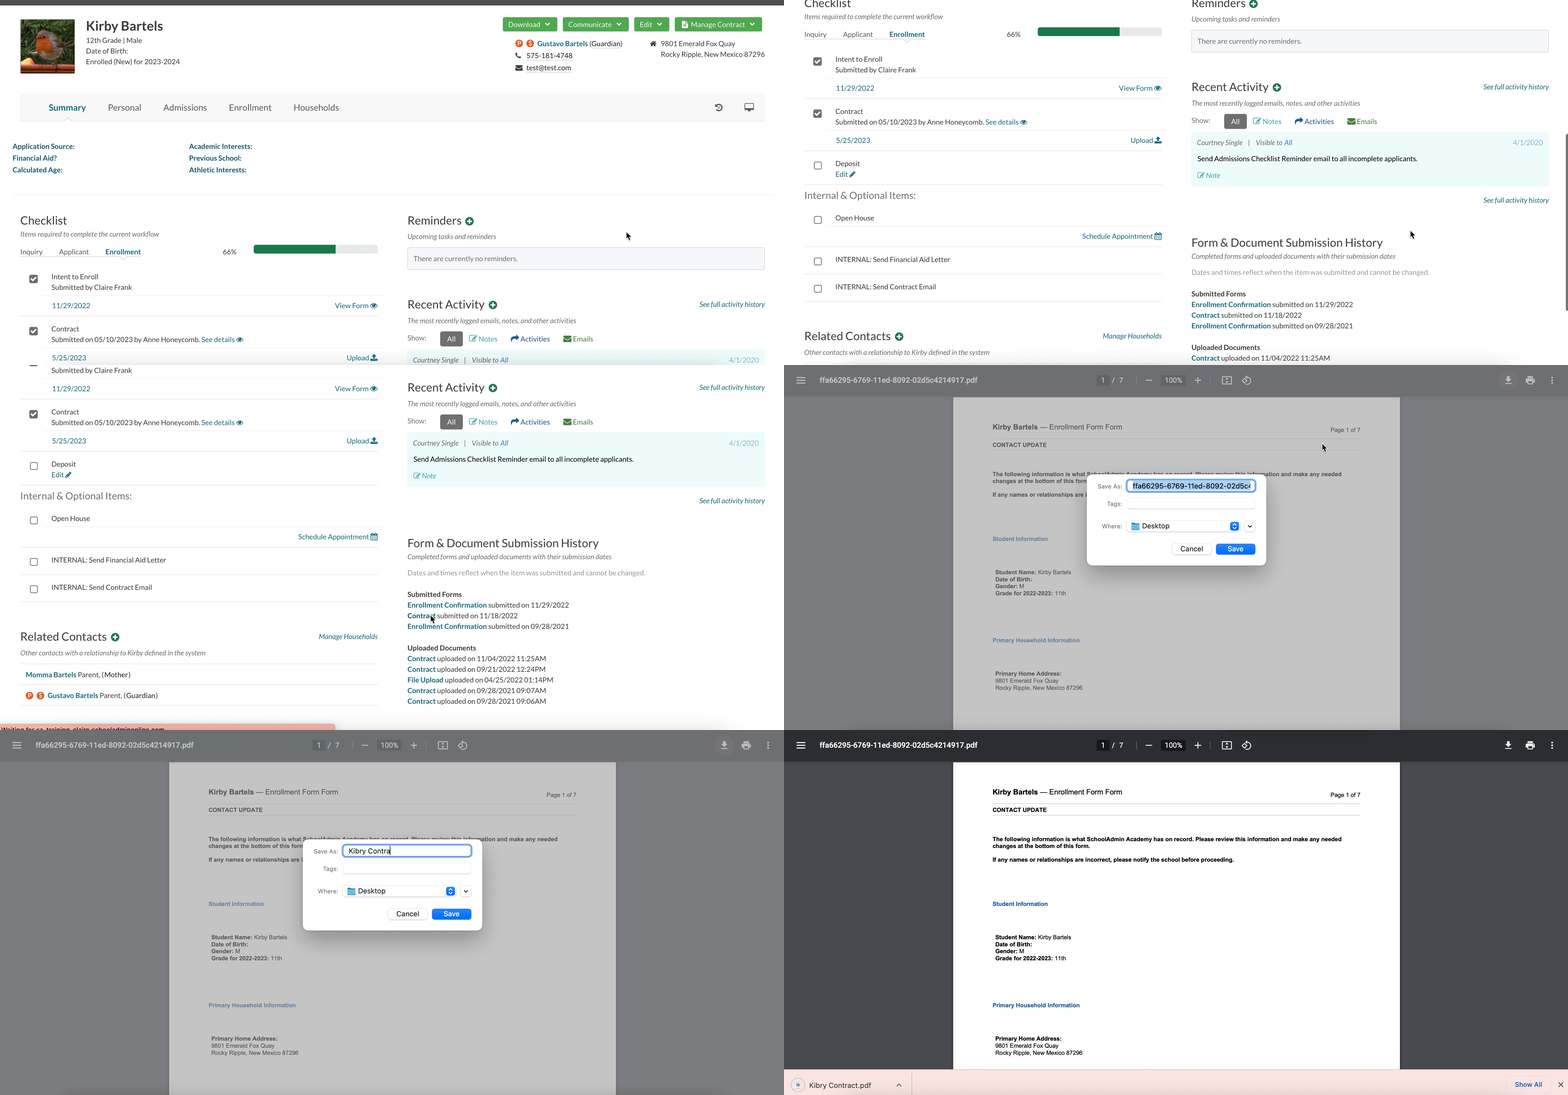
2. Regenerate the student's contract
- Click on 'Manage Contract' -- 'Regenerate Contract' from the menu on the top right side of the student record.
- Follow the prompts in the regeneration window and type the word 'Regenerate' on the final page. Then click 'Submit.' To learn more on contract regeneration, click here. Refresh your page to see the contract status updated to 'Generated'
3. Manually check off the contract checklist item.
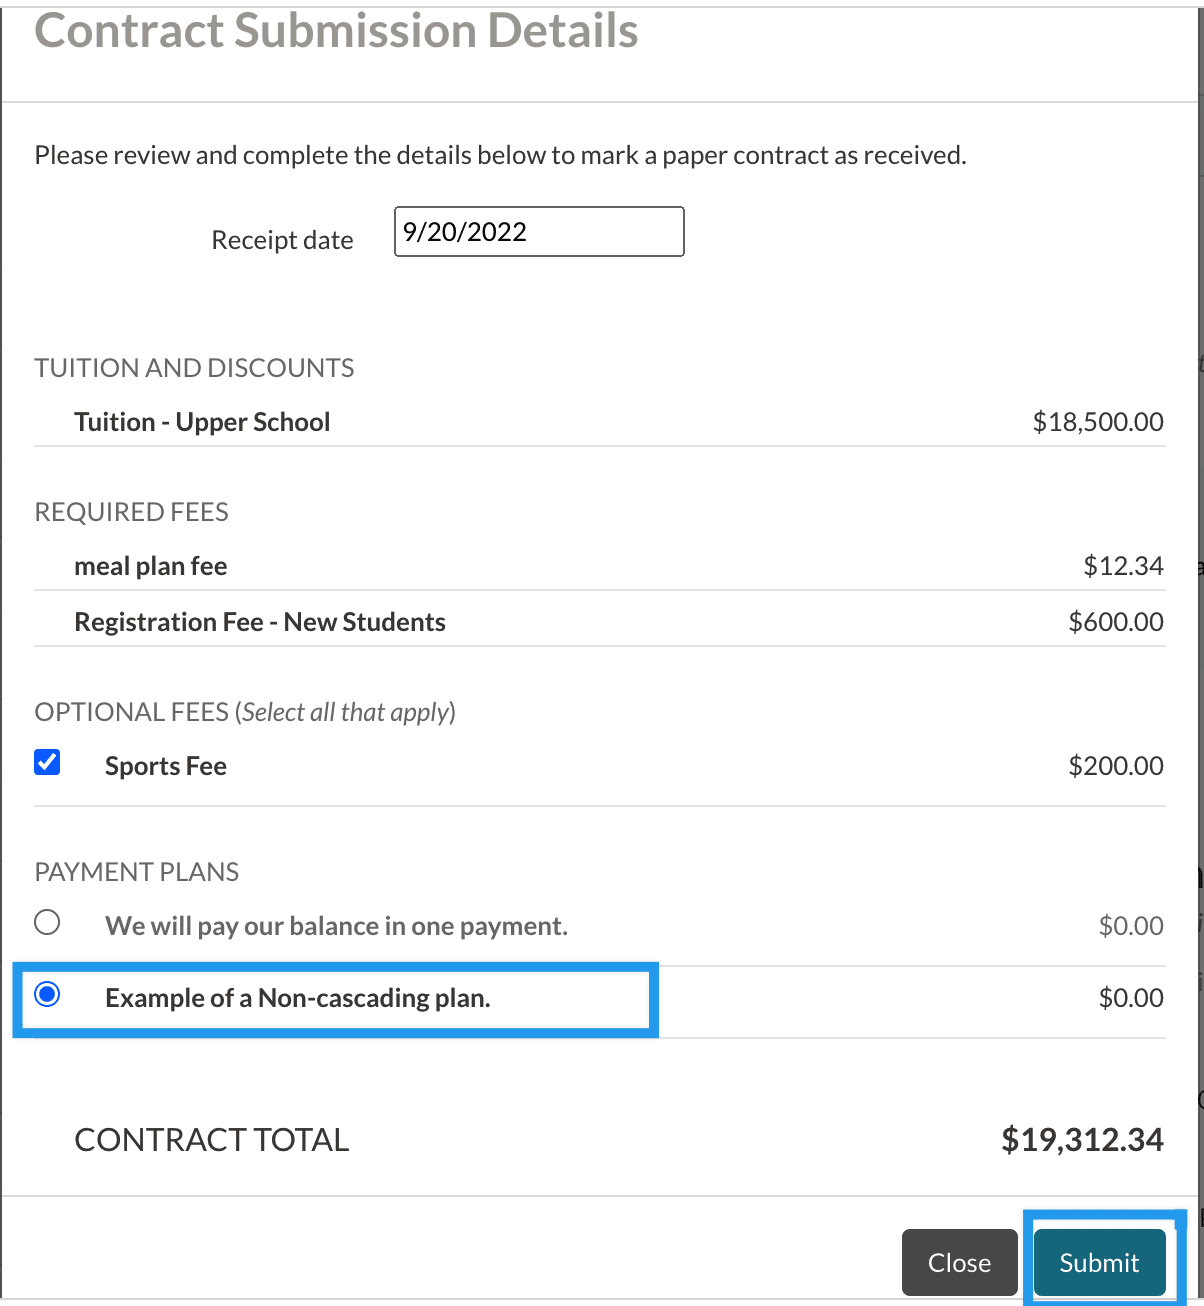
This will display the 'Contract Submission Details' window.
- Set the '
- If you need to include any 'Optional Fees,' be sure to select the checkbox next to the fee.
- Select the non-cascading plan in the Payment Plans section.
- Click 'Submit.'
4. On the student's checklist, select 'Upload' on the contract checklist item.
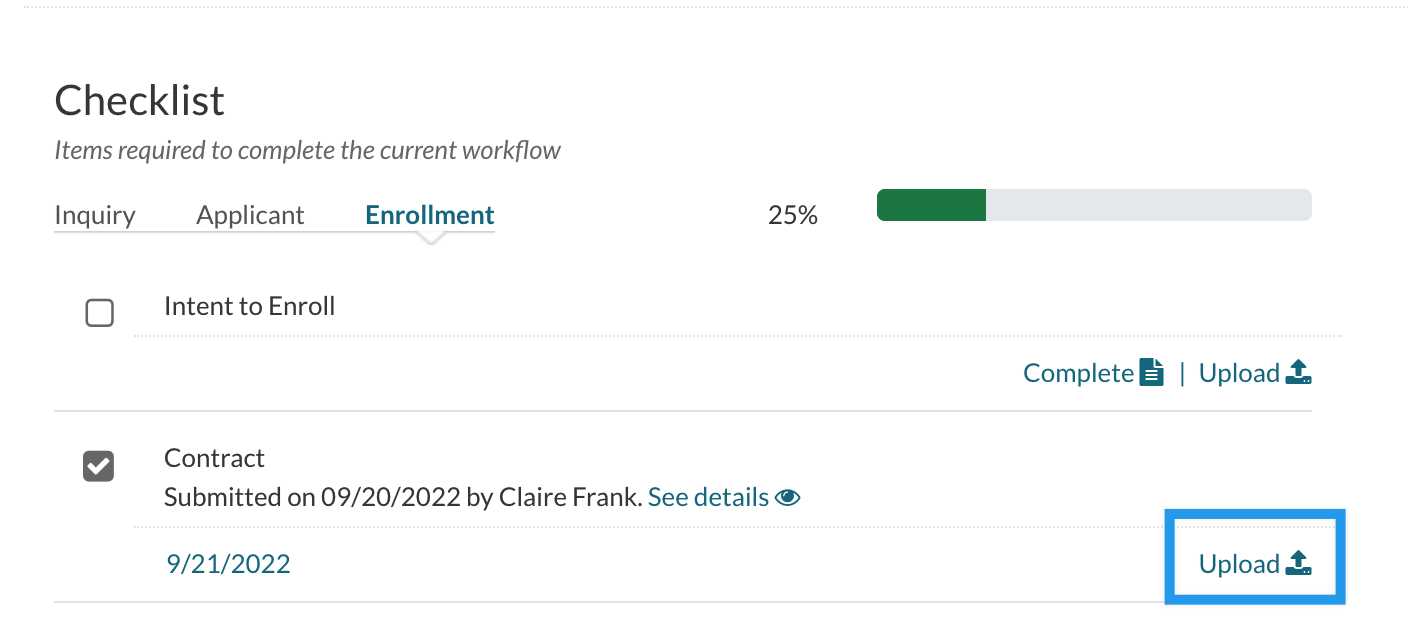
- This will open your computer's file manager. Here, select the downloaded contract and it will upload into the checklist item. The checklist item will appear the same, except that the 'Upload' link will change to a link that says 'Manage Files.'
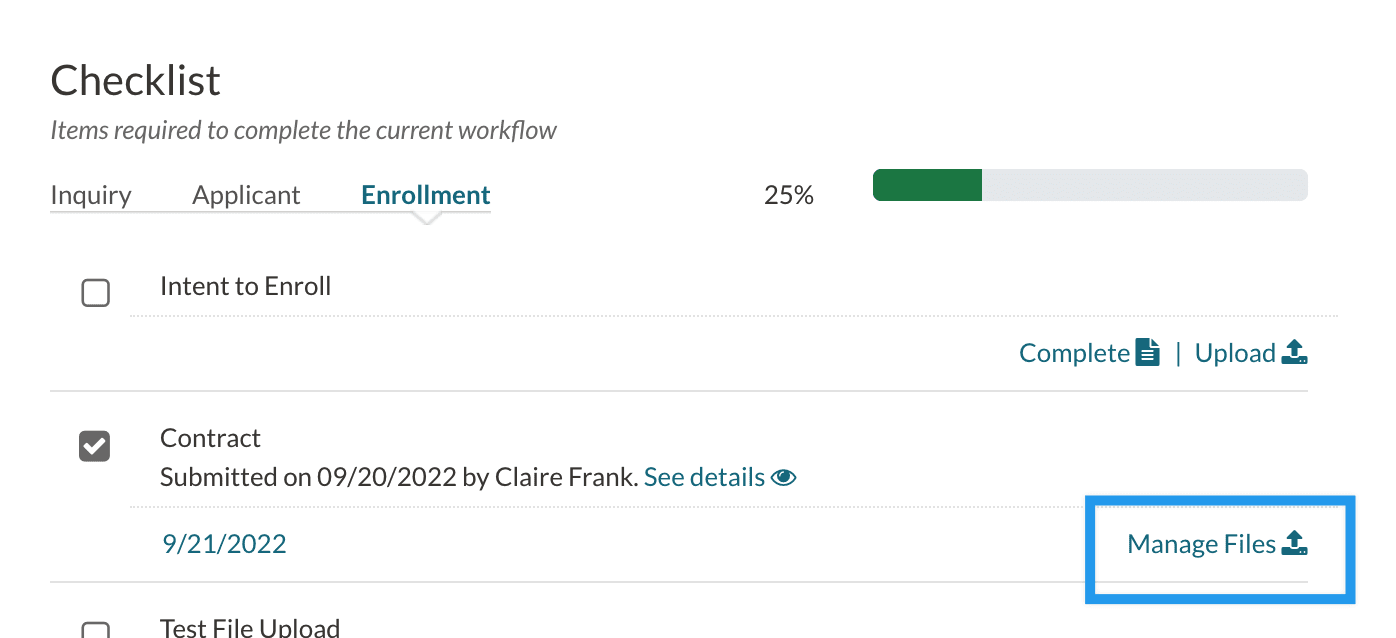
- Your contract will now be listed in the 'Uploaded Documents' section of 'Form & Document Submission History.'
- The updated payment plan schedule will now be displayed within the parent's/guardian's ledgers as per your selection!
Important Things to Remember:
- The contract will only be visible internally. Parents will no longer see the pdf of the contract within the Parent Portal.
- The downloaded contract will not match the updated payment plan.
-
If you are utilizing the Ledger Lock feature and a contract is submitted within the locked period, expect the following:
- Only payment plans that don't have dates within the locked range will appear as options.
- If selecting a pay-at-once option, the charge will post as due on the 1st billing date after the ledger lock period. You can read more about Ledger Lock in our Settings: Billing Setup Page article.

Comments
0 comments
Article is closed for comments.