Overview
During the Billing Process, parents can overpay the amount due in their Billing Management tab, however, they can not allocate what fees their payment is applied to. This is dictated by the billing category order and where there's a remaining balance. This article explains the different overpayment scenarios you may come across, and offers guidance should adjustment to an overpayment be necessary.
--
Overpayment Scenarios
Scenario 1. Overpayment with no future remaining balance
- When a parent/payer makes a payment in excess of the amount due, and there's no remaining balances, the overpayment may be refunded through the school's payment processor. If your school is using Payments, you can read more about how to process a refund here.
Scenario 2. Overpayment with a remaining balance and only one student on the ledger
- When a parent/payer who has only one student in their Billing Ledger makes a payment in excess of their current balance, the overpaid amount will get assigned to the 'Prepaid' billing category.
- Once the next billing cycle arrives, the ledger will auto-adjust and disperse the overpaid amount according to the upcoming amount owed on the ledger as well as the order set within the school's billing category page. IMPORTANT: If you need to make adjustments to the allocation of an overpayment, please read how to do so here.
Scenario 3. Overpayment with a remaining balance and multiple students on the ledger
- When a parent/payer with multiple students makes a payment in excess of their current balance, the overpaid amount will get assigned to the 'Prepaid' billing category.
- Once the next billing cycle arrives, the payment will be evenly distributed across any student balance according to the upcoming amount owed on the ledger as well as the order set within the school's billing category page. IMPORTANT: If you need to make adjustments to the allocation of an overpayment such as redistributing to other students or to different billing categories, please read below:
Adjusting a payment to go to a different billing category and/or student
When making a ledger adjustment, you should always match the type (charge, credit or payment). Therefore, when re-allocating a payment to a different billing category, you'll be adding a negative payment (to cancel out the original one) followed by a positive payment (to apply the amount to the new category). This can be done all in a single step with a $0 payment entry as seen below.
1. Select the 'Add Payment' button.
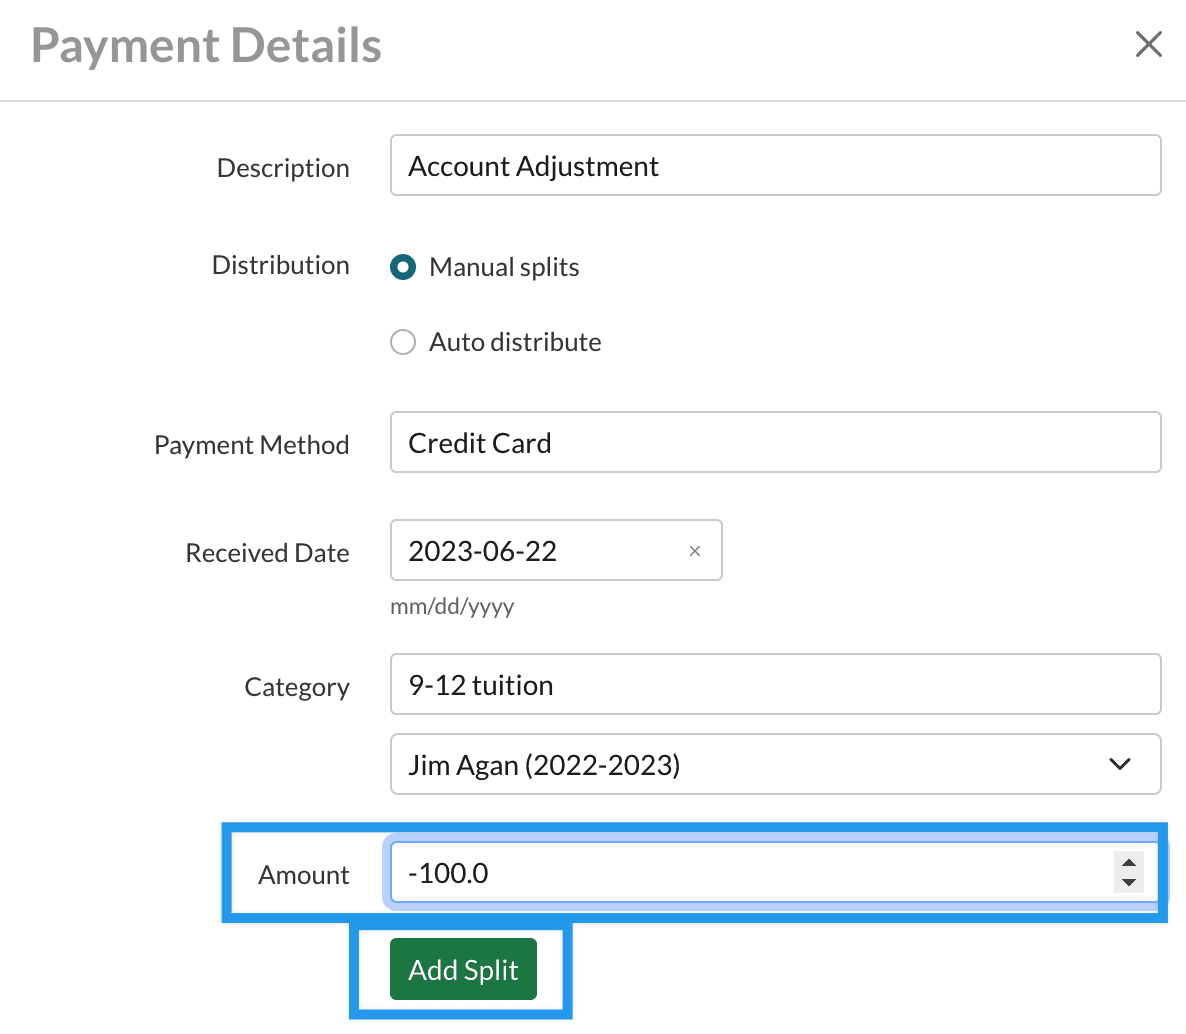
2. Within the 'Payment Details' window, you'll be asked to fill out the following information:
- Description: Add a description of the payment adjustment.
- Distribution > Auto Distribute: In this scenario, leave this box unchecked.
- Payment Method: Select the Payment Method used in the original payment.
- Received Date: Enter the date the payment was received.
- Category & Contact: Select the initial billing category to which the payment was applied and the student/term that the payment applies to.
- Amount {IMPORTANT}: Enter the amount you are moving as a negative number as shown below.
3. Select the 'Add Split button.'
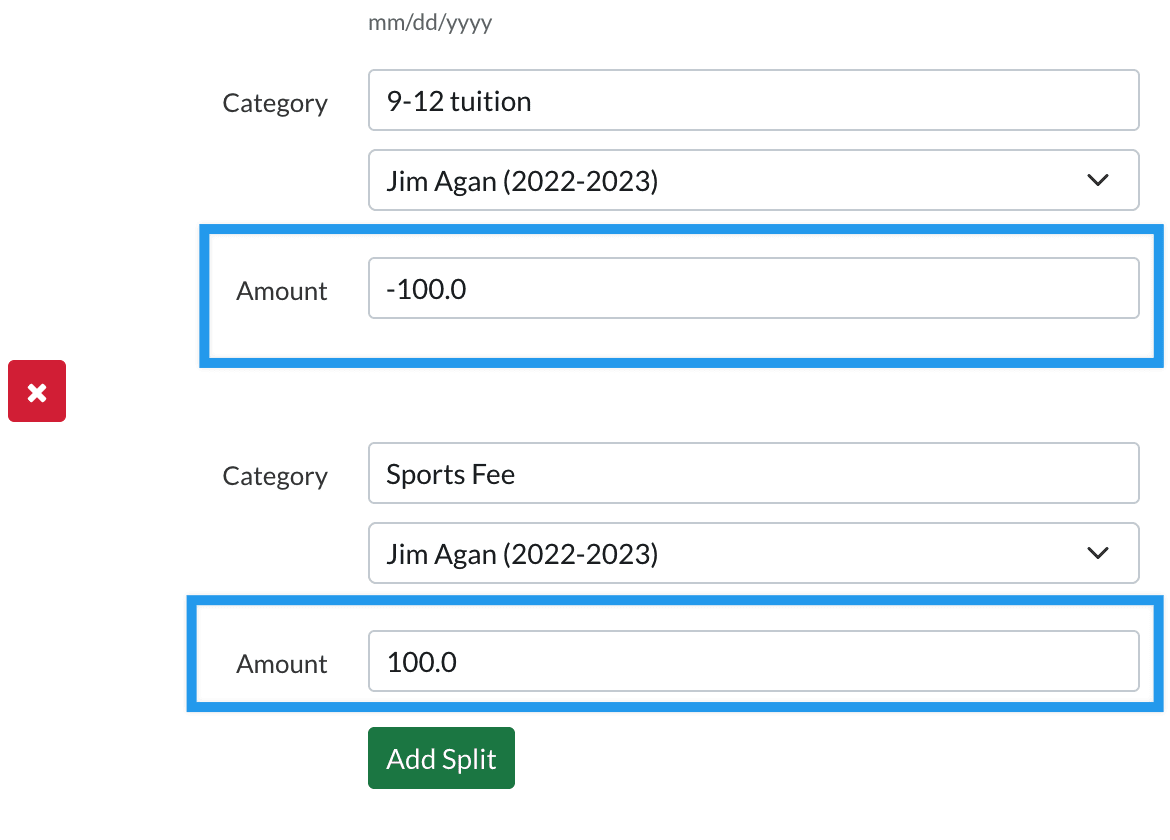
4. Within the split section, you'll be asked to fill out the following:
- Category: Select the billing category that you are moving the payment to.
- Select the student/term that the payment applies to.
- Amount - IMPORTANT: Enter the amount you are moving as a positive number as shown below.
Important Note: If you are reallocating a payment to a different student, this step is where you'd select the other student's name/term from the dropdown that appears under the category.
5. Set the posting date to 'At once' and, in the Date box, enter the date of the original payment.
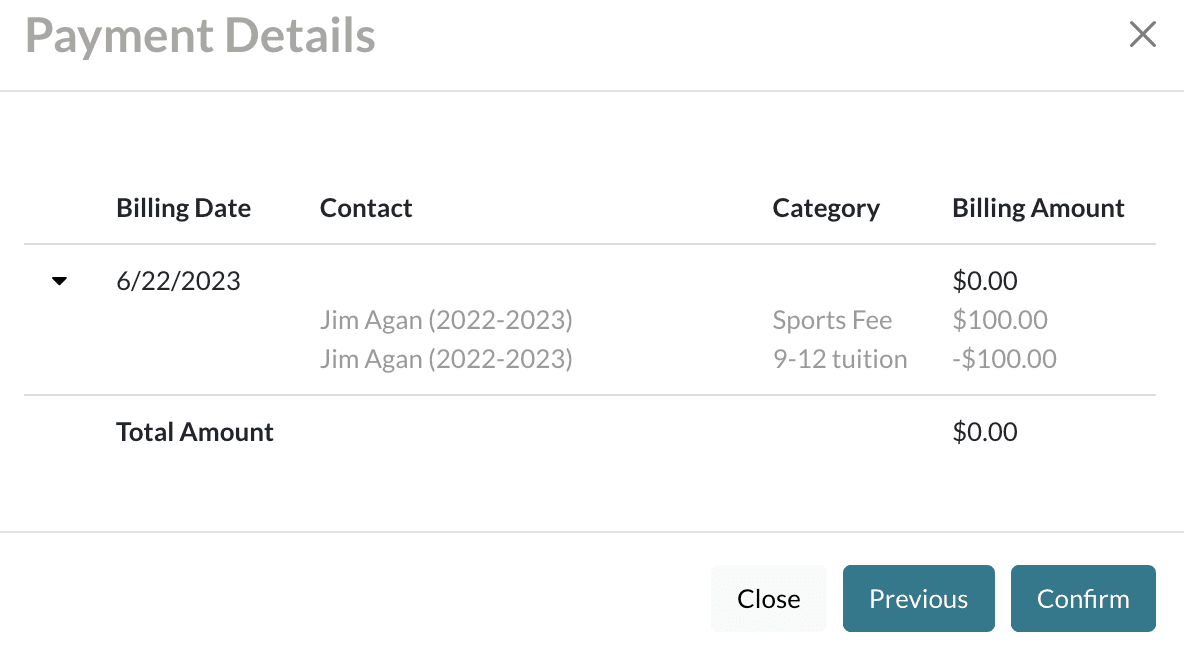
6. Select 'Preview' to view the update in the Payment Details window. If you click on the small triangle to the left of the date, you will see a breakdown of the adjustment. At the bottom of the pop-up, you have the option to select the following:
- Close - which cancels the adjustment.
- Previous - which takes you back to the previous screen in the pop-up.
- Confirm - which closes the box and saves the adjustment to the ledger.
Example of the Payment Details window with the triangle expanded, showing the breakdown:
7. Select 'Confirm' to approve the adjustment.
The expected ledger view will show a $0 payment as you are simply moving an existing payment from one place to another. It will look something like this:


Comments
0 comments
Article is closed for comments.