
Billing Categories (Settings > Financial > Billing Categories) classify all charges, credits, and payments in your ledger. They live inside Billing Category Groups, which act like folders: credit categories can only apply to charges within the same group. The order of categories controls how payments and discounts are allocated, so setup decisions here ripple into every billing report.
💡Quick Answers
- What's the difference between a Group and a Category? A Group is a folder that holds related Categories. Credits inside a group can only apply to charges inside the same group. To add a group: click the green + Add New Billing Category Group. To add a category: expand a group with Edit and click Add a New Charge Category or Add a New Credit Category.
- Why does category order matter so much? Payments and discounts are applied top-down within each term. A parent paying a partial amount has it applied to the oldest term's categories first, in the order listed. Drag-and-drop categories using the lines icon to set precedence.
- What are the key group-level settings? Apply to Student Balance (whether charges in this group hit the student balance, defaults on; turn off for things like late fees that go to the payer). Excluded from Automatic Overpayment Logic (overpayments skip this category). View Edit History (audit log).
- What are the key category-level settings? Revenue Recognition Start/End Month and Allocation Rule (drive the Revenue Recognition Report) and View Edit History.
- Can I move a category to a different group? Yes. Click the Move icon next to the category and pick a new group from the dropdown. You may have to move credit categories first if you're emptying a group of credits before moving a charge.
- What happens when I make a category or group inactive? Previous ledger items remain accessible, but the category is removed from quick-action modals and filters, and contracts referencing inactive categories cannot be submitted. Reactivation is possible if needed.
In this article
- Create a new Billing Category Group
- Creating a new Billing Category
- Making Categories or Groups Inactive
- How Payments are applied
Please read our Billing Categories Best Practices article as well
Please be sure to also read the Billing Category Setup Best Practices article which provides helpful information on understanding how to set up your billing categories to ensure the most accurate and streamlined reporting.
Create a New Billing Category Group
To add a new billing category group, click on the green plus sign: Add New Billing Category Group.
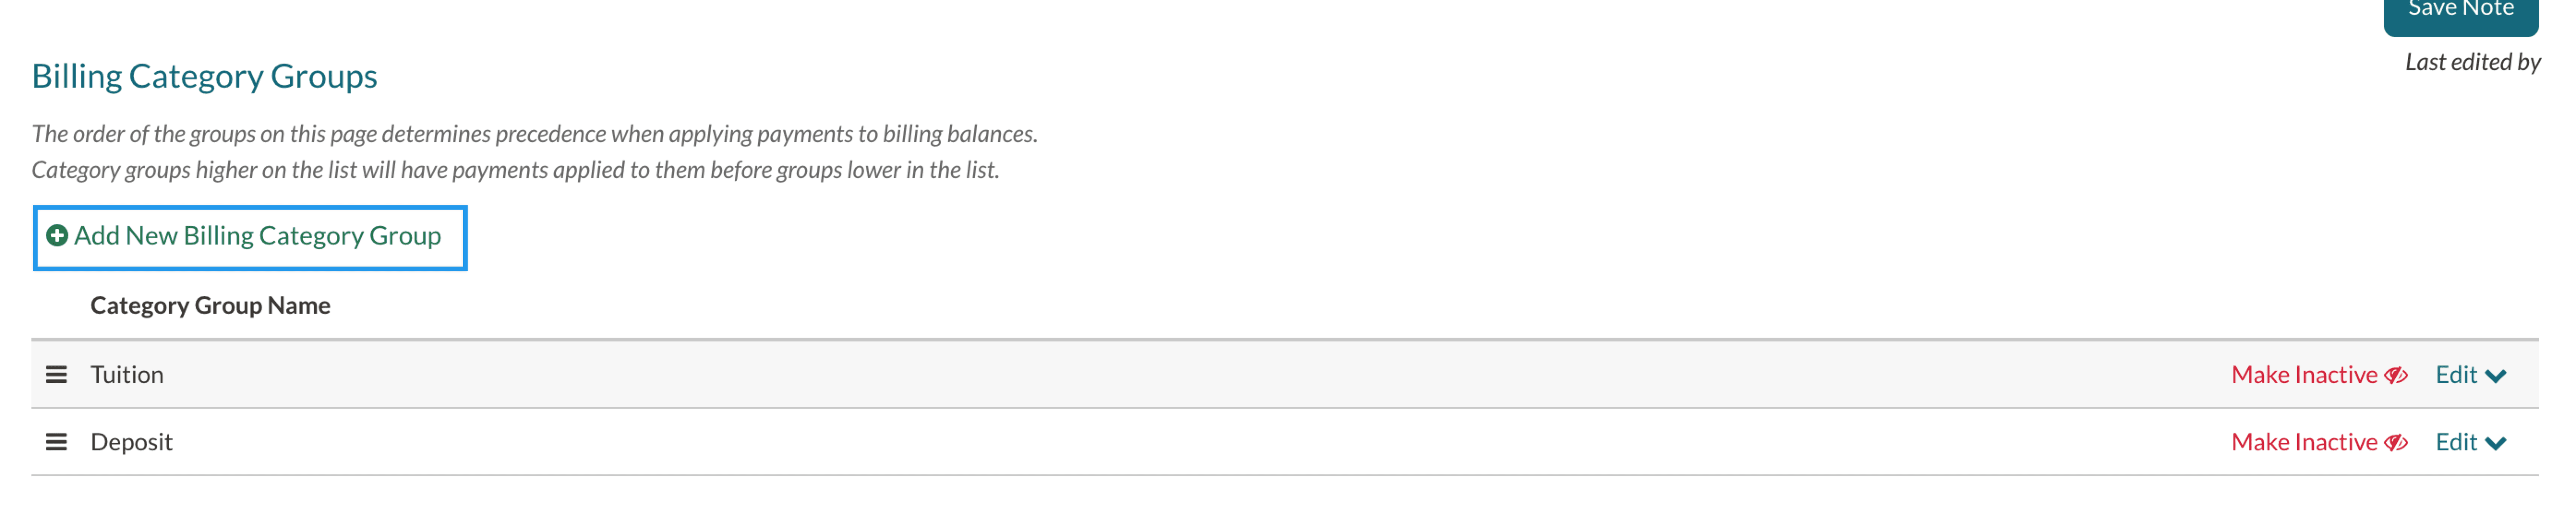
Remember, Billing Category Groups are like folders that can hold and organize multiple categories of charges and credits. Therefore, adding a group is not the same as adding a new category. You can add categories within your groups.
Also good to know: Categories within the same group can interact which means that credit categories can only be applied to charge categories in that same group.
Once you select the button that allows you to add a new group, you'll see a few text boxes open below your other groups. In the first box, enter the name of the group. The second box is an optional space that allows you to enter an account number for the group.
Group-level settings and options
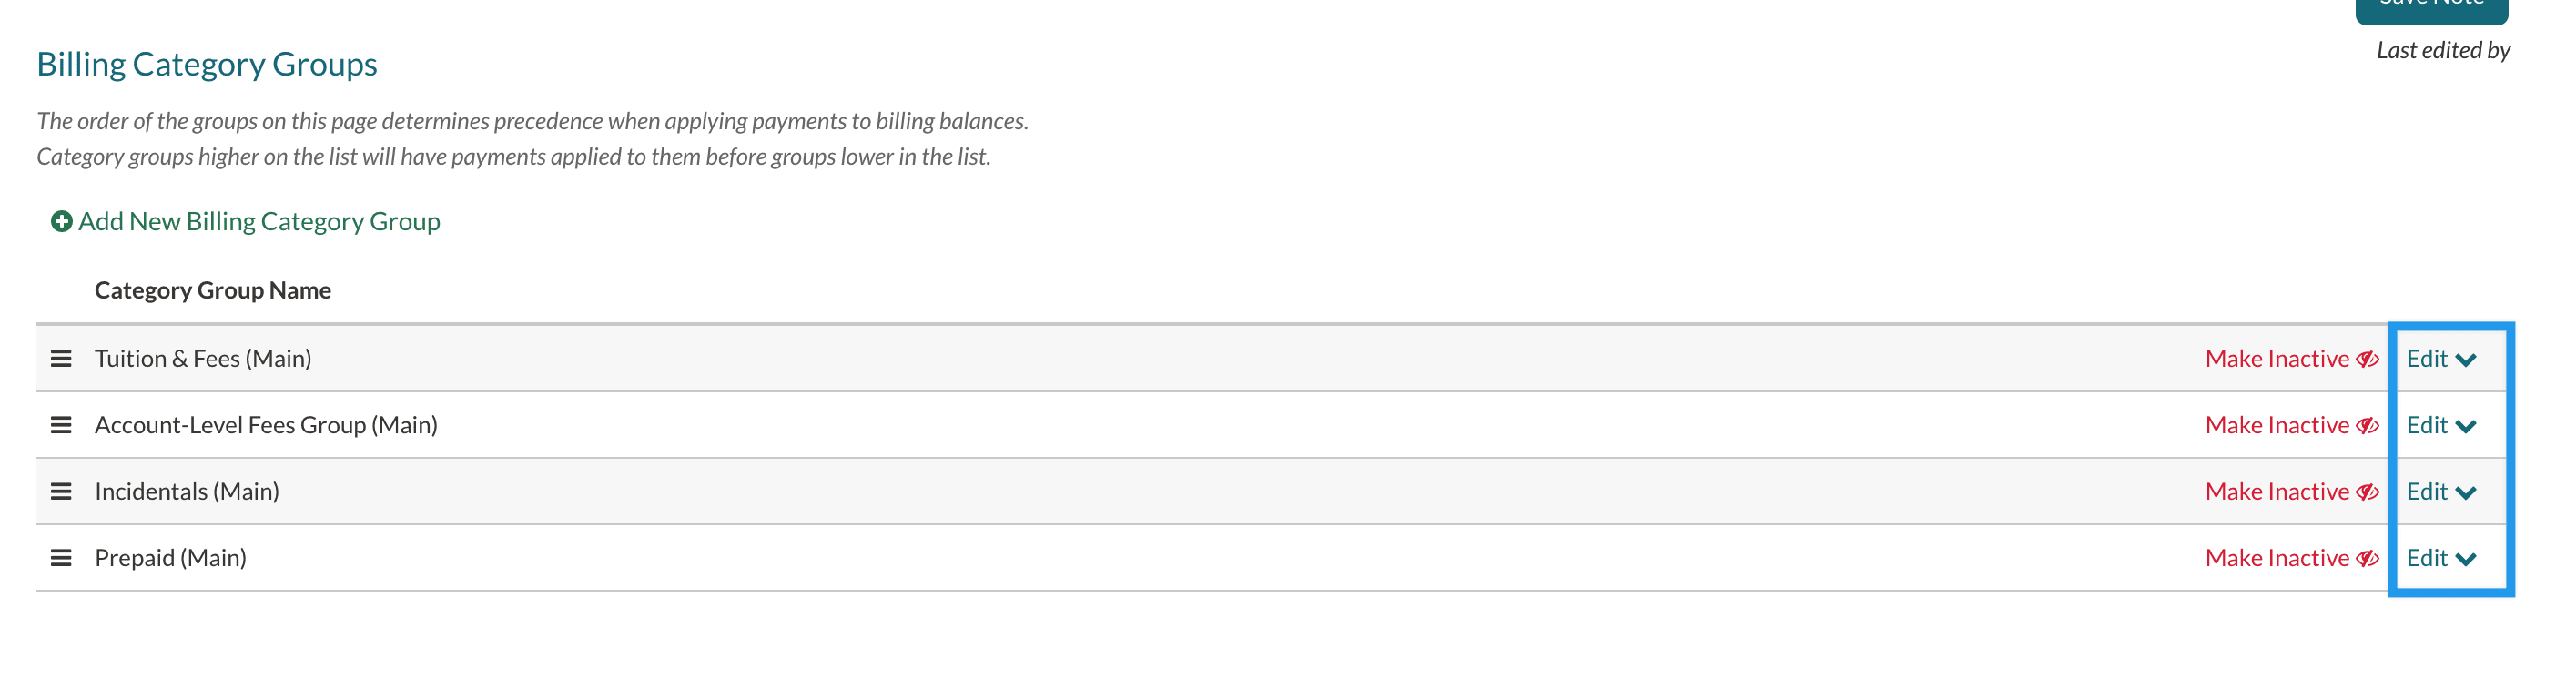
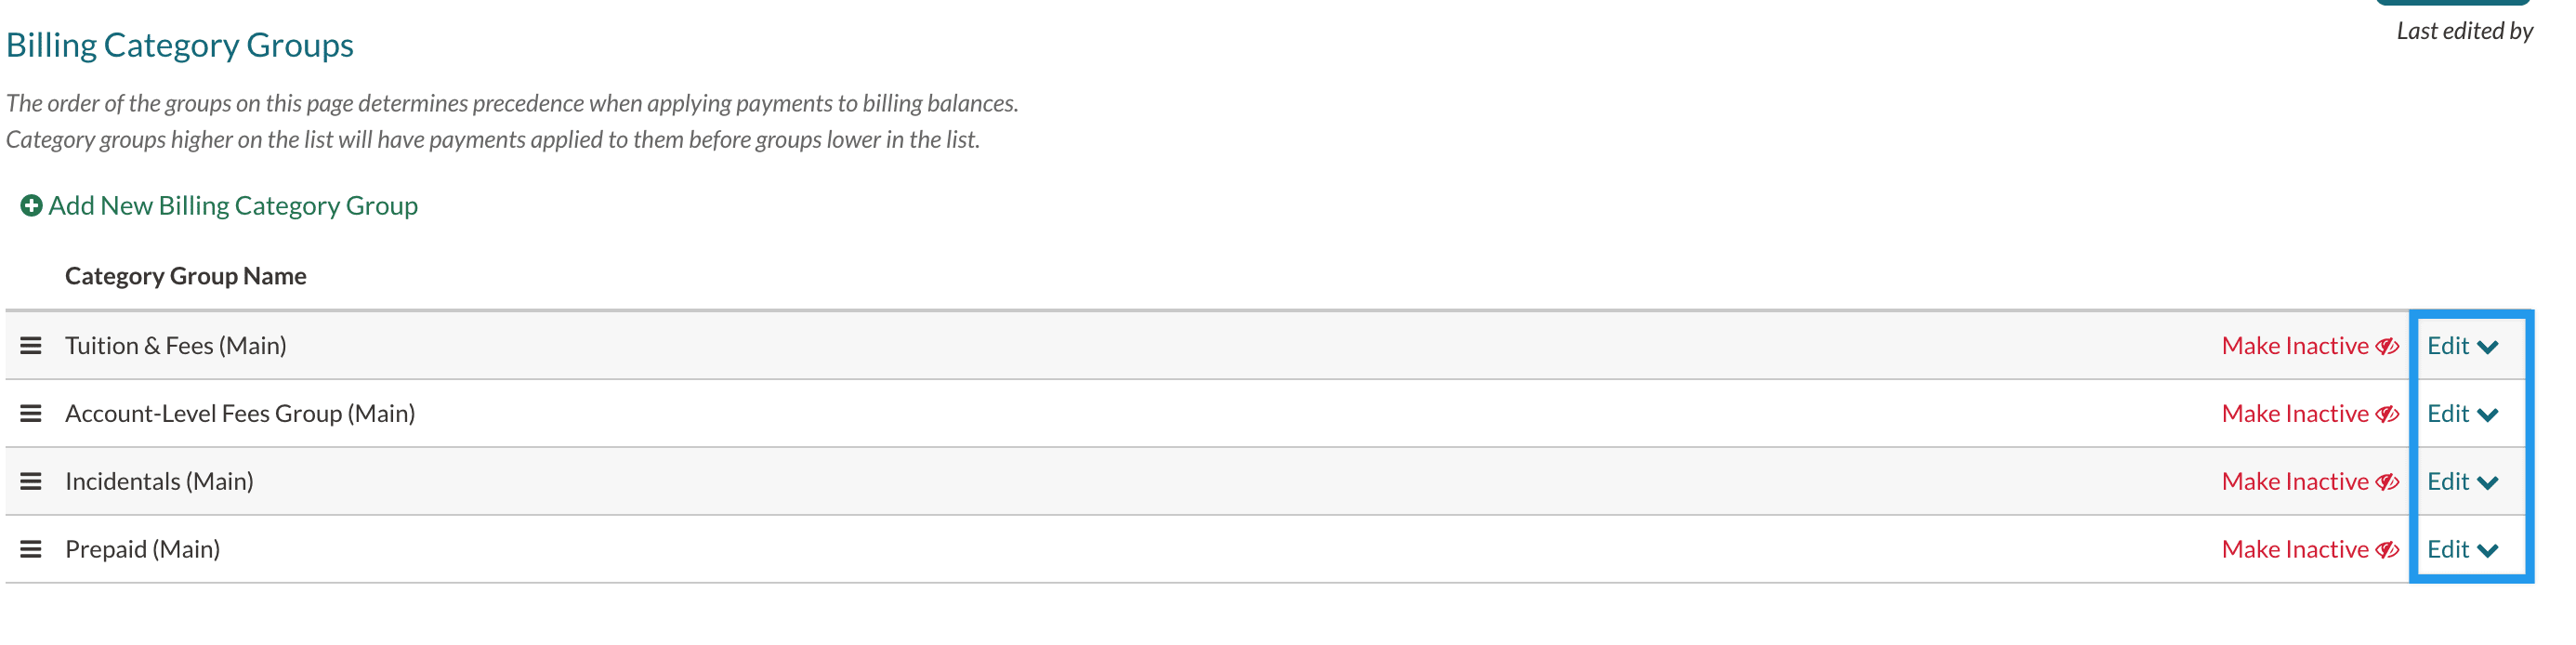
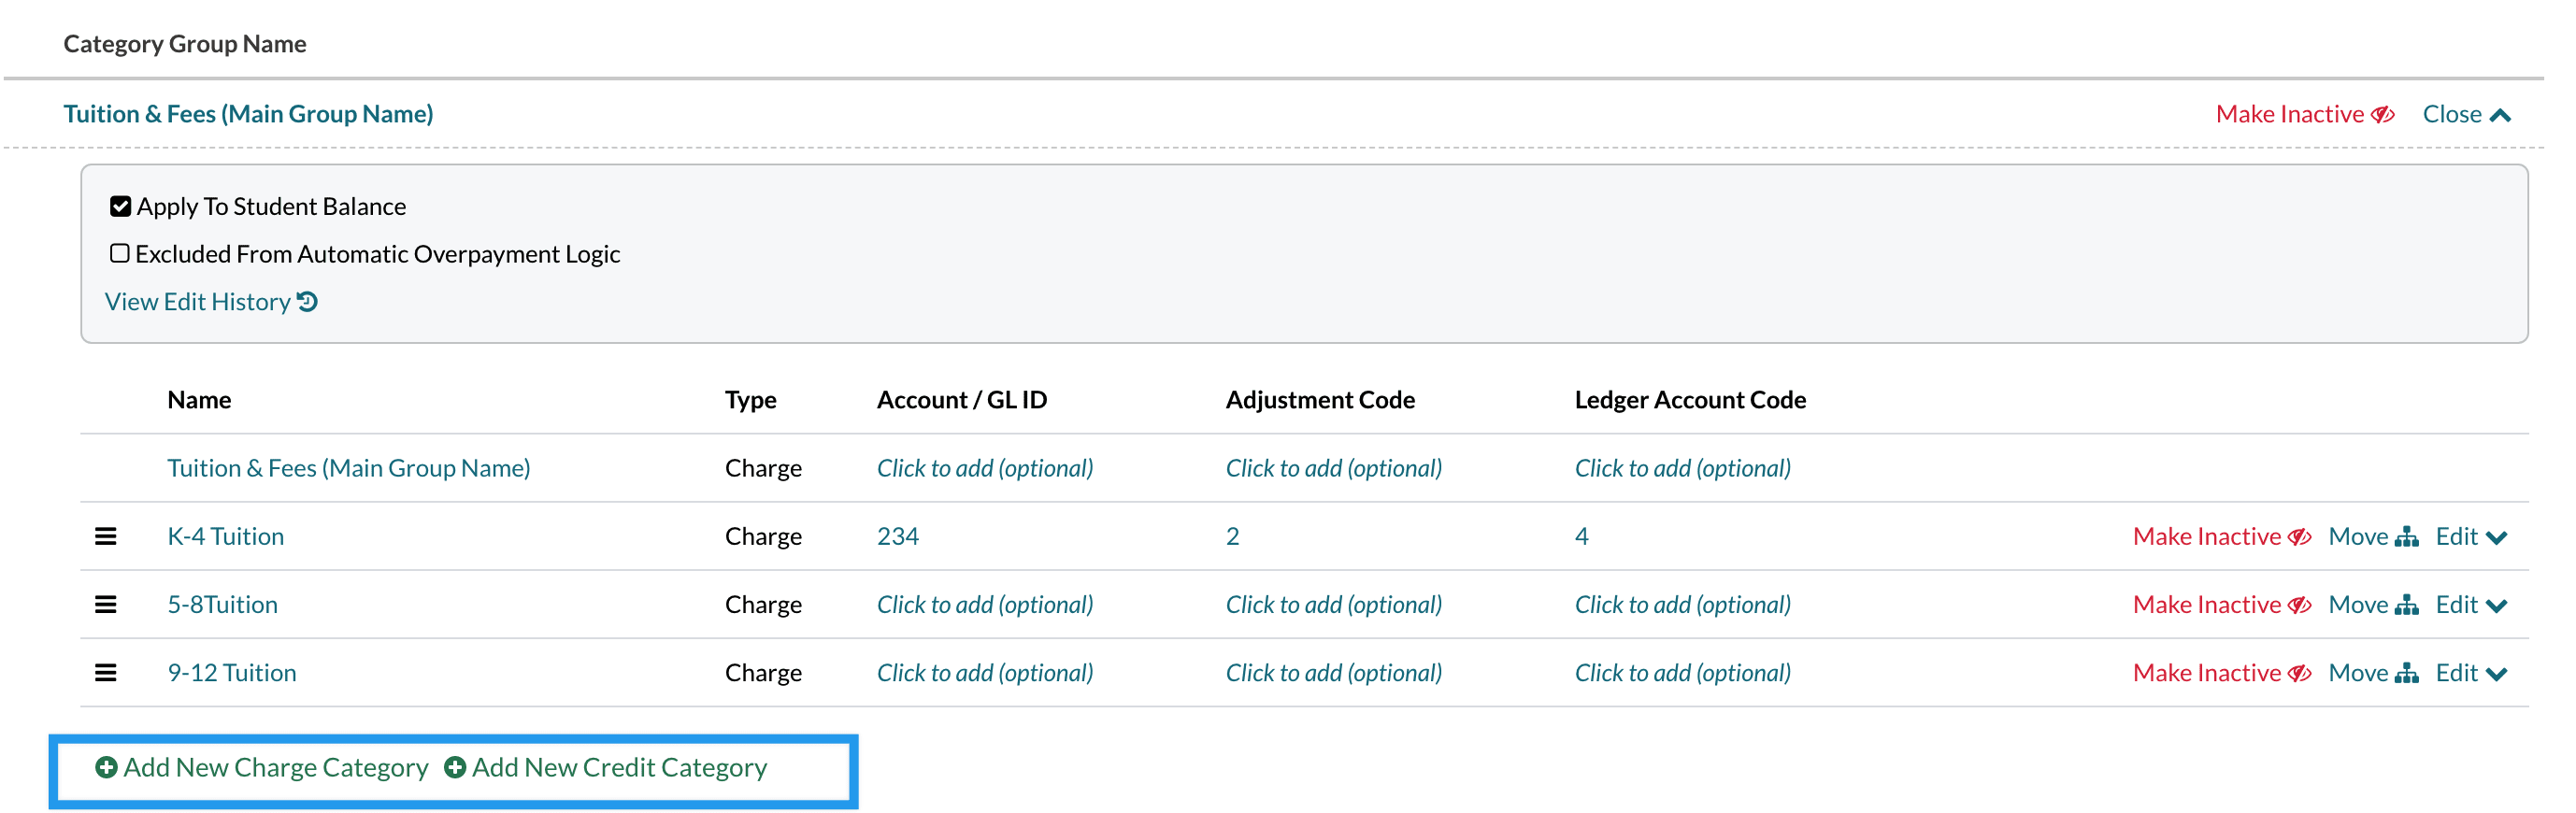
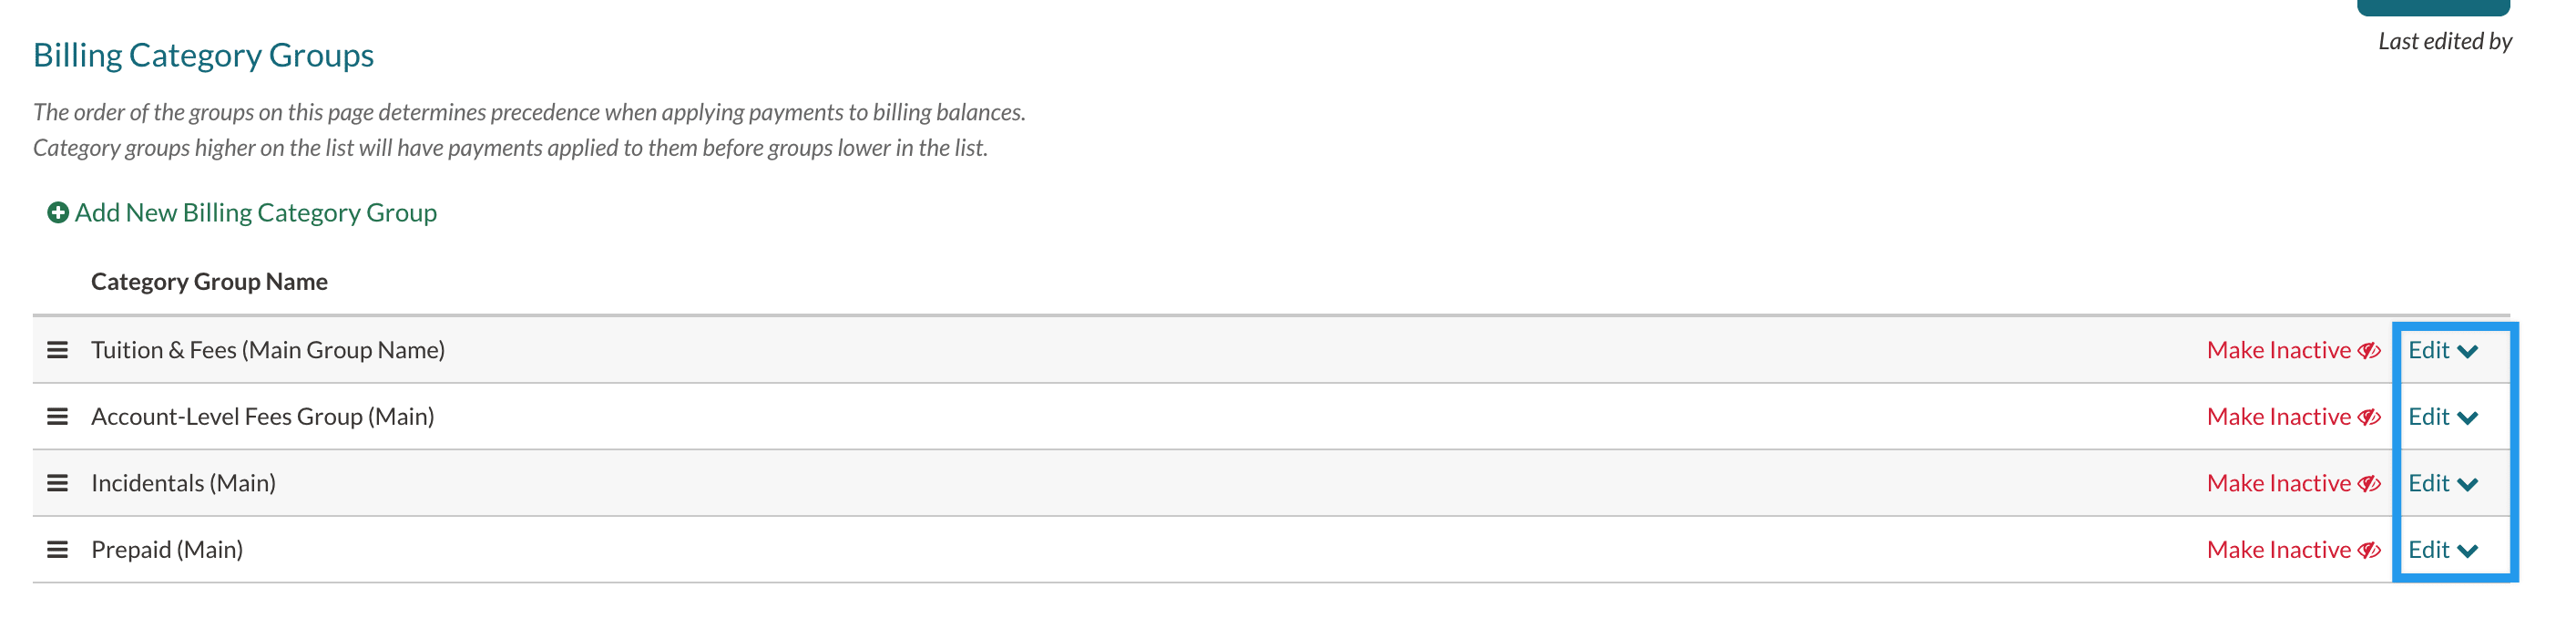
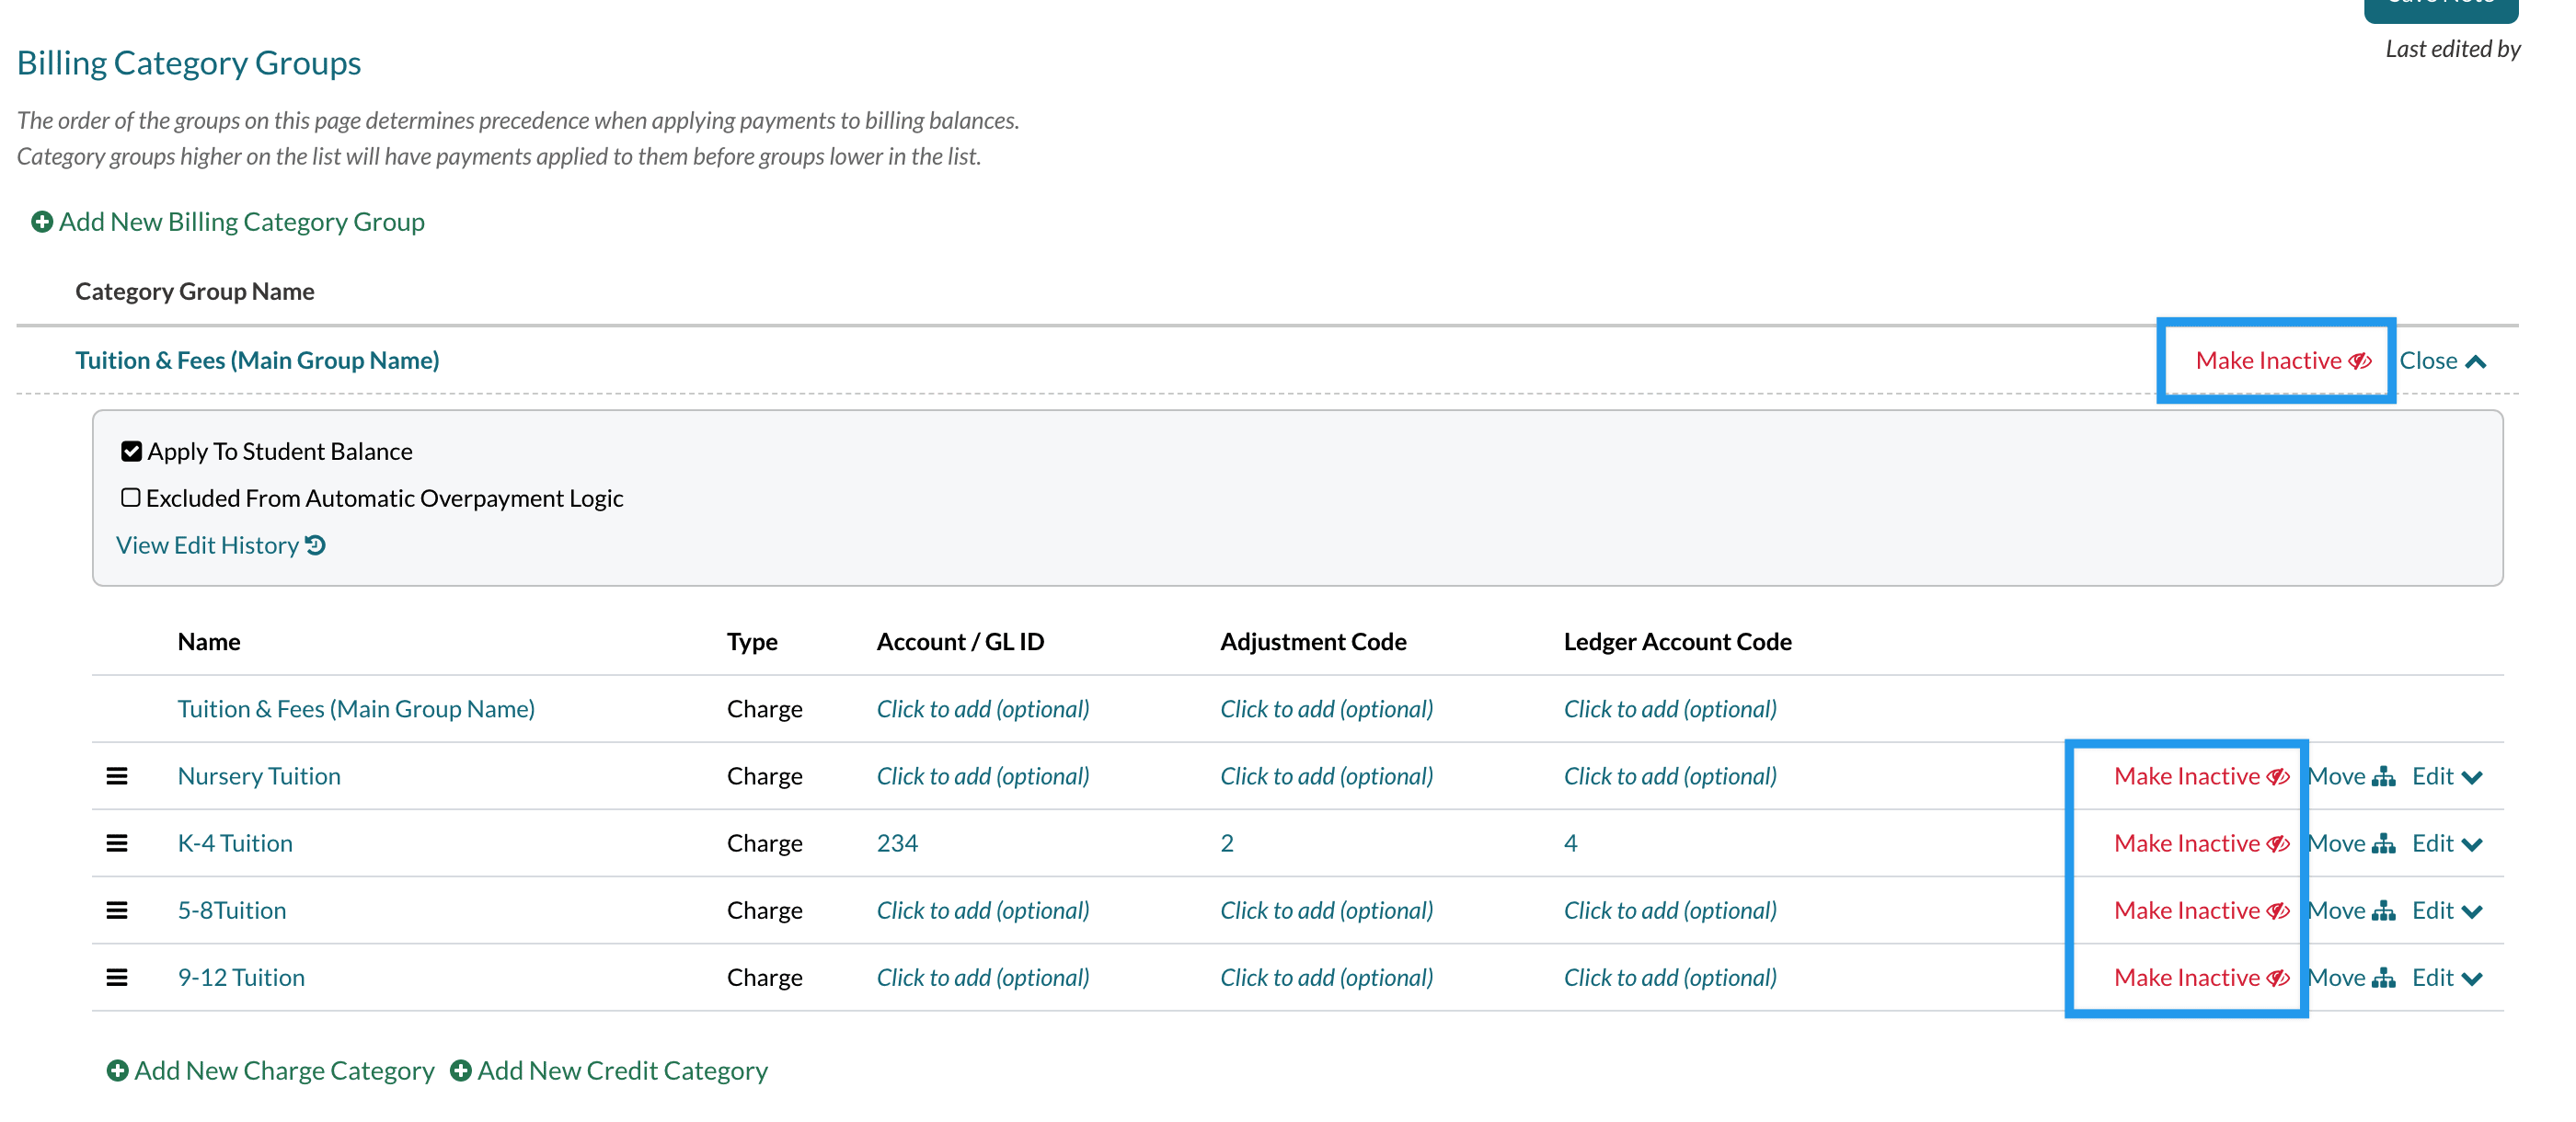
Once you've added a new group, you will have access to adjust a few additional options at the group level. When you select the Edit option next to any of the groups (first image below), the group expands revealing the categories within the group and additional settings for the group (second image below.)
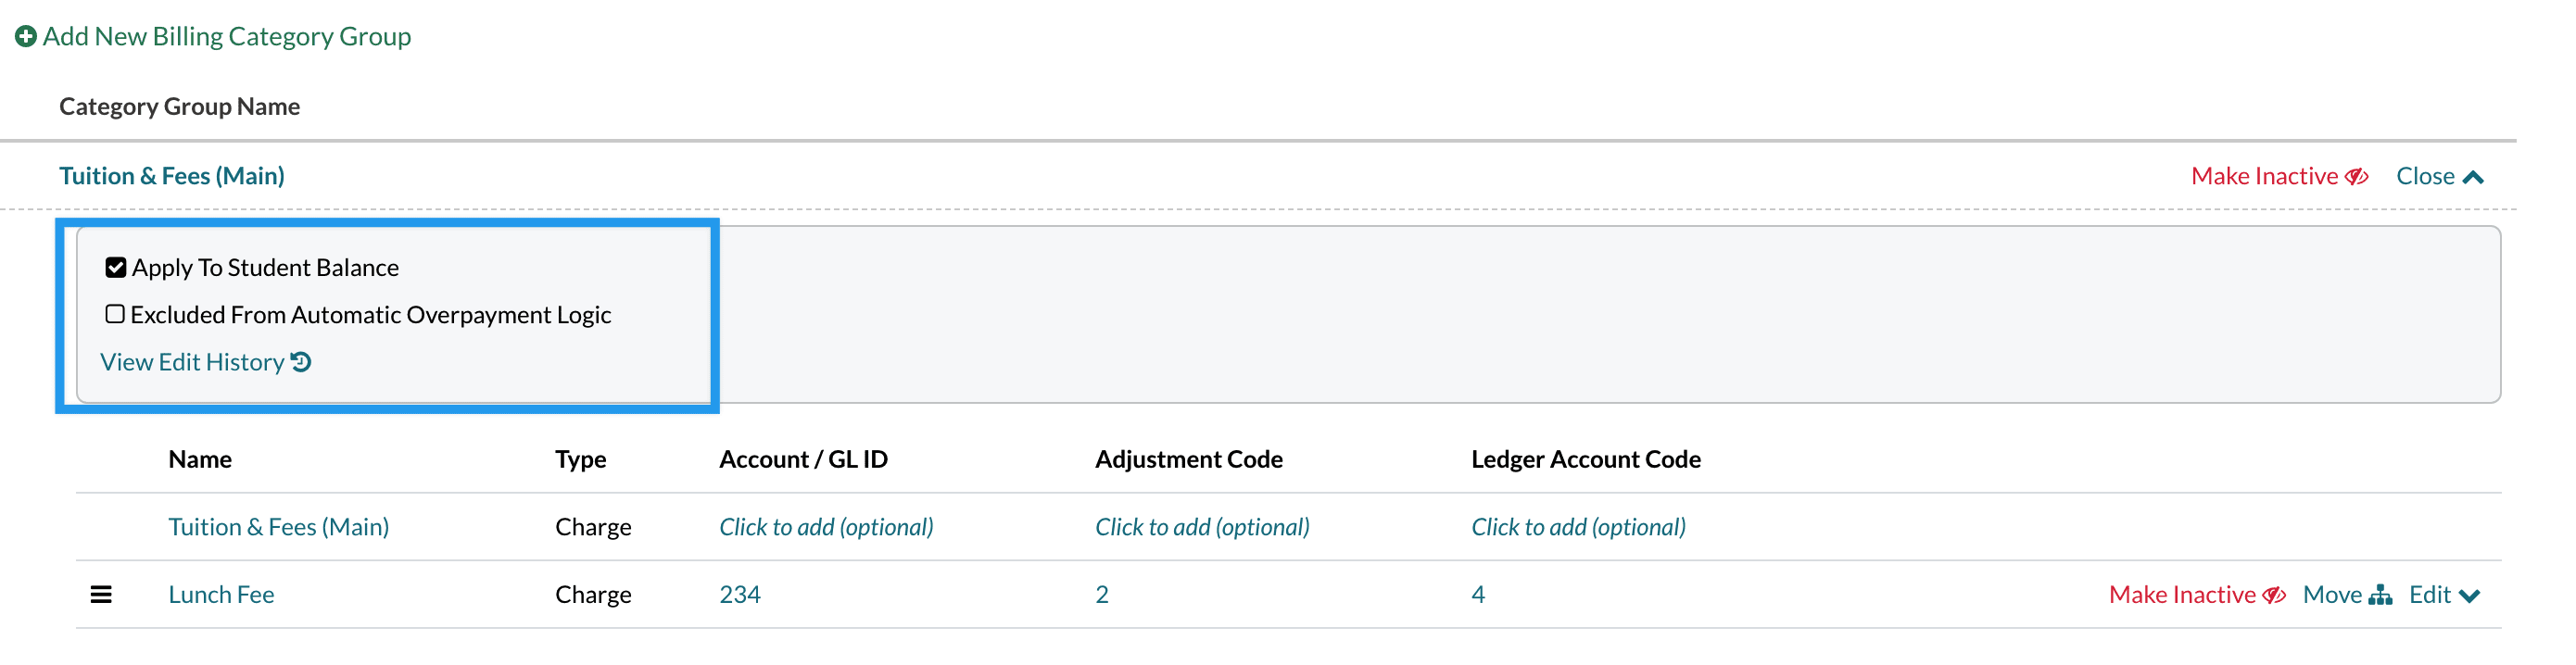
Apply to Student Balance
Should the billing categories within this group get applied to the student balance?
Categories that apply to a student balance describe charges and credits that will be applied to a student, such as Tuition, Trip Fees, etc. This is the default for all billing categories.
An example of a category that does not apply to a student is a late fee, which is assessed to individual payers. Late fees are optional as part of your billing setup and will not be assigned by default. They're also dependent upon your grace period if one is set.
Excluded from Automatic Overpayment Logic
In the case that a parent was to pay more than they owe, do you want to prevent the surplus from being applied to these categories?
When a parent/payer overpays, the additional amount would be applied based on the next outstanding ledger items, however, it would ignore any billing categories with this Excluded flag set.
View Edit History
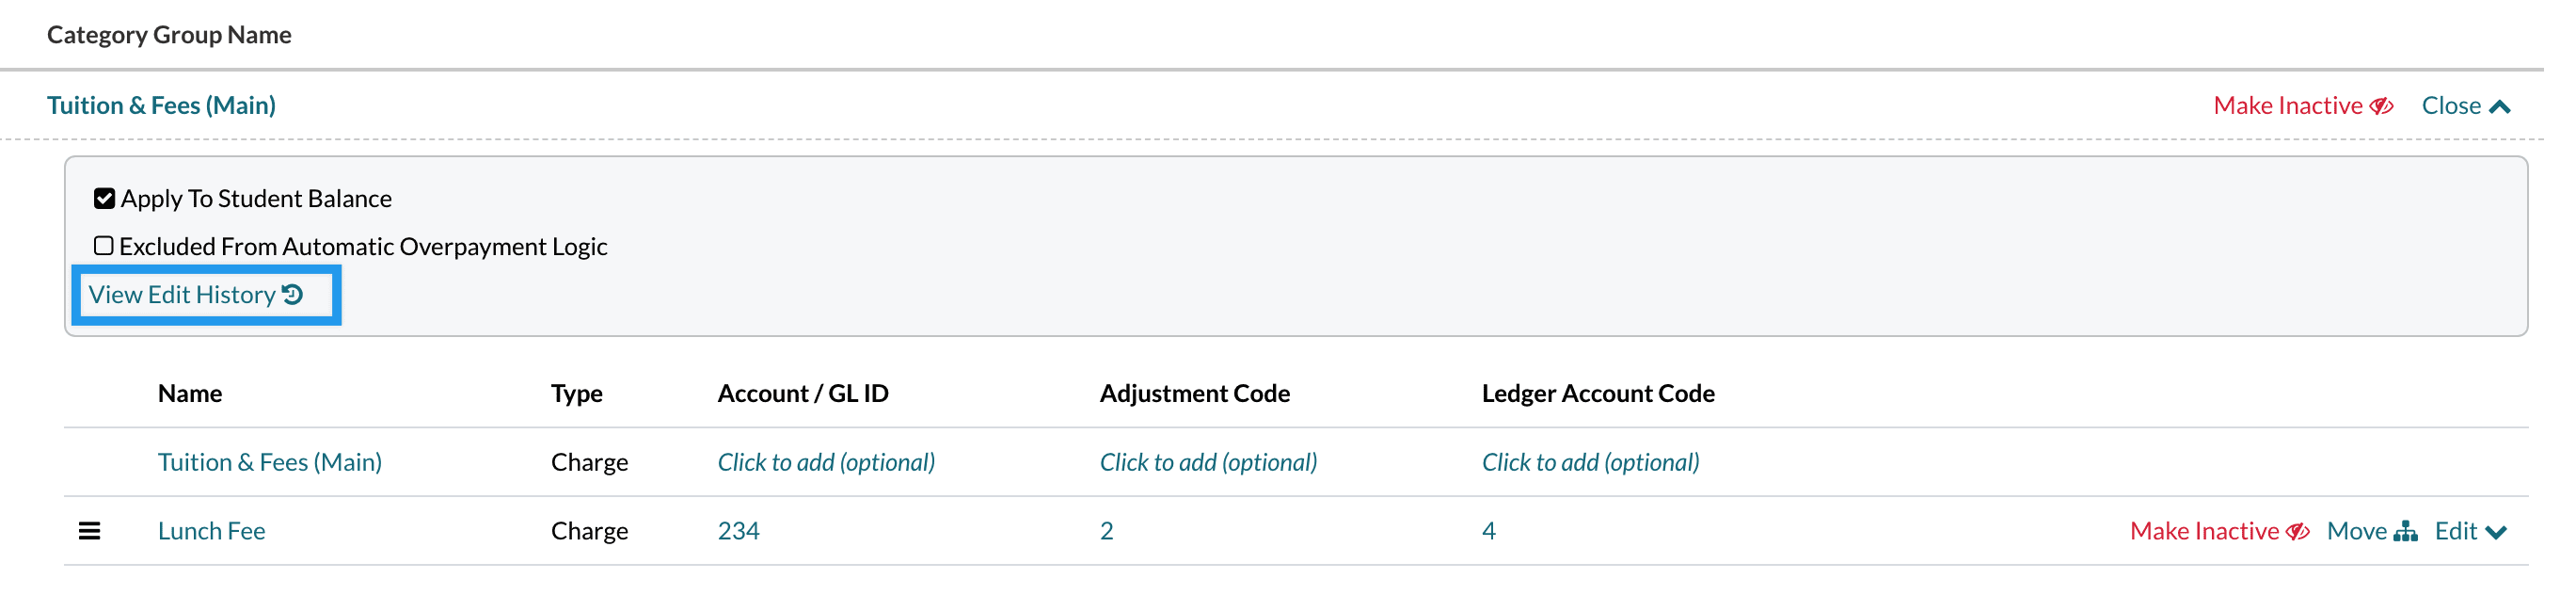
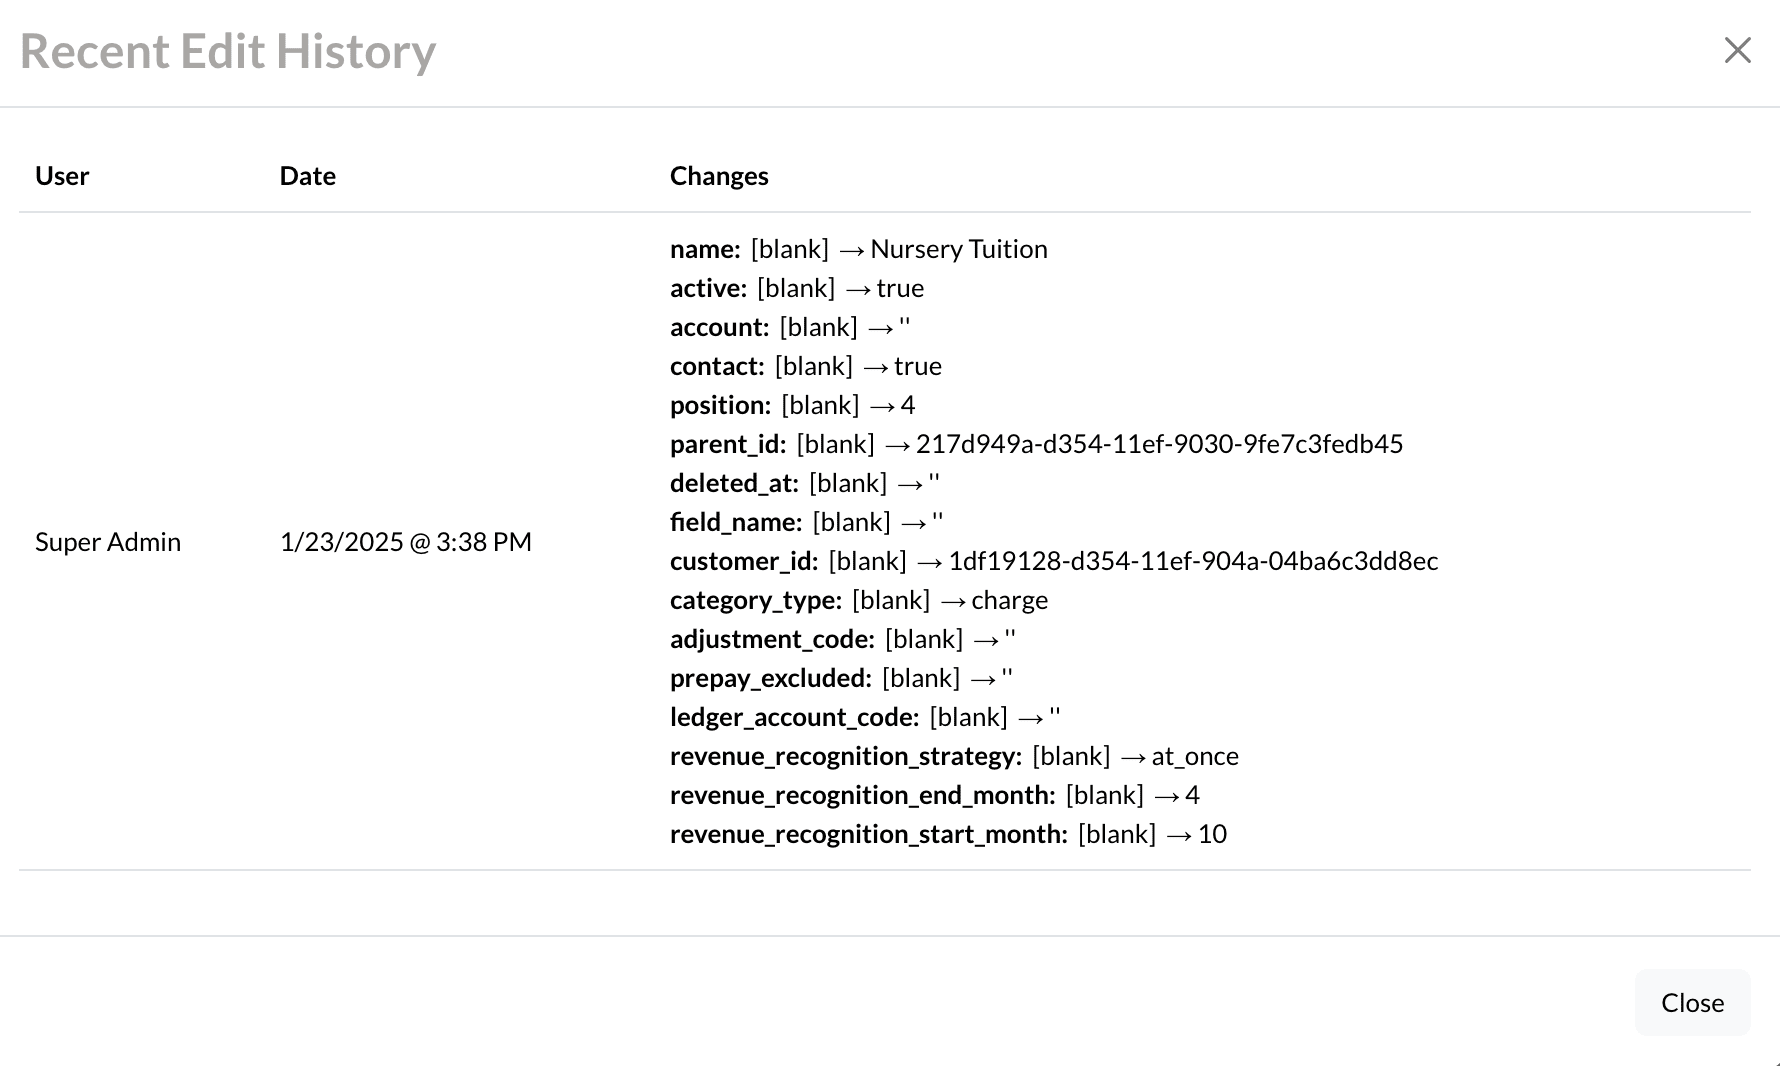
When you click on View Edit History, you'll have the option to select the category that you want to audit.
Once you select one, you'll see its recent edit history. The Recent Edit History will display the user that made the change, the date that the change was made, and what changes were made to what fields/settings.
Editing the group name
If you'd like to change the name of a group or add an account number to the group, start by selecting Edit to open up the group.
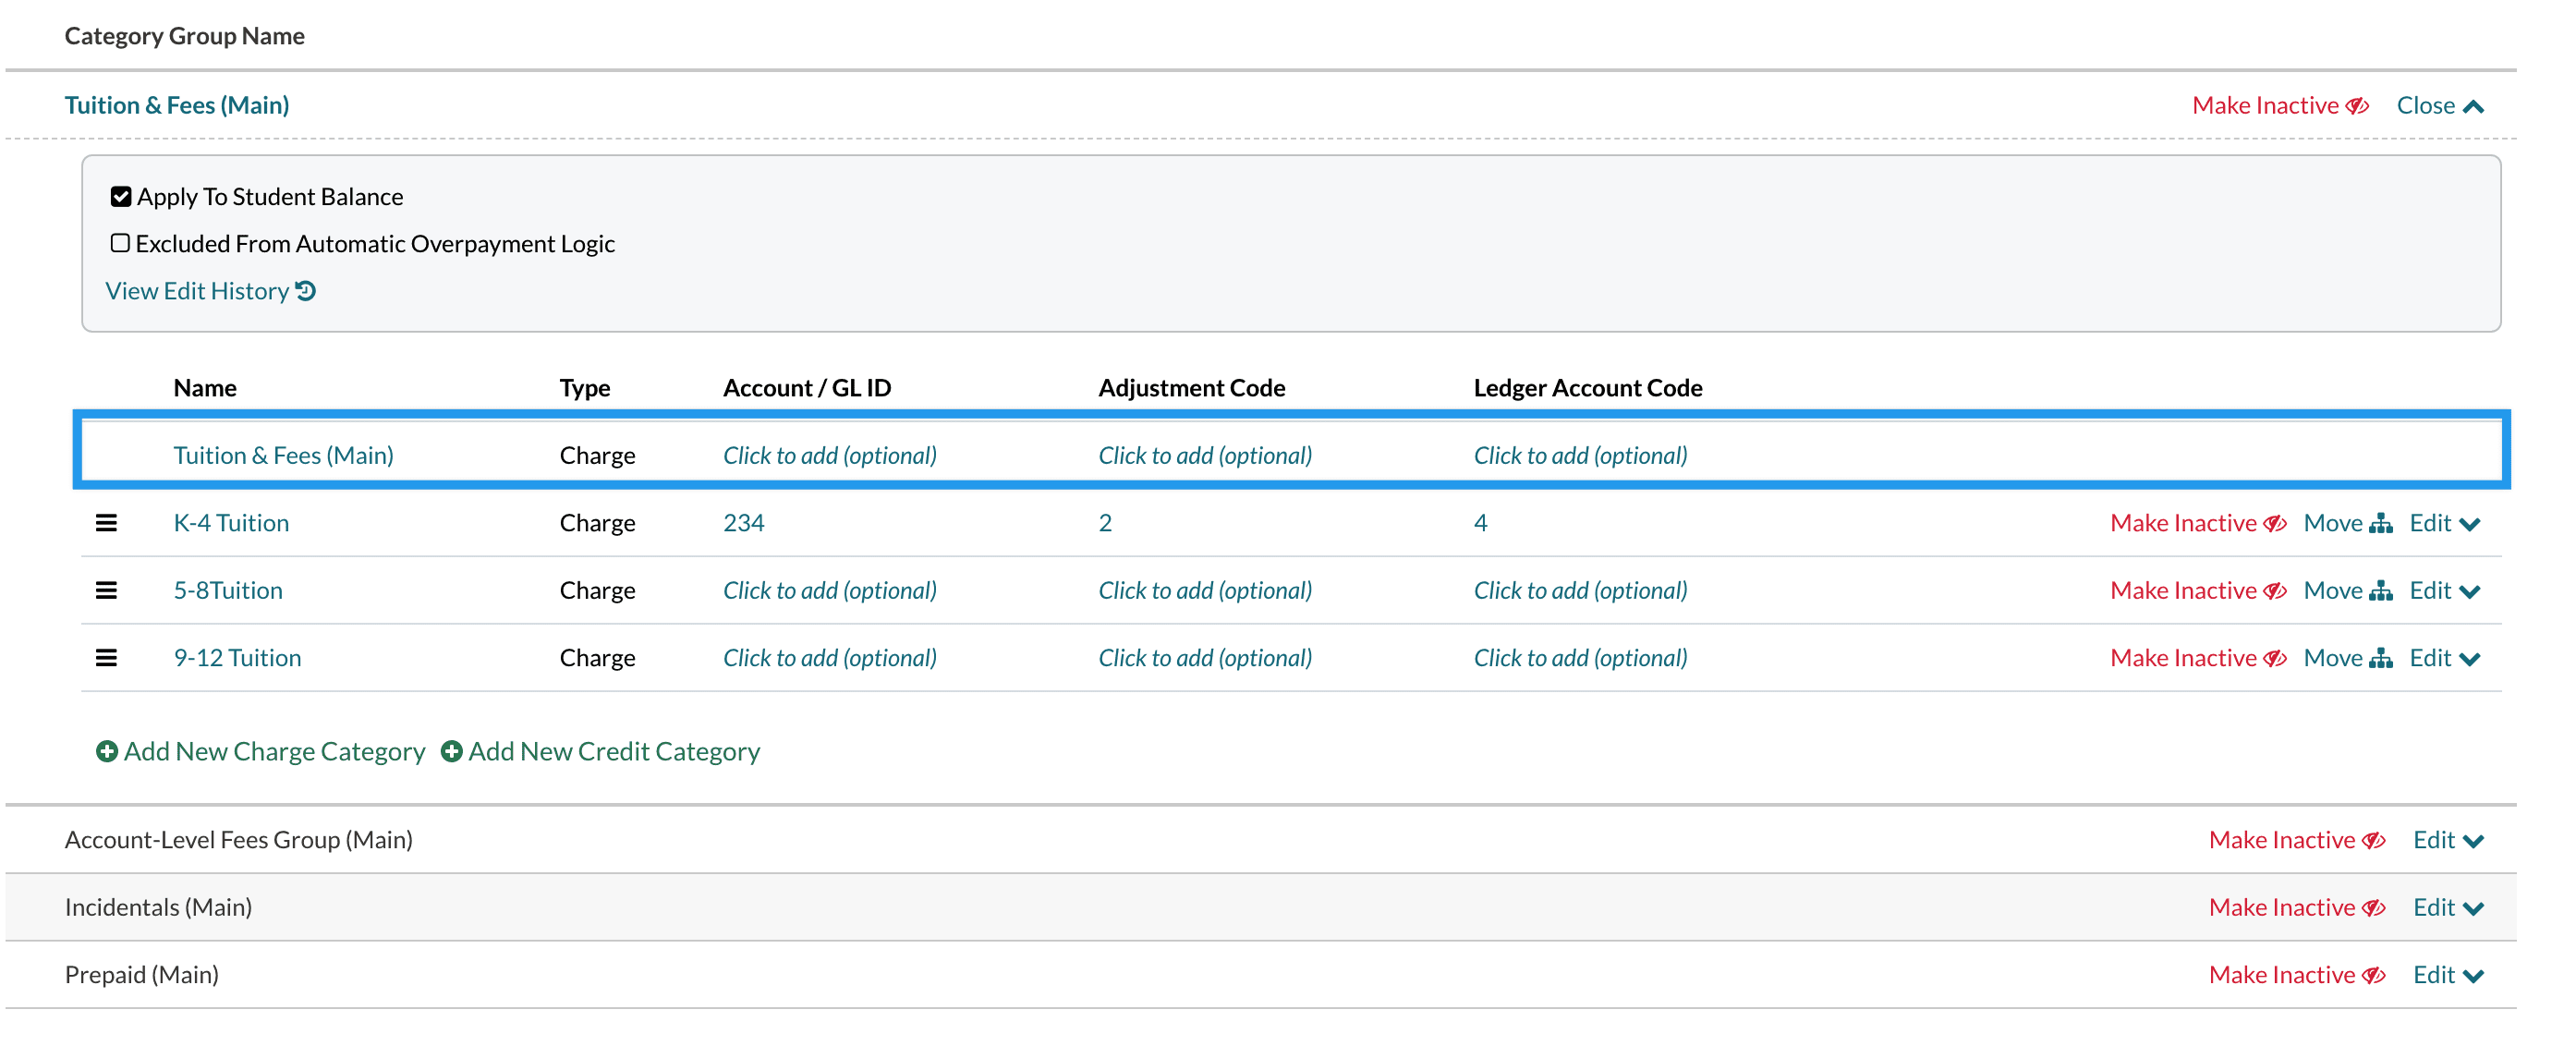
Once the group is expanded, you'll see the group name listed at the top of the list. The group name is always the first one listed.
Here's a helpful hint: notice that the group title is the only item in the list that doesn't have the drag-and-drop icon to the left. (It also doesn't have the make inactive, edit, or move options that the others have.) You can move the categories themselves in any order that you need but that group name will always be glued to the top.
Also, you'll see we've included a note "(Main)" after the name of the group. This is a helpful way to safeguard from accidentally using the group instead of a category when setting up fees.
Simply click on the name itself and you will be able to adjust it and then save when you are done! You'll also have the option to add any additional tracking codes that you'd like to at the group level.
Creating a new Billing Category
To create a new Billing Category, start by expanding the group that you'd like to add the category into.
Beneath the list, you'll see the options to Add a New Charge Category or Add a New Credit Category.
Once you select the type of category that you'd like to add, you'll have the option to click to add a name and (optionally) any codes that will help you with your reporting.
- Name: The name of the billing category used to classify ledger items. A billing Category needs to be created for each Account Code. Contract fees are associated with corresponding billing categories, and multiple fees can be applied to each.
- Account Codes: This field is specific to FACTS clients, however, you can add account codes for your own internal reference for your GL. Please note, that these codes aren't currently available in search or an export and don't drive any behaviors in the system for Billing customers.
- Adjustment Codes: This field is specific to FACTS clients, however, you can add adjustment codes for your own internal reference for your GL. Adjustment codes are set for any credits, and they provide the description for why a credit is applied to an account. Please note, that these codes aren't currently available in search or an export and don't drive any behaviors in the system for Billing customers.
- Ledger Account Code: Schools can define a general account code for each billing category. This code is available within Billing export templates, the Ledger Report, and the Payout Report.
Once you are finished naming the category, click Save.
Category-level settings
Once you've added a new category, you will have access to adjust a few additional options at the category level.
To get to the additional options start by expanding the whole group and then click Edit next to the category that you would like to adjust.
Revenue Recognition Start Month
Set the start month for each category grouping to appear in the revenue recognition report.
Revenue Recognition End Month
Set the end month for each category grouping to appear in the revenue recognition report.
Revenue Recognition Allocation Rule
Set the allocation rule for each category, which will be reflected in the revenue recognition report.
Click here to read more about the Revenue Recognition Report.
View Edit History
Selecting View Edit History on the category level allows you to see a history of adjustments that have been made to the specific category.
The history shows the previous state of the category to the left of the arrow, and the current state of the category to the right of the arrow.
Moving the Category
Important Note about Billing Category Order
Make sure you arrange each Billing Category Group and the Billing Categories within each group in the order that you would like charges and credits to be applied.
- To move billing categories and groups, simply drag and drop them to the desired position.
- Autopay payments and manual payments will always be applied to any current or outstanding billing categories first, and then continue down the list in the order of any categories that have amounts due or overdue.
Moving a category allows flexibility to structure your category groups. You can move Billing Categories up and down within their existing group. Or, you can move the category to a new group.
How to move a billing category up or down within the group
Start by opening up the group. Click the Edit button to expand a group.
Use the lines icon to the left of the category name to drag the category up or down to the desired position.

How to move a billing category into a new group
Start by opening up the group. Click the Edit button to expand a group.
Click on the Move icon on the right side of the page next to the category that you'd like to adjust.
Within the Move Category pop-up box, you can use the dropdown to select another group to move the category into.
While moving, you also can distinguish the category type, in case you need to change it. Example: If there is only one credit category, within a charge group, you will have to move the credit category first, before you can move the charge category.
Editing the Category Name
To edit the name of a billing category, start by expanding the category group and then simply click on the name itself or any of the financial codes, and you will be able to adjust it and then save when you are done! You'll also have the option to add any additional tracking codes that you'd like to at the group level.
Important Note about Editing Billing Categories
If there is a balance in a student category, and you are trying to change it to be a parent/ account category, or the reverse of this, you will not be able to perform this change. You will be prompted with a validation error. A best practice would be to make a new category, this way it will not cause any problems with reporting
Making Categories or Groups Inactive
Within the Billing Categories page, you'll see the option to inactive either a whole group or a single billing category.
Please use caution when opting to inactivate a category or group.
Once you click on the Make Inactive option at the group or category level, you'll see a pop-up to remind you of the outcomes that will result from taking this action. You'll have to confirm within that pop-up that you want to inactive the category or group.

What happens when you inactivate a billing category group?
When you mark a billing category group as inactive, the following happens:
- Previous ledger items will remain accessible.
- All categories in this group will be marked inactive.
- All categories in this group will be removed from the quick action modals and filters.
- Contracts with fees that reference inactive categories cannot be submitted.
If needed, you can reactivate a group after you've inactivated it.
Example of marking a billing category group as inactive

What happens when you inactivate a billing category?
When you mark a billing category as inactive, the following happens:
- Previous ledger items will remain accessible.
- The category will be removed from the quick action modals and filters.
- Contracts with fees that reference inactive categories cannot be submitted.
If needed, you can reactivate a category after you've inactivated it.
Example of marking a billing category as inactive
How Payments Are Applied
Payments are allocated based on both billing category and term.
When a payment is posted to a ledger, the payment applies based on all outstanding balances in the earliest term and applies the payment based on the order of the billing categories.
To put it simply, if a parent owes a balance in more than one term, their payment will cover the older term's balances in all categories before starting to apply the payment to the more recent term.
Let's look at an example.
Example Billing Category Order:
- Tuition Category
- General Fees Category
Sample Criteria:
- Student Balance is $1,200
- $100 is for 21-22 Tuition
- $200 is for 21-22 General Fees
- $500 is for 22-23 Tuition
- $400 is for 22-23 General Fees
Given the example ledger above, if a parent pays $500, the payment will apply as follows:
- $100 goes to 21-22 Tuition
- $200 goes to 21-22 General Fees
- $300 goes to cover part of the $500 charge for 22-23 Tuition
Note how the payment first went to cover the 21-22 outstanding charges, based on the order of their category, then, it started applying to the 22-23 charges.
The parent can't allocate where the amount goes, however, the school can make this adjustment within the payer's record if needed. This means that we're allowing parents to overpay or underpay the amount due, based on the order of the billing categories.
Important Note about Payments
If a credit category has a positive amount a payment will not be applied to this. We only apply payments to charges and charge categories.
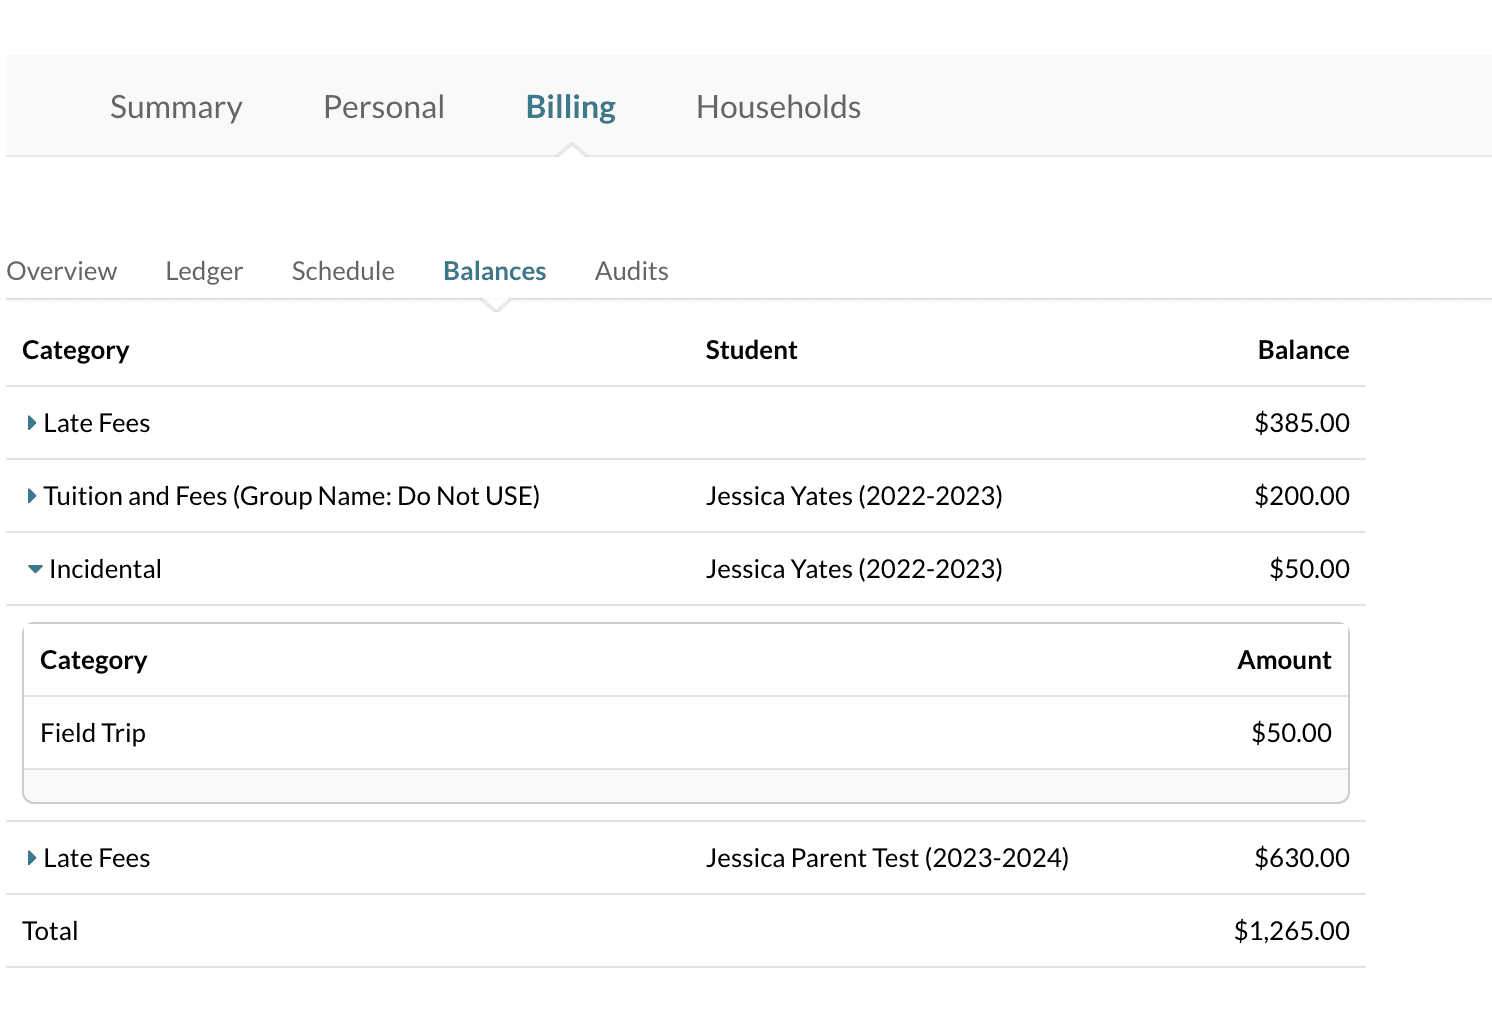
Within the 'Balances' tab in a billing account's ledger, the category groups display with the carat dropdown, it will show all of the credits and balances inside of that category group as seen below. Those balances sum up to the total of the charge group.
Important Note about Billing Category Order
The term the charge is owed in and the order of the categories on this page determine the precedence when applying payments and discounts to billing balances. Categories higher on the list will have discounts applied to them before categories lower in the list.
To set the order of your billing categories, drag and drop them by clicking on the icon to the left of each billing category name. This applies within the category groups as well.
Comments
0 comments
Article is closed for comments.