Overview
From time to time we know that, unfortunately, you may be tasked with managing a family with a deceased guardian or parent. This article contains our recommendations for navigating this situation.
Who can access this feature?
Admin Account Types: System Admins & Admins
Permissions: Communication
In this article
Option 1: Deleting the Contact
Option 2: Disconnect without Deleting
Option 3: For Billing Contacts
Option 1: Deleting the Contact
*This is our recommended approach
To ensure that the family doesn't receive any communications linked to their deceased loved one, we recommend deleting the contact record of the deceased individual and adding a note to the student's record to identify that they have a loved one that has passed on.
Deleted records can not be recovered by our team. Please use caution when taking these steps.
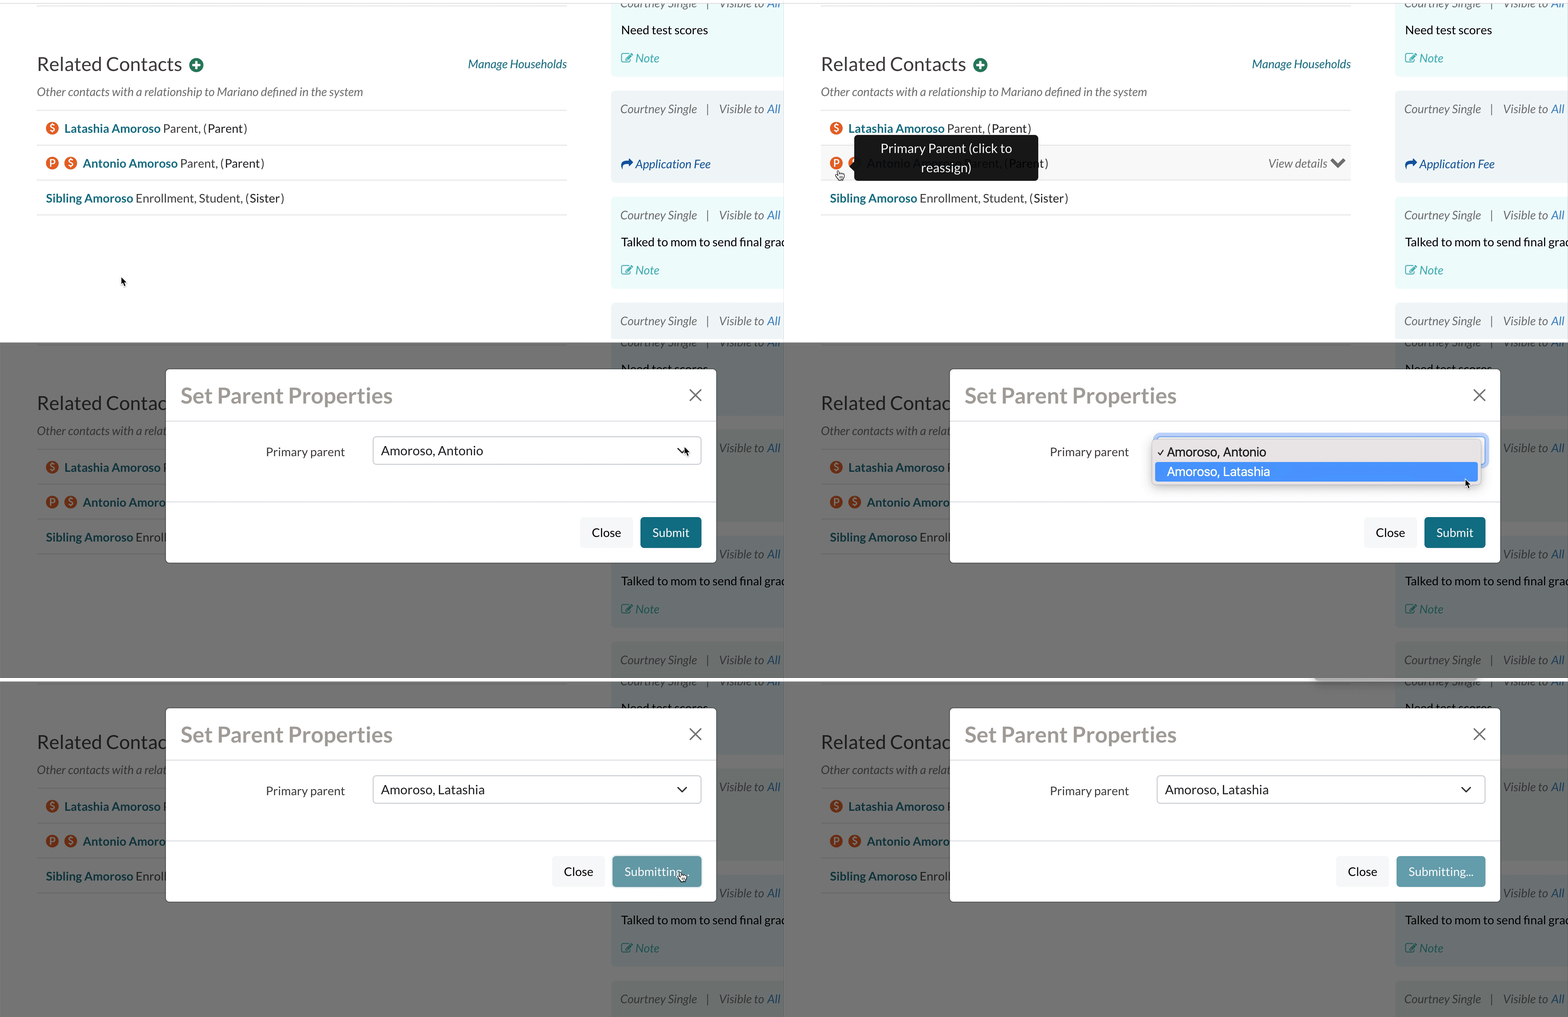
1. Re-assign the Primary Parent
This is only applicable if the deceased relative has a parent relationship and is assigned as the Primary parent, which is noted in the system with this icon:
- Navigate to the student's record, in the related contacts section.
- Click on the P icon and select another parent or guardian as the Primary parent.
- Repeat this step for any other student that has this individual set as their Primary parent.
2. Deleting the contact
- Navigate to the record of the deceased relative or guardian.
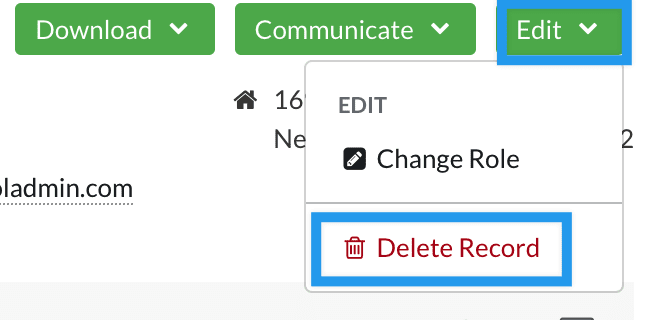
- From the Edit menu, select Delete Record.
- Select Confirm when prompted. Once you confirm, you'll be brought back to the Dashboard page and you'll see a confirmation message appear on the screen.
You only have to do this once. This deletes the contact from the system and removes them from every student, parent, or relative that they were connected to.
3. Add a note to the student's record
- Navigate to the record of one of the students connected with the deceased relative.
- In the Recent Activity Section, select the plus icon to add a note.
- Enter the name of the deceased relative and a brief note.
- You do not have to add an activity type.
- Set the visibility (optional) and Save the note.
- Add notes to any other records that were attached to the relative.
Option 2: Disconnect without Deleting
If you do not wish to delete the relative or guardian from the system, you can alternatively opt to disconnect them from the student and family while adding a note to the student's record.
1. Re-assign the Primary Parent
- Refer to the steps in the above section: Re-assign the Primary Parent
2. Update their name
Add (Deceased) to the end of the name of the deceased relative.
- Navigate to the record of the deceased individual.
- Select the Personal tab.
- Select Edit Fields.
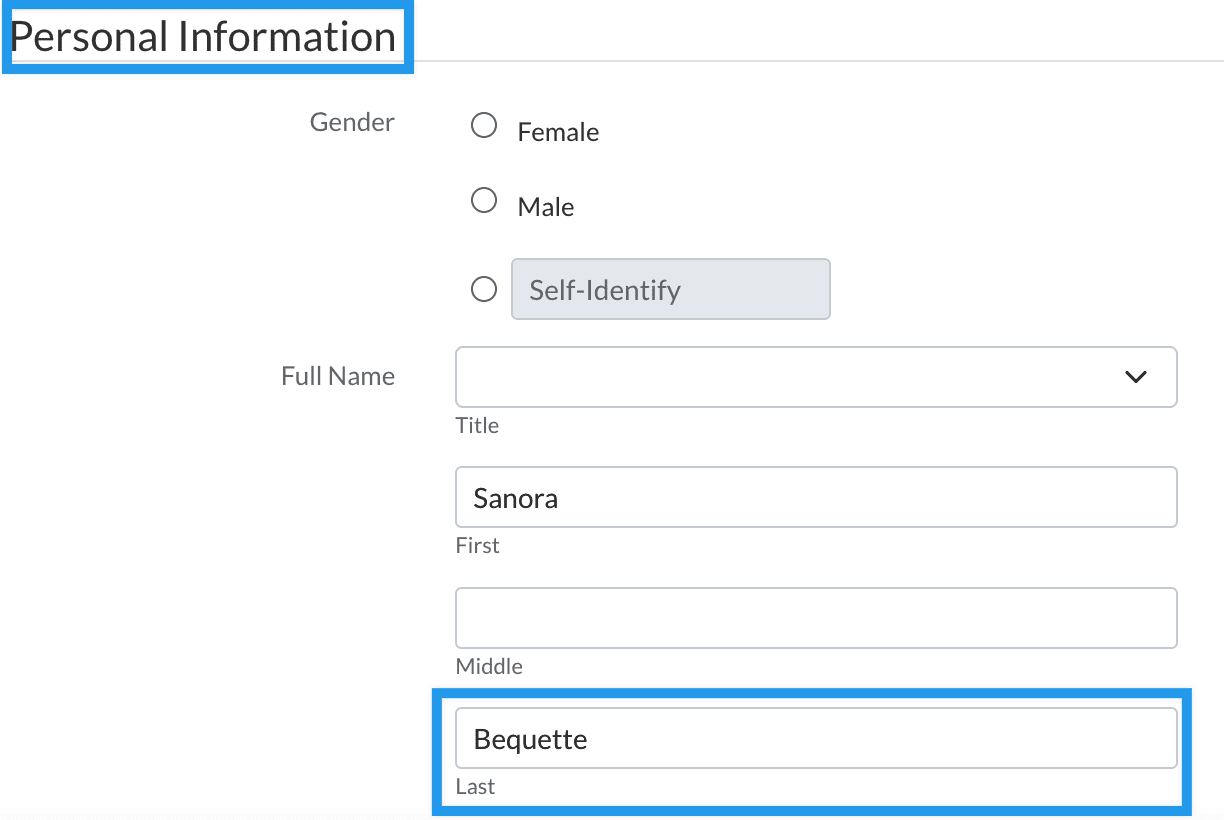
- Under the Personal Information grouping, in the Last Name text box, add (DECEASED) to the end of the name.
- Select Save Edits.
3. Remove the relationship
This is necessary to prevent the remaining relatives from receiving communications labeled with or linked to their deceased loved one.
Very important: Repeat this process to remove the relationship from all family members of the deceased parent or relative.
- Navigate to the record of the student or other family member of the deceased.
- Within the Household Membership tab, deselect the circle next to the name of the deceased relative. This removes them from the household.
- Skip this step if the relative isn't listed in the Households of the student.
- Go back to the Summary tab
- Scroll to the Related Contacts Section
- Click View Details to expand the contact.
-
- Select Remove Relationship.
-
- Click OK to confirm within the pop-up.
- Click OK to confirm within the pop-up.
- Repeat this process to disconnect the loved one from all records they are connected to in the system.
4. Note on the Student's record
- Make a note on the student's record. Follow the steps under option 1: Add a note to the student's record.
Option 3: For Billing Contacts
This option is for schools utilizing our Billing Module and refers to cases where the deceased relative has billing ledger items attached to their record.
1. Re-assign the Primary Parent
- Refer to the steps in the above section: Re-assign the Primary Parent
2. Clear the ledger
- Clean up their ledger: reassign any outstanding charges to another payer.
3. Removing the Record
- No Electronic Payments Attached to the ledger:
- If the parent or guardian does not have any electronic payments attached to the ledger, follow the steps within our Billing: How-to Merge or Delete Contacts with Billing Accounts article to delete the contact from the system.
- Electronic Payments attached to the ledger:
- If the parent or guardian does have electronic payments attached to the ledger they can not be deleted. In this case, we recommend you follow the steps in Option 2: Disconnect without Deleting.
4. Add a note to the Student's Record
- Add a note to the student and other family members to reflect the update within their family. See this step above: Add a note to the student's record.


Comments
0 comments
Article is closed for comments.