Overview
The Quick Action menu can be used to add individual contacts to your Finalsite Enrollment system, including prospects, consultants, inquiries, and applicants. This menu can be accessed by clicking on the plus sign (+) located to the left of your name in the top right corner of the page.
Please note: If you have multiple (10+) contacts of any type to upload to the system, it may be easier to do a bulk import instead of adding them one at a time through quick action. Click here to learn about imports.
In this article
- How to add a Consultant
- How to add a Prospect
- How to add a Lead
- How to add an Inquiry (Fill Out an Inquiry Form)
- How to add an Applicant (Fill Out an Application Form)
How to add a Consultant
Consultants or agents are contacts that are typically working with international families to help guide them in the admissions and/or enrollment process. They can be included in communications and granted Parent Portal access in Finalsite Enrollment as needed. Click here to learn about Consultant management.
- Select the Quick Action menu (plus sign).
- Within the Add Prospect or Consultant dialogue box, enter the first and last name of the Consultant.
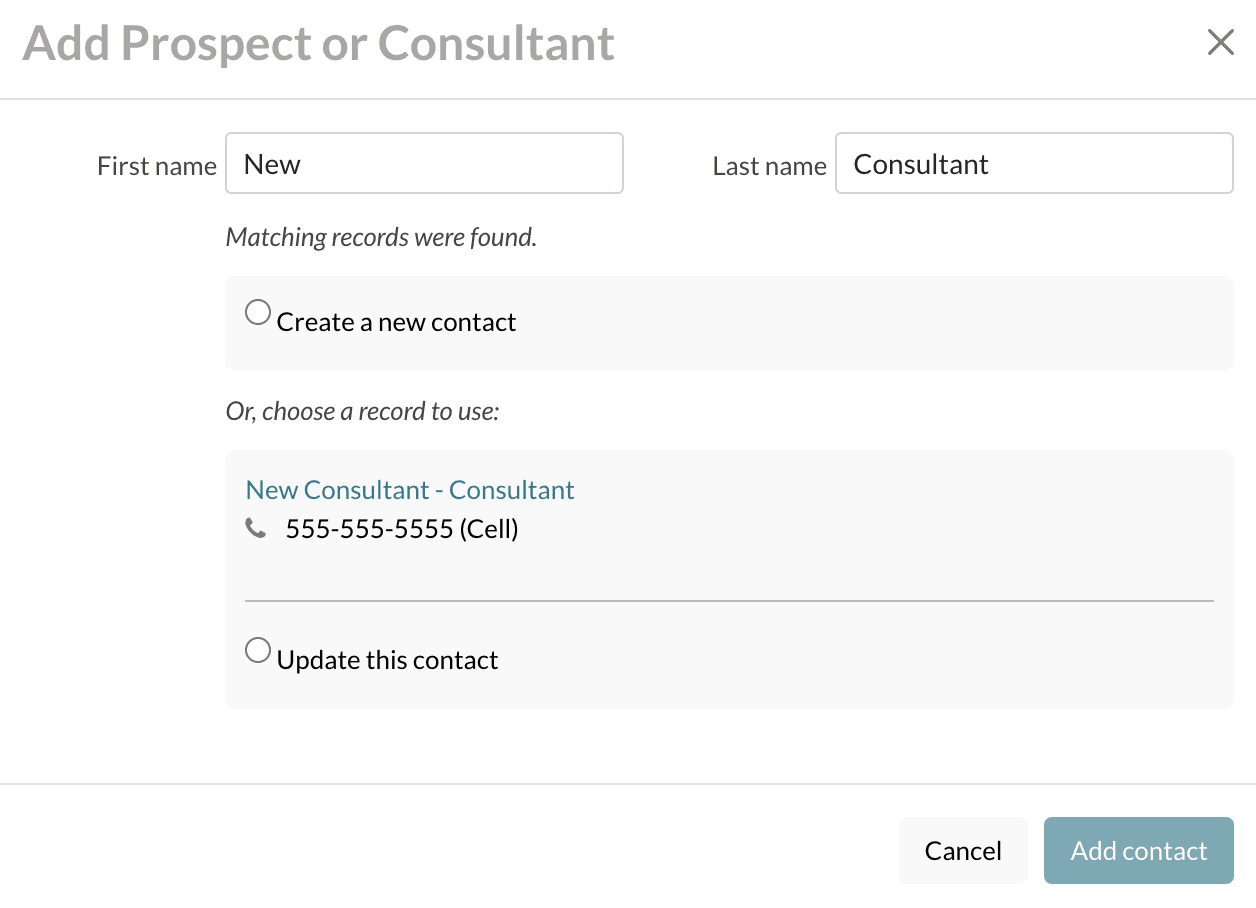
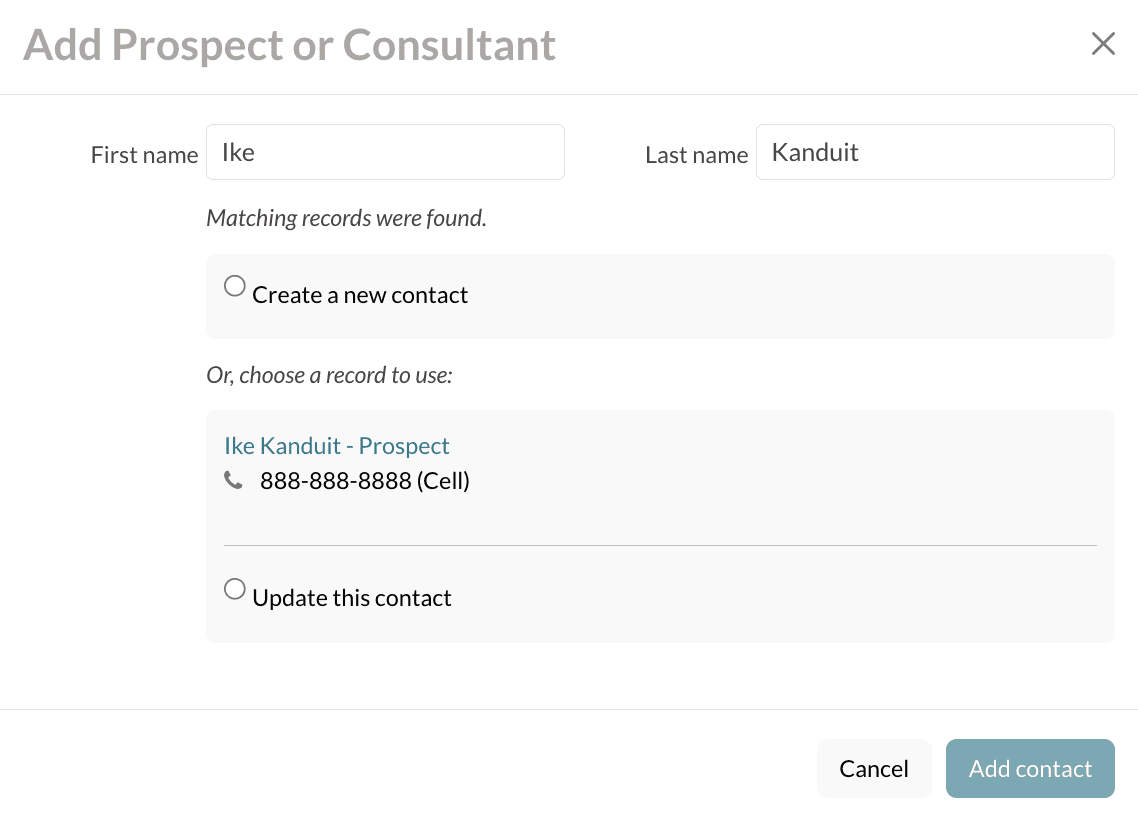
- Hit Enter or Return on your keyboard so that the system can check for duplicates. If a match is found, you will have the option to either choose to update the existing contact or create a new one.
- Contact Role: If there are no matching records found as in the above example, you will proceed with selecting the Contact Role. For this, you will select Consultant.
- Phone 1 (optional): Select a phone type and enter a phone number. If you need to send text messages to your consultants, you will want to add this phone number with the type 'Cell'.
- Select Add Contact.
- To navigate to the new record, you can either click the View link within the confirmation message or search for their name within the search bar.

Additional Notes on Adding Consultants through the quick-action menu.
You can navigate to the Consultant's record later by searching for their name in the search bar or creating a search like this to locate all of your consultants:
How to add a Prospect
Prospects are students who have not yet expressed interest in your school, but who are potential candidates to do so. For example, contacts received from a church or feeder school list. Click here to learn more about managing Prospects.
- Select the Quick Action menu (plus sign).
- Within the Add Prospect or Consultant dialogue box, enter the first and last name of the Prospect.
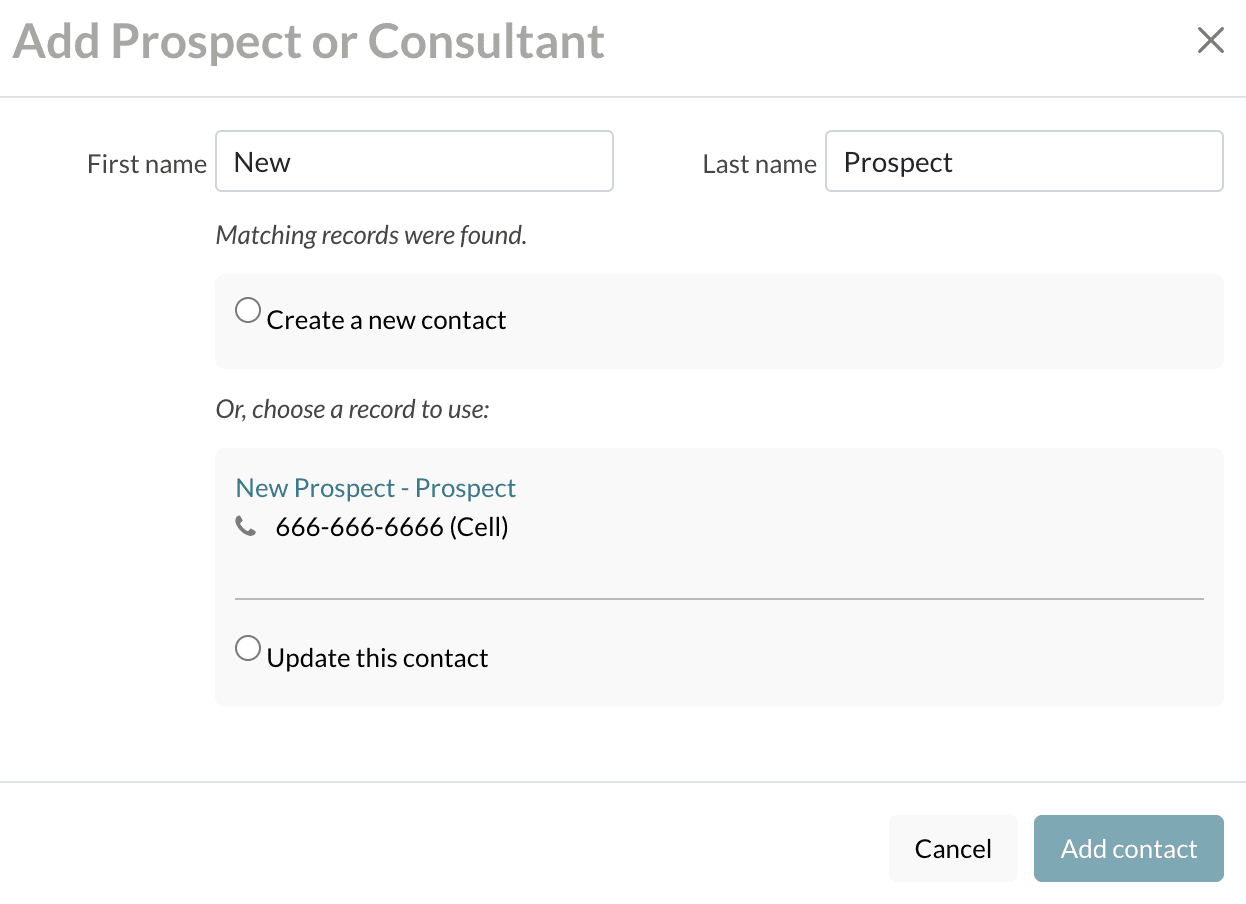
- Hit Enter or Return on your keyboard so that the system can check for duplicates. If a match is found, you will have the option to either choose to update the existing contact or create a new one.
- Contact Role: If there are no matching records found as in the above example, you will proceed with selecting the Contact Role. For this, you will select Prospect.
- Enter Year (optional): Select the potential entry year for the student.
- Enter Grade (optional): Select the potential grade for the student.
- Phone 1 (optional): Select a phone type and enter a phone number.

Additional Notes on Adding Prospects through the quick-action menu
- You can locate Prospects later by either searching for their name in the search bar or on the Prospects workflow page (Admissions > Students in Admissions > Prospects).
- From within their record or the Prospects Workflow page, you can add a prospect to the workflow. For more details on this, see this article.
How to add a Lead
Lead is a role that is applied to a parent who you'd like to nurture toward inquiring or applying. When you add a parent as a lead through the Quick Action Menu, you only need their name. You can add a phone number for them but it is optional. Once you add that, the system creates a record for the parent. They'll also show up on the Leads list page (in the Admissions list pages.)
As a reminder, you also have the option to add prospects through the Quick Action menu. The difference between leads and prospects is that prospects are students and leads are parents.
- Select the Quick Action menu (plus sign).
- Within the Add Prospect or Consultant dialogue box, enter the first and last name of the Lead.
- Hit Enter or Return on your keyboard so that the system can check for duplicates. If a match is found, you will have the option to either choose to update the existing contact or create a new one.
- Contact Role: If there are no matching records found as in the above example, you will proceed with selecting the Contact Role. For this, you will select Lead.
- Phone 1 (optional): Select a phone type and enter a phone number.

How to add an Inquiry (Fill Out an Inquiry Form)
If you receive a phone call from an interested parent or meet a family in person who wants to learn more about your school, a member of your internal team can log the student as an Inquiry in Finalsite Enrollment by filling out an inquiry form for them through this quick action option.
An admin-entered inquiry form will not send out any immediate email notifications, and most required fields will display as non-required so you can submit the form without having all of the family's information. Anything missing can be added directly to the student contact record later.
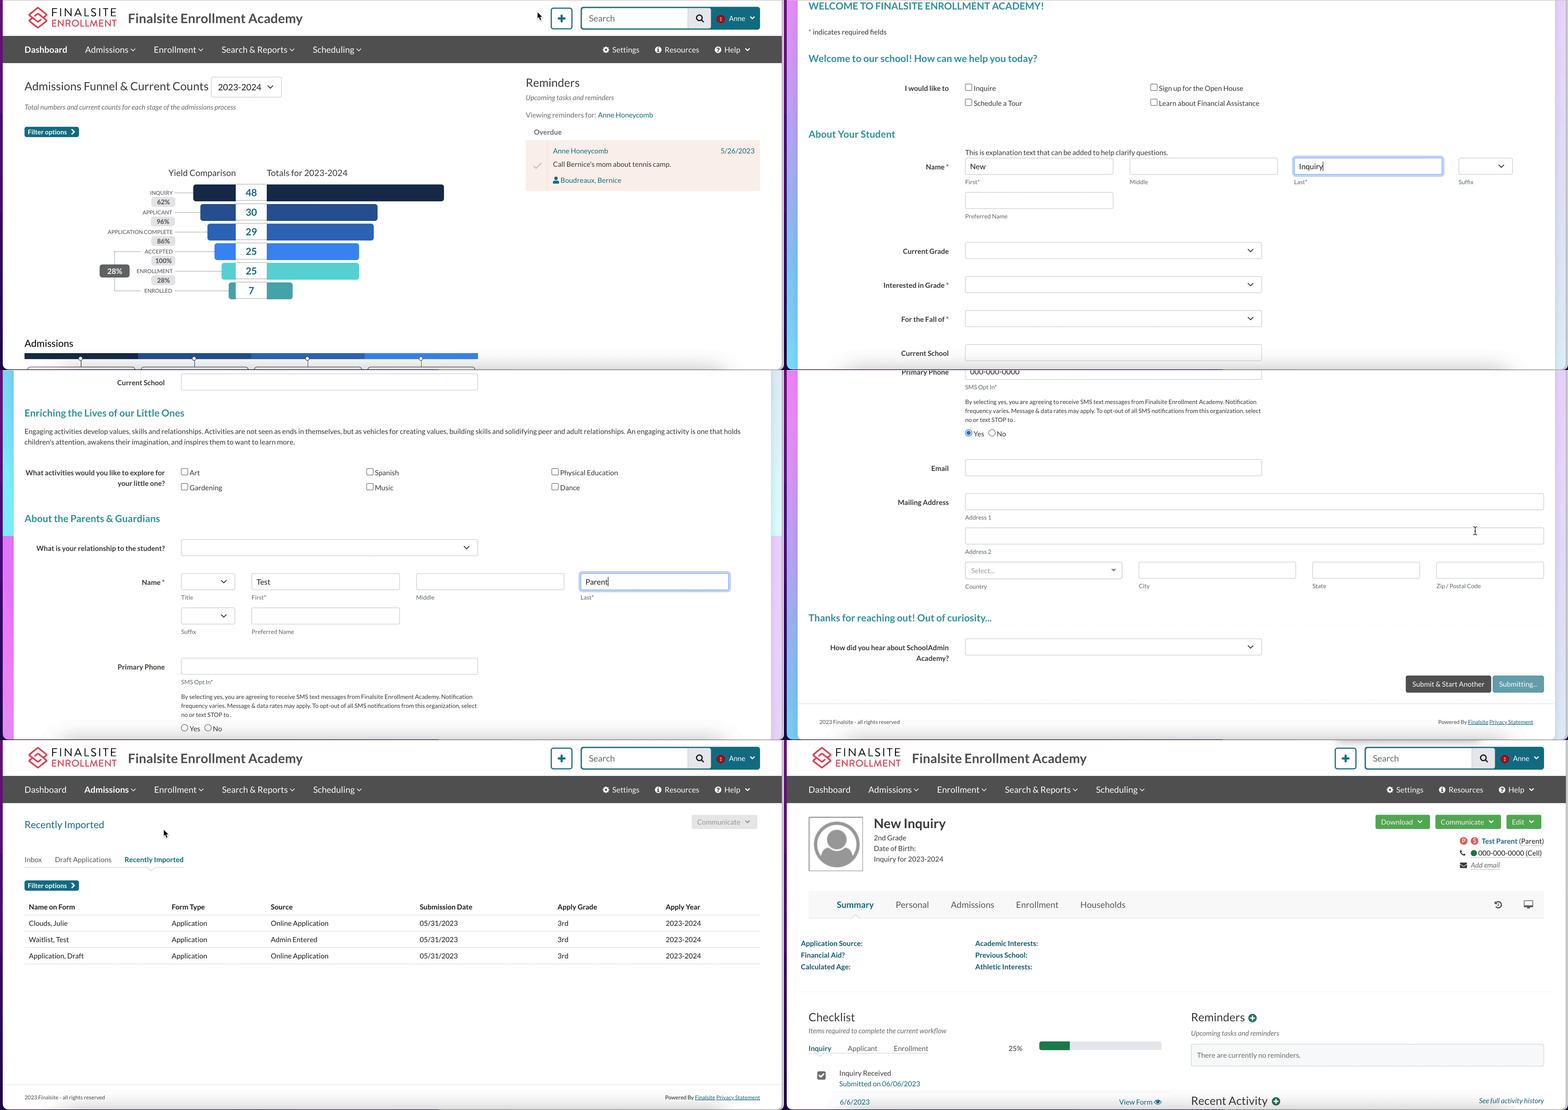
- From the Quick Action menu, select Fill Out an Inquiry form
- Within the form, you will only be required to enter the following information (all other parts of the form are optional when entering an inquiry internally)
- The student's name (first and last).
- The student's grade.
- The term or year that you expect the student to apply in.
- The name of 1 parent (first and last).
- Once you have entered the information within the form, click Submit.
How to add an Applicant (Fill Out an Application Form)
You can also fill out an application form for a prospective family using the quick action menu. This can be a helpful option if you are helping a family fill out an application during a visit, if the family has limited access to the internet at home, or if there is a language barrier.
An admin-entered application form will not send out any immediate email notifications, and most required fields will display as non-required so you can submit the form without having all of the family's information. Anything missing can be added directly to the student contact record later.
- From the Quick Action menu, select Fill Out an Application form
- Within the form, you will only be required to enter the following information (all other parts of the form are optional when entering an inquiry internally)
- The student's name (first and last).
- The student's grade.
- The term or year that you expect the student to apply in.
- The name of 1 parent (first and last).
- Once you have entered the information within the form, click Submit.
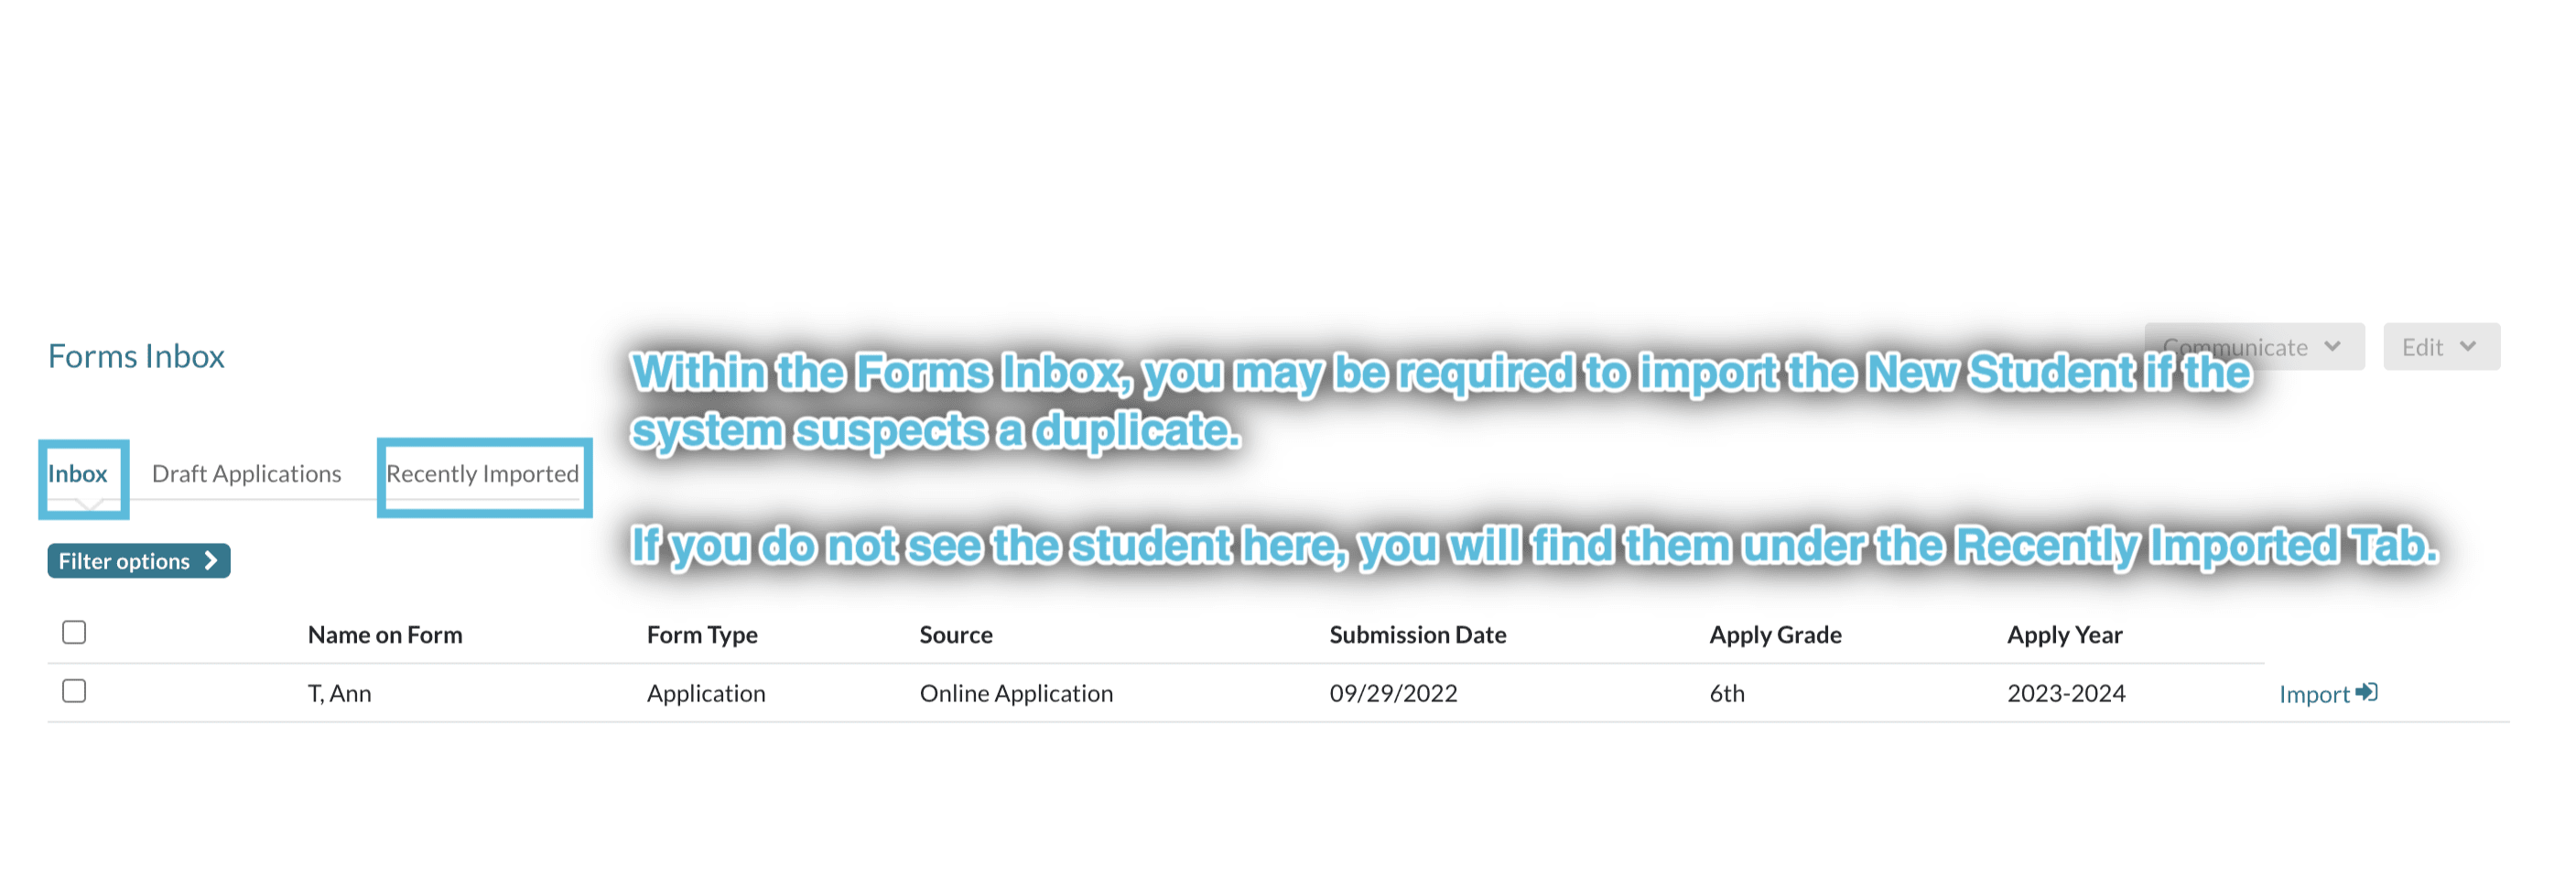
Once you submit the application form, the site will direct you to the Forms Inbox.
In this GIF video example of adding an applicant, you will see that I was first required to Import the application within my forms inbox.
You may or may not be required to do this. If you do not see the student within the Inbox, you can select the Recently Imported form to find the student you added. From there, clicking the student's name will bring you to their record.
Additional notes on adding Inquiries + Applicants through the quick-action menu
-
Inquires and Applications completed by admins will not trigger the automated thank you landing pages or the automated thank you emails to parents.
-
Inquires and Applications completed by admins will trigger any applicable and active automated communication plans, as these are status and checklist-based.
Locating the Applicant or inquiry within the Forms Inbox:



Comments
0 comments
Article is closed for comments.