
Add payments to a parent's billing ledger, split them across categories, spread them across months, or reverse them when needed. Important: for cash or check payments on the deposit, application fees, or AdHoc fees, manage the payment within the student's checklist item (not Add Payment) so the charge marks paid correctly.
💡Quick Answers
- Where do I add a payment? Navigate to the parent/payer's billing ledger and click Add Payment.
- What's required? Description, Distribution (Manual Splits or Auto Distribute), Payment Method, Received Date, Category, Contact Name and Term, and Amount.
- What does Auto Distribute do? Automatically applies the payment across the parent's category balances, so you don't have to assign categories manually. Preview before confirming.
- Can I spread a payment across months? Yes. Use Evenly Across Months in Posting Options, then set start month, start year, and number of months.
- When should I record a cash/check deposit through Add Payment vs. the checklist? Never through Add Payment for deposits, application fees, or AdHoc fees. Those go through the checklist item on the child's record. Add Payment would credit tuition and leave the original charge open.
- How do I remove a payment? Reverse it by adding a negative payment with matching categories and date. Payments cannot be deleted. Use Manual Splits (not Auto Distribute) for reversals.
In this Article
⚠️ Important Note
When recording cash/check payments for the deposit, application fees, and AdHoc fees:
- You need to manage the payment within the corresponding checklist item in the child's record. The 'Add Payment' button won't record them as paid. Instead, it will add the payment as a credit to the tuition, and the charge amount will remain open.
- Click here to learn how to manage the deposit/registration fee within the student's enrollment checklist.
- Click here to learn how to manage Application and AdHoc fees paid via check/cash.
Add a Payment
To add a payment to the ledger, start by navigating to the parent/payer's billing ledger and selecting the Add Payment button.
This will open the Payment Details box.
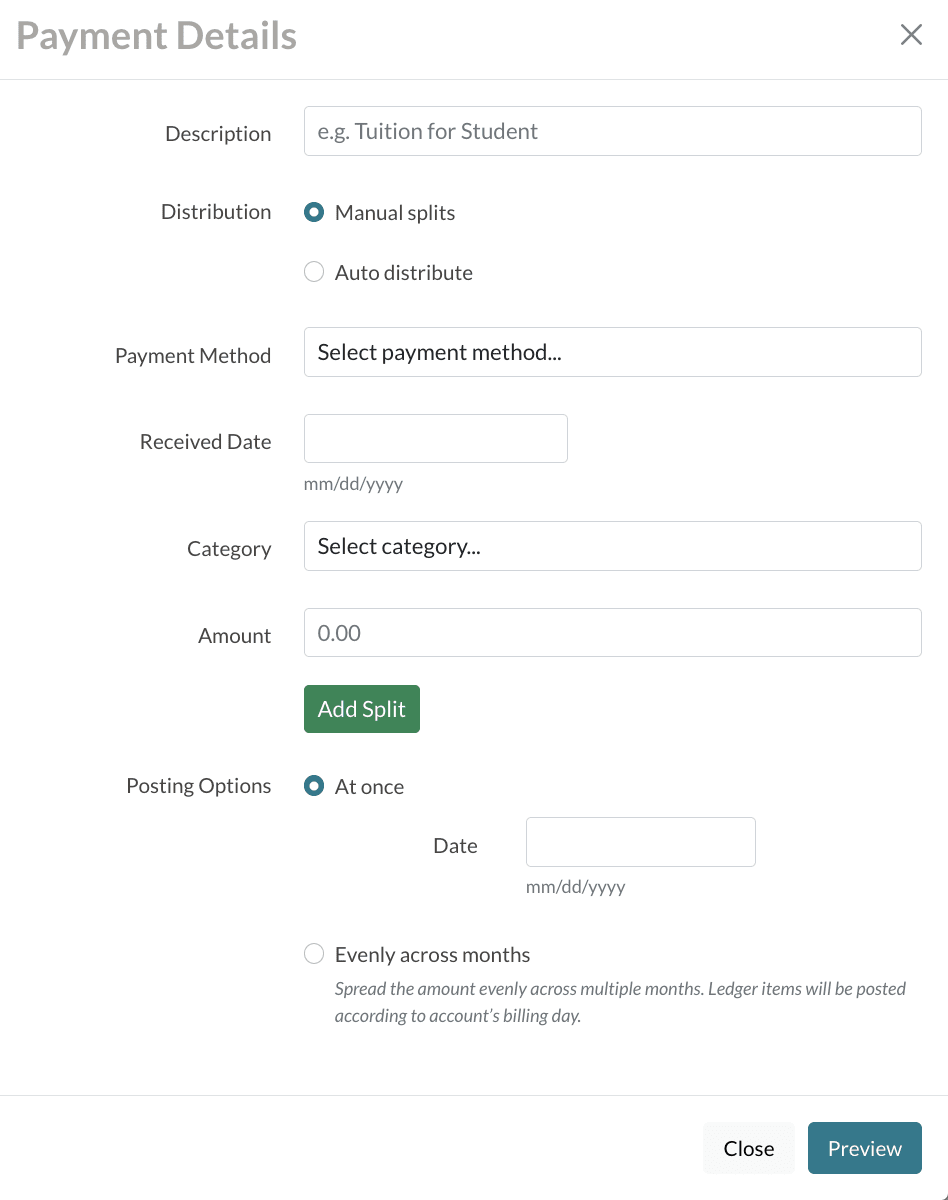
Within this box, complete the following:
-
Description
- Describe what the payment is for.
- Describe what the payment is for.
-
Distribution
- Manual Spits: Manually assign the payment category.
- Auto Distribute: The categories will be automatically assigned.
- Read more below in the Auto-Distribute section.
-
Payment Method
- Select the method used for the payment.
- Select the method used for the payment.
-
Received Date
- Set the date the payment was received.
- Set the date the payment was received.
-
Category
- Select the billing category that the payment should be applied to.
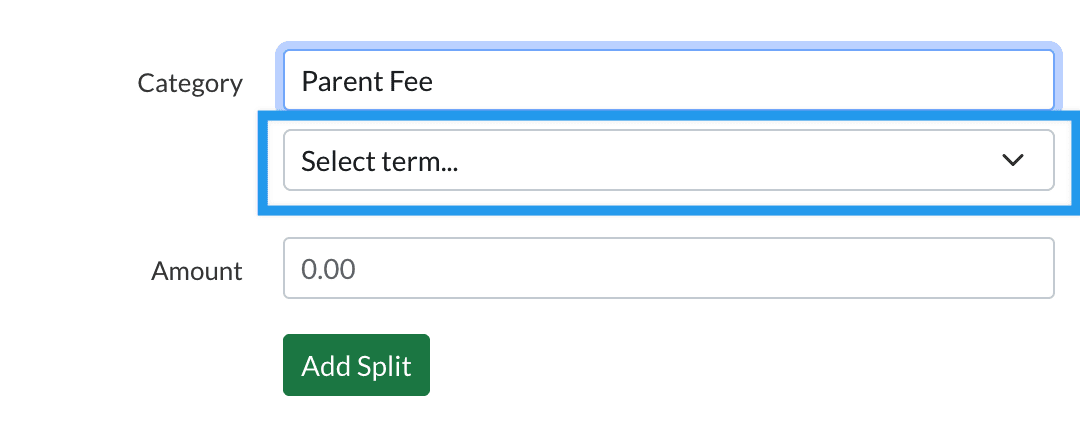
- If you select an account-level category here (like for a Late fee or NSF fee), you'll be asked to select the term (rather than the contact). If you do not select a term, the term listed on your Billing Setup page (Settings > Financial > Billing Setup) will be listed here by default.
-
Contact Name
- Select the student's name/term.
- Select the student's name/term.
-
Amount
- Enter the amount of the payment.
- Enter the amount of the payment.
-
Add Split
- Only select this if you need to split the payment amount across billing categories with custom amounts set for each category you select.
- If needed, Click on Add Split and set the amount, billing category, and child's name.
-
Posting Options
- At once: You can post the full payment amount, as set with or without splits, at once on the date selected.
-
Evenly Across Months: Spread the amount evenly across multiple months. Ledger items will be posted according to the account’s billing day. You'll need to set the start month, start year, and the number of months to spread the charge across.
-
Preview
- Select Preview to proceed once you have added all of the above information. This will allow you to double-check the charge before posting it to the ledger.
- Select Previous to go back and make changes to the charge.
- Select Confirm to approve the charge and add it to the ledger.
Please note
The payment amount will be reflected in the next billing cycle and it will also display in the billing statement that's sent automatically.
Auto-Distribute Payments
The Auto Distribute option will apply the payment across all associated billing category balances so that they don't need to be set manually.
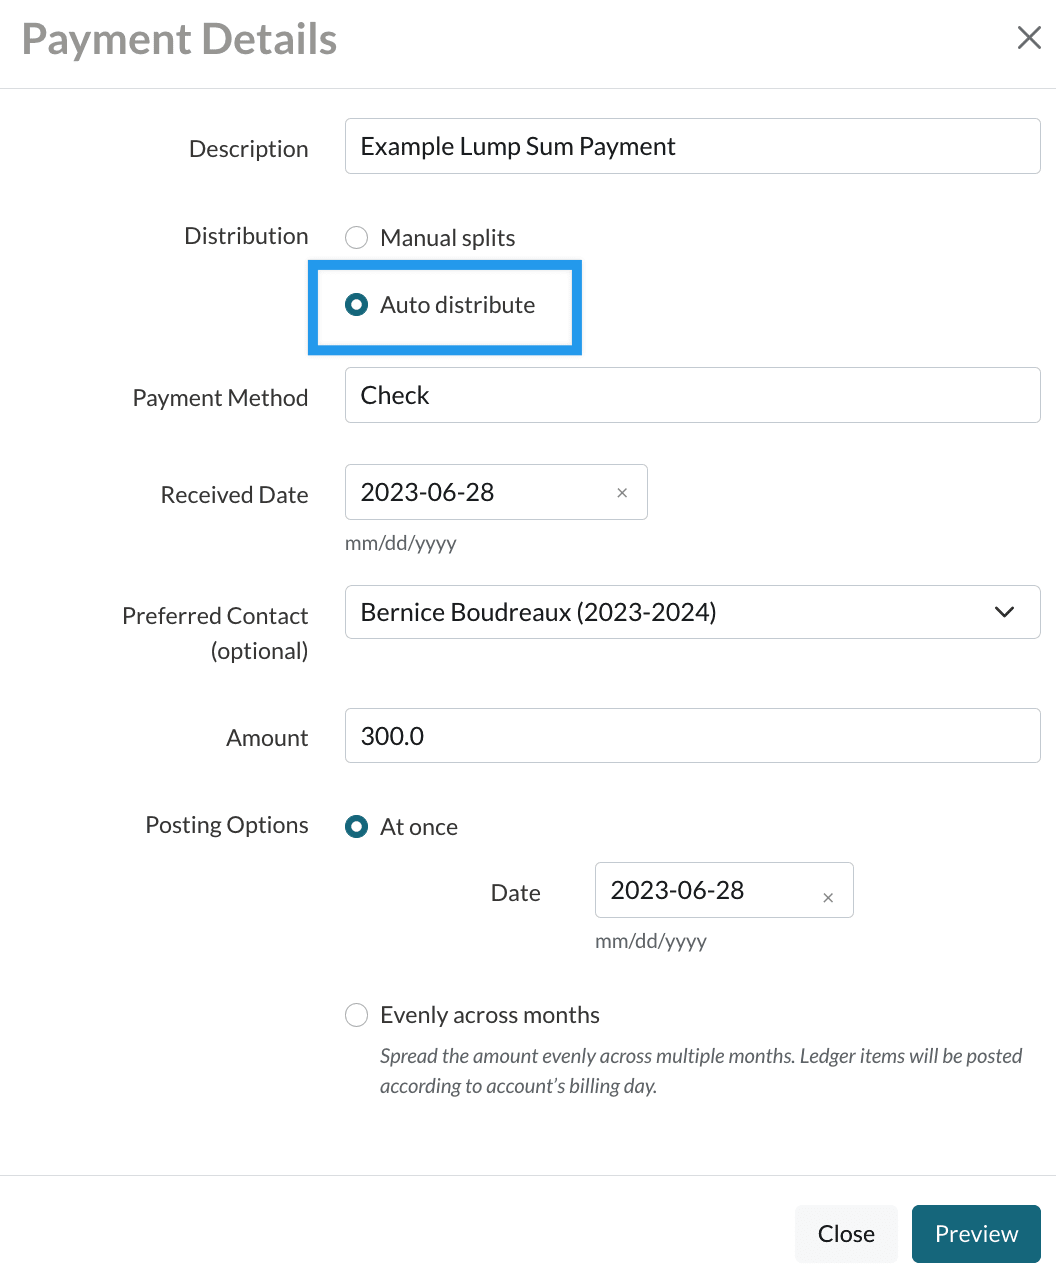
When you select Auto Distribute, you will be able to Preview the distribution.
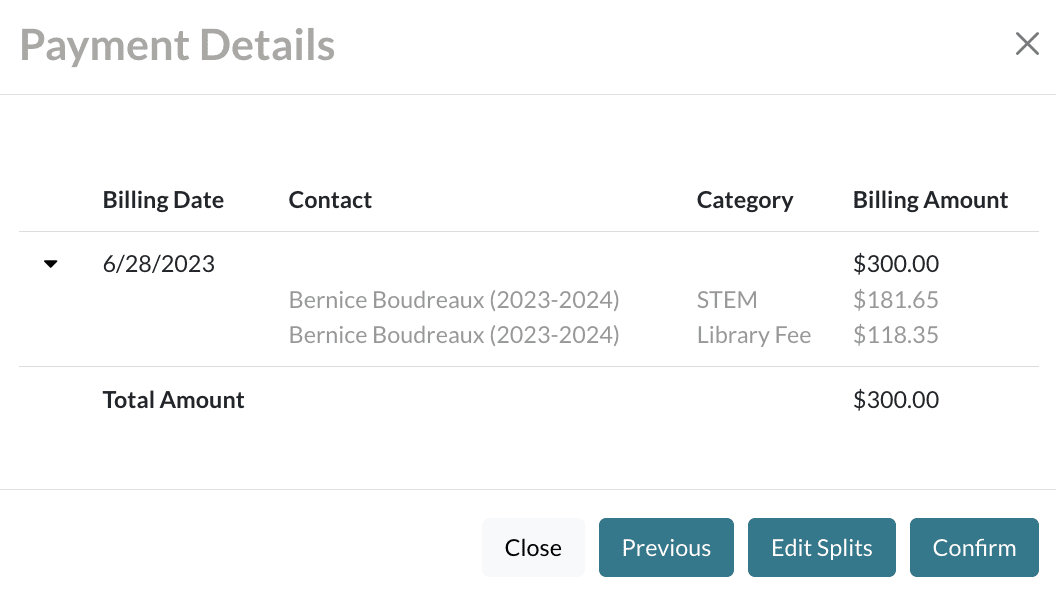
In the preview box, you will be able to: close the box, go back to the previous screen, edit how the payment is split between categories, or, if you are happy with the adjustment, you can confirm in order to post the payment.
Manual Payments can be edited or deleted by using the icons on the right of the screen.
Reverse a Payment
You can not delete a payment. If you need to remove a payment from the ledger, you will need to reverse it by adding a negative payment. To reverse a payment, add a negative payment that matches the exact categories and date of the original payment.
How to Reverse a Payment
Navigate to the parent’s billing ledger and select the Add Payment button.
-
Description
- Enter a description to note the reason for the payment reversal.
-
Distribution
- Select Manual Splits: This is the only option you should select when reversing a payment. Do not select auto-distribute for payment reversals.
-
Category
- Set the billing category that the payment should be applied to. For payments that comprise of multiple categories, you will need to split the payment so that this negative payment is an exact match for the original one.
-
Amount
- Add the amount as a negative number. You MUST add the amount as a negative number in order to reverse the original payment.
-
Add Split
- In order to match the reversal to the exact setup at the original, you will need to match the category split as well.
- For each split, be sure to add the payment amount as a negative number.
Short example video of a Payment Reversal:
Comments
0 comments
Article is closed for comments.