Under Settings > Fields & Data > Fields, you can create new fields and edit existing ones.
In Finalsite Enrollment, "fields" are like containers for storing specific information about students, parents, and contacts.
- To learn more specifics about how Fields function in Finalsite Enrollment, check out the Fields Overview article.
- To learn more about the types of Fields in Finalsite Enrollment, refer to the Field Types article.
- To learn about field settings options, review the Field Settings article.
Who can access this feature?
Admin Account Types: System Admin & Admin
Permissions: Data
In this article
How fields affect your site
Editing fields can affect different parts of your site and data. Because of this, our team has created a list of things to keep in mind. Before diving into creating or editing fields, we recommend you read this section first.
A quick note about the term Field Values: We use the term field values often throughout this article. When doing so, we are referring to the options in a field. For example, "yes" or "no".
Whatever options you input within the field's options box are known as the "field values."
-
Searching: If you edit or delete a field value, the original value will no longer appear in your search results and you will not be able to search on it. Because of this, we urge you to use caution when making edits or removing values.
- But what if you need to update a field value and would like to change the previous values to match the updated version? We've got you covered! Click here to check out our helpful guide below which gives you step-by-step instructions for navigating that.
- Spelling: On a similar note, when you are adding or editing fields, it's always a good idea to double-check and triple-check the spelling.
-
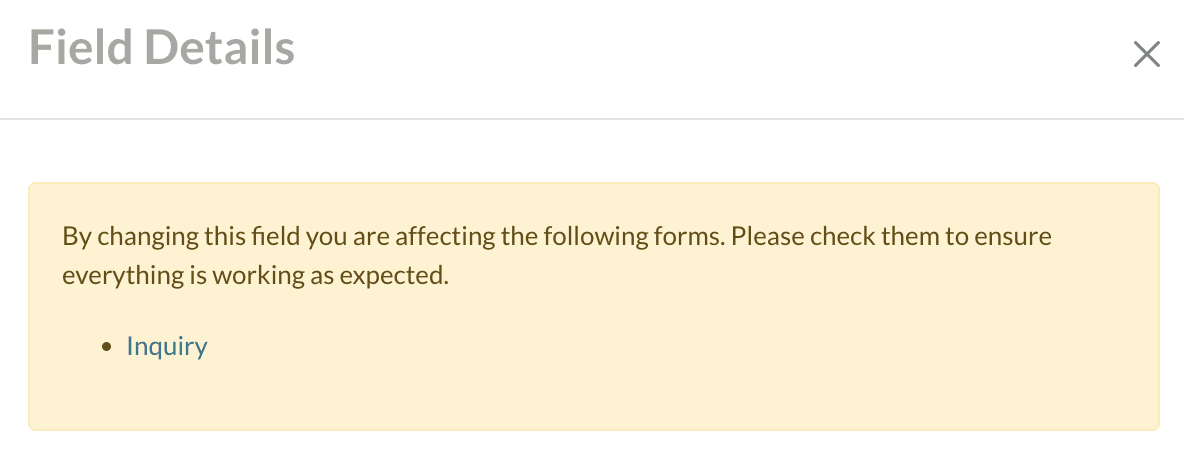
Forms: If you go to edit a field that is listed on a form, we've built in a warning message that looks something like the one below. That way, you can double-check and adjust the form if needed.
- If you edit a value used as a dependency on a form, you need to re-add that value to the form options.
- If you delete a field value that's used as a dependency on a form, the value will no longer appear to those completing the form.
-
Exports: If you select to edit a field that is used within an export, you will see a warning message like the one below.
- It's important to use caution when considering adjustments to the values of those fields and we recommend contacting support for help with this.
- Click here to jump to our notes on what to do when you need to adjust a field that's used on an export.
-
Checklist Items, Contract Fees, and Payment Plans: If you select to edit a field that's used to add a rule to a checklist item, contract fee, or payment plan, you will see one of the messages below.
- If you see this message, please reach out to our support team with the details of what you'd like to adjust within the field and we'll be happy to help you navigate that.
Checklist Item Rule Message: If you try to edit a field used in a checklist item business rule, you will see this error message: You can not change this field as it is associated with a checklist business rule. Please contact support to make any changes.
Contract Fee Rule Message: If you try to edit a field used in a contract fee rule, you will see this error message: You can not change this field as it is associated with a fee rule. Please contact support to make any changes.
Payment Plan Rule Message: If you try to edit a field used in a payment plan rule, you will see this error message: You can not change this field as it is associated with a payment plan rule. Please contact support to make any changes.
Create a New Field
- Navigate to the Fields page: Settings > Fields & Data > Fields.
- Select the Add a new field link in the upper left.
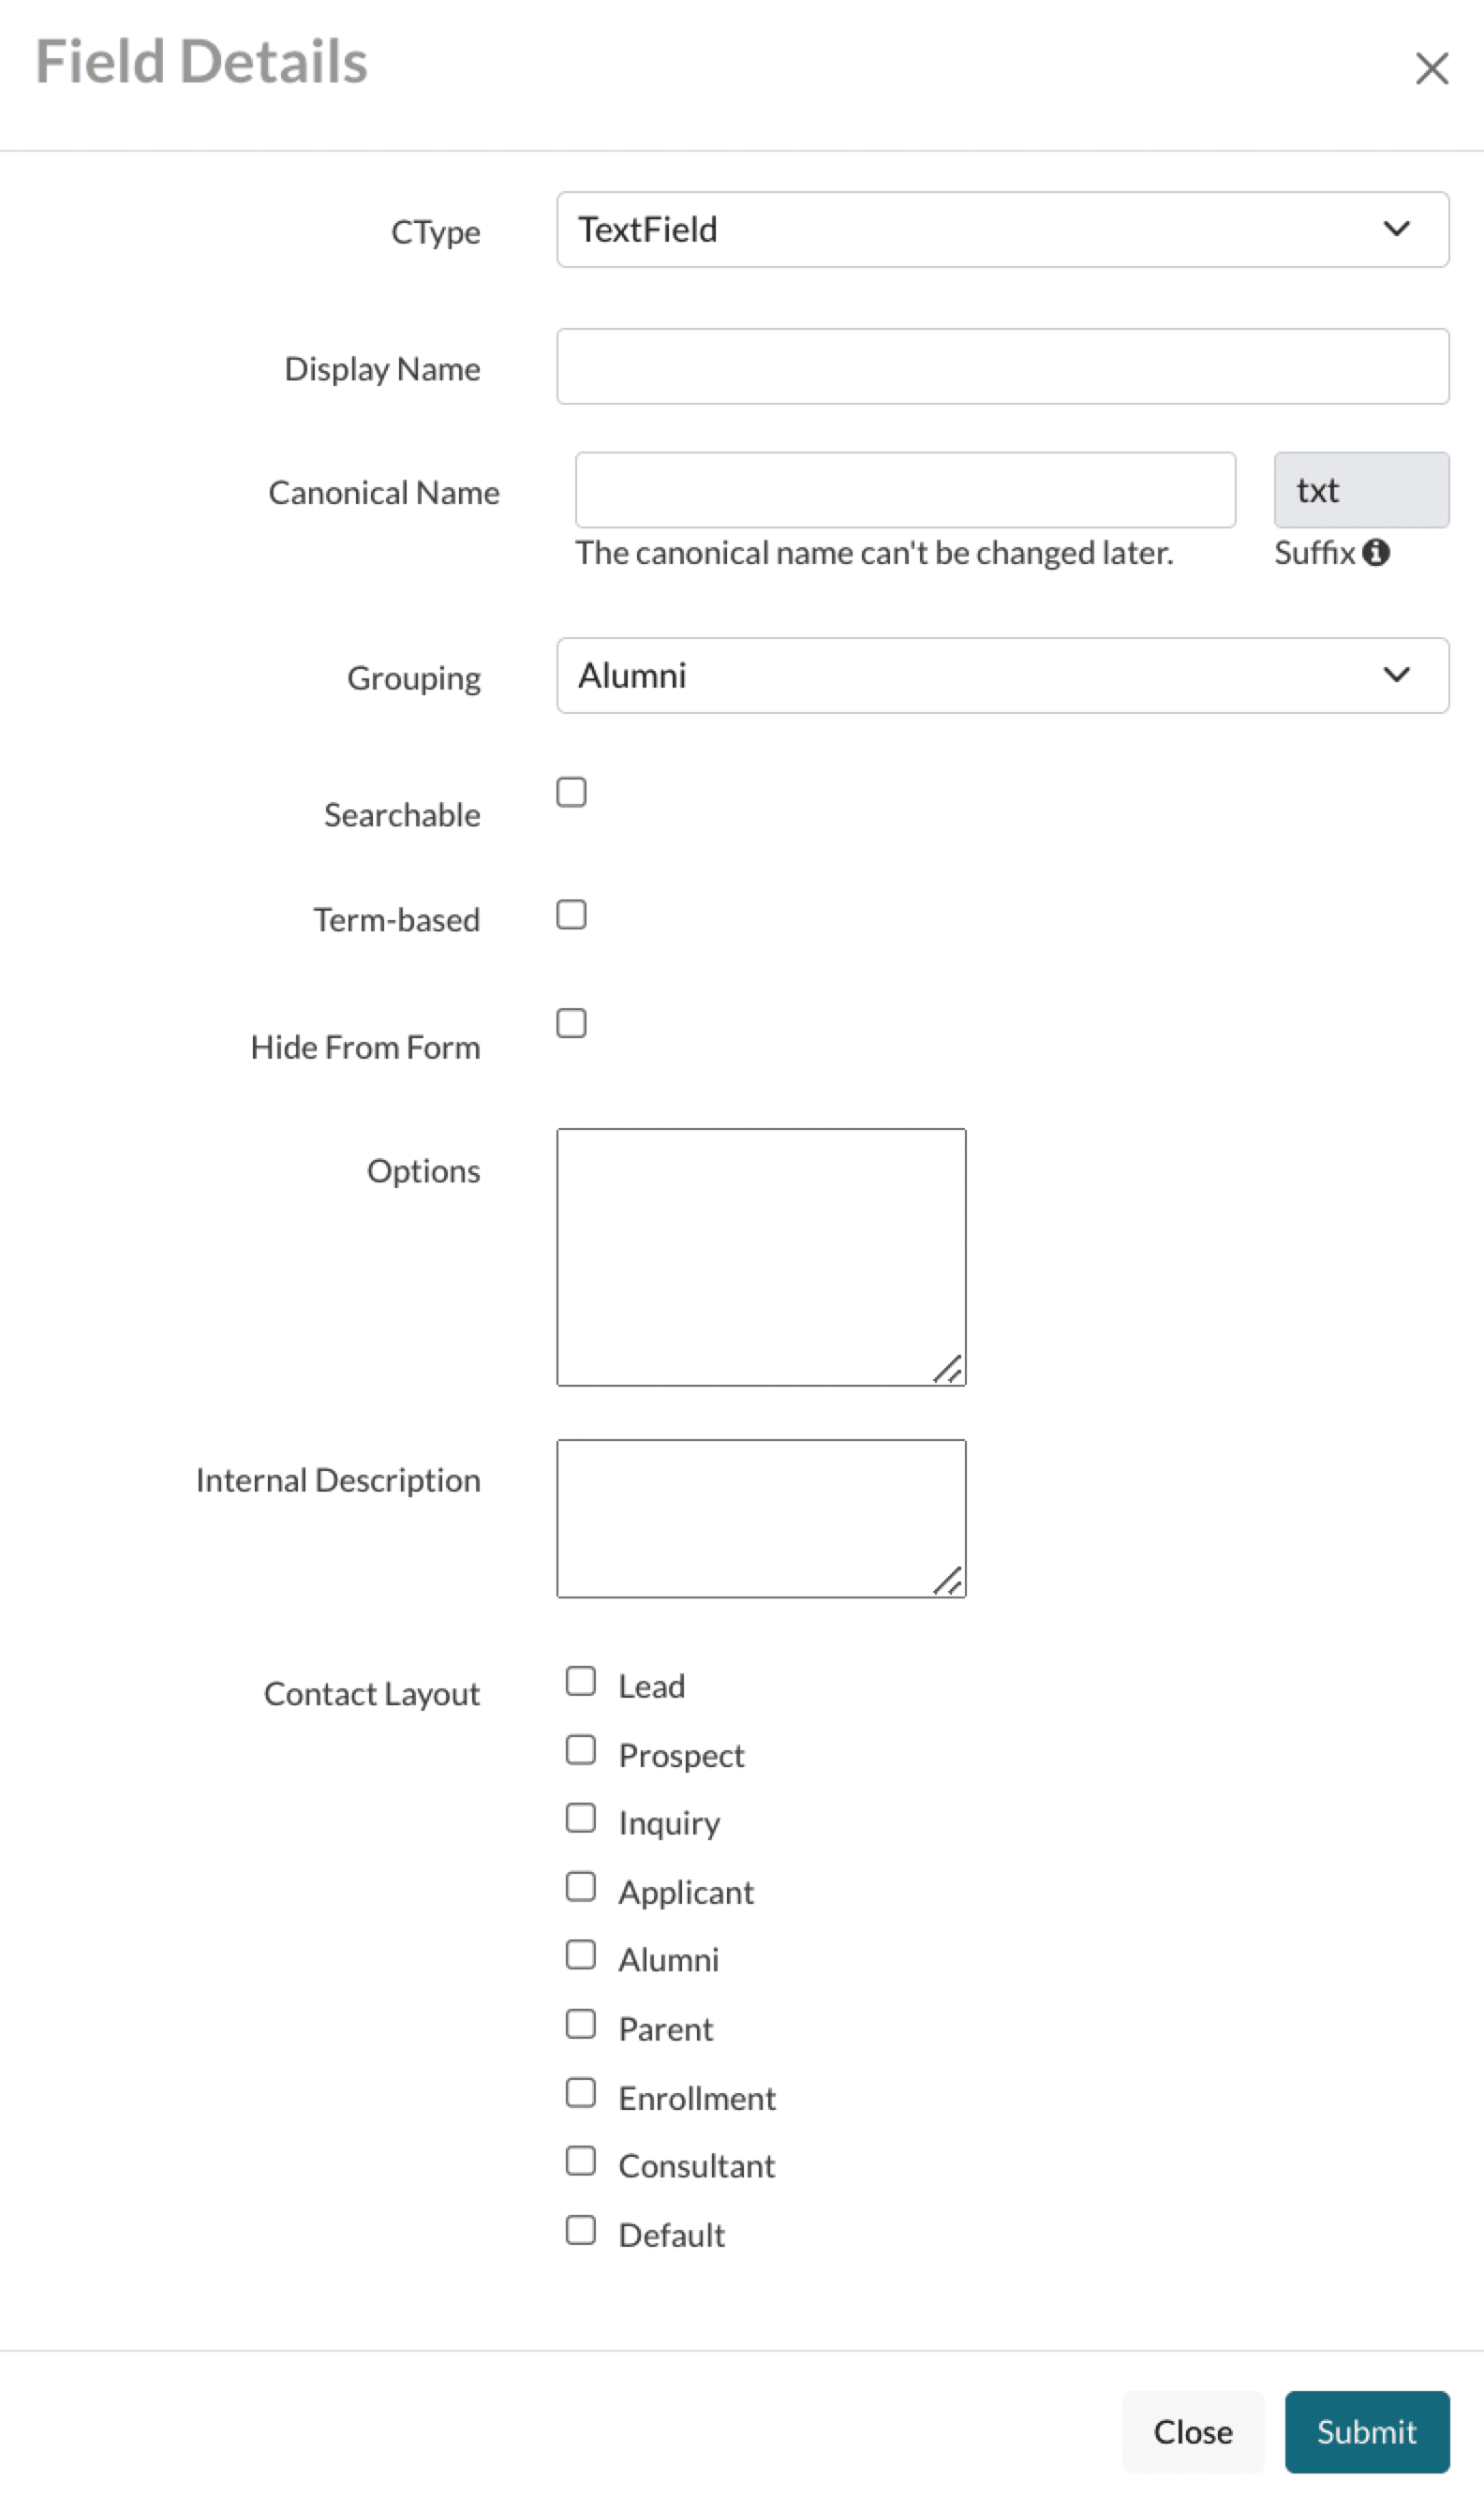
- Complete the Field Details Options. (Read the guide below in the Field Details section to learn about each option.)
- Once you've reviewed your field and are ready, select Submit to finalize and save your new field. If you do not wish to continue, simply "x" out the box, or select Close.
Deleting a field
Please note that you cannot delete a field once it has been created, as this will delete any values in that field. If you need to retire a field, we recommend updating the name of the field to include "RETIRED" or "DO NOT USE" for clarity. Learn more about editing fields in the Edit an Existing Field section below.
However, if a field was created by your team in error and does not hold any values yet, please submit a request to support for assistance. Deleting is permanent and we cannot recover field values.
Field Details
-
Ctype: This is the type of field you are creating.
- For a quick reference, check out our Field Type Quick Guide below to review the most common field types.
- You can also refer to the Field Types article for more detailed insight into the options.
-
Display Name: This is the name of the field. The name should be short, yet clear enough for someone to read it and know the purpose of the field. Here are our recommendations for creating a good display name:
- Keep it simple but descriptive: think in keywords instead of full sentences.
- Check your spelling :)
-
Canonical Name: This is the system name for the field. It will populate automatically for you but you can edit it manually when creating the field. Once you save the field, it is locked in and cannot be adjusted.
- Suffix: This is part of the internal, system name for the field. The system will input this automatically.
- Grouping: Use the dropdown to select the group the field should belong to. To learn more about field groups, please refer to the Field Settings article.
- Searchable: Selecting this option makes the field searchable. If you'd like to be able to pull the data within this field into a search, select this box.
-
Term Based: USE CAUTION Selecting this option makes the field term-based. Term-based fields clear out each year when you roll students over to the next term.
- Term based fields may only be mapped to the student as parents and other entities do not have a term.
- Once a field is set as term based, it can not be undone. To review more about term-based fields, please refer to this article: Term-Based Fields & Enrollment Refresh.
-
Hide From Form: If you select "Hide From Form" for a field used in a form, its value will be hidden when admins are viewing the form.
- Regardless of the admin permission level, any admin who views forms on the record, downloads the PDF version of a form, or checks out a form in the review module will see "Hidden From View" instead of the data for any field that has "Hide From Form" enabled.
- Check out this section in our Field Settings article for more insight.
-
Options: Use the options box for Boolean (yes or no), Boolean List Fields (multi-select), and Single Select (dropdown) fields. Leave this blank for any other type of field you create.
- For a quick reference, check out our Field Type Quick Guide below.
- Internal Description: This is optional. If you add an internal description, it will display on the Fields page within the description column when hovering over the icon.
- Contact Layout: Selecting these options tells the system when you want to display the field. For example, if you only need to see this field on your Applicant's records, then you would select only Applicant from this list.
Field Type Quick Guide
This is a quick reference describing only the most common field types. For a full list and description of all field types, please check out our Field Types article.
-
Text: Smaller open text box that can hold any type of information. Text Fields do not have set character or word limits.
- Do not enter anything in the Description box when creating or editing a text field.
- Example of a text field:
-
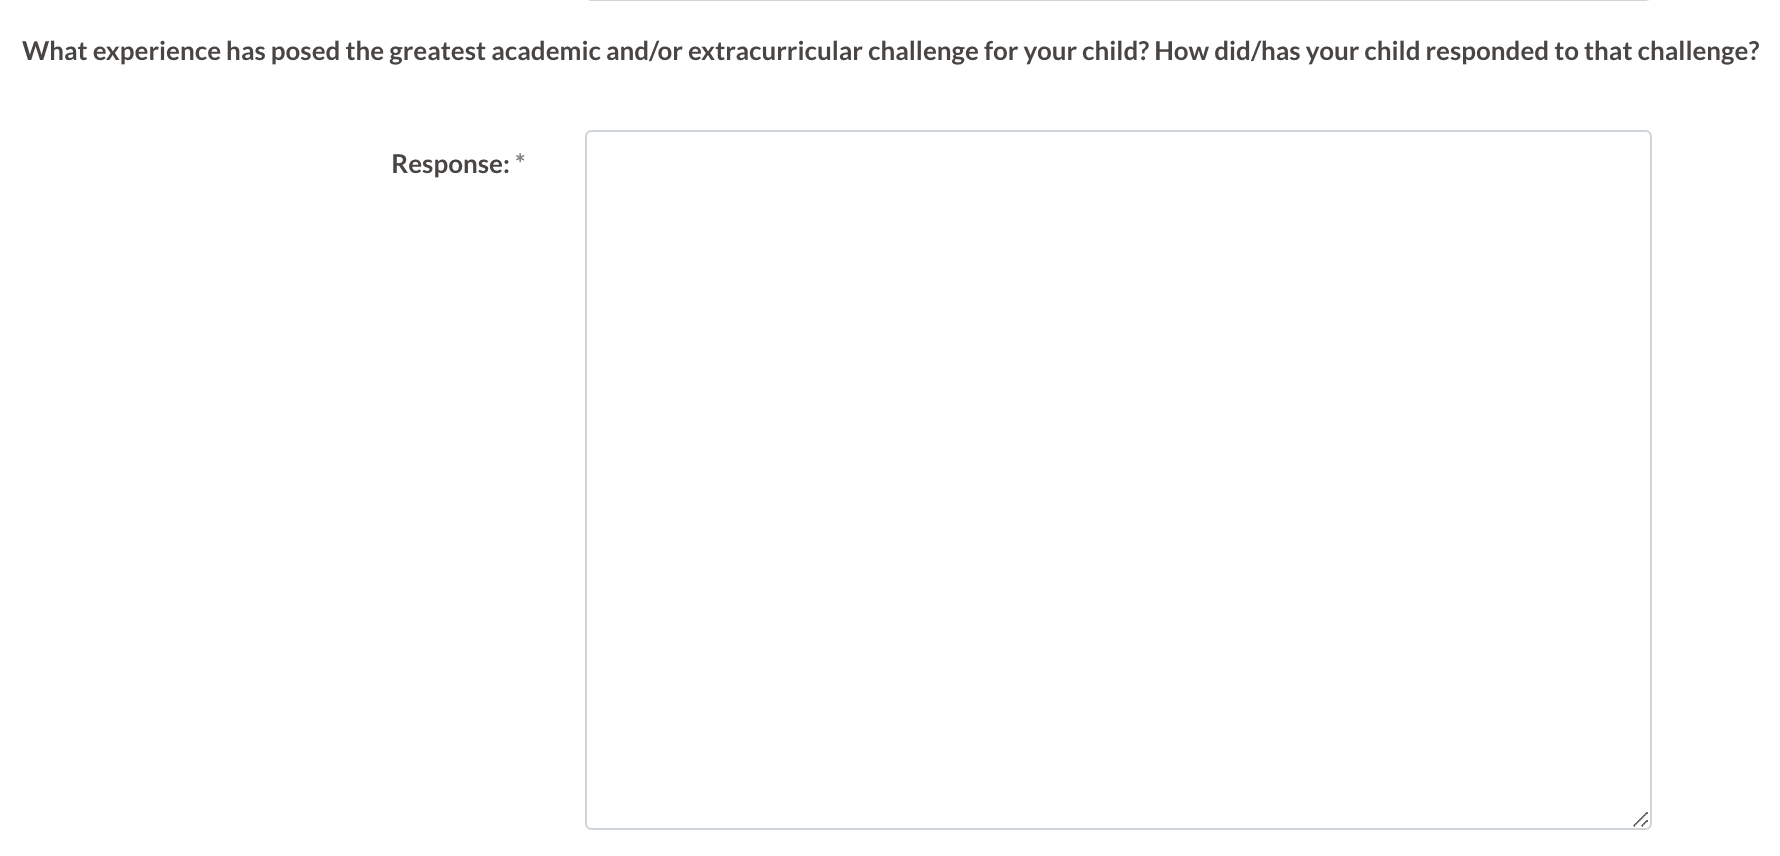
Text Area Field: Larger open text box that can hold any type of information. It preserves line breaks and will always display submitted data across the full width of the page to make it easier to read long answers. Ideal for essays, internal notes, and any other items requiring longer responses.
- TextArea Fields do not have set character or word limits.
- Do not enter anything in the Description box when creating or editing a text field.
- Example of a Text Area Field:
-
Single Select: Drop-down list field in which only one selection can be made from the list of options. Useful for collecting data such as t-shirt size, so that a single value can be selected from a list of options.
- When creating a Single Select Field, you must enter the field options in the Description box.
- Example of a Single Select Field:

-
Boolean: Field in which accepted values are only yes or no. Additional options cannot be added to Boolean Fields.
- When creating a Boolean Field, you must enter yes and no as the options within the Description box.
- Example of a Boolean Field:
-
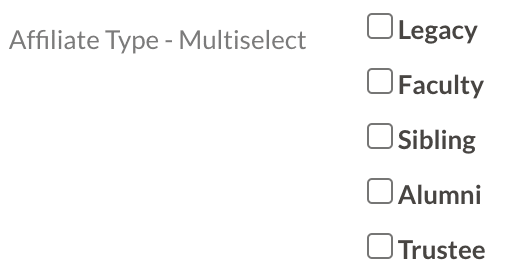
Boolean List Field: Multi-select field in which one or more of the listed options can be selected. Useful for collecting data such as academic or athletic interests, so that a student can check all that apply.
- When creating a Boolean List Field, you must enter the list options within the Description box.
- Example of a Boolean List Field:
Edit an Existing Field
Before you make any field edits, please be sure you've reviewed the Read This First section at the top and the Field Edit Workflows below.
- Navigate to the Fields page: Settings > Fields & Data > Fields.
- Select the Edit link on the right side of the page and the Field Details pop-up will open.
- Once your edits are complete, select Submit to save the changes. If you do not wish to make a change, simply "x" out the box, or select Close.
Field Edit Workflows
Changing Previous Field Values to Match New Values
Sometimes you need to change a field value and want the previous value updated to match the new one. Updating the previous value can clean up your data and keep things consistent. The following steps using a real-world example can guide you through our recommended approach.
Real World Example: You plan to change one of your ethnicity values from Asian American to Asian and would like all prior existing values changed.
Here's what you do:
- Add the new value (Asian) to the field option list.
- Run a search under the current term to pull all contacts with the prior value (ethnicity = Asian American).
- Select all contacts (*remember: If the search is multiple pages long this must be done by page and you should start with the last page of the search).
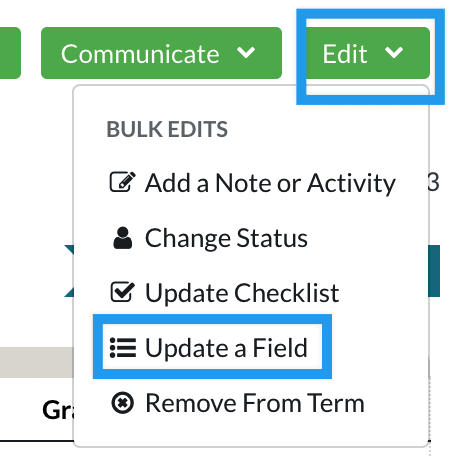
- From the Edit menu select Update a Field Value.
- Update all student's field values to the new option.
- Go back to the Field's page (Settings > Fields & Data > Fields).
- Select to edit the Ethnicity field.
- Remove the old value (Asian American).
Updating Field Values that are Used in Exports
Changing a field value that's on an export can affect your mapping and break your export.
If you need to make a change that affects the values listed on one of your exports, here's what we recommend wrapped in a real-world example.
Real-World Example: You have the ethnicity field in an export. In EMS, the value in your ethnicity field is Asian and, in your other SIS, you need that value to simply be A. Here's what to do:
- Contact Support.
- Let the support team know:
- Which field you edited
- What change you've made to the field
- What Export the field lives on
- The Support team will take it from there!





Comments
0 comments
Article is closed for comments.