Overview
Did you know?
Did you know that you can create and edit your own fields? Check out this article to learn more: Creating and Editing Fields.
Within Finalsite Enrollment, fields are the containers that store specific data about students, parents, or other contacts in the system. To learn more about what fields are and how they work, click here.
This article will detail how to adjust various settings for your fields, so you can manage how they appear and are organized within your Finalsite Enrollment site.
Please note, you do not have the ability to delete fields on your end. If you need to delete a field, please reach out to our Support Team.
Click to jump to:
How-To: View & Navigate the Fields Setup Page
To view your full list of fields, navigate to Settings > Fields & Data > Fields. Please note: This page will only be accessible to Admins/System Admins. This page, also known as the Fields Setup Page, contains a list of every field in your Finalsite Enrollment site. This contains both standard fields (e.g. Name, Grade, etc.) as well as any custom fields you have requested be created.
Search or Filter for a Field
To search for a particular field or field type within this page, click on the blue 'Filter Options' button near the top of the page.
When the filter options expand, you will see the following:
-
Search: Allows you to search by text by typing a full or partial field name into the search box.
-
Grouping: Allows you to search by specific field groupings (e.g. Personal Information, Review, etc.) by checking the boxes. This is a multi-select filter, so you can check as many boxes as you want to filter by.
-
Field Type: Allows you to search by specific field types (e.g. Scholarship field, Date field, etc.) by checking the boxes. This is a multi-select filter, so you can check as many boxes as you want to filter by.
Once you have selected the filter options you want to use, click on the blue 'Apply Filter' button. If you want to go back to the default view, you can click the red 'Clear Filters' button.
How-To: View & Edit Field Settings
Within the Fields Setup page, you can see the different elements displayed as columns. You can also edit some of this information by clicking on the Edit button to the right of any field to open the Field Details window.
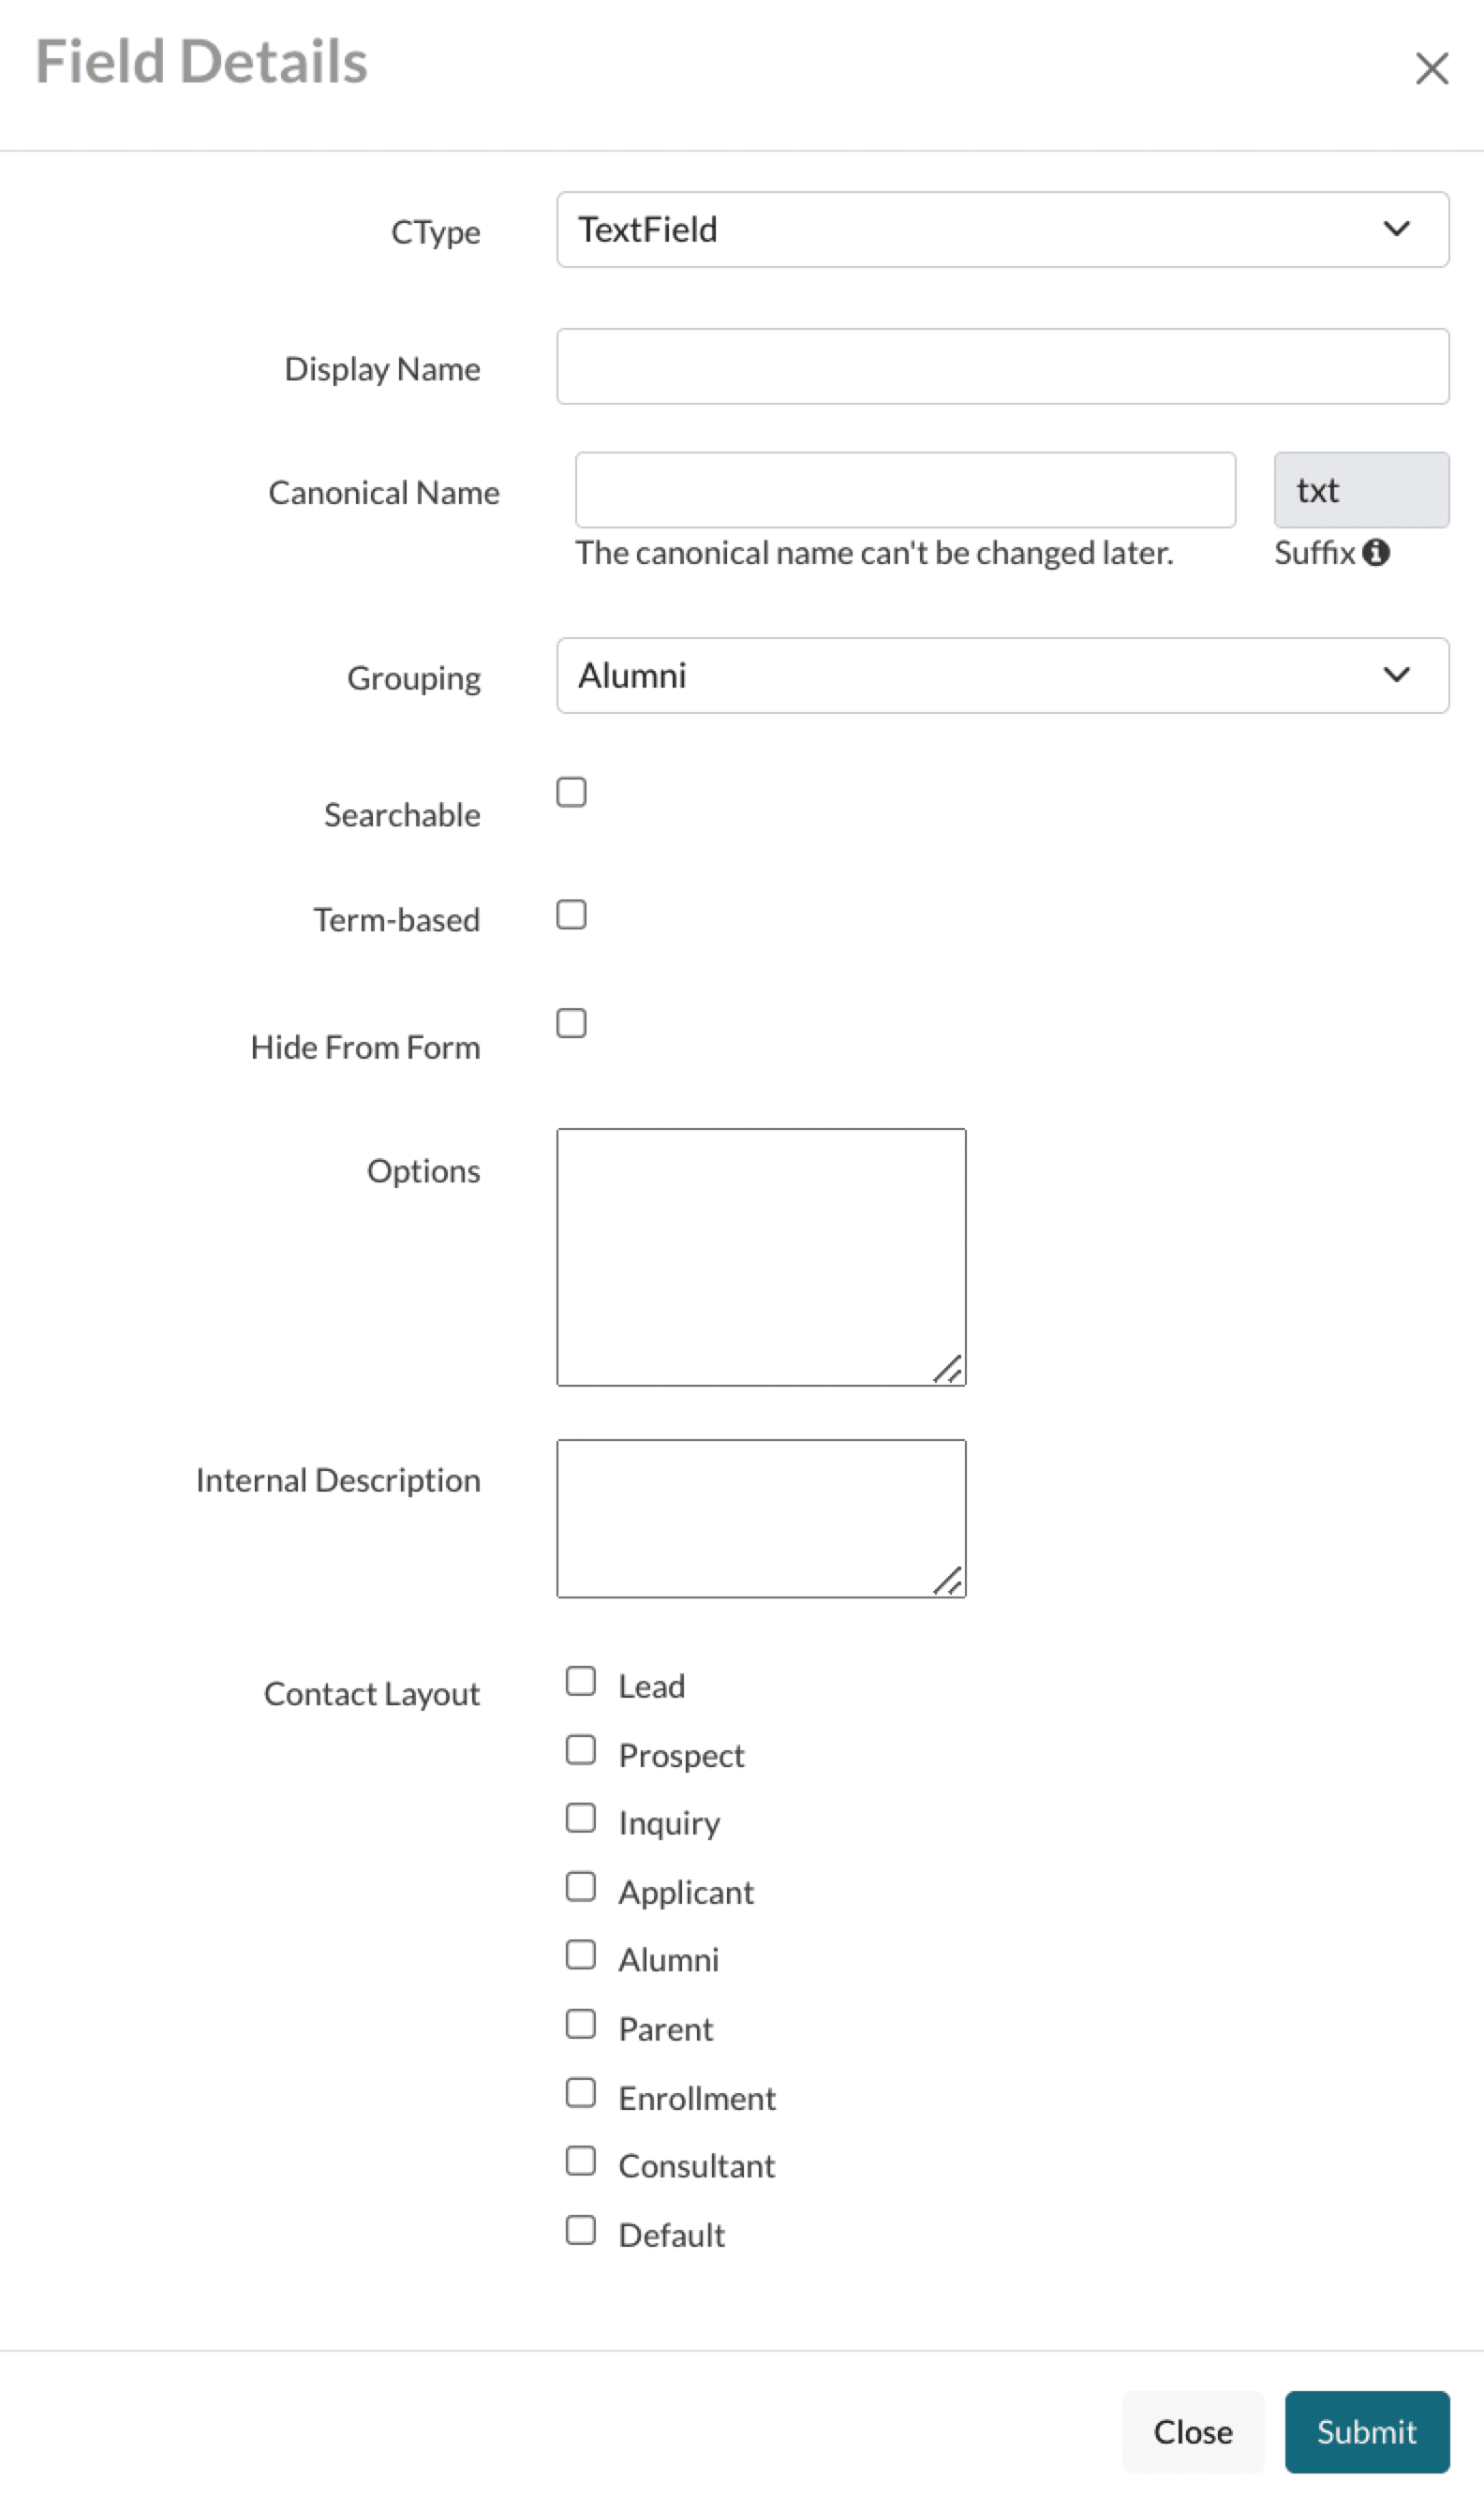
Within the Field Details window, you will see the following information:
-
Display Name: Name of the field as you will see it displayed on contact records and within search & reports, as well as some other spots such as the template editor, communication plan steps, etc. The Display Name can be changed by your internal team, and does not affect what is seen on forms. The way a field is displayed on forms is through a prompt - click here for more information.
-
Name: Canonical name of the field that is used on the back-end of the system. It will always be all lowercase with underscores instead of spaces. The canonical name is used for pulling information into merge fields / tokens, as well as in online forms, contact imports, data exports. Once a field is created, the canonical name cannot be changed.
-
CType: The type of field, which determines what data inputs are allowed in the field. For example, a DateField requires a formatted date, while a TextField allows anything to be typed into it. Once a field is created, the type cannot be changed - a new field with the updated type will have to be created instead. Click here to learn about the different field types in the system.
-
Grouping: Indicates the specific grouping in which a field will appear within the Personal, Admissions, or Enrollment tab of the contact record. The field grouping also determines where you will locate a field within the Change Display/Columns window in Search & Reports. Field groupings can be changed by your internal team, although some standard fields (e.g. name, address, birthdate) have a hard-coded grouping and cannot be edited. The visibility of groupings and the fields contained within also pertain to user viewing permissions as defined in the Admin Portal Accounts page.
Note on the 'Hidden' field grouping: Assigning a field to this grouping hides it from the contact record. This is mostly used for retired fields that your school is no longer using. The grouping can be set to Hidden, instead of deleting the field, so that any historical data will still be kept in the system if needed for a historical search.
-
Searchable: This checkbox determines if the field can be searched on and displayed as a column on the Search & Reports page. Your internal team can toggle whether fields are searchable or not by checking/unchecking this option. When building a search, the field can be located in the All other fields search criteria, as long as you have access to view that grouping. If you are unsure where to locate the field in the change display/columns window, refer to the grouping of the field within this Fields page, as it will match the grouping of displayed columns in Search.
-
Term-based: This checkbox determines if the data stored in the field is term-based, i.e. it can hold a unique set of data for each academic year. Term-based fields clear out each year when you roll students over to the next term.
- Term-based fields may only be mapped to the student as parents and other entities do not have a term. Once a field is set as term-based, it can not be undone.
- To learn more, visit our Term-Based Fields & Enrollment Refresh page. Term-based fields clear out each year when you roll students over to the next term.
-
Hide From Form: If you select "Hide From Form" for a field used in a form, its value will be hidden when admins are viewing the form. Read more below.
-
Options: A list of options will appear only for certain field types, such as boolean, booleanlist, or single select. These are the options available to choose from for this field on a form or in the contact record.
-
Internal Description: A short description of the field. This is optional. If you add an internal description to a field, it will display on the Fields page within the description column when hovering over the icon.
- Contact Layout: Indicates which contact record types will have the field displayed. For example, if you are collecting specific field data on your Contract, you may only want to display those fields for contacts in the 'Enrollment' contact type, or you may only want to display work information for contacts in the 'Parent' contact type. The contact layout options can be changed by your internal team by checking or unchecking the boxes. For a faster way to change the contact layout options for all of your different fields, use the 'Contact Layout' page within Settings > Fields & Data.
Hide From Form
When Hide From Form is selected for a field, it conceals the value of that field from admins when they view it on a form.
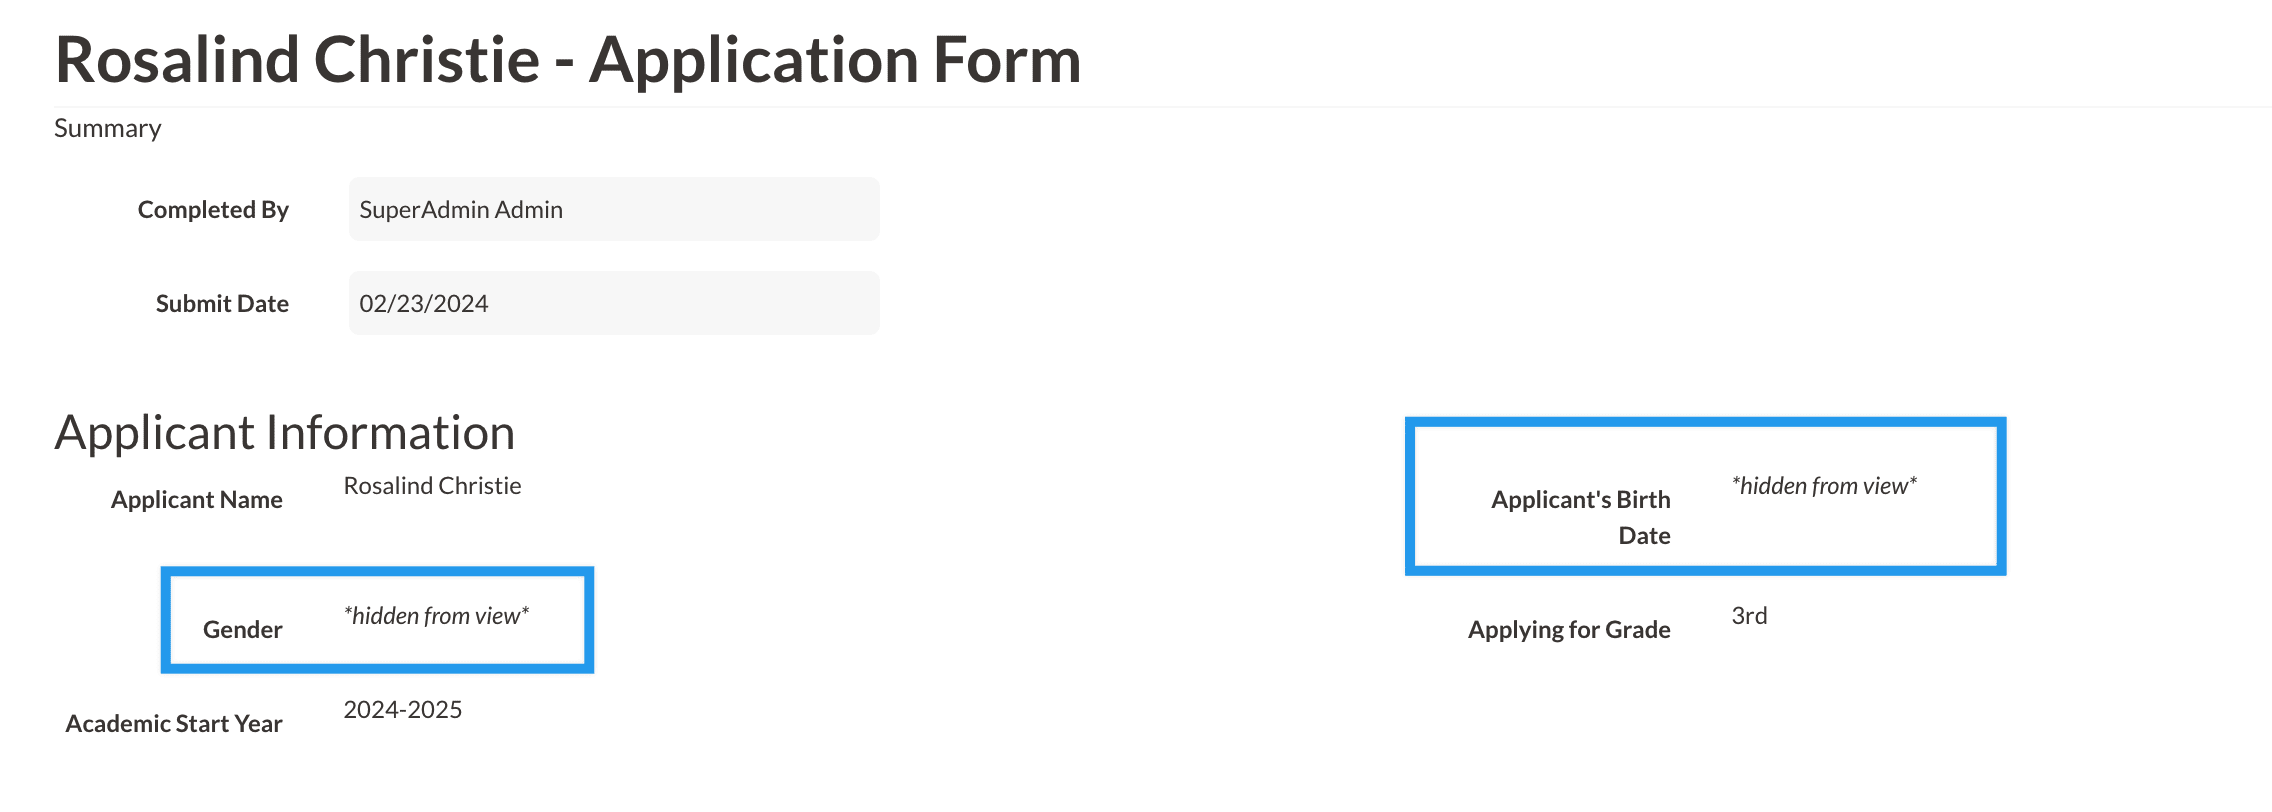
For instance, in the image below, both the Gender field and the Applicant's Birth Date field have Hide From Form enabled. Consequently, when an admin views the form, they will not see the data stored in those fields.

When "Hide From Form" is selected:
- Parents will still be able to see the data within the field on their end.
- Regardless of an admin's permission level, whenever they view forms on the record, download the PDF version of the form, or check out the form in the review module, they will encounter 'Hidden From View' instead of the actual data for any field with 'Hide From Form' enabled.
- This only applies to viewing the field on a form. Any field with 'Hide From Form' enabled will continue to display its data within searches, on the contact record (if the field is visible in the Contact Widget or within tabs like Personal, Admissions, or Enrollment), in emails, and any other location where the field is displayed. The information is only hidden from admin when they view the field on a form.
Good to know: Hide Form Form is reversible. You can de-select 'Hide From Form' in the field settings at any time and, as soon as you do so, the data will start to display again.
How-To: Rearrange Field Order
Fields can be arranged in a custom order on the contact record (shown below) within the Personal, Admissions, and Enrollment tabs, based on the order they appear in the Fields List Page.
To rearrange the order in which your fields appear, follow these steps:
-
Navigate to Settings > Fields & Data > Fields.
-
Click the 'Filter Options' button, select the grouping you would like to rearrange, and then click 'Apply Filter' button. Click here for more information on this step.
-
Rearrange the fields by hovering over the field until you see the cross arrow symbol, then drag and drop the field to the desired position.
-
Check a contact record to see the applied changes!
You can also rearrange fields from the Contact Layout page. Click here for more information.
How-To: Examine Field Usage
To see the different places a field is being used in the system, click on the 'Examine' button to the right of any field to open the Field Examine page for it. This will show you if the field is being used on forms, saved searches, exports, email snippets, and more.
In addition, for any composite fields (i.e. fields made up of various subfields), such as phone numbers and names, you can see the specific canonical names for each subfield. This is helpful if you want to pull in the information from a specific subfield (e.g. phone type or name title) on a template, export, etc. instead of pulling in the entire field.


Comments
0 comments
Article is closed for comments.