
The Finalsite Explore Content page (Settings > Portal > Finalsite Explore Content) is where you update the key information that identifies your school in the Finalsite Explore portal, including school name, logo, grades, programs, and address.
Who can access this feature?
Admin Account Types: System Admins and Admins
Permissions: Any
💡Quick Answers
- What fields can I update on this page? School Name, School Information Snippet (500-character limit), School Logo (1:1 square, 2-5 MB), More Information Hyperlink, Min/Max Grade Levels, Portal Grade/System Grade mapping, School Address, NCES School ID, Programs, and the Enabled toggle.
- What happens if I leave the More Information Hyperlink field blank? The More Information button will not appear on your school's Explore profile, and inquiries will not be generated from Explore.
- Does the More Information button appear for users browsing without an account? No, the More Information button only appears after a visitor has created a Finalsite Explore account; see Finalsite Explore Access for link options.
In this Article
Field Descriptions
School Name
Enter your school's name here. This will be displayed on the parent end in the list of schools on the left and in the panel that opens when your school is selected.
School Information Snippet (Optional)
This information is displayed in the school profile panel when a school is selected on the Explore Schools page. This is an optional field.
Good to know:
- 500 character limit. Keep an eye on your text; there is no warning to let you know when you exceed 500, the box will just cut off your text.
- This area doesn't support emojis.
- This area doesn't recognize page breaks.
- Tip: Use the drag to expand feature to make this area easier to edit.
Upload School Logo
Add your school's logo image file here. This is like a thumbnail image that will display beside your school's name in the list of schools.
Requirements:
- Aspect Ratio: 1:1 (Square)
- Recommended File Size: 2 MB–5 MB
More Information Hyperlink (Optional)
This is the URL that parents will be directed to when they select the More Information button. You may wish to link to your school website or inquiry form here.
This is an optional field. If you do not fill in a URL in the More Information field, or if you remove an existing URL added to that field, the More Information button in Explore will not appear and inquiries will not be created from Explore.
Important Note
Please note that if you are sharing the Public Explore link to allow families to browse without creating an account, the More Information button will not appear. This option only appears after a visitor has created an account.
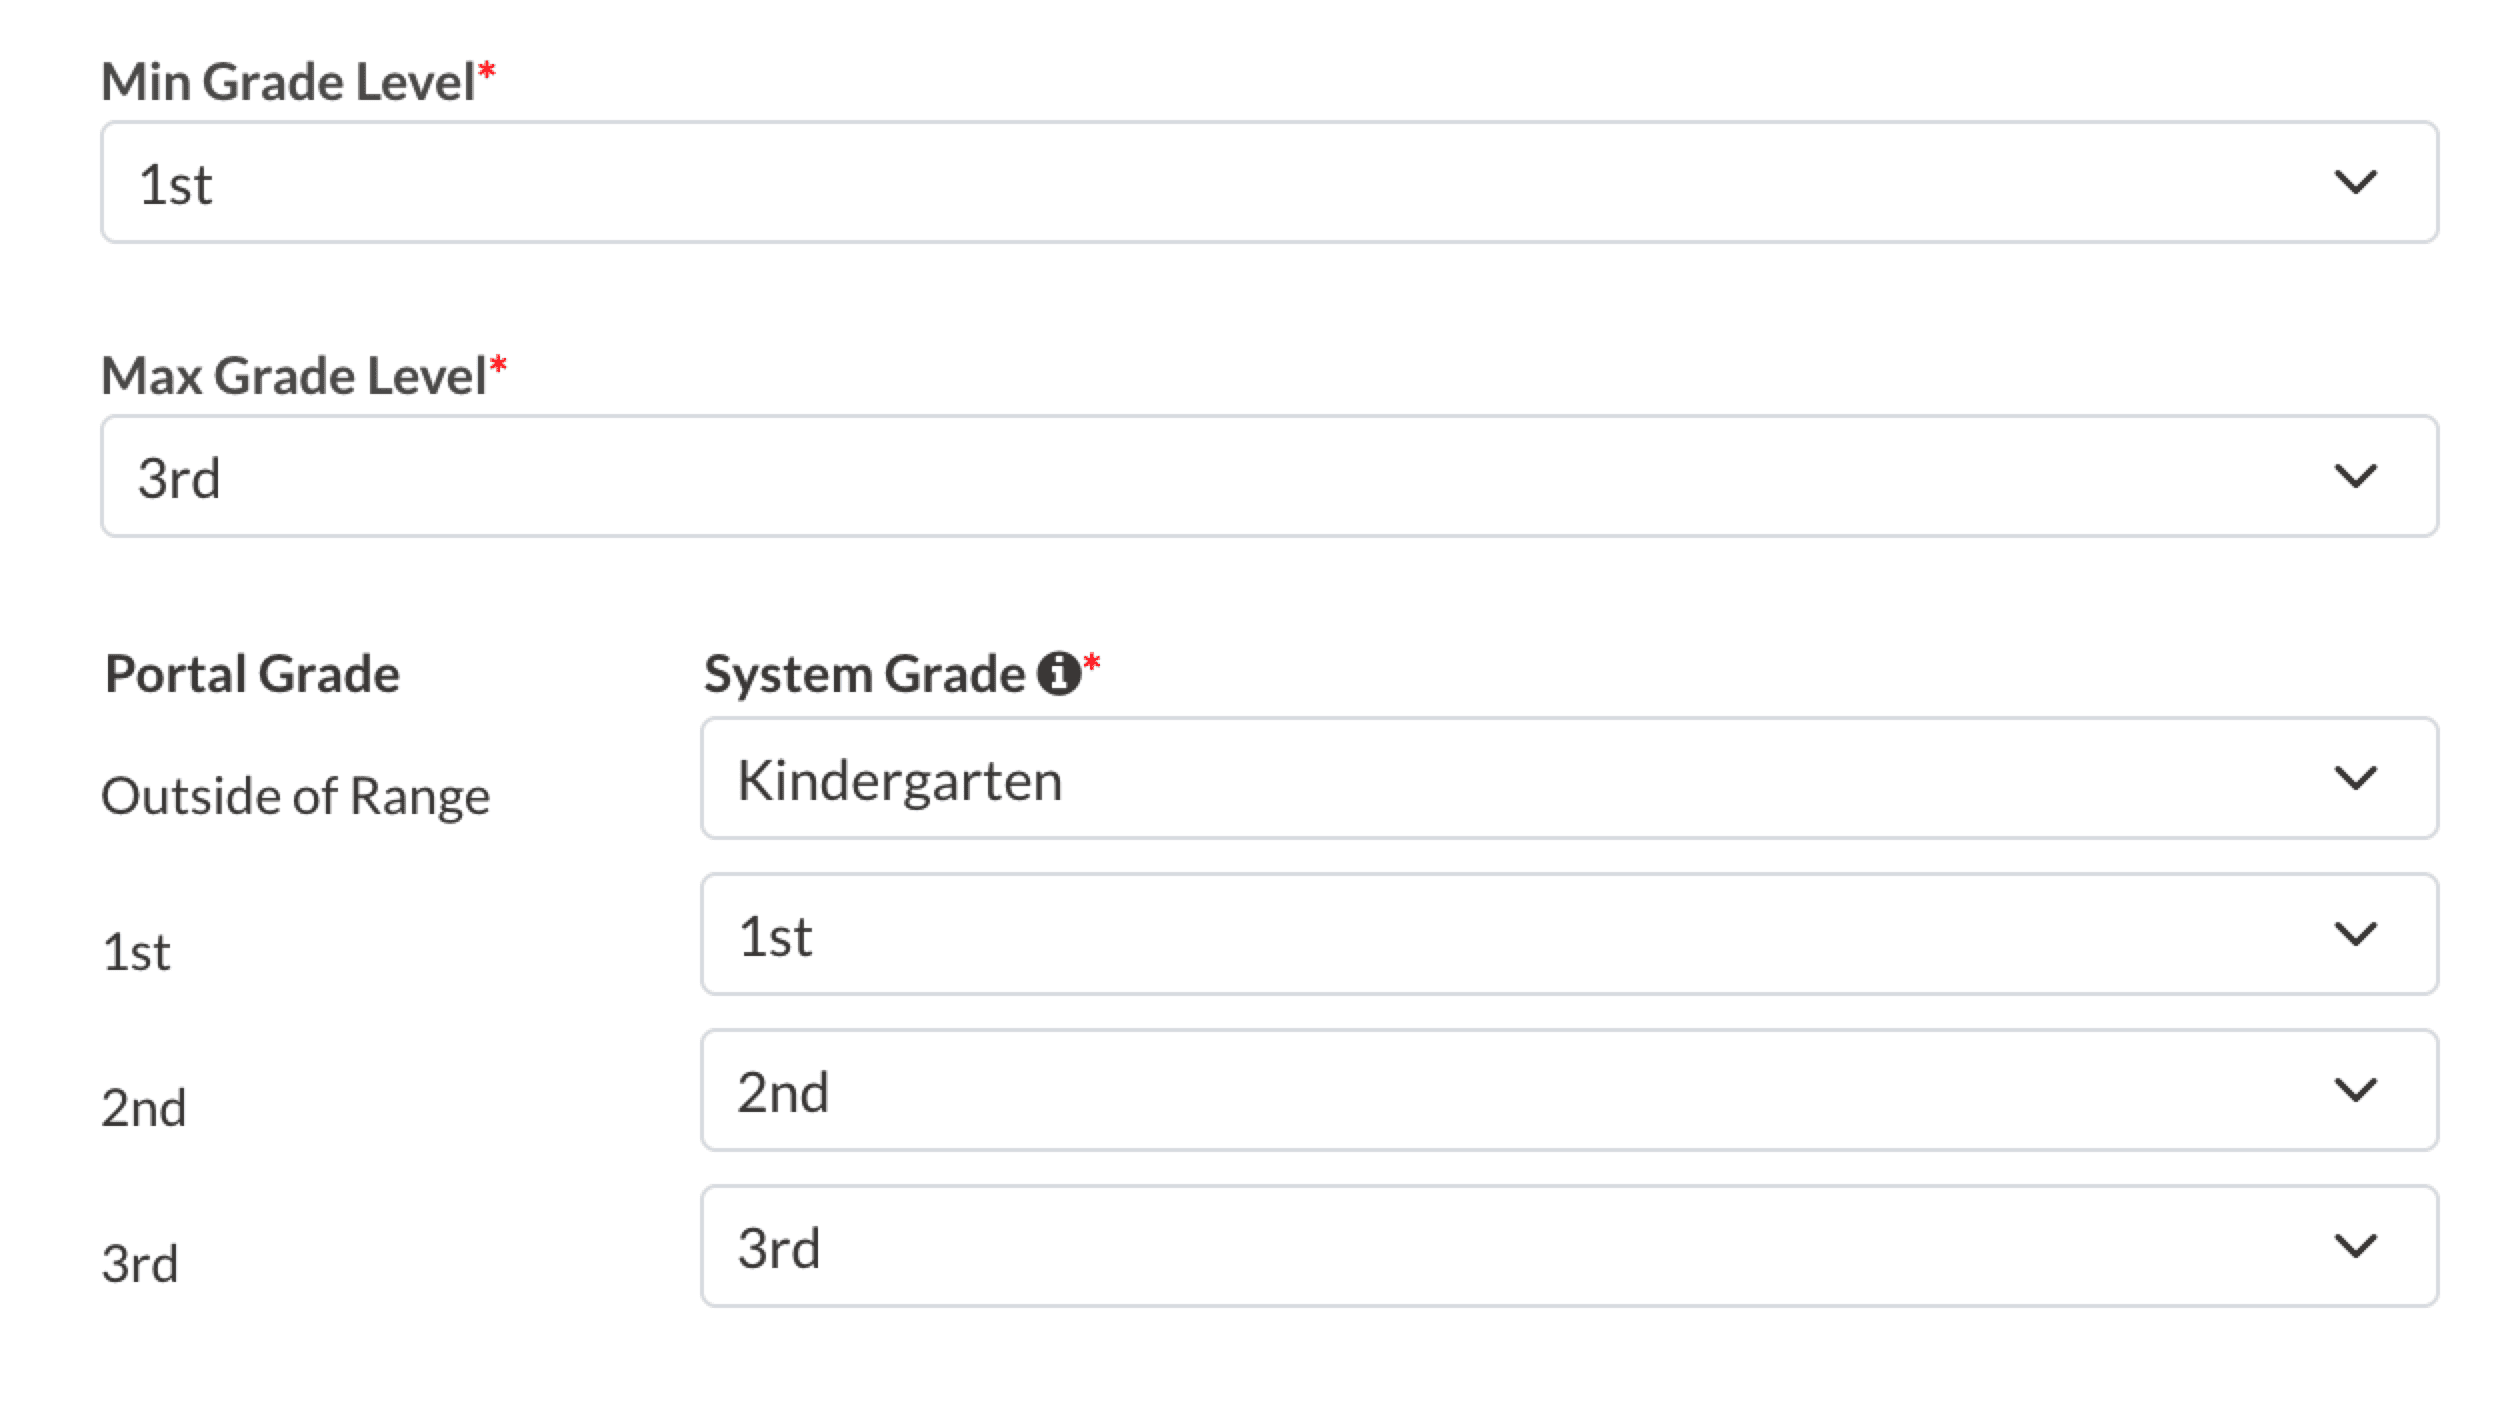
Min Grade Level and Max Grade Level
Select the lowest and highest grades at your school.
Portal Grade/System Grade:
- Portal Grade: On the left side, you see all grades within your min/max levels selected above.
- System Grade: On the right side, you can choose the grade that corresponds to the grade on your site. Inquires from Finalsite Explore will feed into the grade selected here.
- Out of Range: There is also a grade for out of range. This is what an inquiry will map to if the student’s grade is not one you offer. For example, if the student selected Pre-K, but your school does not offer that grade.
School Address
Enter your school's address here. The School Address tells the system where to display your school on the Explore map, and it will appear under the school name in the list and in a bubble on the map when a user hovers over the school's pin. Learn more about the Explore map in the "Finalsite Explore: School Map & Zoning" article.
NCES School ID
For school groups that require zoning, you will need to add your NCES School ID to this field and then check the Require Address Zoning box. This will add the Zoned label to your school in Finalsite Explore.
The NCES School ID field is used specifically for Public Schools that enroll students based on defined geographic boundaries.
Important Guidelines:
- Zoned Schools Only: Please only provide an NCES ID for public schools that require address zoning.
- School ID vs. District ID: You must use the School ID. Do not use the District ID, as it will not be recognized for zoning purposes.
- Validation Errors: If you enter an ID and receive an error message (e.g., "NCES ID not found"), this usually indicates the school is not classified as a zoned public institution in the federal database.
Learn more about zoning in the "Finalsite Explore: School Map & Zoning" article.
Find Your NCES ID
If you are unsure of your School ID, you can use the official NCES search tools:
- Search for an Individual School
- Search by District (Useful for finding a list of all schools within your local area)
Programs
Within this field you can add a list of the programs that you offer. The programs you add here are not connected to any fields in your site. This is just a way to add the programs that you offer to be displayed within the Explore page on the parent end.
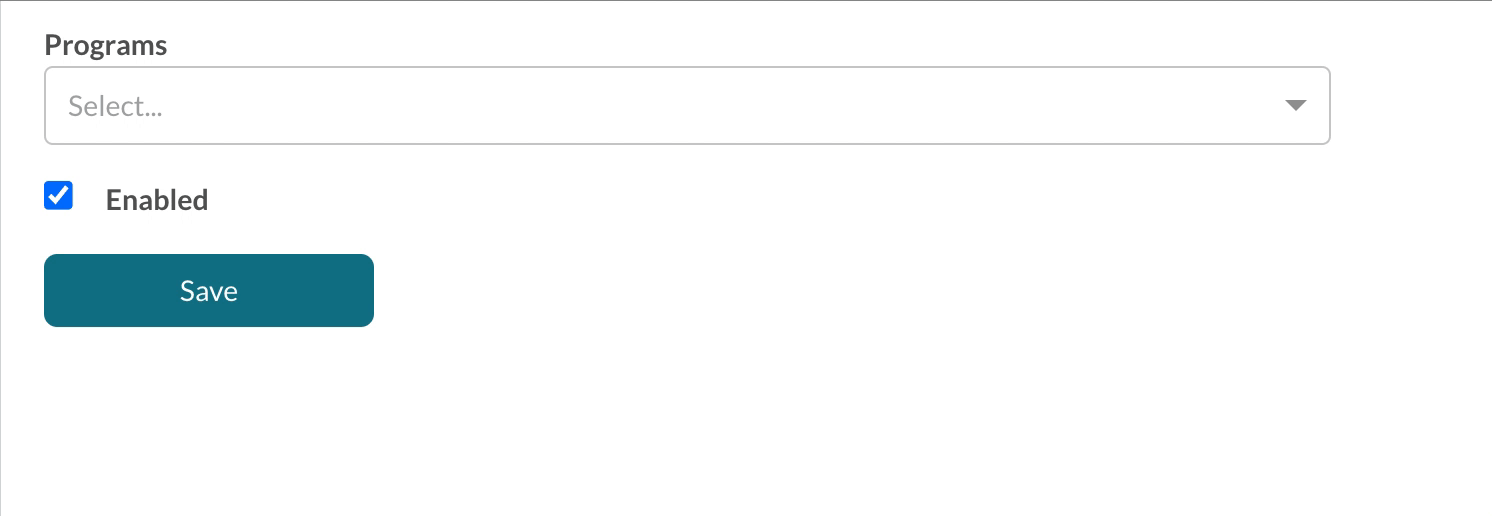
Whatever you add here will display on the parent end in the school profile panel.
In addition, your visitors will be able to filter the group by program (and/or grade) above the school list on the left side of the page.
Consistency is Key
To ensure your filters work correctly, make sure your programs are spelled and capitalized identically across all schools in the group.
For example, "AP Classes" and "AP classes" are treated as two different tags. Using both will result in duplicate filter options.
Enabled?
IMPORTANT: This is your big red launch button. This button should not be pressed until your group is fully ready.
- Still in onboarding: this will be after you launch. Connect with your onboarding manager for more info.
- No longer onboarding (your site is already live): Contact support if you are not sure.
Save
IMPORTANT: You have to save your changes at the bottom of the page. If you refresh or leave the page without saving, your changes will not be saved.
Comments
0 comments
Article is closed for comments.