
This article is for Billing schools and covers Step 3 of the mid-year withdrawal workflow. Use it after you've already updated the student's status. If you haven't done that yet, start with the article "Managing a Midyear Withdrawal Student."
💡Quick Answers
- What is the first step when a family is released from future charges? You must first stop autopay to prevent accidental drafts while you are adjusting the ledger.
- How do I ensure upcoming months show a $0.00 balance? Use one of three methods (Reverse Charge, Rearrange & Reverse, or Zero Out Contract) depending on the complexity of the remaining fees.
- What should I do for complex scenarios or overpayments? Use contract regeneration for intricate billing splits, and always process a refund for overpayments before finalizing the ledger cleanup.
In this Article
- Step 1: Stop Autopay
- Step 2: The Zero-Balance Rule
- Step 3: Choose a Cleanup Option
- Step 4: Handle Edge Cases
- FAQs
⚠️ Important Note: Forgiving the Balance
- If the family will still be responsible for the remaining charges on their ledger (for example, a late-withdrawal policy that bills through end of term), no ledger action is needed. Just make sure the family’s payment method and autopay are set as needed.
- If the family is released from remaining charges, continue to follow the steps below and choose one of the three cleanup options.
Step 1: Stop Autopay
Do this before you reverse any charges.
- Open the parent's contact record.
- Go to the Billing tab > Overview.
- Locate the payment method with autopay enabled and uncheck the Autopay box.
How to confirm autopay is actually off: You can cross-check on the Accounts report that the parent’s Autopay column does not have a checkmark.
Step 2: The Zero Balance Rule
A successful cleanup means every upcoming month on the ledger reads $0.00, not a total of $0 with some months positive and some negative. If any future month shows a non-zero balance, the parent will continue to receive billing communications implying money is owed.
Step 3: Choose a Cleanup Option
| Option | Best When | Complexity |
| A. Reverse Charge | Short remaining schedule (1–3 charges) or a simple, contract-only ledger | Low |
| B. Rearrange Installments & Reverse Charge | Many remaining installments (e.g., 6+ months left). Combining them first means fewer reverse clicks. | Medium |
| C. Zero Out Contact | Remaining charges are equal every month. If amounts vary, don't use this option. | Low |
If you're not sure, start with Option A for short schedules or Option B for longer ones. Use Option C only when you've confirmed each remaining month is the same amount.
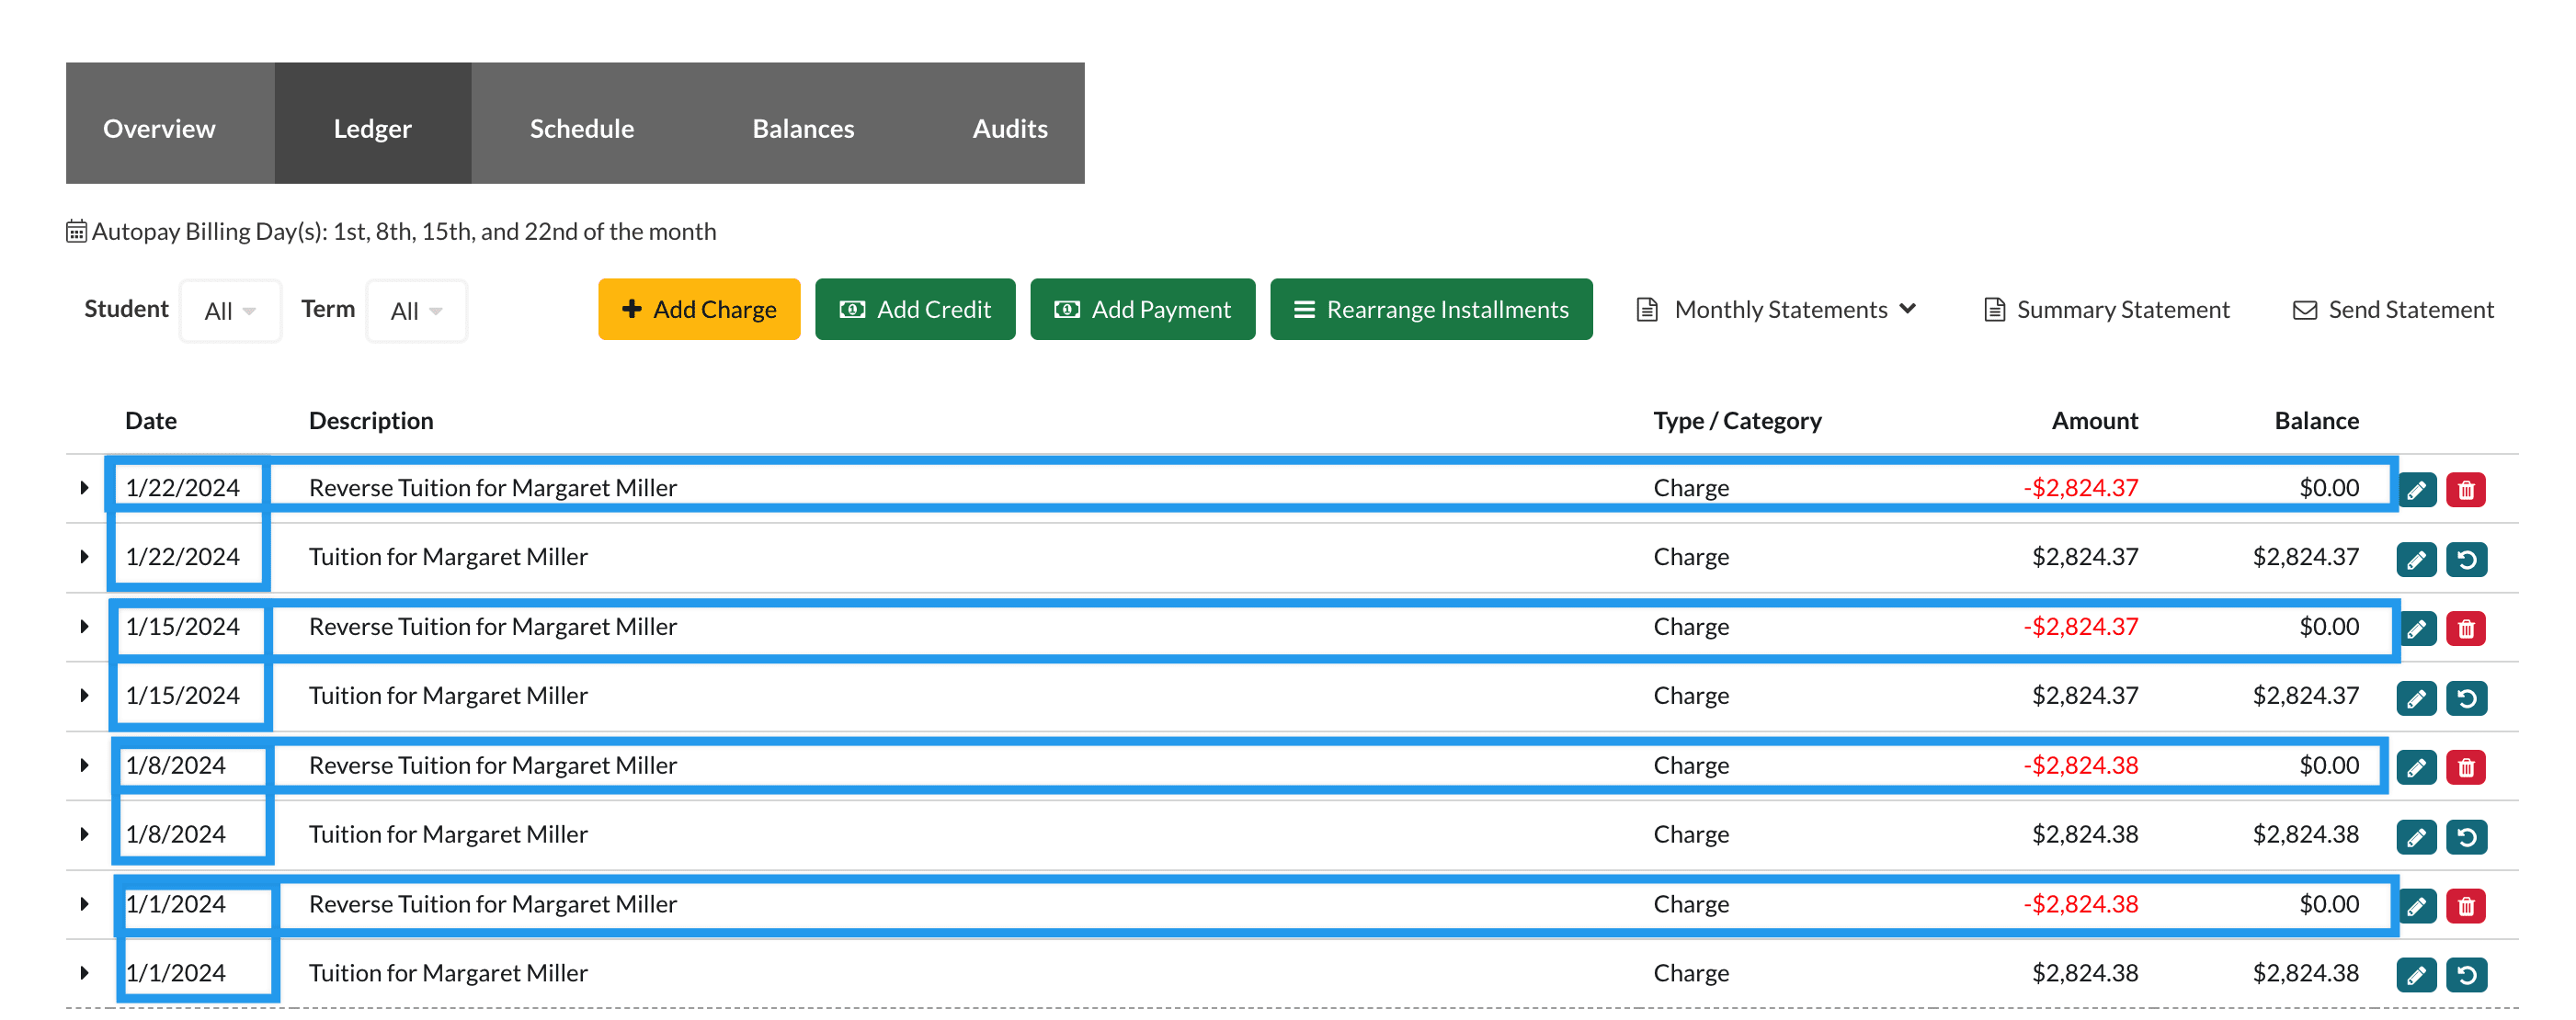
Option A: Reverse Charge
Use the Reverse Charge button within the ledger to reverse outstanding contract charges, then use the red trashcan icon to delete any manually-added items.
Step 1: Reverse the Contract Charges
Use the Reverse Charge button on the right side of each contract fee to reverse the charge. Repeat for every contract line item on the ledger.
Refer to the "Reverse Charge" section of the "Billing: Add Charge" article for full step-by-step detail, or walk through it below with the interactive tutorial.
Step 2: Remove Manually-Added Charges
The reverse button is only available for charges that came from the contract. For any manually-added charges (late fees, activity fees, etc.), use the red trashcan icon to delete them.
⚠️ Important Note
Use caution to only delete outstanding charges. Charges that already have matching payments should be left alone. If you delete an item by mistake, you can restore it from the Audit tab. See the article "Billing: How To Restore a Deleted Ledger Item" to learn more.
Option B: Rearrange Installments & Reverse Charge
This option is best when the family has many remaining installments. Combining them first means fewer reverse clicks later.
Step 1: Rearrange into the Fewest Installments Possible
From the parent's ledger, click Rearrange Installments, confirm the correct billing contact/term, and select the lowest allowed number of payments from the drop-down. The interactive tutorial below walks through each click.
⚠️ Important Note
Rearrange Installments applies the change to every payer with a percentage of financial responsibility for that student. If only one payer should be affected, make the adjustment manually instead. Learn more in the article "Billing- Rearrange Installments (Payment Plan Changes)".
Step 2: Reverse the Combined Charges
Use the Reverse Charge button on the right side of each contract fee to reverse the charges, as outlined in Option A above. Because you've rearranged into fewer installments, there are fewer to reverse. You can also edit the reversal amount if you're prorating rather than forgiving in full.
Refer to the "Reverse Charge" section of the "Billing: Add Charge" article for full step-by-step detail, or walk through it below with the interactive tutorial below.
Step 3: Delete Any Remaining Manual Charges
Use the red trashcan icon, same as in Option A, to delete any remaining manual charges from the ledger.
Option C: Zero Out Contact
Built into the Add Charge and Add Credit ledger buttons, Zero Out Contact posts a single negative charge sized to bring the balance to $0.
Only use this when every remaining month owes the same amount. If amounts vary, the system can't distribute the credit evenly, and you'll end up with some months over $0, and the parent will continue to receive billing communications. When in doubt, choose Option A or B.
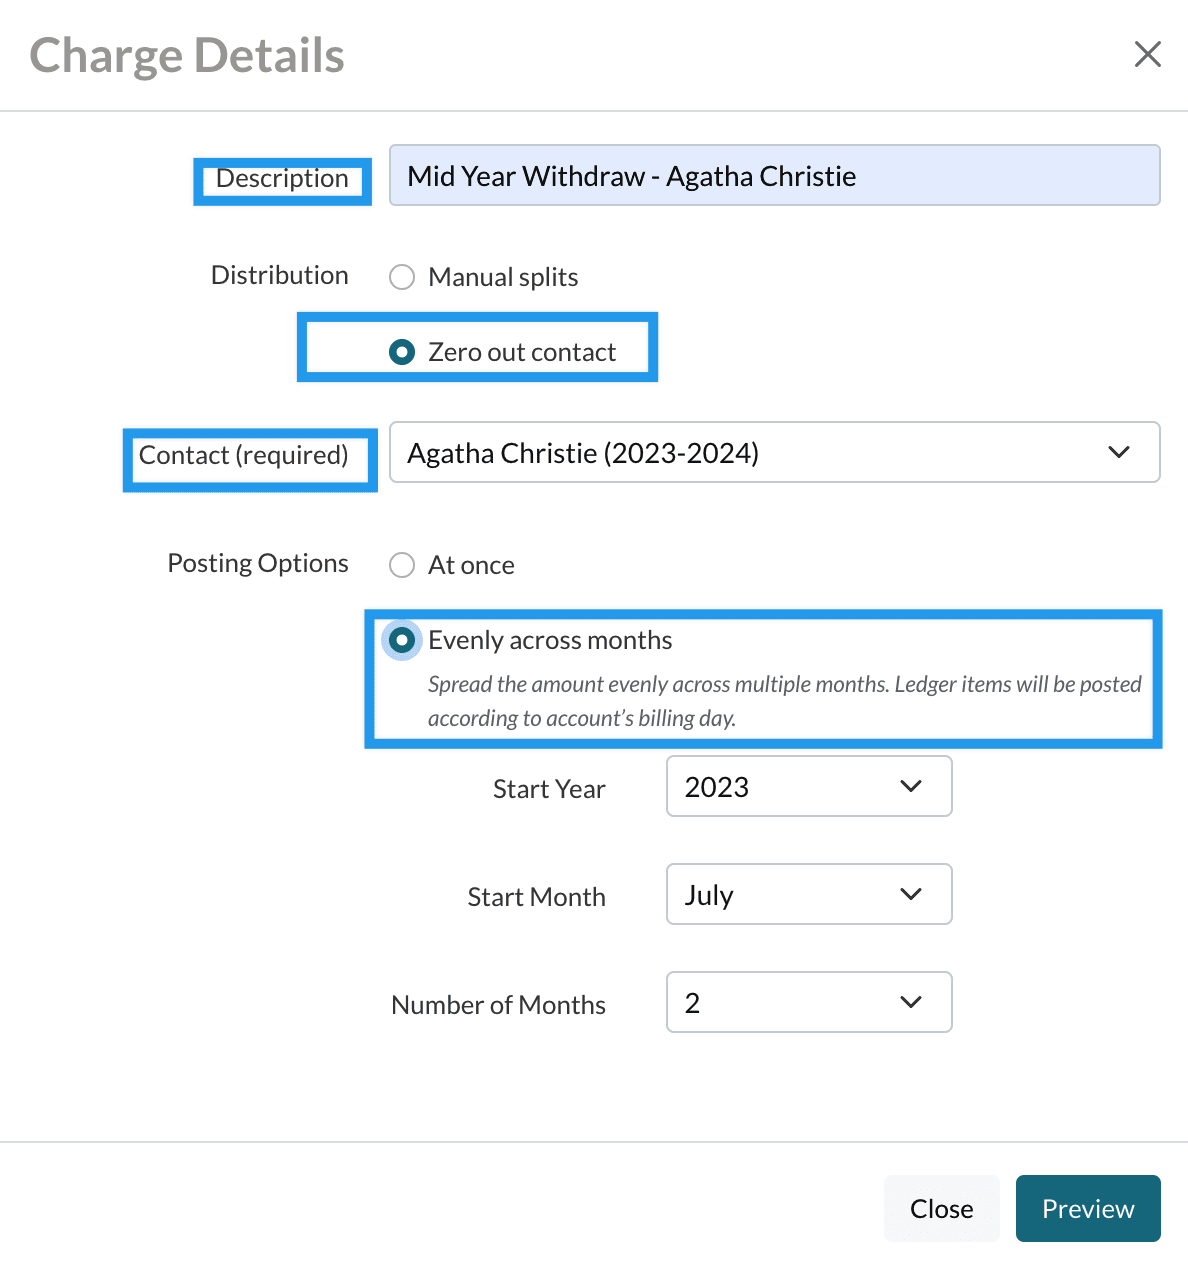
Key settings:
- Contact: Select the student/term you're zeroing out.
- Posting Options: Choose Evenly Across Months (recommended).
- Start Month: Current month.
- Number of Months: Remaining months on the ledger.
Click Preview to review the distribution before saving.
If you zero out the contact and any month still shows an amount owed, delete the Zero-Out adjustment from the ledger and switch to Option A or B. Otherwise, the family will continue to receive billing communications even though the total is $0.
Step 4: Handle Edge Cases
Use Contract Regeneration
Rearrange Installments cannot modify past charges and applies to all payers on a shared financial split. If your cleanup requires either of those, regenerate the contract instead.
Use Contract Regeneration when:
- You need to change past charges (not just future scheduled installments).
- You need to adjust the financial split between multiple payers.
- You need a signed contract that matches the new payment plan.
Download the current contract before regenerating. You will need this file to re-upload it later. For the full list of steps on how to regenerate the contract and submit it internally, visit the article "Billing: How to Make Changes to Past Charges-Payment Plans with Contract Regeneration."
Refunds
If the family has already paid into the ledger and is owed money back, reversing the tuition charge alone will create a credit balance; it doesn't issue a refund. To refund paid amounts, follow the steps in the article "Payments: Refunding a Payment." Process the refund before you reconcile the ledger to $0 so the records line up.
FAQs
Q: Can I undo a Zero Out Contact if it went wrong?
A: Yes. The Zero Out Contract action creates a ledger entry (a negative charge). Delete that entry using the red trashcan icon, then choose Option A or Option B.
Q: I reversed the wrong charge. How do I get it back?
A: If you deleted a manual charge by mistake, restore it from the Audit tab. Visit the article "Billing: How To Restore a Deleted Ledger Item" to learn more. For an unintended reversal, you can delete the reversal rather than trying to undo the original.
Q: Which option should I use if the student withdrew in the last month of the year?
A: If there's only one remaining installment and no prior payments to refund, simply Reverse Charge on that single line (Option A).
Comments
0 comments
Article is closed for comments.