
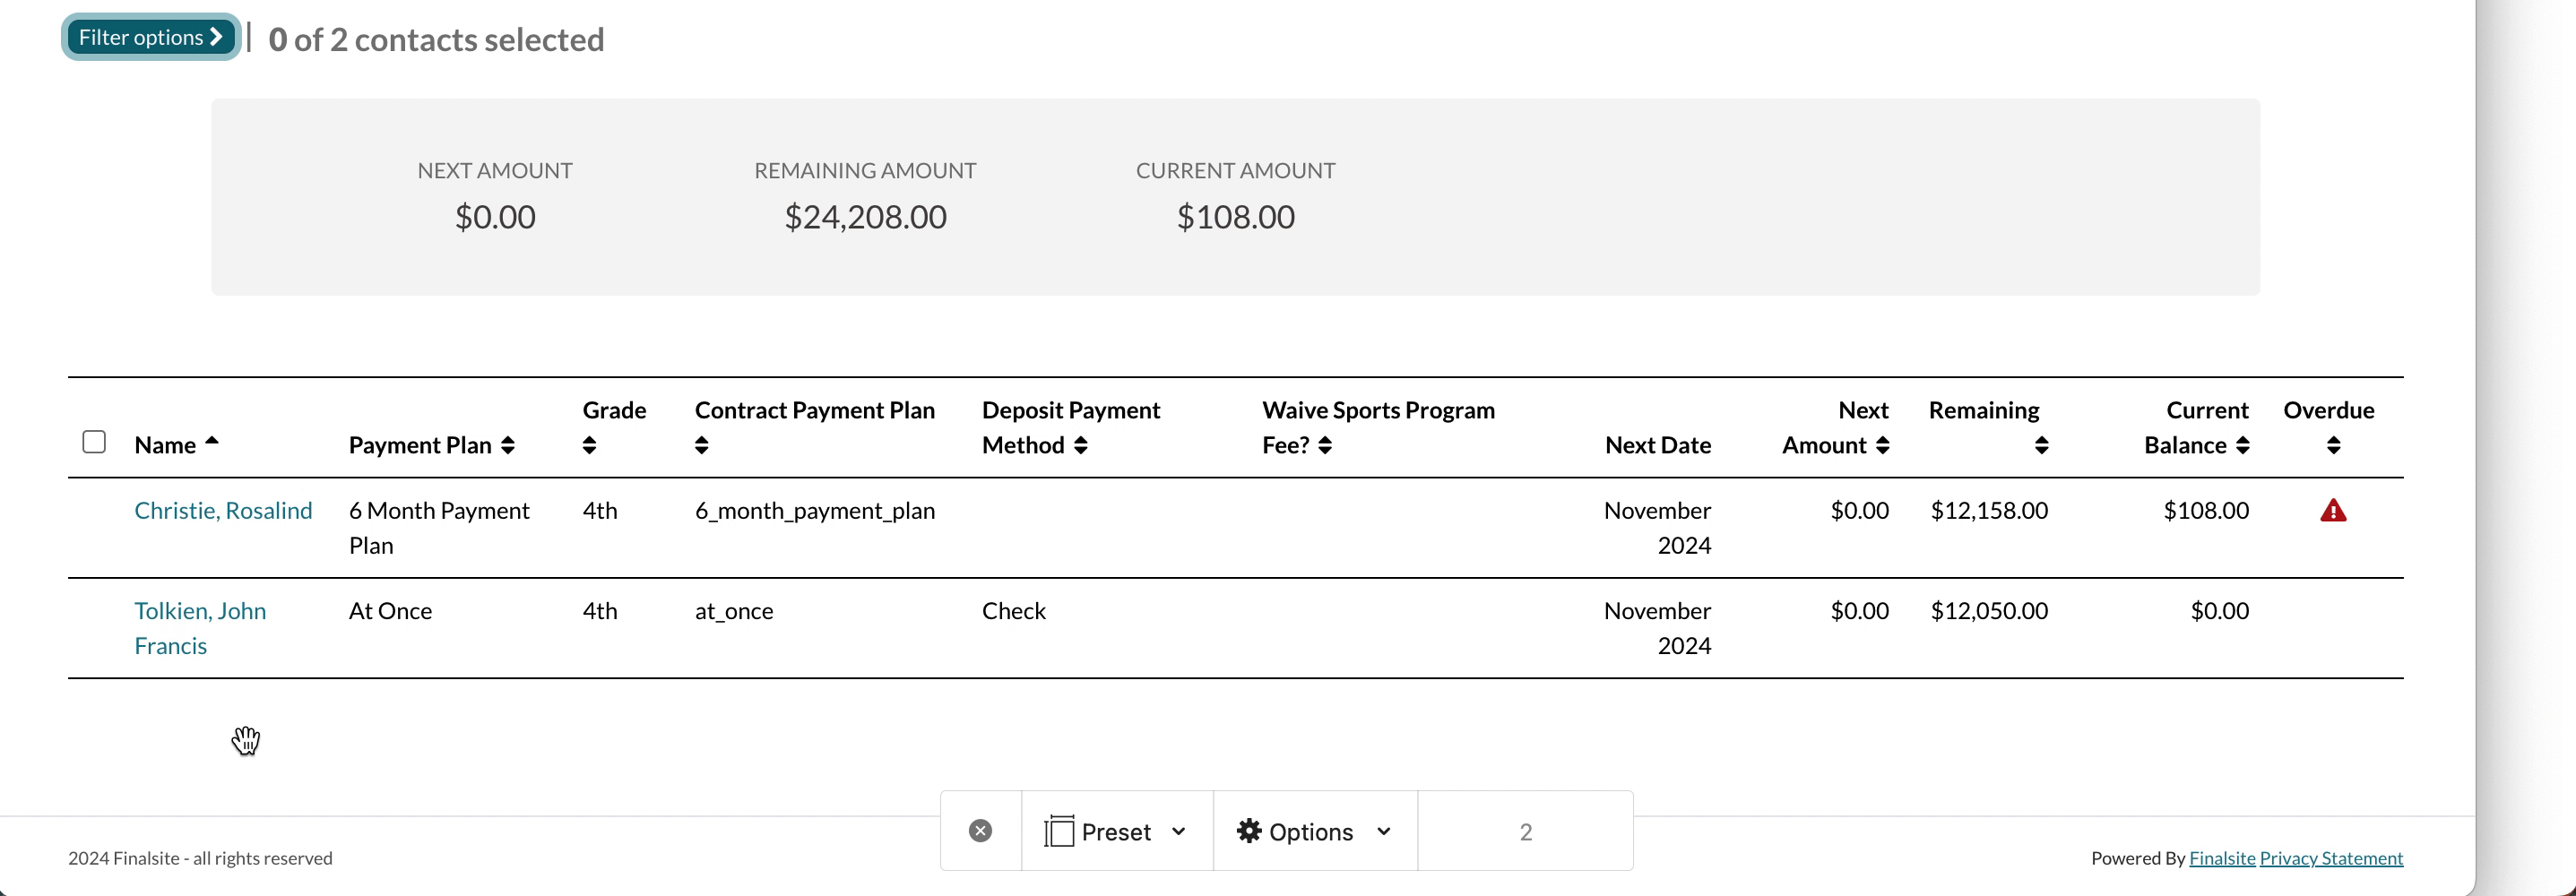
The Students List page (Billing menu > Students) shows upcoming and remaining billing amounts at the student level, useful for tracking what's due per student rather than per payer.
💡Quick Answers
- Where do I find it? Billing menu > Students.
- How do I select students? Hover left of a name to select one, or check the box next to Name to select all on the page. Uncheck to deselect.
- What filters are available? Grade level and overdue status. Use the term picker to choose the school year.
- What bulk edits can I do here? Add Charge or Add Credit (with Date, Category, Description, Amount). All students across ALL pages are selected by default. Check individual boxes if you want only specific students.
- Can I export the data? Yes. Use the Export menu to send to CSV or PDF.
In this article
Selecting Students
- By default all contacts are deselected.
- Hover to the left of a name to select one student, or select the checkbox to the left of Name to select all students.
- Uncheck the box to deselect a student. Once deselected the contact's checkbox will disappear but will reappear when hovered over again.
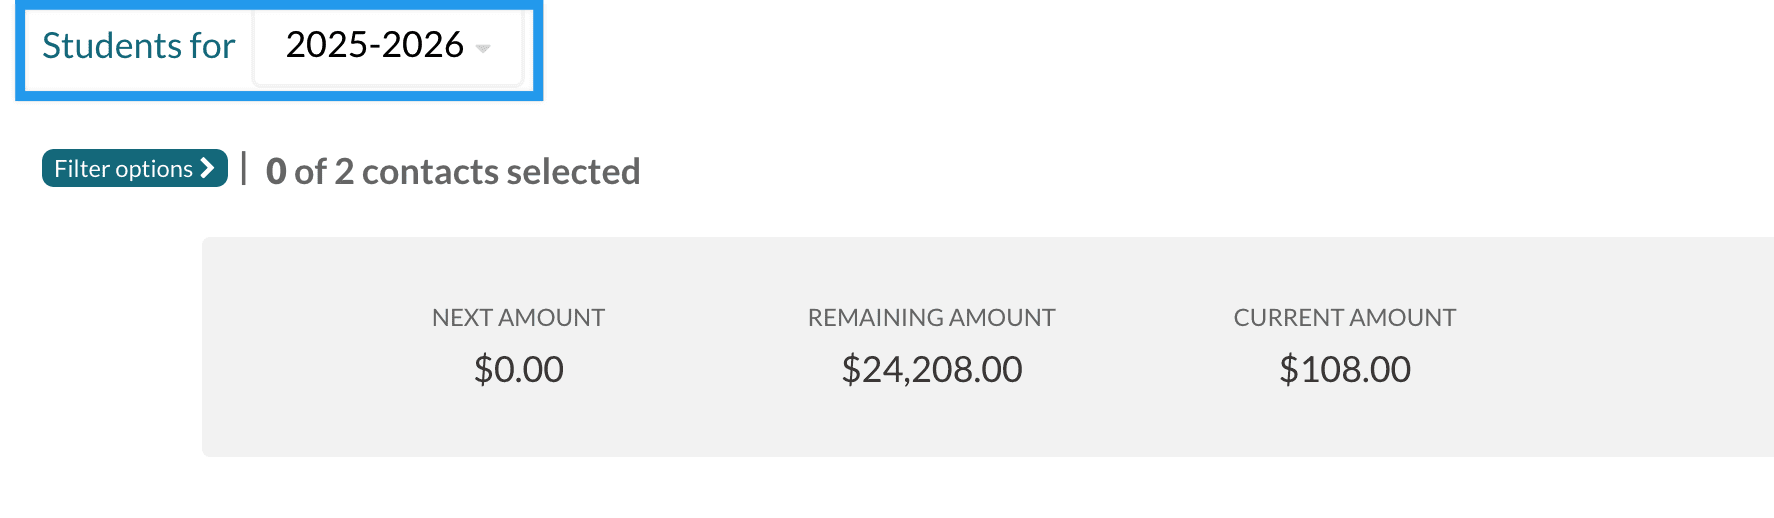
Terms Filter
Set the term/school year of students you'd like to view from the drop-down menu.
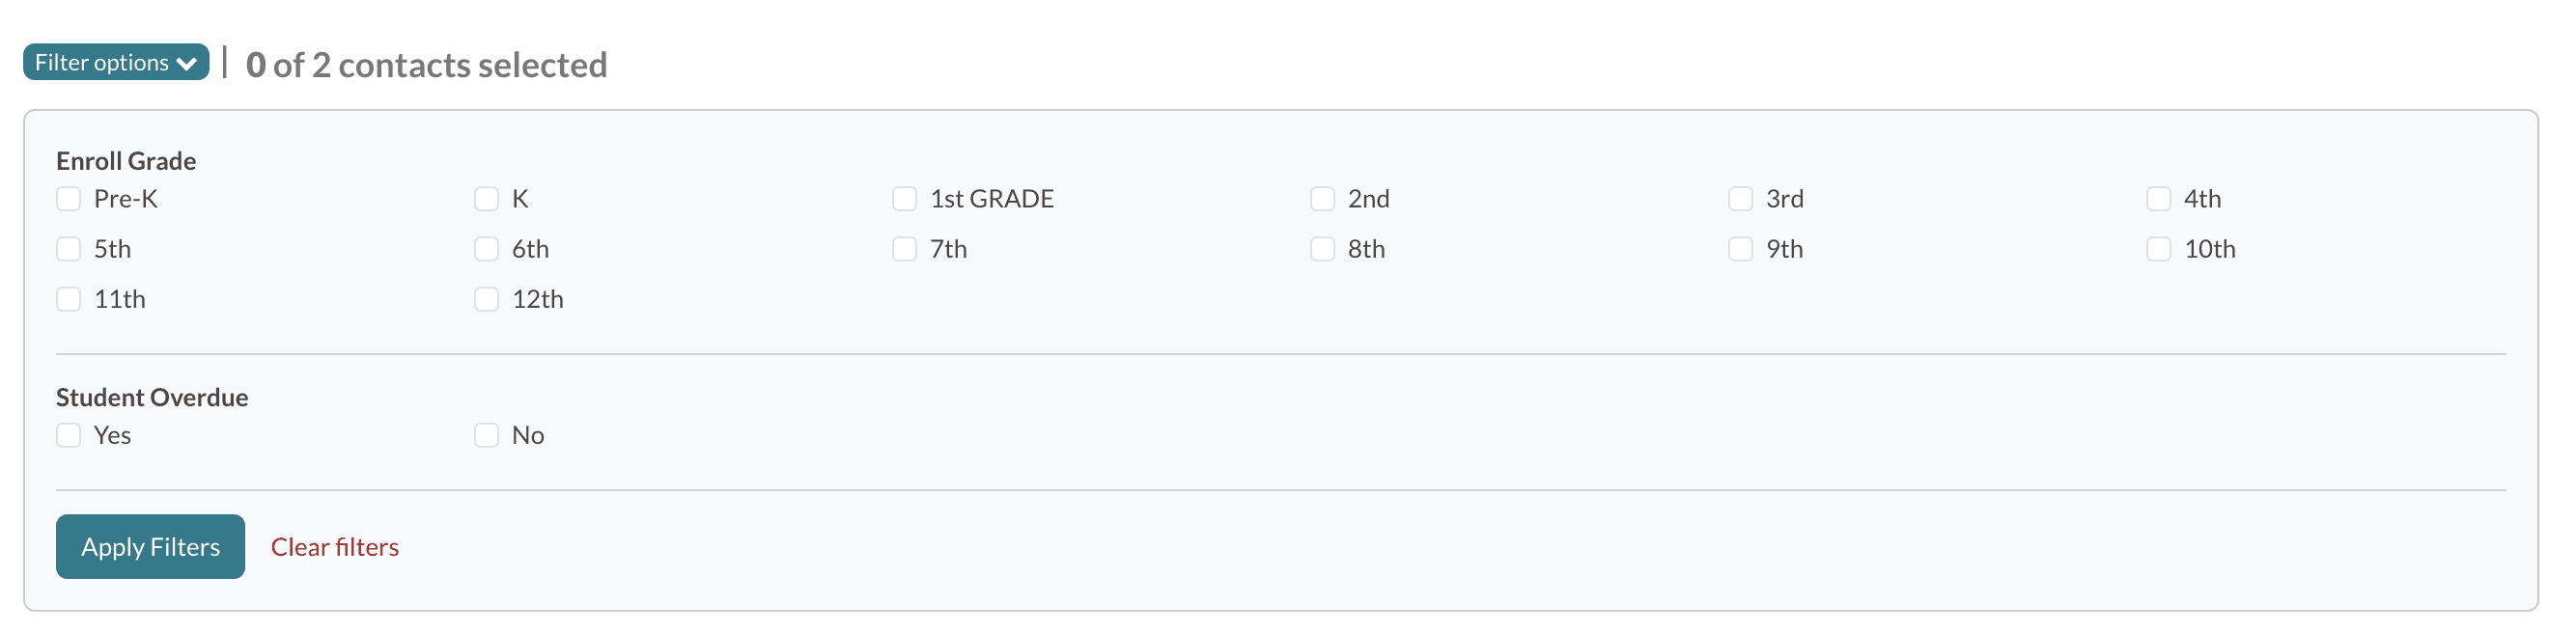
Filter Options
Filter options allow you to drill down on student balances by grade level and overdue status. Select your options and then click 'Apply Filters.'
Important Note: The Student Overview filter option will be set to 'yes' if 1 or more billing accounts are overdue. This page will not show you which billing accounts are overdue, and should not be used for overdue account communications.
Export, Communicate, Edit
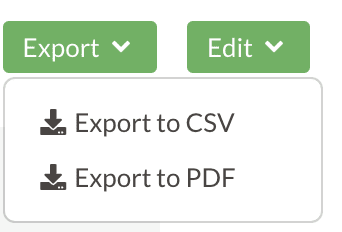
Export Menu
The report can be exported to a CSV or PDF through the Export menu.
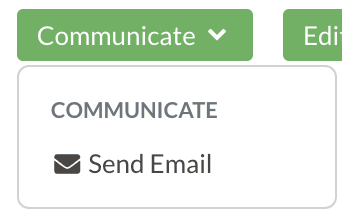
Communicate Menu
To bulk email families from this page, use your filter options or select students as needed and then click on the 'Communicate' menu in the upper right. Click here to learn more.
*Important Note about Multiple Billing Accounts and Delinquency Communications:
If you need to send an email ONLY to billing accounts/payers that are overdue or any other account level criteria, you'll need to create a filtered search within the 'Search & Reports' tab for overdue or delinquent accounts. Sending an email within this page to 'Student Overdue' is 'yes' will email all responsible payers, where only one of them might be overdue, not both since this page doesn't drill down on billing accounts.
Edit Menu: Adding Charges/Credits in Bulk
To add a charge or credit to student accounts in bulk, click on the 'Edit' menu in the upper right of the 'Students' page. *IMPORTANT NOTE: All students are selected in bulk across ALL pages of students by default. This means that if you have 4 pages of students, all 4 pages of students are selected, which means you do not need to add a charge or credit to each page of students. If you'd like to select students manually, mark the checkboxes of the student accounts you need. Once you click on the 'Edit' menu, the drop-down menu will display two options:
- Add Charge
- Add Credit
Add a Charge
To add a charge in bulk to the selected contacts, you will be asked to fill out the following information:
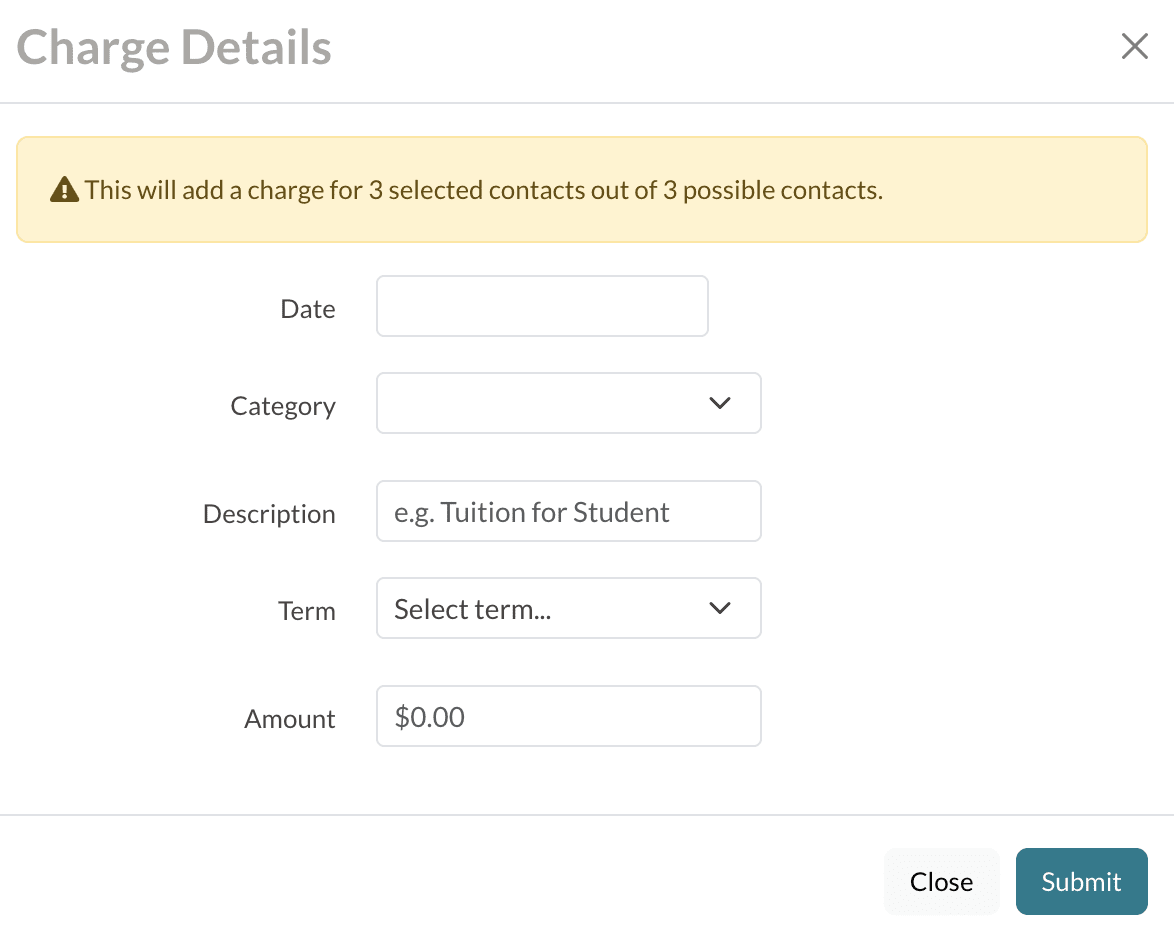
- Date: The date the charge is being applied to the account.
- Category: All current billing categories in your site will be available in the drop-down menu. Select the category that this charge should be assigned to.
- Description: Type a description of the charge.
- Amount: Enter the amount of the charge.
Click 'Submit' to apply the charge.
Add a Credit
To add a credit in bulk, you will be asked to fill out the following:
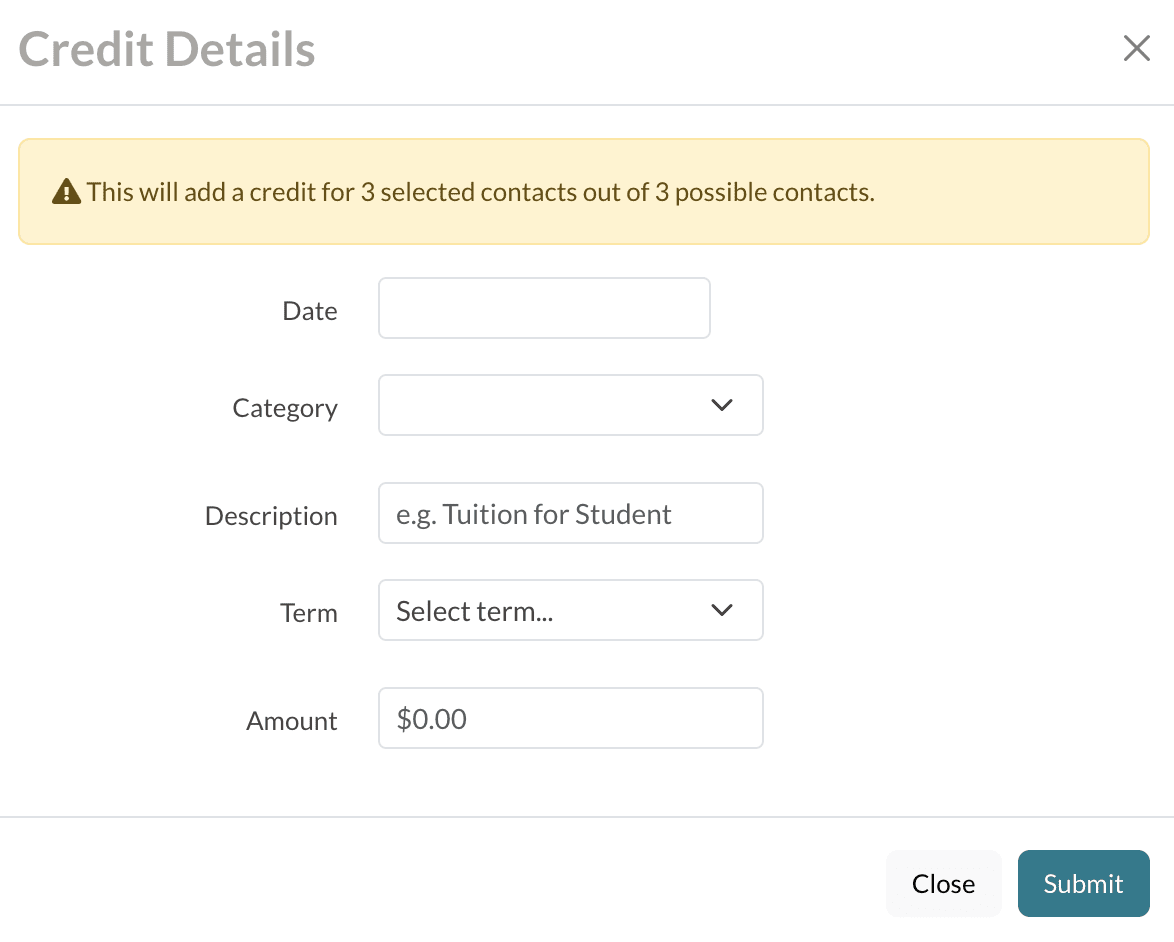
- Date: The date the credit is being applied to the account.
- Category: All current billing categories in your site will be available in the drop-down menu. Select the category that this credit should be assigned to.
- Description: Type a description of the credit.
- Amount: Enter the amount of the credit.
Click 'Submit' to apply the credit.
Columns
Columns within the report
- Name (sortable): The name of the enrolled student.
- Payment Plan (sortable): Shows the payment plan selection.
- Grade (sortable): The current grade of the student.
- Custom Columns (if set): Any custom columns that have been set within the 'List Page Configuration' page will display to the right of the 'grade' column. There are two in the example above.
- Next Date: Shows the due date for the next amount column.
- Next Amount (sortable): Will show any charges and unpaid tuition that are within the next billing cycle.
- Remaining (sortable): Shows the total of any upcoming charges and any unpaid tuition.
- Current Balance (sortable): Shows any unpaid charges that have been due or are currently due.
Custom Columns
You can add up to 5 custom columns to this report, which will display to the right of the 'Grade' column. The examples above include 'Boarding?' and 'External ID.' Some schools want to add charges or credits in bulk according to student ID's, programs such as day/boarding/daycare/afterschool, and more which makes this customization useful. Click here to learn how.
Ledger Lock Note
The Ledger Lock lets you secure your financial records by setting a locked date. Once enabled, it prevents any alterations to the ledger entries dated on or before the set date.
If you are utilizing the Ledger Lock feature, you will not be able to add charges or credits to apply during the locked period.
This feature can be adjusted on the Billing Setup Page (Settings > Financial > Billing Setup). Read more about Ledger Lock and how it affects other areas of your site in our Settings: Billing Setup Page article.
Comments
0 comments
Article is closed for comments.