
When an email sent through Finalsite Enrollment fails to deliver, it goes to the Failed Emails page (Settings > Communication > Failed Emails) with the failure reason. From there you can ignore, resend, or investigate the failed email.
💡Quick Answers
- Where do I find Failed Emails? Settings > Communication > Failed Emails. Filter by subject, email address, or contact name.
- What columns are shown? Sent At, To, Subject, Failure Reason, and Contact. Click Show on a row to see the full email and the complete failure reason text.
- What can I do with a failed email? Show (read-only preview with details), Ignore (remove from the list), or Resend (attempt to send again exactly as-is, with no edits).
- How do I clear a backlog at once? Click Ignore All in the upper right. This ignores every failed email across all pages and cannot be reversed.
- What are common failure reasons? Inactive email, full mailbox, marked as spam, hard bounce (address doesn't exist), or soft bounce (temporary mailbox issue or oversized message).
- Can permissions restrict who sees failed emails? Yes. If an email template has a permission applied, only admins with that permission can see those failed emails.
How-To: Review Failed Emails
To access this page, go to Settings - Communication - Failed Emails. Here, you can view a log of all emails that failed to successfully send from within the Finalsite Enrollment system. You can apply Filter Options to search for an email by subject, email address, or contact name.
Visibility Permission for Emails
- If you've set a Permission within the email template, only admins with that permission will be able to:
- view or edit the template
- send that template to a recipient
- view the sent communication on the contact record, sent email page, and failed email page
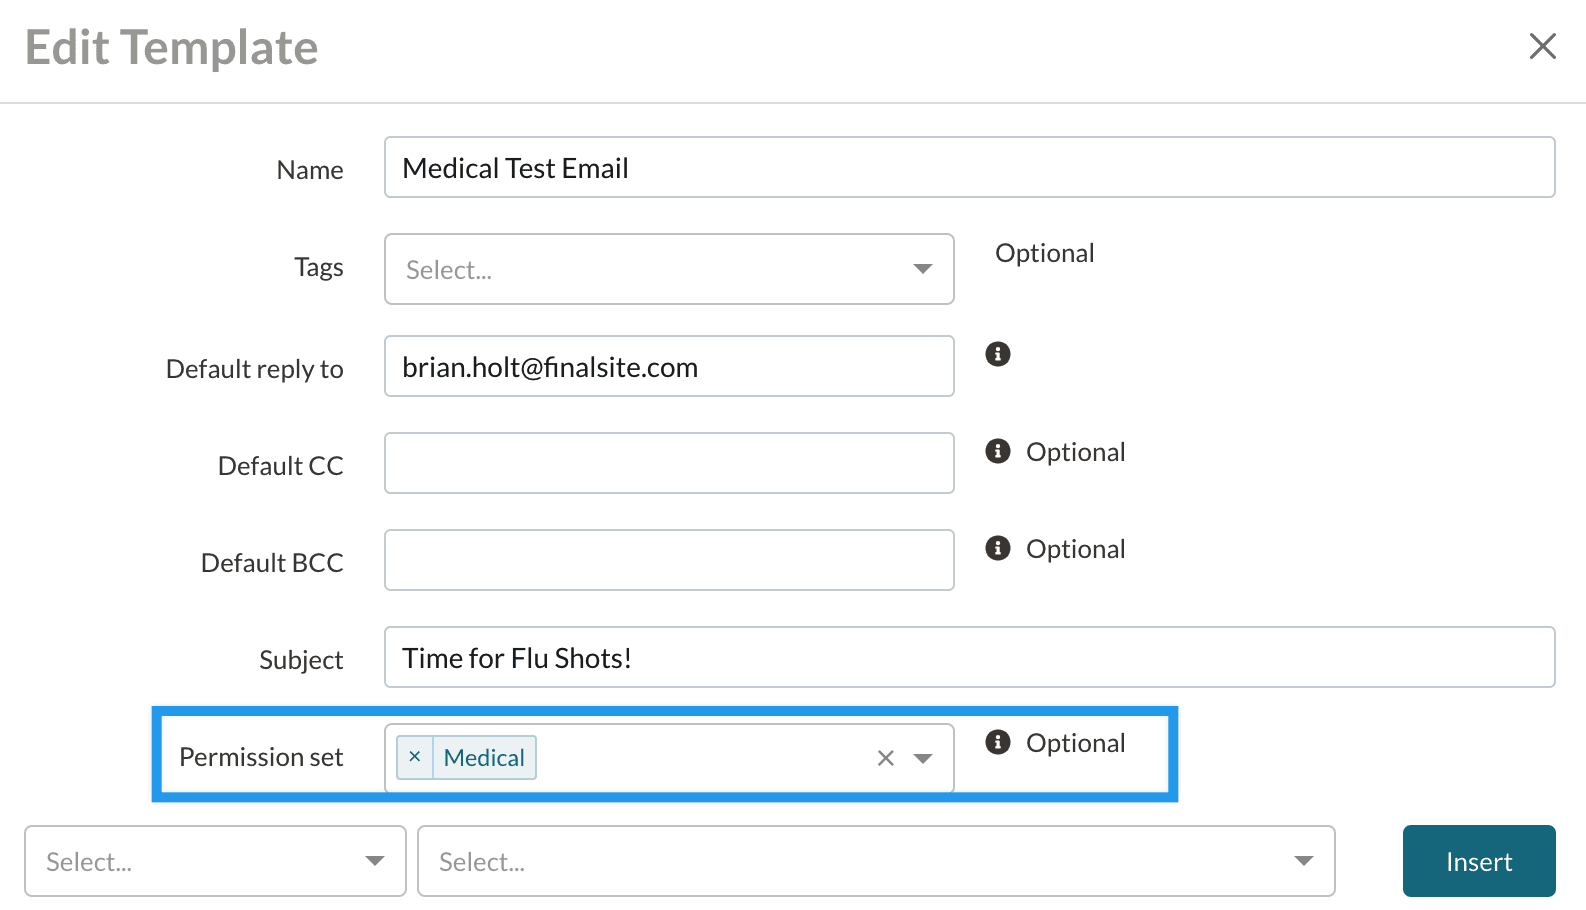
- To add a permission level within an email template, click into the Permission Set box and select which permission(s) to apply. You can add multiple permissions or leave it blank. If you leave it blank, the email will be visible/manageable by any admin regardless of permission.
For example, if you've set an email template with the Medical permission (as seen below), only admins with Medical permissions assigned to them will be able to see those emails.
- Admin Permissions are assigned under Settings > Portal > Admin Portal Accounts.
- Permissions can be added within email templates under Settings > Communication > Email Templates.
Within the Failed Emails page, you will see the following columns:
- Sent At: The date that the email was sent.
- To: This is the email address that the email was sent to.
- Subject: This is the subject line of the email.
- Failure Reason: This is the reason an email was not sent to or received by the recipient. See the section on Failure Reasons below for some specific examples.
- Contact: The name of the contact to whom you sent the email.
You also have access to a few different actions along the right side of the page:
- Show: This action will open a read-only view of the email that you tried to send. It also allows you to see the full text of the Failure Reason.
- Ignore: This action will remove the failed email from the list. In addition to ignoring individual emails, you can bulk ignore all of your failed emails. See the section on Bulk Ignore below for details.
- Resend: This action will attempt to resend the email. Please note: No edits can be made (to the email message or recipient email address) before resending.
Bulk Ignore
If you have a backlog of failed emails that you want to clear out, you can click the green Ignore All button towards the upper right of the page. You will be prompted to confirm the action. This action will ignore all failed emails across all pages (not just the page you are currently viewing) and cannot be reversed.
How-To: Understand Failure Reasons
Some examples of reasons that emails can fail include:
- Inactive email address
- Mailbox is full
- A user marked one of your emails as spam and can’t receive any more as a result. The recipient would need to go into their spam settings to mark the email as not spam or add your Finalsite Enrollment domain to their email allow list (whitelisting them). Whitelisting emails prevents them from going to Spam. Here's a great resource on how to whitelist emails from Hubspot.
- A hard bounce means an email address does not exist. It could be the user doesn’t exist or the domain doesn’t exist. This could be due to a misspelling or perhaps that person is no longer at that company/school/etc. Hard bounces are saying the destination server can’t recognize the recipient.
- A soft bounce means a recipient exists but there is an issue with the mailbox or message such as mailbox full, recipient email server is down or offline, or the email message is too large.
Comments
0 comments
Article is closed for comments.