
The Template Editor is the shared interface for customizing emails, letters, and Parent Portal content pages. This article covers the text formatting toolbar, image management (upload, URL, browse), HTML code view, the merge token picker, tags for organizing templates, and permission controls that restrict who can see or send a given email template.
💡Quick Answers
- How do I insert and resize images? Click Insert Image. You have three options: upload from your computer (auto-saved to File Management), insert by URL, or browse existing images already uploaded. Pre-size images to a max of 600px wide and roughly 150px tall for consistent rendering.
- Where's the HTML code view? Click Code View on the toolbar to edit raw HTML. Changes don't apply until you click Preview Changes or click the Code View icon again. Note that email clients render HTML inconsistently, so use sparingly.
-
How do I add a merge token? Use the Merge Field Picker above the toolbar. First dropdown is the entity (Contact, Recipient, School, System), second is the specific field by display name. Click Insert. You can also type tokens directly as
{{category.canonical_field_name}}, like{{contact.referral_method}}. - Why doesn't the Recipient merge category appear in some templates? Recipient tokens cannot be used in web templates (Parent Portal Content). They only work in emails, letters, and labels.
- What are Tags for? Sorting and grouping related templates (custom emails, letters, texts, or labels). Add them in the Tags box and click Save. See the Tags article for managing them in bulk.
- How do I restrict who can see or send a specific email template? Set a Permission in the template editor's permission set box. Only admins with that permission will be able to view or edit the template, send it, or see the sent communication on the contact record. Leave blank to allow all admins. Permissions are assigned in Settings > Portal > Admin Portal Accounts.
- Can I control checklist item visibility the same way? Yes, granular permissions are available on checklist items too. See Granular Permissions for Emails and Checklists.
Format Text
In the top section of the toolbar, you have various text formatting options available to you. Hovering your cursor over any of the icons will display a descriptor of what that option does.

Any formatting option selected from this toolbar should be immediately visible in the preview. If you would like to clear any of your formatting options, use the eraser button on the right. The image below shows examples of what you can do with the text formatting options.
Image Management
To add an image to your template, click on the 'Insert Image' button on the toolbar. There are a few different options for adding the image:
- Upload from your computer - Drag and drop an image from your computer, or click to select the image from a folder on your computer. After inserting an image this way, the image will be uploaded to the Finalsite Enrollment File Manager to use in the future.
- By URL - If you already have the desired image hosted somewhere else on the web, you can input the URL here and click 'Insert' to add it to the template. For best results, ensure it is directly linked to the image.
- Browse - Look for images that have previously been uploaded to your Finalsite Enrollment File Manager or are used on other templates. Move the cursor over the desired image and click the plus button to insert it into the template.
Pre-formatting your images to a maximum size of 600px (width) is recommended for consistency across templates. The max height we suggest is 150px, though that varies based on the use case. Once you have inserted your image, you will see a few different options for formatting. For more information, click here.
HTML Code View
For more advanced editing options, click on 'Code View' on any template to edit the content in HTML.

Any changes made in the code view editor will not be applied until you preview them out of the code view. Click on 'Preview Changes' at the bottom of the template or click on the 'Code View' icon again to preview your changes live.
Click here for more detailed information on what you can do with HTML. Please note that HTML has limited support by most email clients so it is recommended to limit its use there.
Merge Tokens
Use Merge Fields (also known as tokens) in your templates to pull in dynamic information - such as student names or academic interests - from your Finalsite Enrollment system. To easily pull these merge fields into a template, use the Merge Field Picker above the toolbar.
The first drop-down menu is the entity:
- Contact - The assigned contact (student).
-
Recipient - The person receiving the communication; most often the parent.
- Note: The Recipient entity cannot be used in web templates.
- School - Includes school-specific information, such as Contact Information.
-
System - Includes current date formats and Google Translate plugin.
- Please note, that while you will see Google Translate as an option in the System Merge token list in email templates, it doesn't work in emails. Google Translate will only work on parent portal content pages. However, as support for the web widget is being sunset by Google, it may not be the most efficient solution for your translation needs. Please see the note below.
Insight:
While Google Translate is still an option within your site and, if you are using this feature, it will remain in place, we do caution against its use, as Google has sunset its support for the free Google Translate for Websites widget, resulting concerns about long-term functionality.
If you would like to know more about our alternative option, Weglot, please check out our Language Translation with Weglot article.
The second drop-down menu is the specific field to pull into the template. Fields are listed by their display name. To find a desired field quickly, you can begin typing into the box. Once you have selected the desired field, click on 'Insert' to place it in the body of the email.
Merge fields can also be typed or copied directly into the body of the template. All of them will take the form of: {{category.canonical_field_name}}. For example, if you wanted to pull the information in the field referral_method for the student, you could type in: {{contact.referral_method}}.
Tags
Tags can be added within the Template Editor to make it easier to sort and distinguish between groups of related communications.
Template Tags can be added to custom email, letter, text, or label templates.
Depending on which template page you are on (email, letter, etc), the experience will look slightly different. This is an example of the Tags field within a custom email template.
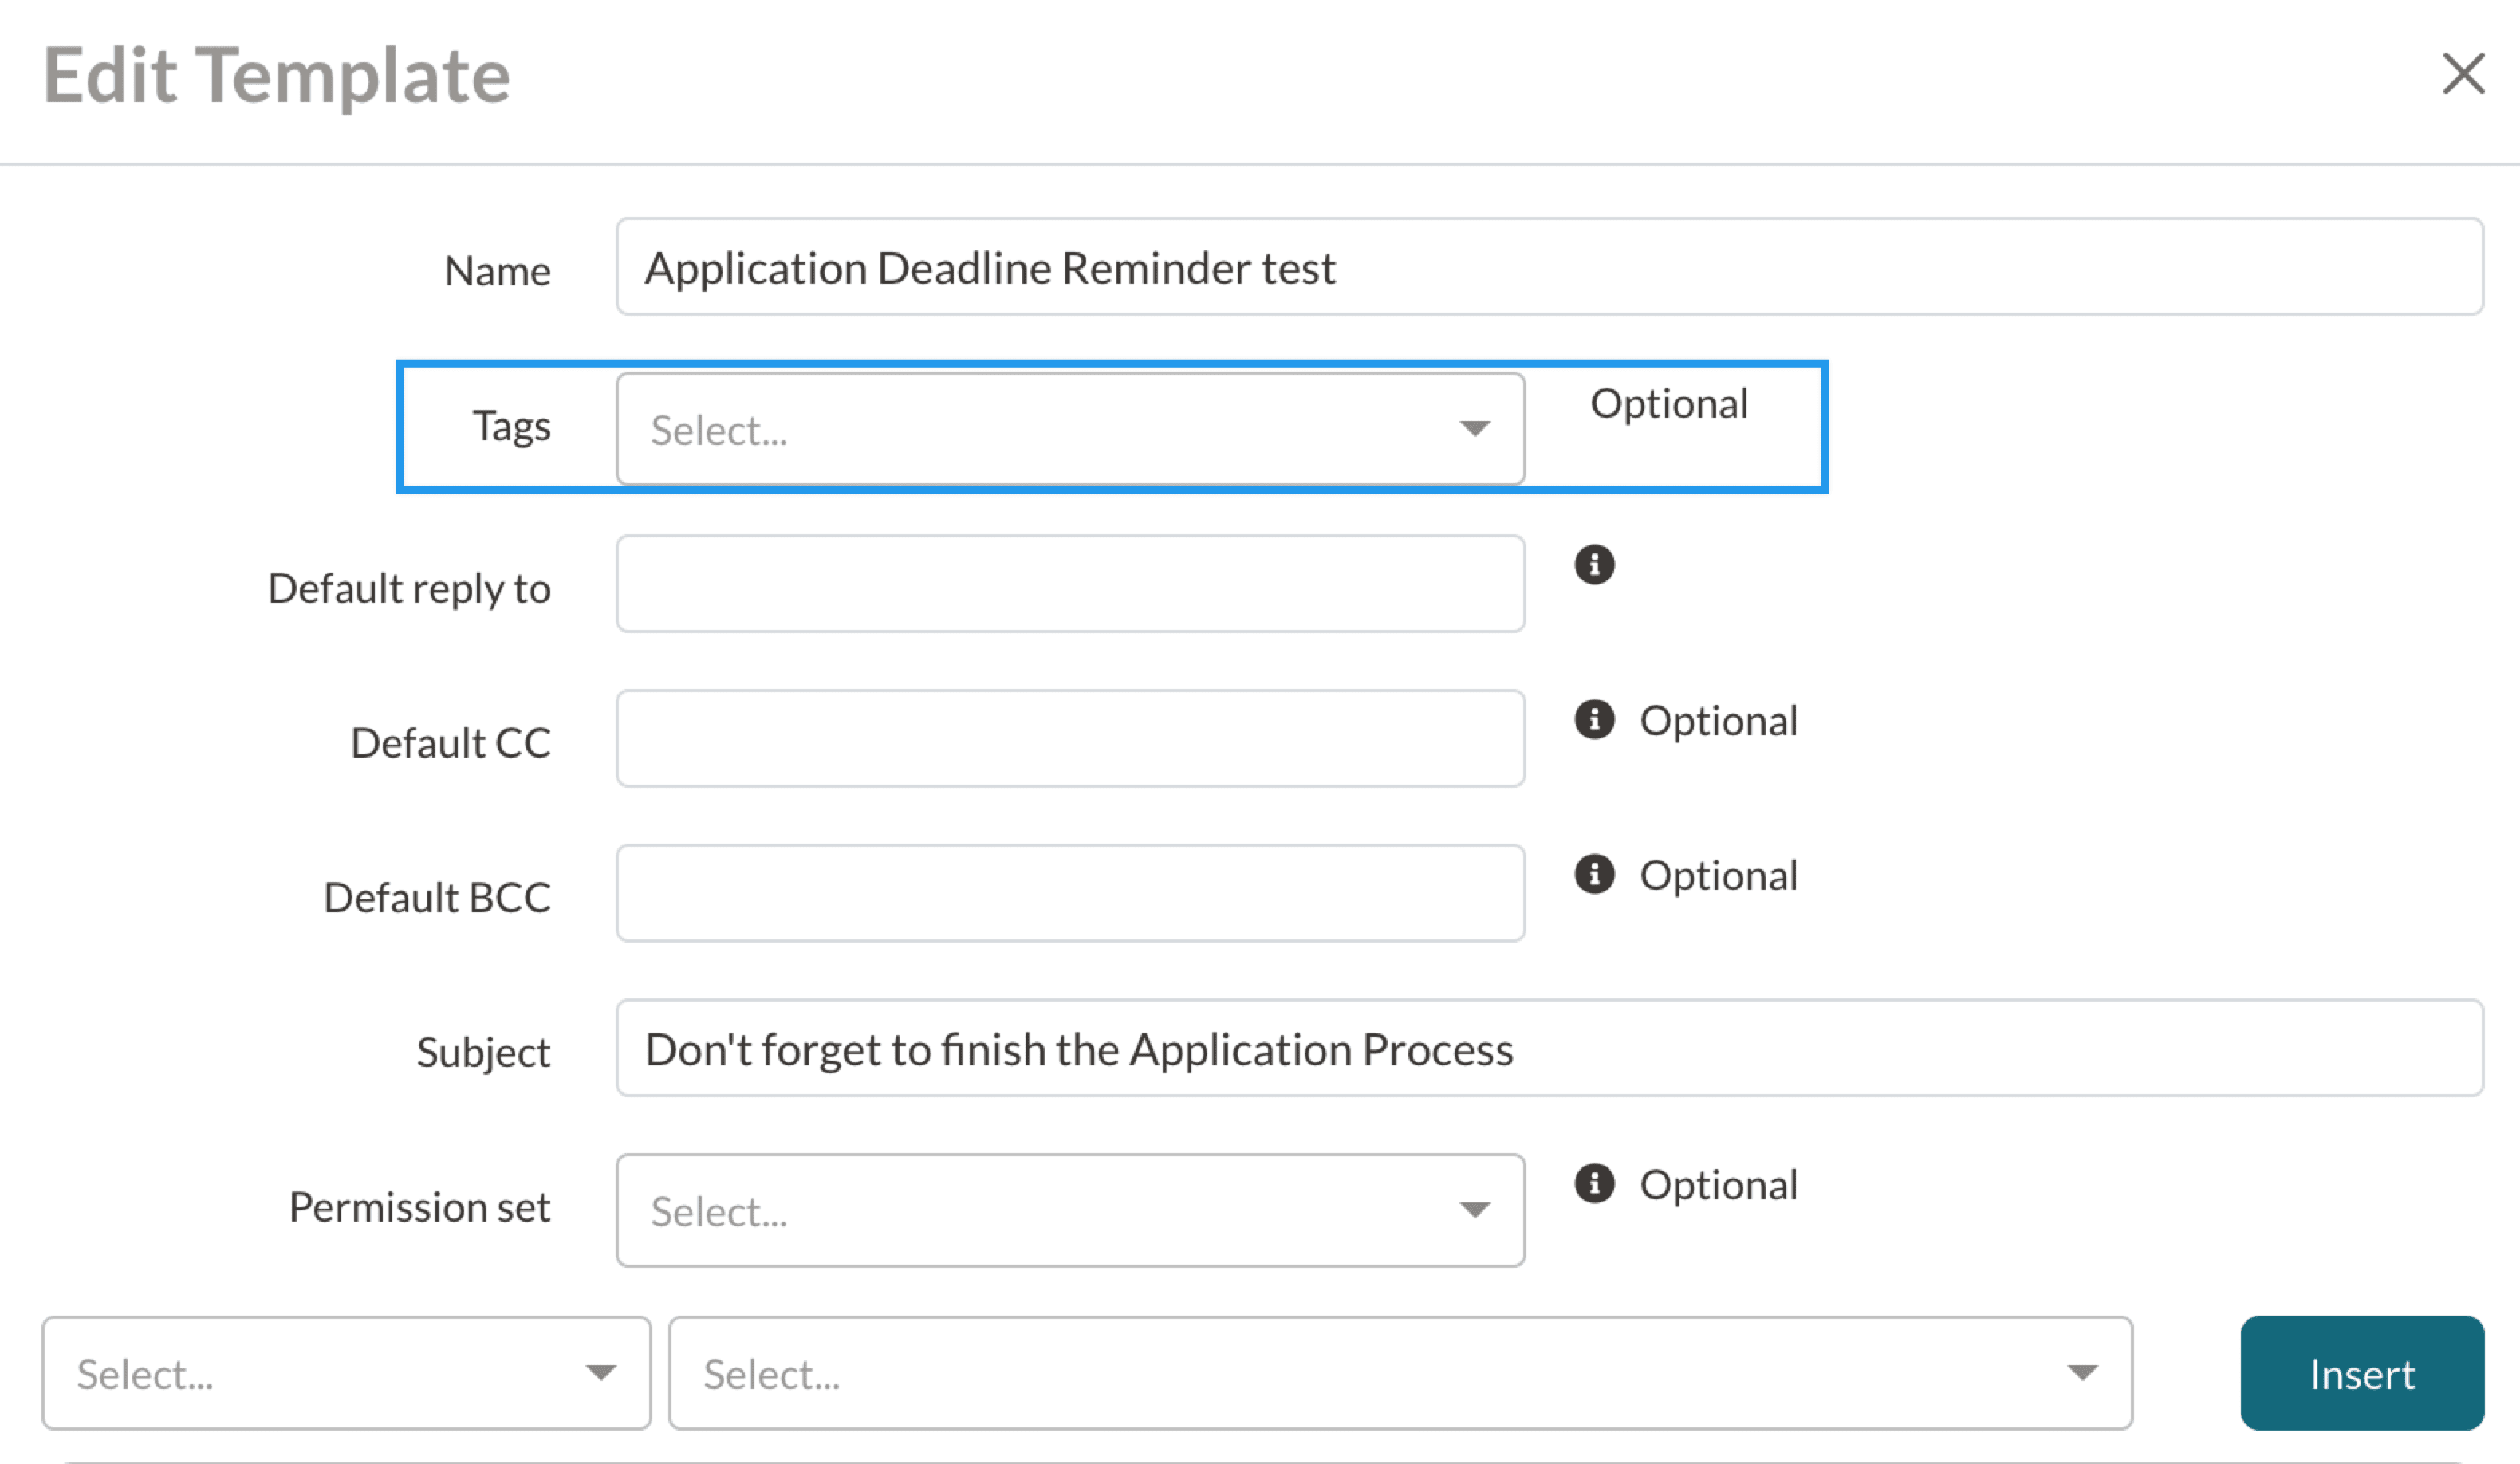
Adding a Tag
- Within the template editor, in the 'Tags' box, select or enter the name of the tag you'd like the add.
- Click 'Save' when you are done creating or editing the template.
To learn more about creating and editing tags, please refer to this article.
Permissions in Email Templates
Adding permissions in email templates allows you to control which admins can access/edit/view the email.
To add a permission level within an email template, click into the permission set box within any email template editor and select which permission(s) to apply.
You can add multiple permissions or leave it blank. If you leave it blank, the email will be visible/managed by all admin regardless of permissions set.

If an email template has a permission set, only admins with that permission will be able to:
- View or edit the template under Settings > Communication > Email Templates.
- Send that template to a recipient.
- View the sent communication on the contact record, sent email page, and failed email page.
Please Note: Admin Permissions are assigned under Settings > Portal > Admin Portal Accounts.
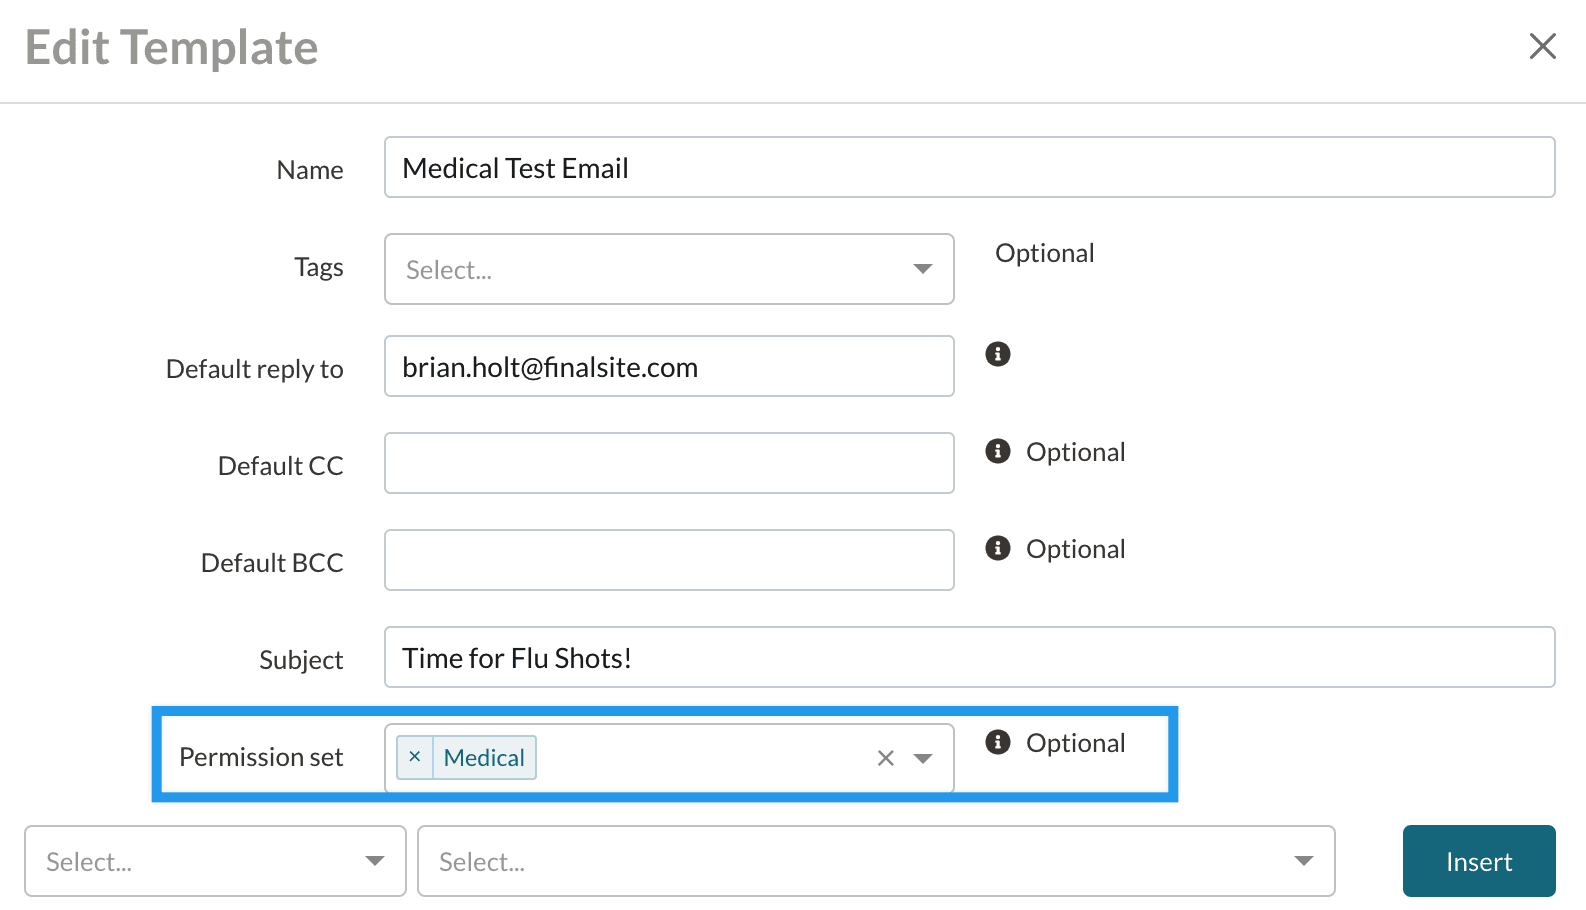
Example:
If you've set an email template with Medical permission (as seen below), only admins with Medical permissions assigned to them will be able to see and manage those emails.
Did you know?
Granular Permissions are also available for Checklist Items.
To learn more about Granular Permissions, please refer to our Granular Permissions for Email and Checklists article.
Comments
0 comments
Article is closed for comments.