
The Billing Management tab in the Parent Portal is where parents manage tuition and fee payments and view their payment history. This article walks through what parents see and do in that tab, from contract signing through ongoing payments.
If you're new to how families interact with billing in Finalsite Enrollment, start with the article "Finalsite Enrollment Billing- Family Experience" for foundational concepts (parent accounts, financial split, shared access).
💡Quick Answers
- When can a parent start making payments in the portal? The "Make Payment" button appears automatically once the first billing statement is sent, which is typically 10 days before the first payment due date.
- Who is responsible for the bill if two parents sign the contract? By default, the parent who pays the deposit is assigned 100% financial responsibility. If the family needs to split the bill (e.g., 50/50), an admin must manually adjust the "Financial Split" before or after the contract is signed.
- Can a payment be cancelled while it is "Processing"? No. Once a payment is in the processing stage, it cannot be reversed or adjusted. You must wait for the payment to fully clear before issuing a refund or correction.
- Why can't a parent delete their only saved credit card? If your school requires Autopay, the system won't let a parent delete their only payment method. They must add a new payment profile first, then they can remove the old one.
- How can a parent see what they owe for just one specific student? In the Ledger section, parents can click "Details" on any charge to see a per-student breakdown of tuition and fees.
In This Article
- Contract Process
- Billing Management Tab
- Making a Payment
- Update Payment Details
- Shared Access
- Billing for Inactive Statuses
- Automated Reminders/Emails
Contract Process
Contract Submission
Parents/guardians access the contract within the checklist of the Parent Portal. From there:
- They'll select their payment plan and any other options you have listed within the contract.
- Note: Payment plans MUST be set up with schedules. Visit the article "Billing: Payment Plans & Schedules" to learn more.
- The contract will be signed by one parent/guardian, or by two if your school is using dual signatures. Visit the article "Dual Signatures on Contracts" to learn more about dual signatures.
- If using dual signatures, either parent/guardian can pay the deposit and enter their payment information. If enabled by your school, they can also check a box to enroll in Autopay for tuition payments.
Financial Responsibility
Unless you are utilizing our Split Contracts feature, the parent/guardian who pays the deposit will be assigned 100% financial responsibility for billing payments. It can be adjusted at any point in time after contract signing to reflect a split within the student record.
Split Contracts
Split Contracts is a feature that will automatically divide the amounts owed on a student contract based on the percentage of financial split assigned to the student’s parent/guardian(s). Learn more about Split Contracts within this article: Billing: Split Contracts.
Autopay
If you are requiring autopay but not collecting a deposit or any other fees at the time of contract signing, parents will be required to enter their payment information on the last page of the contract to save their account information. In workflows like this, parent payment information is saved on the contract, but no payment is collected at the time of contract signing.
For more information, please review the "Autopay Setup" section of the Settings: Billing Setup Page article.
Ledger
Once the contract has been submitted and financial responsibility has been set, the payer's ledger will be generated, and the Billing Management tab on the Parent Portal will be accessible.
Billing Management Tab
When a parent/payer logs into their Parent Portal account, they select Billing Management to access their ledger and billing options.
At the very top of the left side of the page, the payer will see:
- Any text you've added to the Billing Management Widget (Settings > Portal > Parent Portal Content). Visit the article "Parent Portal Content" to learn more.
- The convenience fee rates, if your school passes them on to payers. Visit the article "Payments: Passing on Convenience Fees to Parents."
Amount Due and Make a Payment
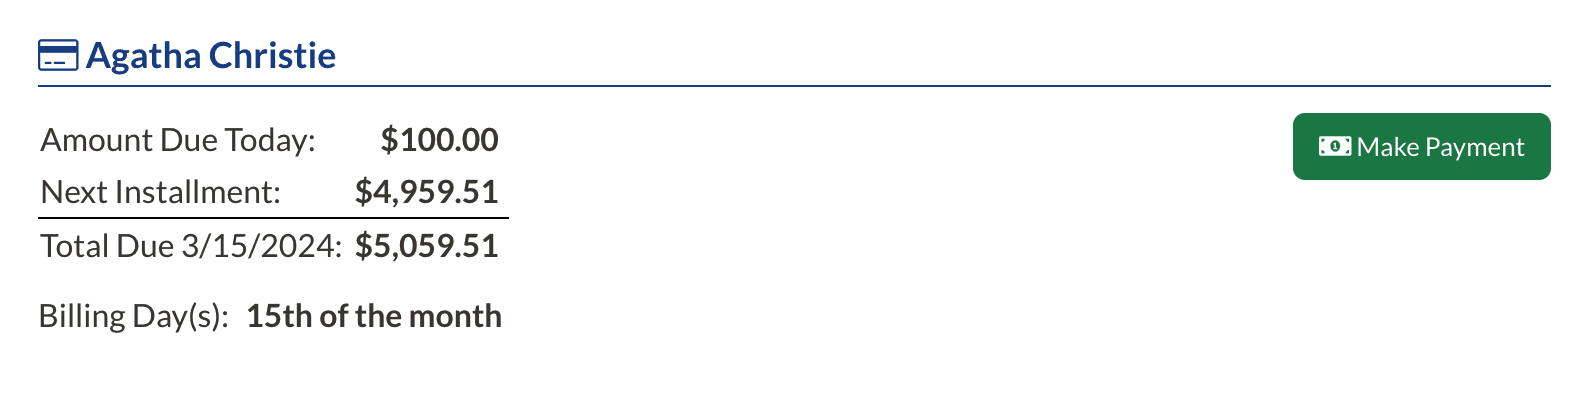
- Amount Due Today: Current total balance owed by this contact. With a financial split, each parent only sees the amount they owe. A red triangle indicates an overdue balance.
- Next Amount Due: The next scheduled amount and due date. If a custom Autopay date is set, the parent sees that date; otherwise, it will display the global billing day by default.
- Make Payment button: Appears once the first billing statement is sent (10 days before the first payment is due). Parents not enrolled in Autopay can use it to pay a current balance.
Important Note: Processing Payments
When a payment is made, it goes into processing. You can not reverse or make adjustments to a payment that's being processed. Once the payment has been processed, you can take action (if needed), such as setting up a refund to the payer.
Making a Payment
When submitting a manual payment, payers will enter the following information:
- Input a custom amount into the Enter Amount field. For reference, families can see the Amount Due Today, Next Installment, and Total Due on their next billing date on the right side of the screen.
- Select a saved payment method, or enter new credit card/electronic check (bank account) information by clicking Change Payment Method. Depending on the device, they may also see Apple Pay or Google Pay options.
- An option to enroll in Autopay, if not already enrolled (hidden if your school disables Autopay), will be visible when they set up a saved payment method. To learn more about the autopay experience and see examples of what it looks like on the payer's end, visit the article "Billing: Managing Autopay."
After the payment processes, parents receive a Payment Received email. If it fails, they receive a Payment Failed email. Both templates are customizable; visit the article "Billing Communications" to learn more.
⚠️ Important Note: Manual Payment Reporting
Manual payments will not be assigned to the student until the next billing date. You can see the payment reflected in the payer's ledger; however, you won't see the student it was applied to until the billing date. The payment also will not be applied to the student's balance on the billing Student list page.
Admin-Entered Manual Payments
If a parent drops off a check, admins can apply the payment from the payer record. Visit the article "Payments: Processing a Manual/Phone Payment" to learn more.
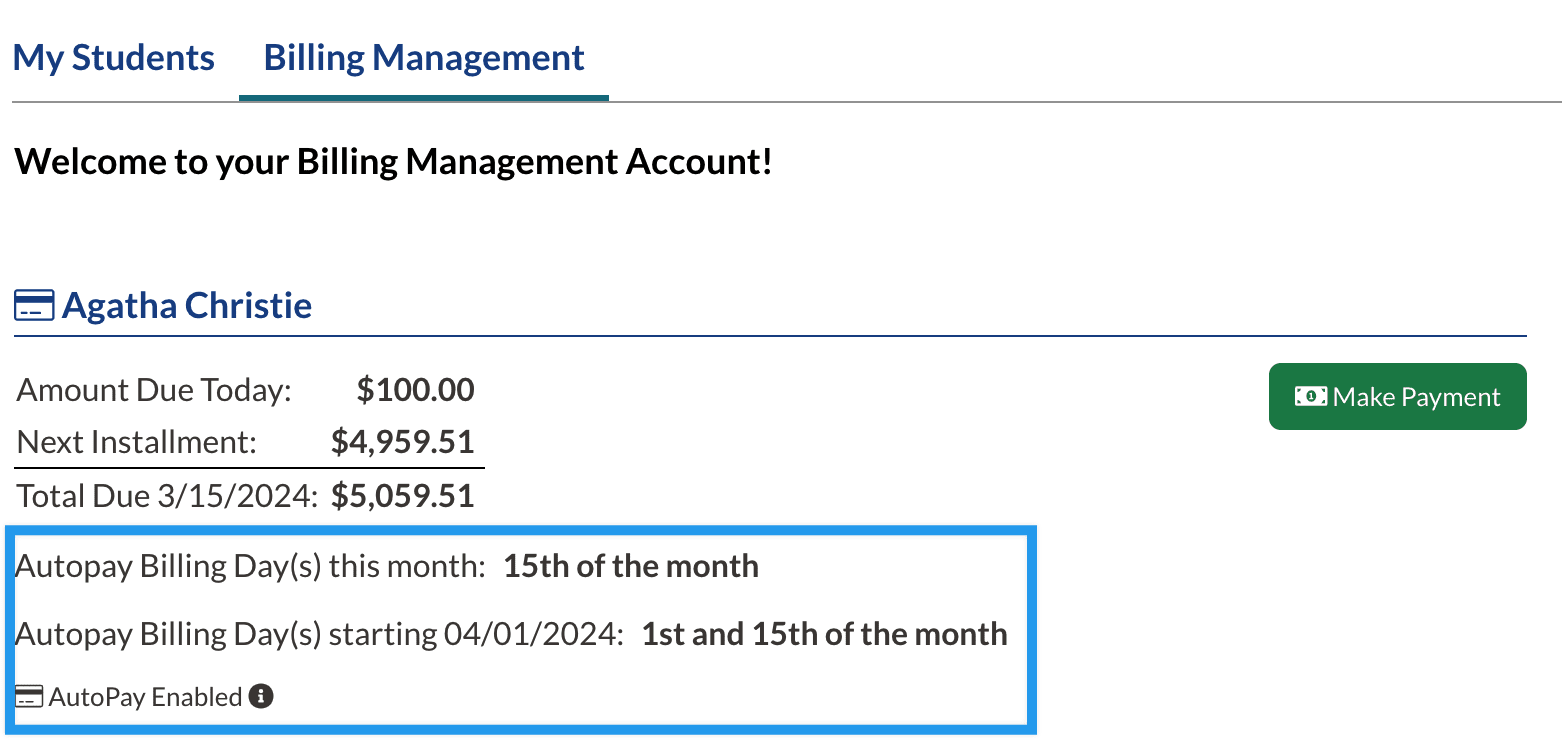
Autopay (Parent View)
⚠️ Important Note
This section only applies to schools that have Autopay enabled. For full Autopay setup, behavior, and admin management, visit the article "Billing- Managing Autopay."
When Autopay is set up, the Autopay details display under Next Amount Due. If an Autopay date change is pending, the effective date is shown.
What parents can do, depending on your settings:
- Enable/disable Autopay (unless your school requires it) via the Update Payment Details button on the Billing Management tab.
- Manage Autopay date(s), only if you've enabled parent-facing payment options. The Manage Autopay Dates section appears on the right of the Billing Management tab.
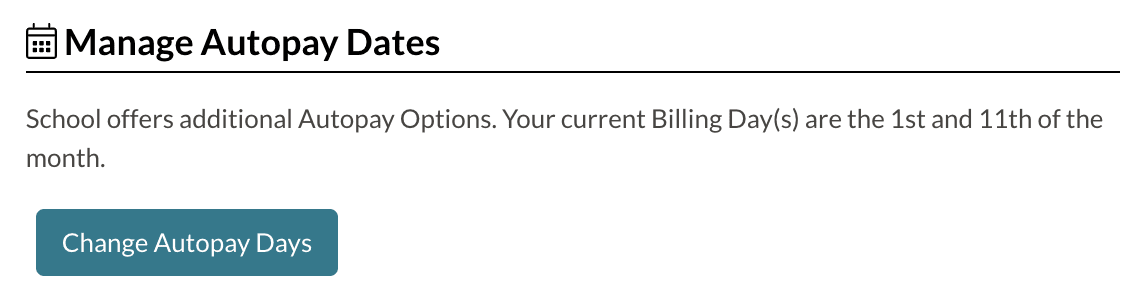
If parent-facing options are not enabled, parents won't see Manage Autopay but will still see Autopay dates above the ledger and can enable/disable Autopay through Update Payment Details.
If Your School Requires Autopay: If you manually disable autopay for a parent, it can only be re-enabled by an admin (via the Enable Autopay link on the parent's Contact Record > Billing > Overview tab) or by the parent adding a new payment profile and selecting Enroll in Autopay.
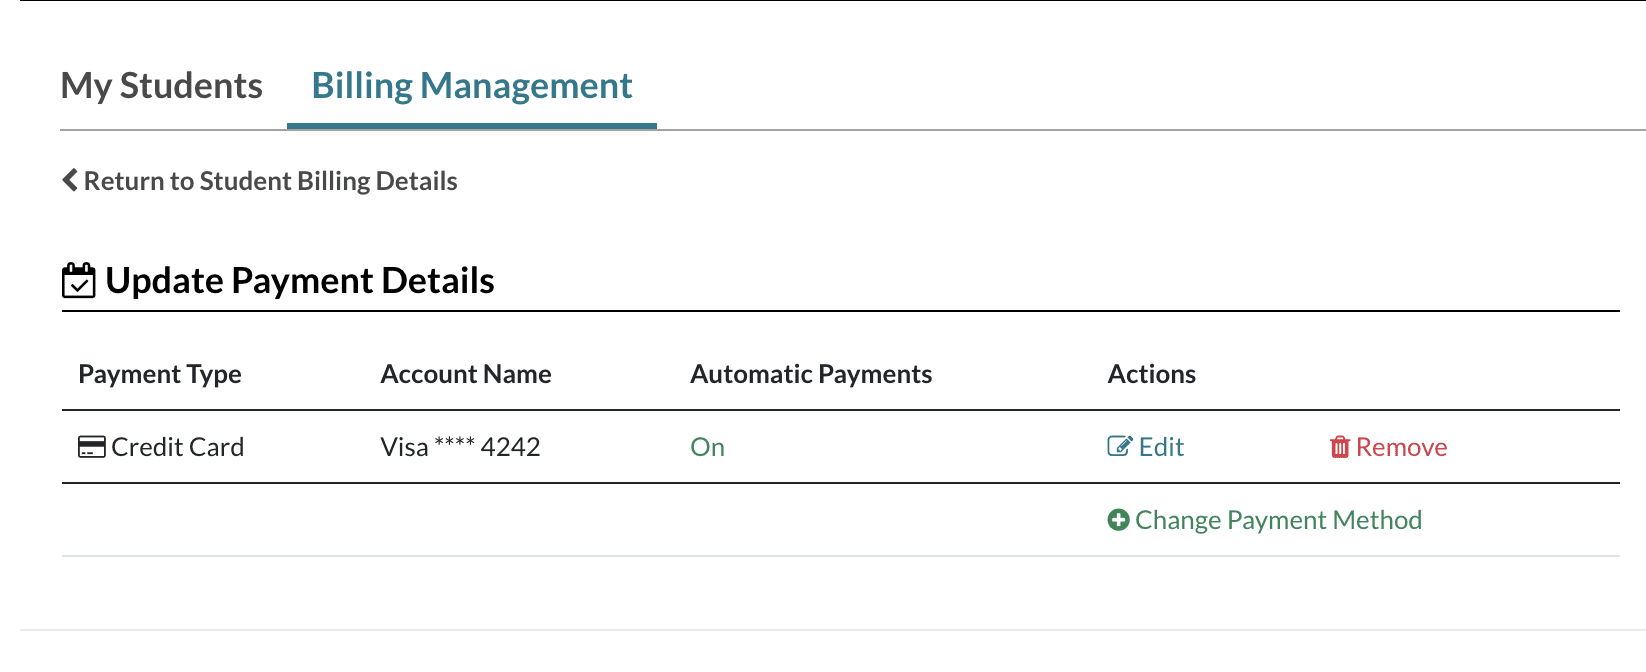
Update Payment Details
Important Note: Payment Profiles
Payment profiles are tied to the Parent Portal login. If the login for a financially responsible party is changed in any way outside of editing the email address under Parent Portal Accounts, the connected payment profile will not be connected to the new login.
Clicking Update Payment Details lets parents add, edit, or delete payment profiles.

If you require Autopay, payers must add a second payment profile before editing the original one (when only one profile exists).
Ledger and Statements
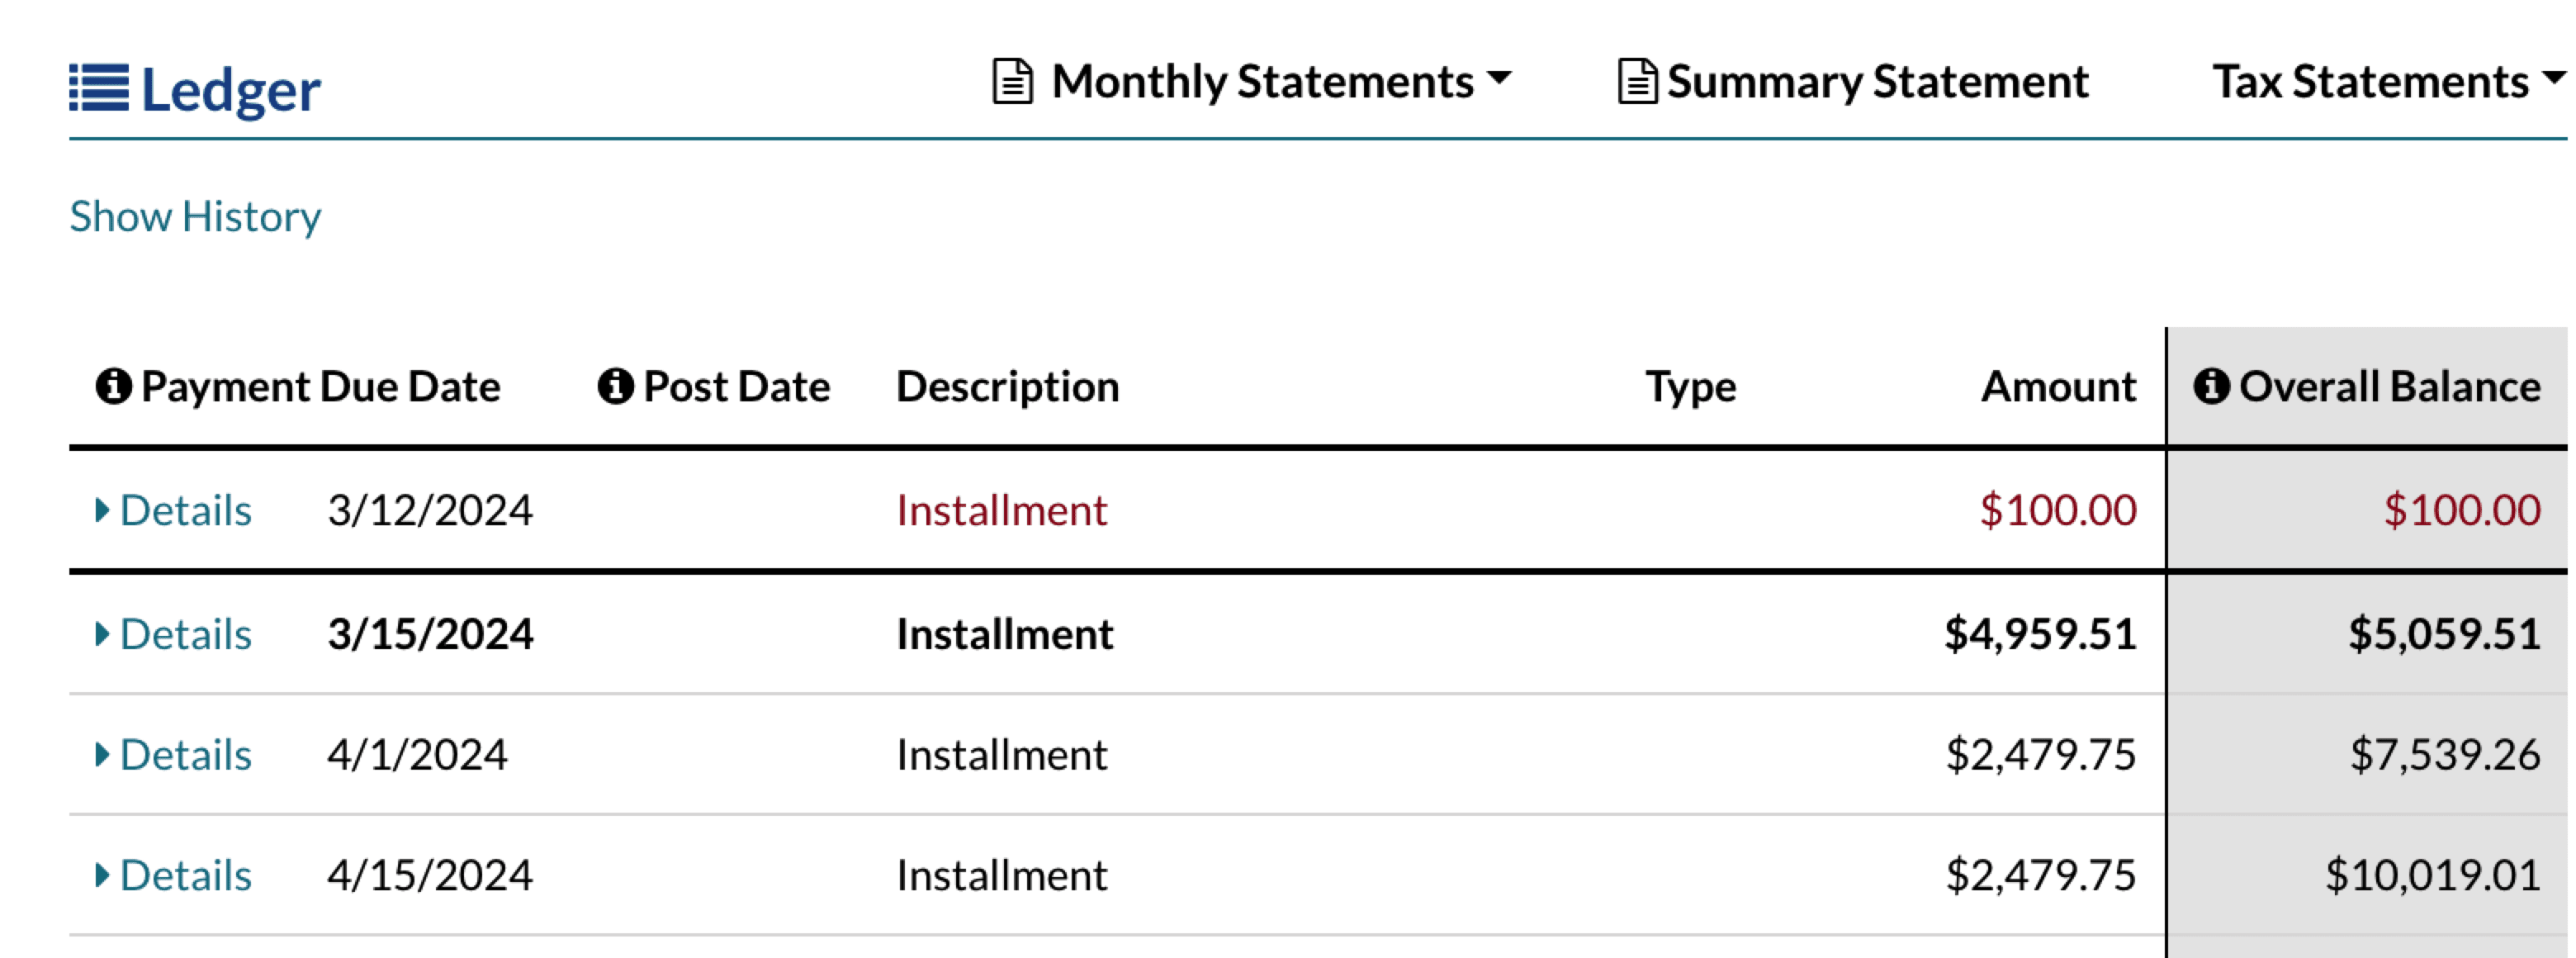
The ledger shows charges and credits with date, description, category, amount, and remaining balance. By default, it shows a month of past-due balances and some upcoming charges. Parents can click Show History to see the full ledger and Show Installments to return to the abridged view.
Within the ledger:
- Items are listed in ascending order (oldest first).
- A thick black line marks the current date; anything above is past due.
- Past-due items are bold red and roll forward each month until paid.
- Parents can expand Details to see a per-student breakdown.
- Information icons in the column headers reveal helper text on hover.
Statements available to parents:
- Monthly Statements (download by month)
- Summary Statement (all activity to date)
- Tax Statement
For the full statements walkthrough, including admin access, customizing templates, and sending statements, visit the article "Billing- Statements."
Shared Access
Shared Access allows a parent or billing account holder to grant access to another individual for making one-time payments on an account.
To learn about the Parent/Guardian experience with Shared Access, please check out this article: Shared Access: Parent/Guardian Experience.
Billing for Inactive Statuses
Billing will still post for any students who are moved to an inactive enrollment status and have outstanding/remaining balances. Inactive statuses include Financial/Academic Hold, Mid-Year Withdrawal, Not Enrolling, and any custom inactive statuses.
Depending on your school's policy for the payer's financial responsibility for the situation, the school will need to apply a credit to all associated payer accounts for any amounts not owed.
Automated Reminders/Emails
- Visit the article "Billing Communications" to learn about automated billing email templates that you can customize.
- Visit the article "Automated Communication Plan Setup" to learn about Automated Communication Plans to further customize your billing process.
Did you know?
We have merge tokens that will pull in Convenience fee information! Read more about these and how to incorporate them into templates, forms, and emails in this article: Convenience Fee Merge Tokens
Comments
0 comments
Article is closed for comments.