
Public Calendar Links let families register for events (open houses, tours, info sessions) by clicking a link from your website or an email, with no inquiry form or portal login required. Every registration through a public link creates a new inquiry in the system, which is why public links are best reserved for prospects and inquiries, not students already on an admissions or enrollment checklist.
💡Quick Answers
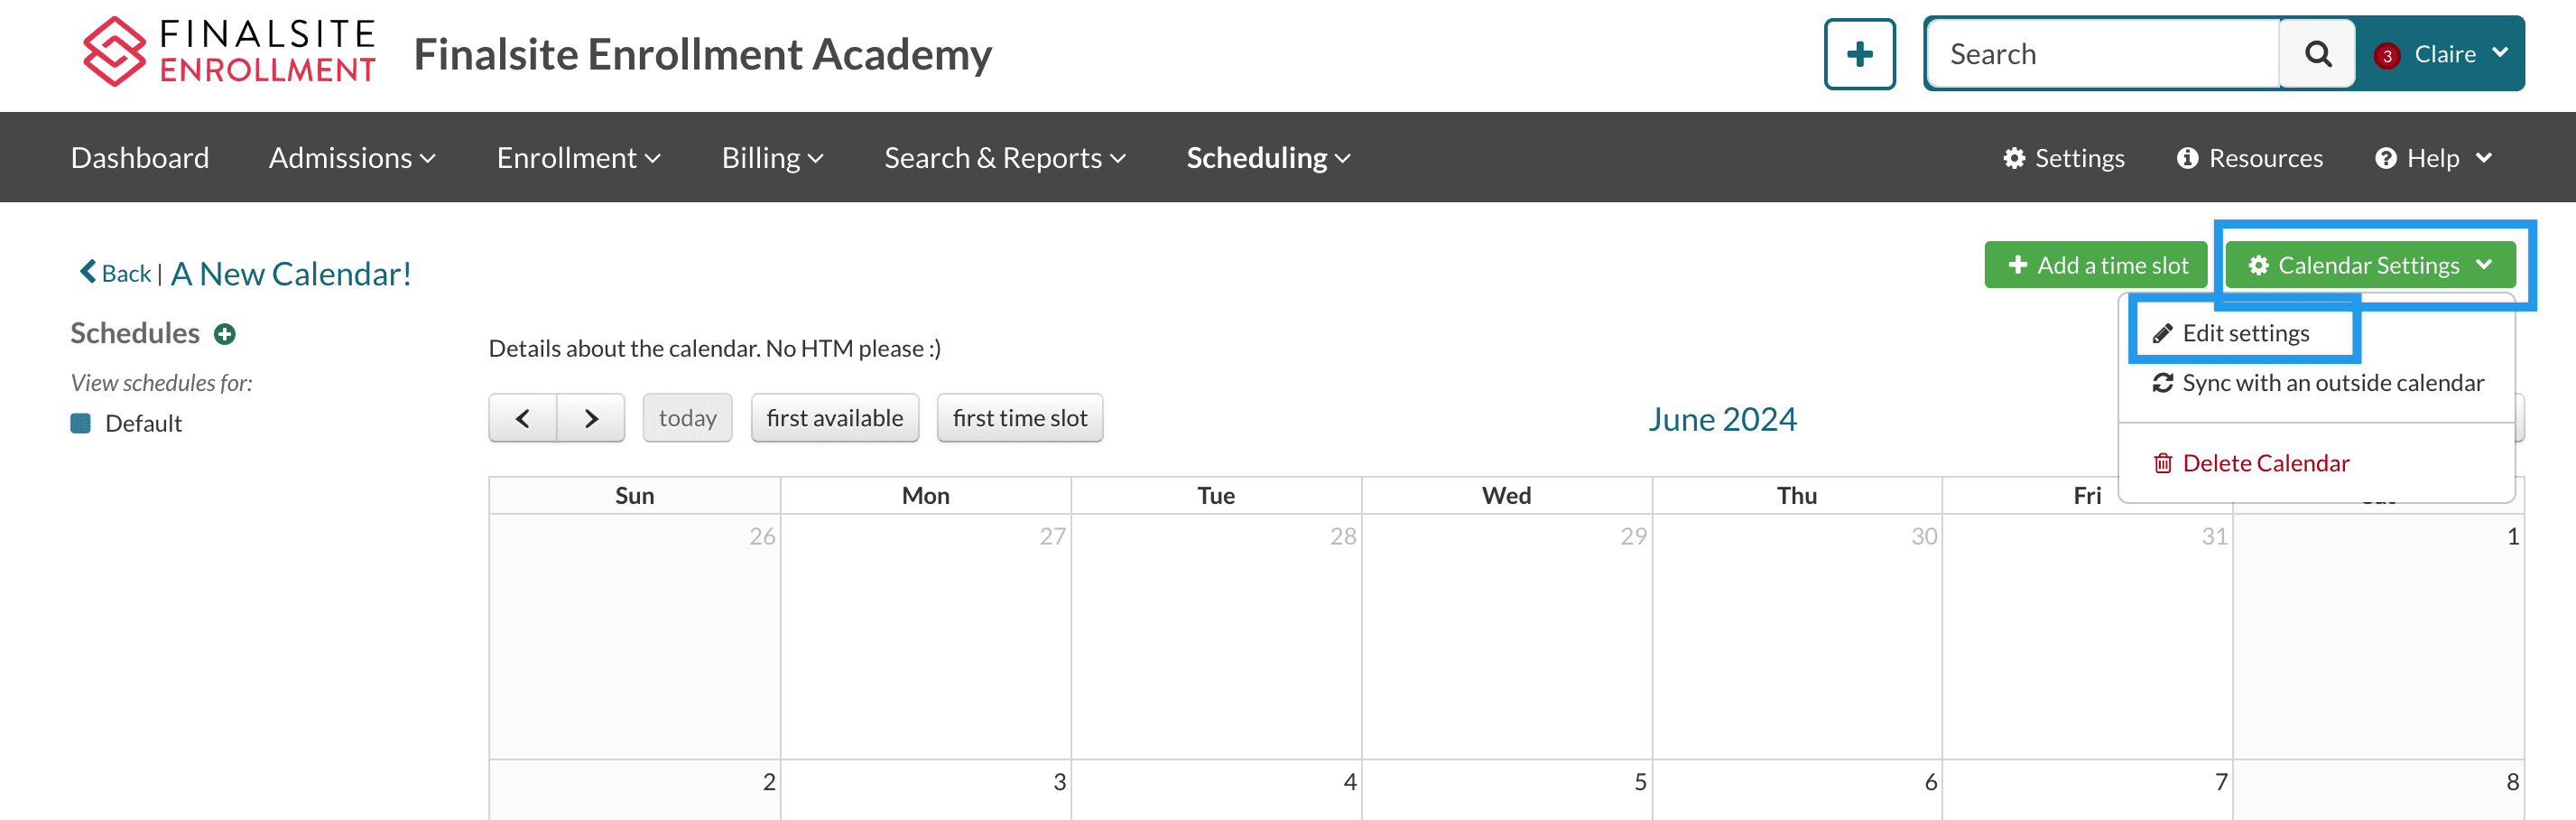
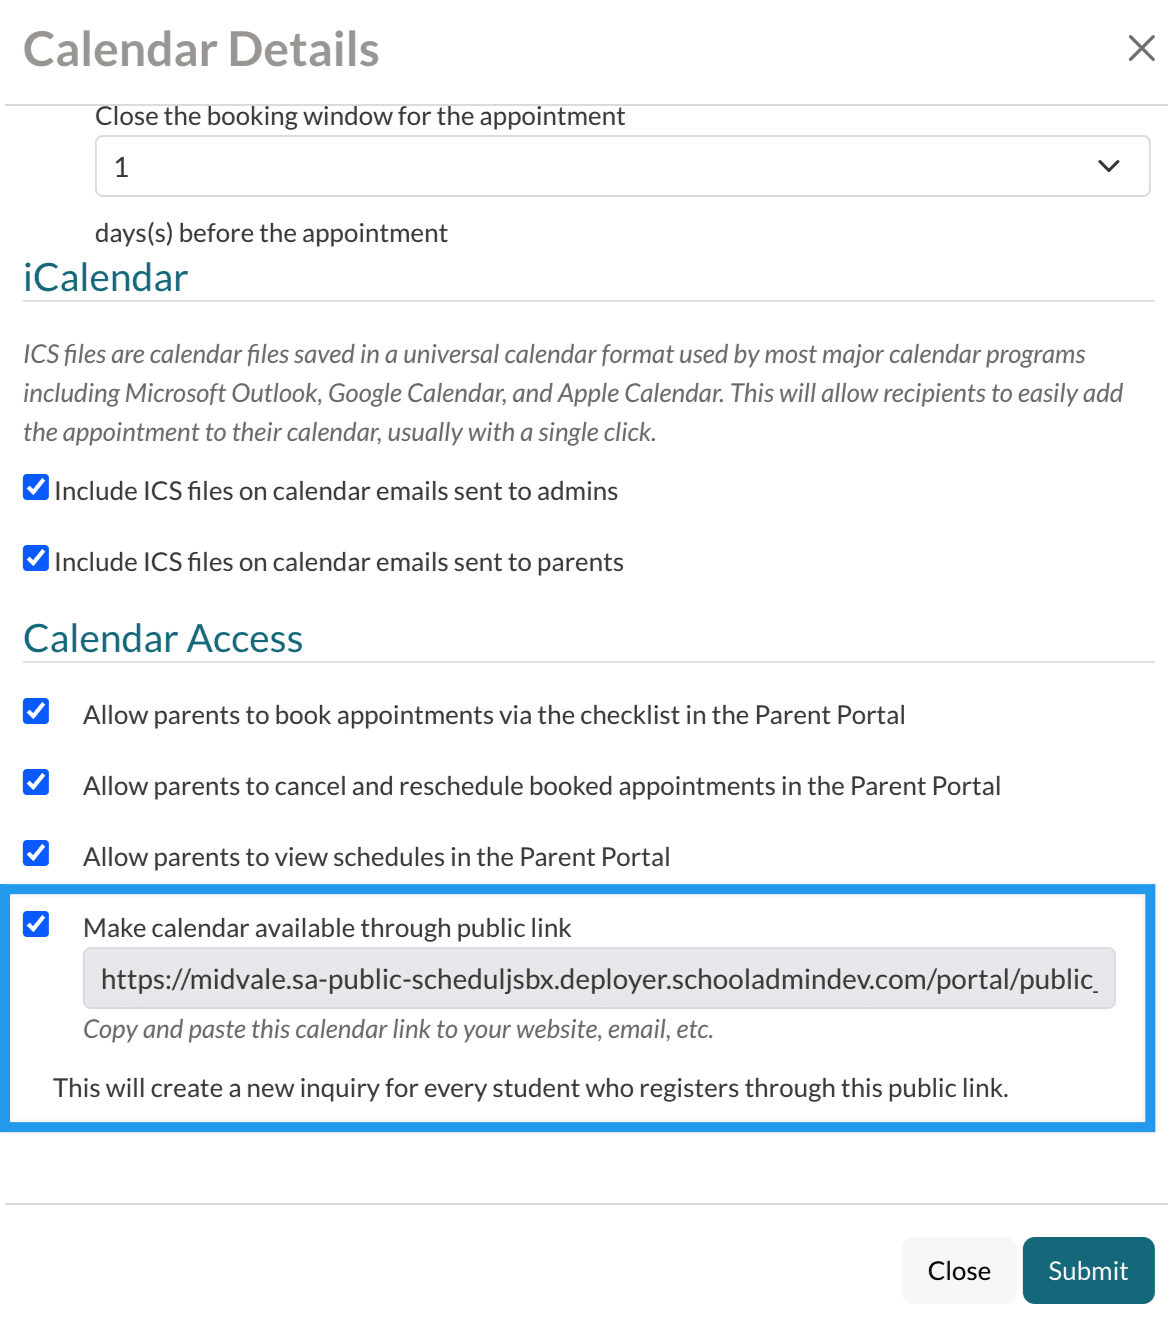
- How do I make a calendar public? Scheduling > Calendars > select the calendar > Calendar Settings > Edit Settings. In the Calendar Access section, check "Make calendar available through public link," and click Submit. The link appears for you to copy.
- What info does the public sign-up form collect? Student first/last name, apply grade, apply year, parent first/last name, parent email, and parent phone. To collect more, attach a Custom Appointment Form in the calendar settings.
- When should I NOT use a public link? For students who already have a checklist (applicants or enrollees). Every public link sign-up creates a new inquiry, which causes duplicate records and mixed-up statuses for those students. Use a calendar checklist item instead.
- What happens after a family registers through a public link? They get an option to Add to my Calendar from the Appointment Details modal, plus any confirmation, reminder, and cancellation emails enabled in the calendar settings. The system creates an inquiry record with the appointment info attached.
- What if a family needs to change or cancel their public registration? They have to contact the school. Public registrations cannot be self-managed because there's no portal login. The admin cancels the existing appointment, then the family clicks the public link again to rebook.
- What about duplicate bookings through public links? Since the form has no login, the same family can sign up multiple times. The system alerts you in the event search, on the student checklist, and during forms inbox import. See Duplicate Appointment Bookings.
Set Up a Public Calendar Link
To start setting up a public calendar link, navigate to the Scheduling tab in your Finalsite Enrollment site, then click on Calendars and select the calendar that you want to make public from the list. To learn how to create a new calendar, visit the article "Creating New Calendars."
Once the calendar page has opened, click on the green Calendar Settings button in the top right and select Edit Settings from the menu.
In the calendar settings, scroll down to the Calendar Access section and check the box for 'Make calendar available through public link'. Once you have done so, a hyperlink will appear. This is the direct link to your calendar, which you can copy and paste into your website, emails, or elsewhere for families to click on and register for the event. Remember to click Submit to save your changes!
Manage Public Calendar Sign-Ups
Event Registration
When a family clicks the public link, they are taken to a Finalsite Enrollment page that has your calendar and any available dates listed. They will simply click on a date and enter the required information to register for the event.
By default, this is the only information that public calendar sign-ups must provide:
- Student First & Last Name
- Student Apply Grade
- Student Apply Year
- Parent/Guardian First & Last Name
- Parent/Guardian Email
- Parent/Guardian Phone
If you want to collect additional information about the family (e.g. interests for shadow day, t-shirt size, etc.), consider setting up a Custom Appointment Form.
Post Registration
Families who register for an event through a public link will have the option to add the appointment to their calendar by selecting "Add to my Calendar" in the Appointment Details modal.
Families will also receive email confirmations or reminders as configured in the settings for that calendar.
The system will create inquiry records with all of the basic appointment information for each student that signs up, along with their parent/guardian contact. From the admin side, the submitted form will look like an inquiry, but it will contain only basic information.
If a family needs to change or cancel their registration, they will need to contact the school, so that this can be taken care of on the Admin side. The school can then cancel the existing appointment, and the parent can click on the link again to sign up for a different date and/or time.
Duplicate Appointment Bookings
When you share a Public Calendar link, families can easily click the link, select a date, and input their information. Since it's a public link without login requirements, there's no way to stop someone from accidentally signing up multiple times.
To help you manage duplicate bookings, we've set up layers of alerts to notify you, allowing you to check in with the family and remove any duplicate bookings. You'll see the duplicate appointment in your event search, on the student checklist, and when importing the forms in the Forms inbox.
Check out our Duplicate Appointment bookings article to learn more!
Comments
0 comments
Article is closed for comments.