
Leadflow connects forms on your Finalsite Composer website to Finalsite Enrollment, so that submissions on the CMS side automatically create parent and (optionally) student records on the EMS side. Parents come in with the role of Lead, students come in as Prospects, and you can track them in the Leads workflow page and the Leads Report. Initial setup requires Support to enable the integration.
💡Quick Answers
- How do I enable the Leadflow integration? Contact Support to turn it on. After that, you build CMS forms with the integration toggled on, and they flow into EMS.
- What CMS form fields are required vs. optional? Required: Parent Name and Parent Email. Optional: Child Name, Entry Grade, Entry Year. Important: if you map Entry Grade or Entry Year, you must also map Child Name, or you'll get an error on form submission.
- What's the most common Leadflow setup mistake? Grade or term values on the CMS form not matching EMS exactly. The CMS field choice 1st must match EMS 1st, not first. Always alter the CMS form to match EMS, never the other way around.
- Where do leads show up in EMS? Three places: Admissions > Students in Admissions > Leads (the Leads workflow page), Search & Reports > Admissions Reports > Leads Report (showing source form and counts), and the Dashboard funnel filter (which only shows leads who have progressed to Inquiry or beyond).
- What's the difference between a Lead and a Prospect? A Lead is a parent. A Prospect is a student. Both are out-of-workflow roles. Leadflow can create either or both, depending on which CMS fields you map.
- What are the Lead Status options? Active (a parent has come in alone), Progressed (a student is also attached to the parent), and Inactive (manually applied via the Personal tab or in bulk via Edit > Update a Field on the Leads list page).
In this article
How to Enable This Feature
If you're interested in enabling this feature, submit a request to our Support team for the initial setup.
During setup, the team will ask you for your school's site address. If you are a district or multi-school group, please provide the list of school sites that should receive leads.
Leads in CMS
After the internal setup process has been completed, you can create and configure a form in the CMS module menu > Forms. Once completed, creates a lead that can be connected between the CMS and EMS.
Create a form
In CMS, open up Forms from the module menu.
Build a form with easily customizable fields that can solicit the information you need to bring a person into your system.
At a minimum, the connector form must include the following fields:
- Parent Name
- Parent Email
Additional fields that can be included and tracked are:
- Entry Grade (prospect_entry_grade) (optional)
- Child Name (optional)
- Entry Year (prospect_entry_year) (optional)
⚠️ Important Notes
Child Name Field
While Child Name is an optional field on its own, it is required to create a prospect record in EMS if Entry Grade and/or Entry Year Name fields are mapped. If you map these fields but do not map Child Name, you will receive an error message in the CMS form submission email. The error may read "There was an error connecting this field to a field in the Leads Workflow."
Grades and Terms
The format of your terms and grades must exactly match in CMS and EMS in order for the Leadflow form to work.
For example, if the grade choice in EMS is listed as 1st, you must use 1st and not "first" as a field choice in the CMS form.
Do not alter the terms or grades within your EMS site to match the values on the form. Instead, alter the CMS form to match the values in your EMS site. This helps avoid potential problems, as alterations to term or grade formats can impact various aspects of your EMS site.
You can check your EMS grades page under Settings > General > Grades and your terms page under Settings > General > Terms.
Set form notifications
After adding your form fields, customize your form's submit options in the quick panel in the right column. Set Notification emails in the CMS Forms module so that the right people can stay looped in as soon as a form is submitted. Learn more in the CMS article "Customize form Submit options."
Configure form settings
Once your form build is complete and notifications are set up, configure the Integration Settings , which can be found by clicking on the Settings tab in a selected form.
Once in Settings, scroll past General and Payment settings to find the Integration Settings box.
- Toggle on Enable Finalsite Enrollment
- Match the Enrollment lead title with any CMS form labels used in this particular form.
Two additional fields appear in the Integration Settings:
- EMS Subdomain: A dropdown listing the EMS sites available for this form. Select the EMS site you want leads from this form to go to. This allows different forms on the same CMS site to send leads to different EMS sites, which is useful for districts with multiple schools.
- EMS URL: Auto-populates with the full URL of the selected EMS destination. Use this to confirm leads are being directed to the correct site.
Once settings are configured, Display or share your form so that anyone completing and submitting this form may then be connected to Finalsite Enrollment.
Leads in EMS
Workflow
Once you've enabled this feature and set one of your forms in Composer to map data into Finalsite Enrollment, whenever that form is completed, some of the data within the form will be transferred to Finalsite Enrollment (EMS), where it will automatically create parent and (if possible)* student records.
*Note: The data sent over is determined by what you have enabled in the CMS form setup.
What information can be passed over?
- Parent Name (required)
- Parent Email (required)
- Student Name (optional)
- Student Entry Grade (optional)
- Student Entry Year (optional)
That info is used in EMS to automatically create parent and (if possible) student records.
- If only parent data is enabled for sharing, only a parent record is created in EMS.
- The parent is created with the role of Lead.
- If parent and student data is enabled for sharing, both parent and student records are created in EMS.
- The parent is created with the role of Lead and the student as a Prospect.
Where the Parent/Student can be found in EMS once they are created
Students/Parents created this way are trackable within the following places on your site:
-
Leads Workflow Page: (Admissions > Students in Admissions > Leads)
- This tab will list all parents who have been created through a Leadflow Form.

-
Leads Report: (Search & Reports > Admissions Reports > Leads Report)
- This report shows each Lead Source (CMS form name) and the number of students generated from it, separated by status.
Columns Within the Report:

- Leads Source: The CMS form name.
- Lead: The number of parents created by the form.
- Prospect through Enrollment: The number of students tied to that lead in any of those statuses including any siblings added to the initial student.
-
Prospects Page: (Admissions > Students in Admissions > Prospects)
- This tab lists all prospects (including the students who are created through a Leadflow Form).
-
Dashboard:
- Within the Dashboard of your site, you can filter your funnel by Lead Source (CMS form name).
- Note: The Funnel only displays data for students who have progressed into the workflow, i.e. it doesn't show your prospects, only inquiry and onwards.
- Within the Dashboard of your site, you can filter your funnel by Lead Source (CMS form name).

Important: Keep in Mind
- Automated Communication Plans (ACPs) are available for leads. See the new "Automated Communication Plans for Leads" section below for setup details, or jump to "Automated Communication Plan Setup."
- Communication for prospects (students before they enter the Inquiry phase) must still be sent manually.
Lead Status
The Lead Status is one of the columns you'll see on the Leads Workflow page (Admissions > Students in Admissions > Leads).
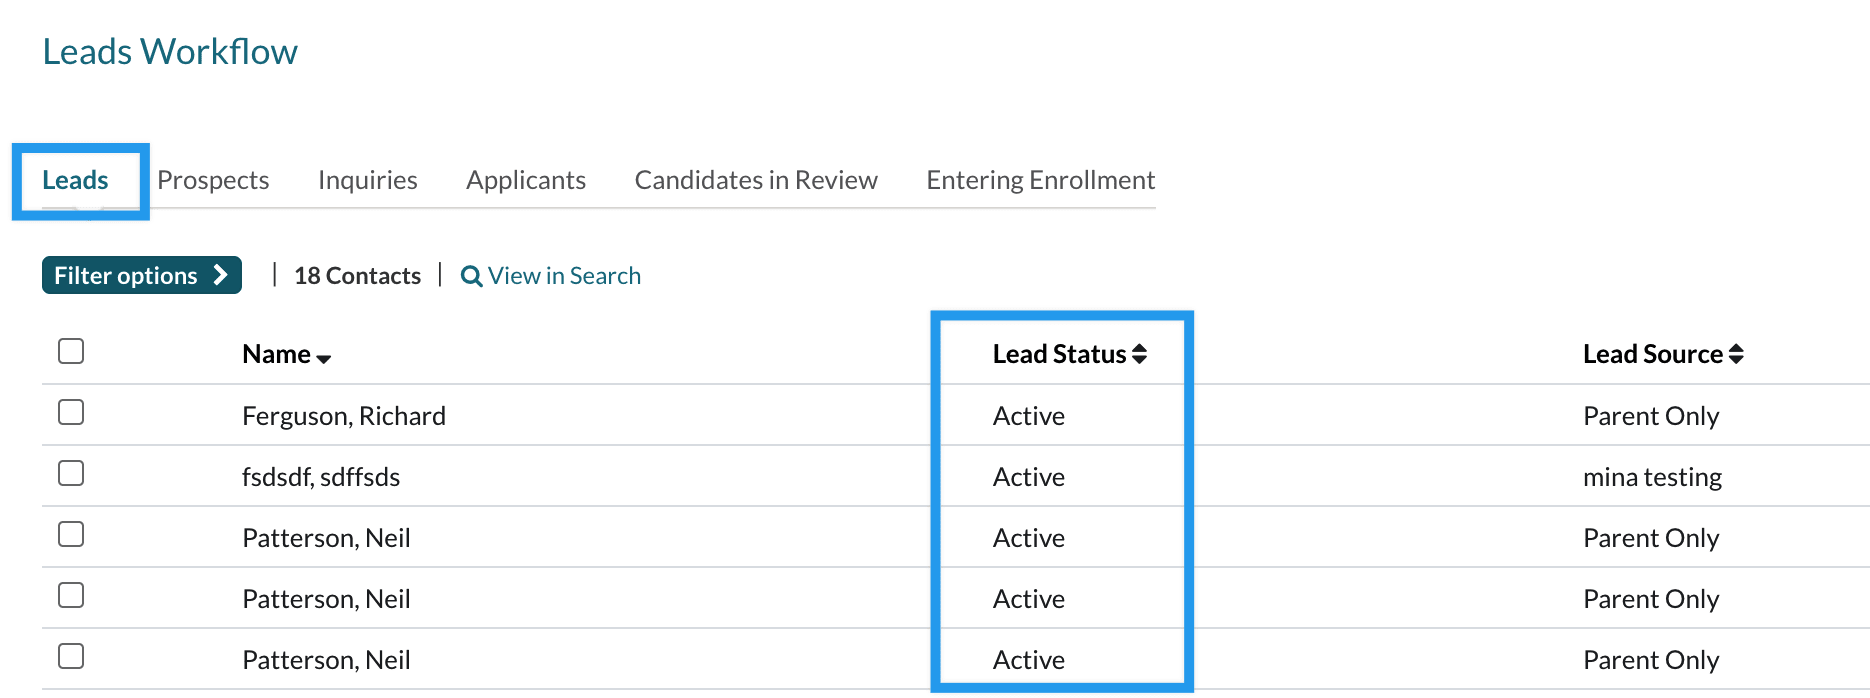
This is the status given to your Leads allowing you to track them. There are three statuses for Leads.
-
Active: Once a form is submitted and the record is created in EMS, the Lead (parent) will have an Active status.
- If a student is sent at the same time, the Lead will automatically show as Progressed rather than Active.
- Progressed: The Lead will have the status of Progressed whenever a student is added to them (or if they are imported with a student).
-
Inactive: If you'd like to mark a lead or group of leads as inactive, you can do so manually within their record by editing the Lead Status field under the Personal Tab. You can also update their status to inactive in bulk on the leads list page by using edit > update a field.
- See the box below for the detailed steps on how to change this status individually or in bulk.
Can I manually update the Lead Status?
Yes. You may wish to mark some leads as inactive if you haven't heard back from them in a while. Expand each dropdown to learn how.
- Create a Search to pull in your Leads under Search & Reports > Search.
- In the Search by dropdown menu, select All Other Fields and then choose Role > Is > Lead as your criteria.
- Click Search to get your results.
- Use the checkboxes along the left side to select the Leads you want to update.
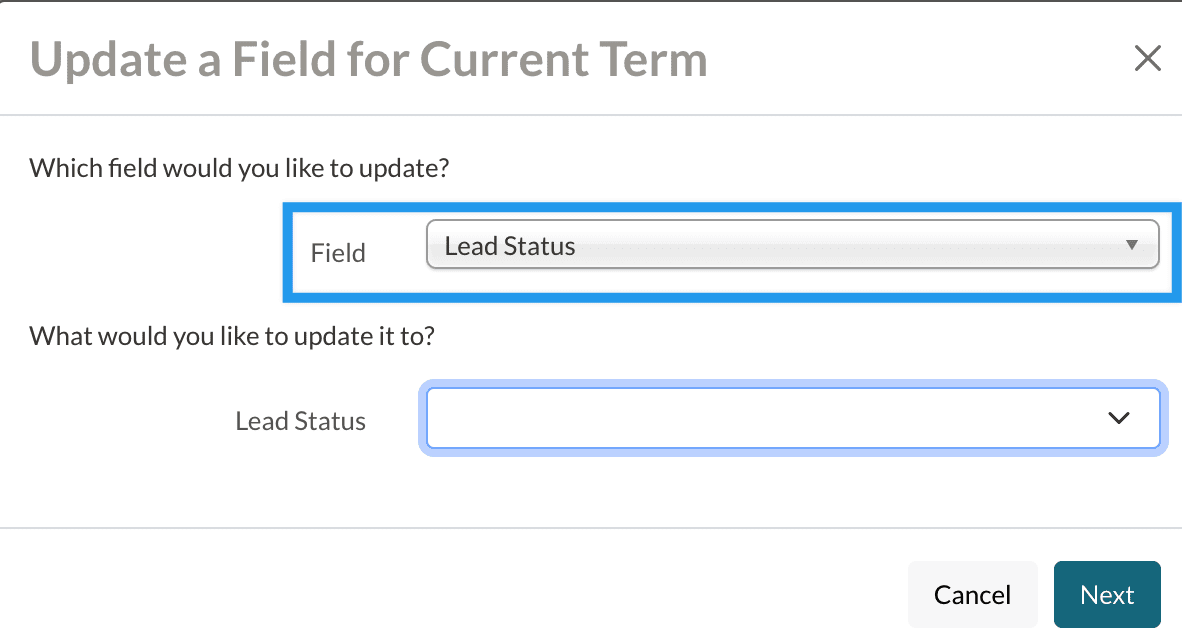
- From the Edit menu, select Update a Field.
- Search for Lead Status.
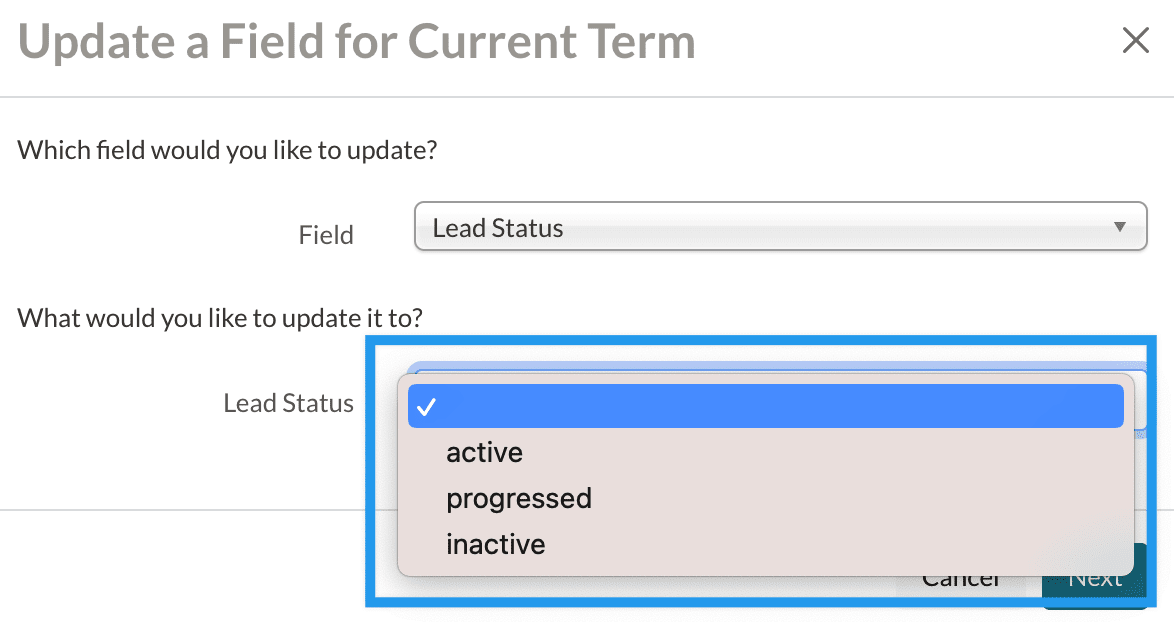
- Select the new status from the dropdown menu.
- Select Next.
- Select Update to confirm and submit the update.
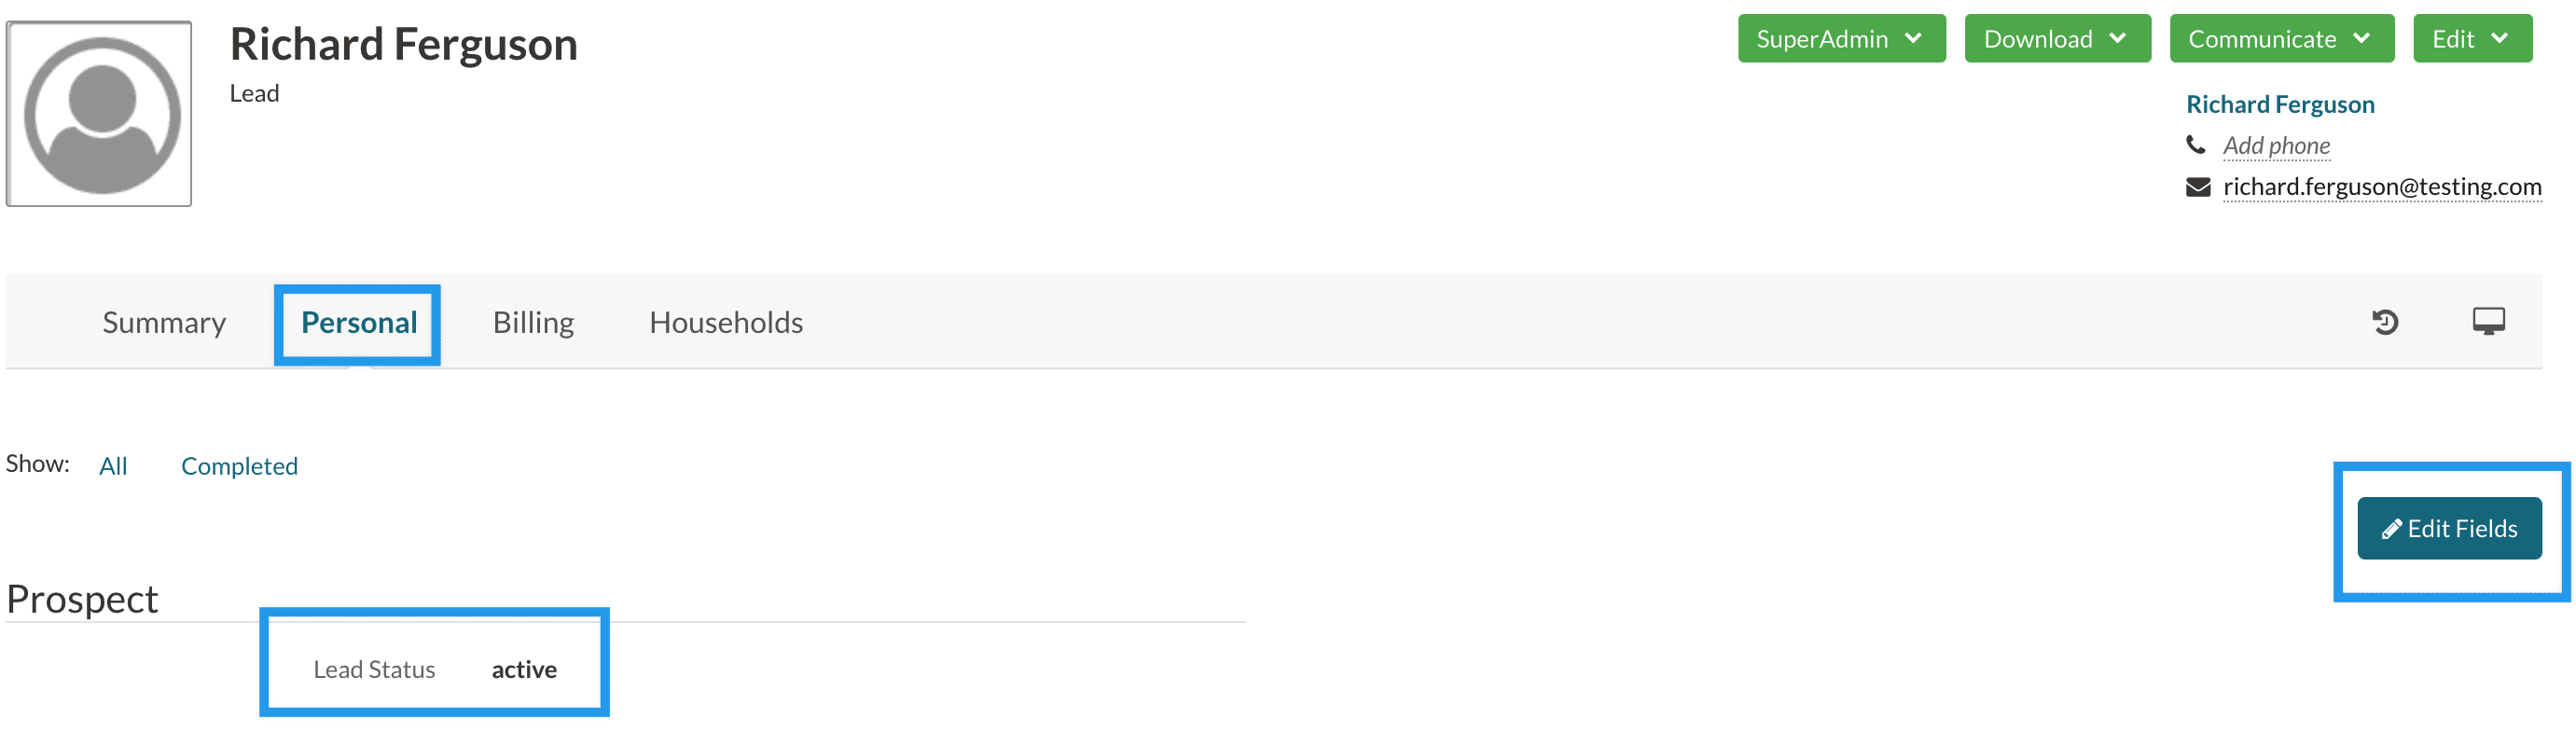
- Navigate to the Lead (parent) record by searching for their name or clicking on their name on the Leads Workflow page.
- On their record, select the Personal Tab.
- Select Edit Fields.
- Update the status to Inactive in the dropdown for the Lead Status field.
- Select Save Edits.
Lead Role
The role of Lead is an out-of-workflow role that is assigned to parents or guardians who are added to EMS through a Leadflow form.
- The role is automatically applied to any parent that is brought in through a Leadflow form.
- Parents/Guardians with the role of Lead will appear in the Leads workflow list under Admissions > Students in Admissions > Leads.
- If the role of Lead is removed from a parent/guardian they will no longer appear in the Leads Workflow list.
To learn more about roles and statuses, please check out this article: Roles & Statuses Explained
Yes. Here's how to do that:
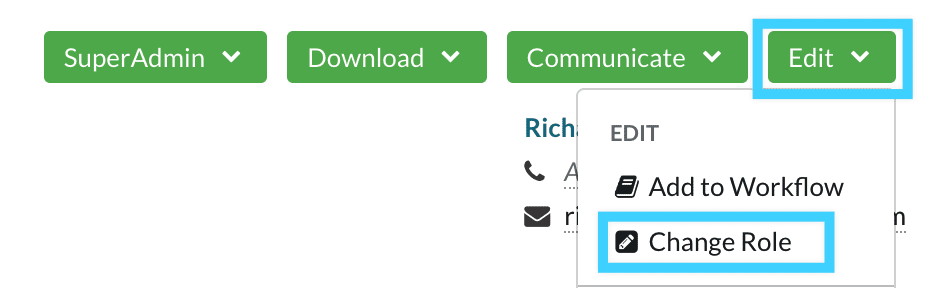
- Navigate to the Lead (parent) record by searching for their name or clicking on their name on the Leads Workflow page.
- Select Edit.
- Select Change Role.
- Select or De-select Lead.
- Select Save Changes.
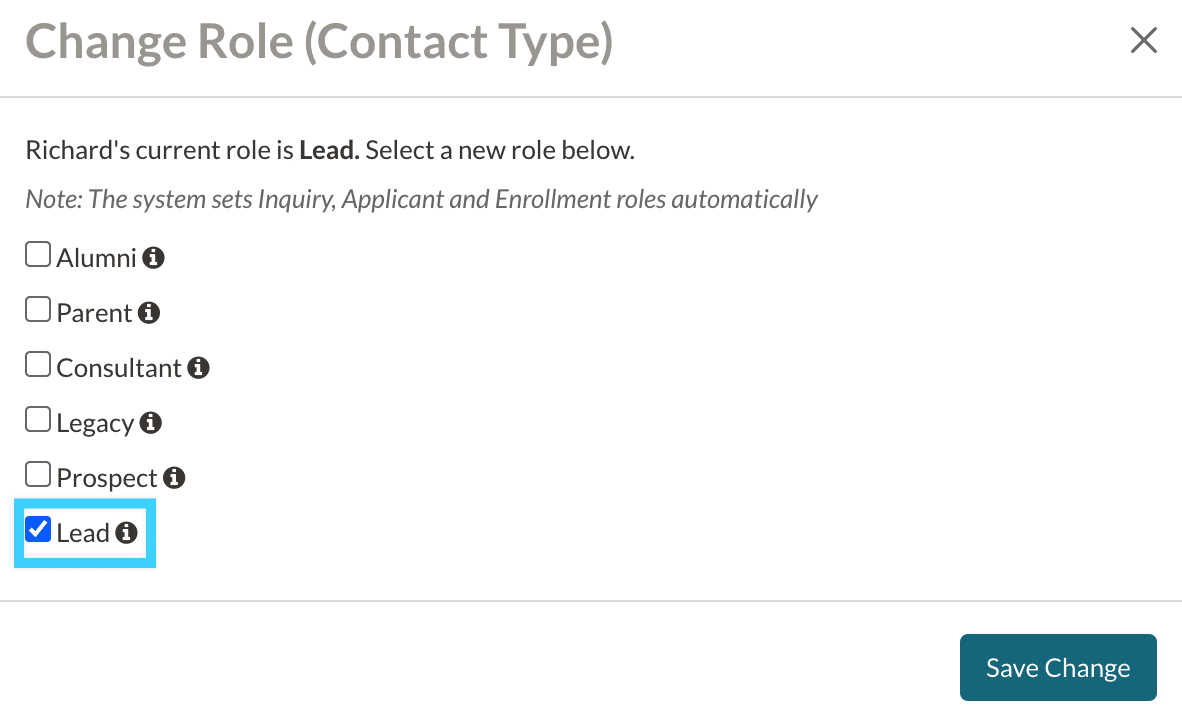
You'll see a green confirmation box letting you know that the role was changed successfully.
What's the difference between a Lead and a Prospect?
Leads and Parents are both considered Roles in Finalsite Enrollment. A role defines the type of contact in the system. For example, the role of "Parent" identifies anyone in the system who is a parent.
The main difference between a Lead and a Prospect is that a Lead is a Parent while a Prospect is a Student.
- Leads represent parents that have been added to Finasite Enrollment through a Leadflow Form.
- Prospects can be students brought over from a Leadflow form, but they can also be imported into your site or added through the Quick Action menu.
Lead Source and Lead Source Date
- The Lead Source is the name of the CMS form submitted by the lead (parent).
- You can see this data on the Leads Workflow page (Admissions > Students in Admissions > Leads) and the Leads Report (Search & Reports > Admissions Reports > Leads.)
- The Lead Source Date column displays the date that a lead comes in from CMS.
- You can see this data on the Leads Workflow page (Admissions > Students in Admissions > Leads.)
- Good to know: If a duplicate lead comes in and is merged, the oldest (original) submission date will show.
Finalsite Enrollment Leads Workflow Page (Admissions > Students in Admissions > Leads)
Automated Communication Plans for Leads
Once a lead is created in EMS through a Leadflow form, you can use an Automated Communication Plan (ACP) to send an email or create an internal reminder automatically. Lead ACPs are configured on the Lead tab of the Communication Plan page (Settings > Communication > Communication Plan).
How Lead ACPs trigger
- The trigger for every Lead ACP step is preset to "lead" and cannot be changed. The step fires when a contact enters the lead status.
- Lead ACPs only run on lead creation. They will not fire again if the lead's status changes later (for example, from Active to Progressed).
- A Lead ACP is evaluated based on the lead's state at arrival. For example, you can set up one ACP for Active leads (parent only) and a separate ACP for Progressed leads (parent with attached student/prospect). If an existing Active lead later becomes Progressed, the Progressed ACP will not fire.
- Additional Criteria, such as filtering by Lead Source, work the same way as in the other ACP tabs.
For full setup instructions, see "Automated Communication Plan Setup." For strategy guidance, see "Best Practices for Automated Communication Plans (ACPs)."
Comments
0 comments
Article is closed for comments.