
Within Finalsite Enrollment, you have the option to manage various aspects of payments by going to Settings > Financial > Payment Setup. Read on to learn more about what settings you are able to control and the best practices for using them.
💡Quick Answers
- What is a "Statement Descriptor" and why does it matter? This is the text that appears on a parent’s bank or credit card statement. It is limited to 19 characters. We recommend using a format like SA-SCHOOLNAME so parents easily recognize the charge and don't accidentally flag it as fraudulent.
- What is the difference between Fee Rate and Fee Amount? Fee Rate is a percentage (e.g., 3.05%), while Fee Amount is a flat dollar amount (e.g., $2.50). If you use both, the system calculates the percentage first and then adds the flat fee to the total.
- Can I choose which types of payments get charged a convenience fee? Yes. Under the "Apply To" section, you can check or uncheck specific categories like Billing, Application Fees, or Deposits. Please note that if you uncheck a category, the school still pays the processing fee, but it isn't passed on to the parent.
- How can I see who changed our fee settings? Click the "View Changes" link at the top of the Payment Setup page. This opens an Audit Log that tracks every edit made to your payment configurations.
In This Article
- Credit Card Configuration
- Electronic Check Configuration
- Check Configuration
- Custom Payment Configuration
- Convenience Fee Merge Tokens
- View the Audit Log
Credit Card Configuration
Payment Mode
This setting determines whether transactions processed through your Finalsite Enrollment site are live or in "test" mode. While this is visible for transparency, the setting can only be changed by a member of the Finalsite Enrollment Support team. If you have questions about your setting or believe you need it to be changed, please contact Support.
Credit Card Options
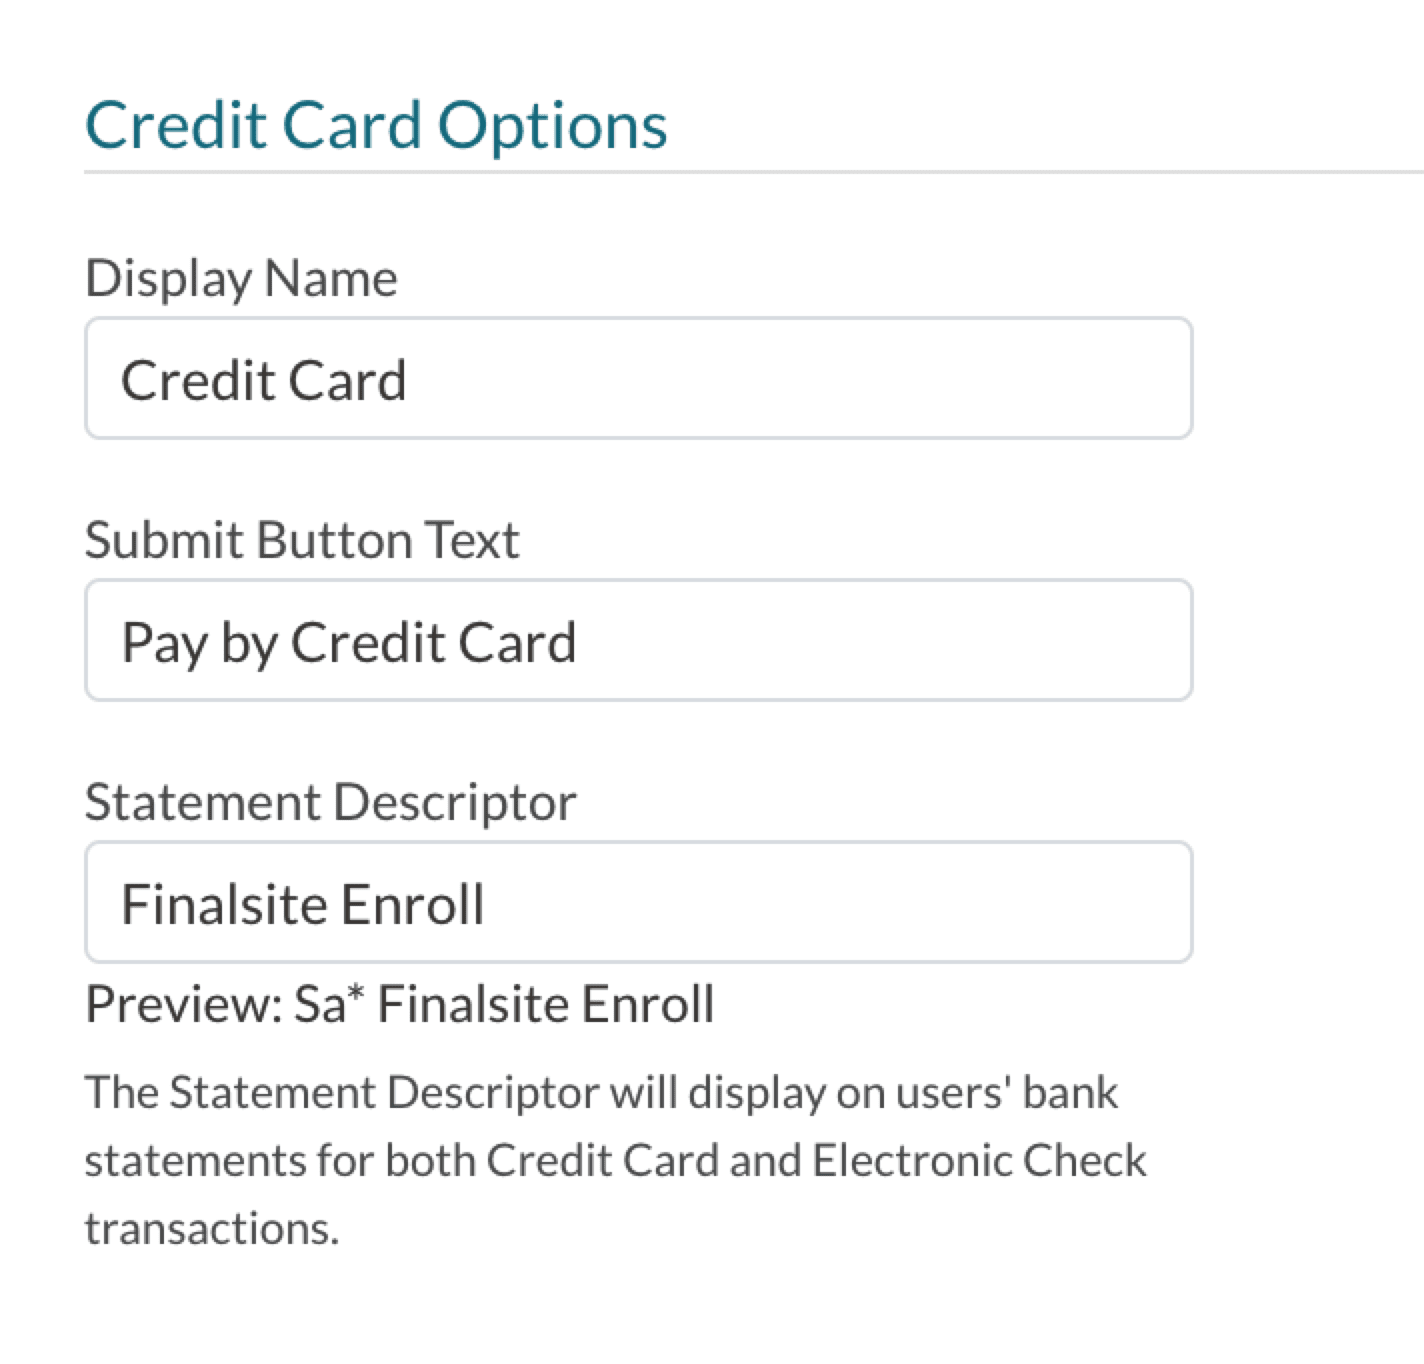
- Display Name: How credit cards are referred to in the Parent Portal.
- Submit Button Text: What parents will click to process their payment.
-
Statement Descriptor: Your school's Statement Descriptor is what's used on bank accounts or credit card statements when a payment is made through Payments.
- The Statement Descriptor is set by default to the Business Website provided during the Payments onboarding/verification process. Example: Finalsite Enrollment.COM.
- Your descriptor can list up to 19 characters. We recommend adding your school name after the dash. For example, SA-YOUR SCHOOL NAME.
⚠️ Important Note: Information on Deprecated Payment Customization Settings
For Payments customers only: While the options to update the Display Name and Submit Button Text for Credit Card and Electronic Check remain visible within the Payment Setup page, please note that these features are deprecated and will be removed in a future update.
Credit Card Convenience Fees
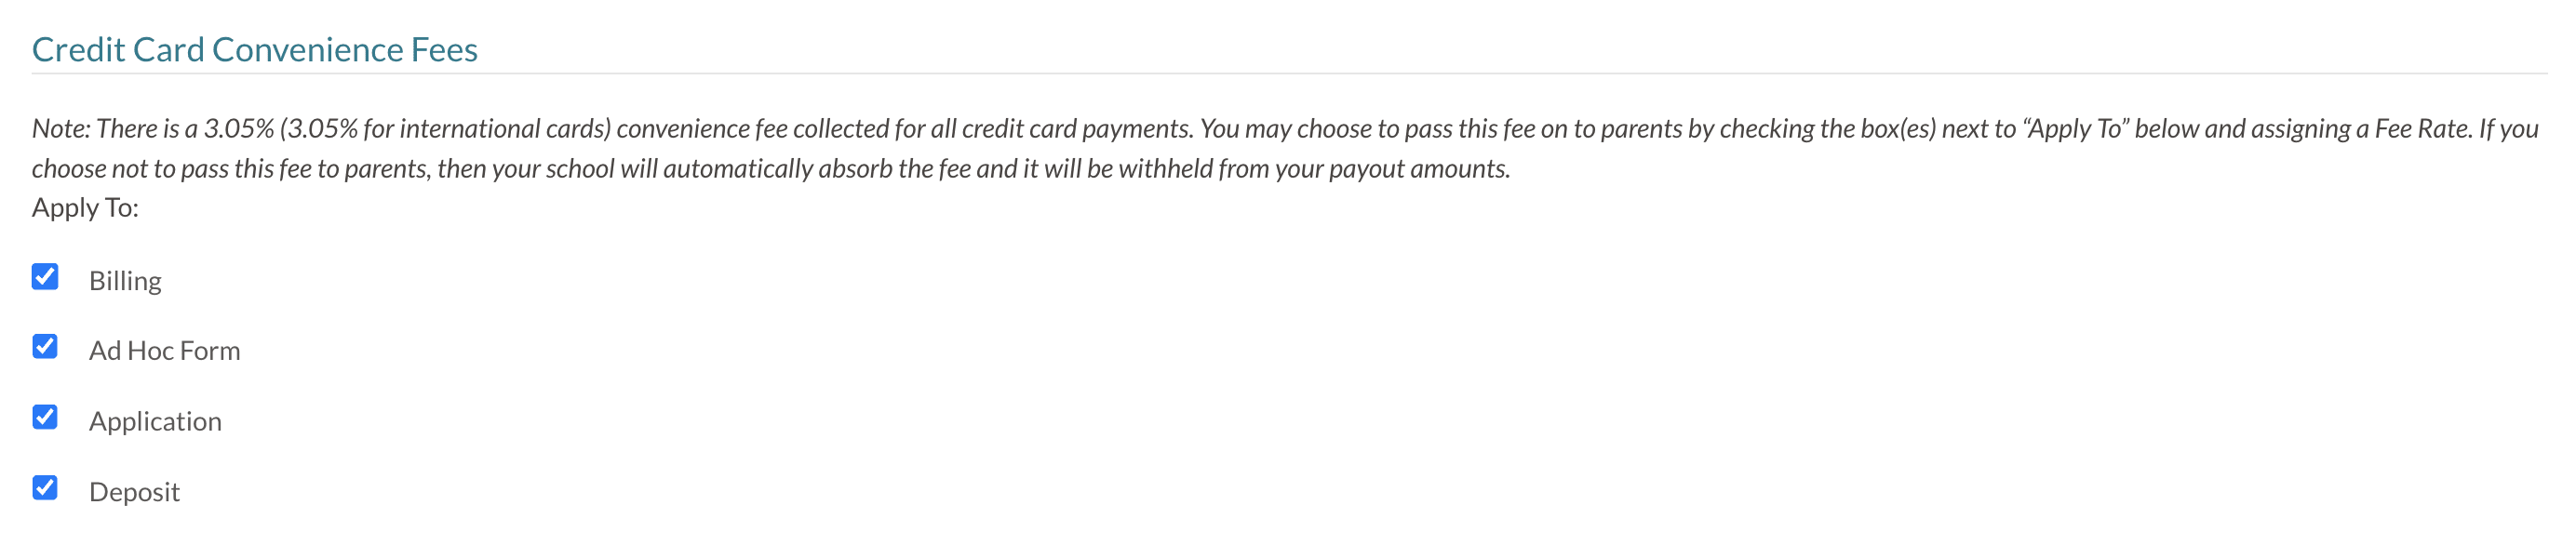
This setting refers to any credit check convenience fee that you would like to pass along to your parents. Learn more about passing on convenience fees in the article "Payments: Passing on Convenience Fees to Families."
- At the top of the section, you will see the rates that apply to your school.
-
Apply To: Beneath the convenience fee message, choose which charges you want to pass on to parents: Billing, Ad Hoc Form, Application, and/or Deposit.
- For example, if you deselect "Application," families won't be charged a credit card convenience fee for the application fee. However, these fees will still be deducted from your payout.
Convenience Fee Rates
Convenience fee rates vary by school. Your school's specific rates are displayed on this page and on the Payments page (Settings > Financial > Payments), where you can see all of your rates displayed in a read-only (uneditable) format. For a list of the standard convenience fee rates, see the "Before You Start: Convenience Fee Rates" section of "Payments: Passing on Convenience Fees to Parents."
Domestic & International Credit Card Fees
These settings refer to the amount of the credit card convenience fee that you would like to pass along to your domestic and international families. International rates are applied to credit cards issued outside of your school's country.
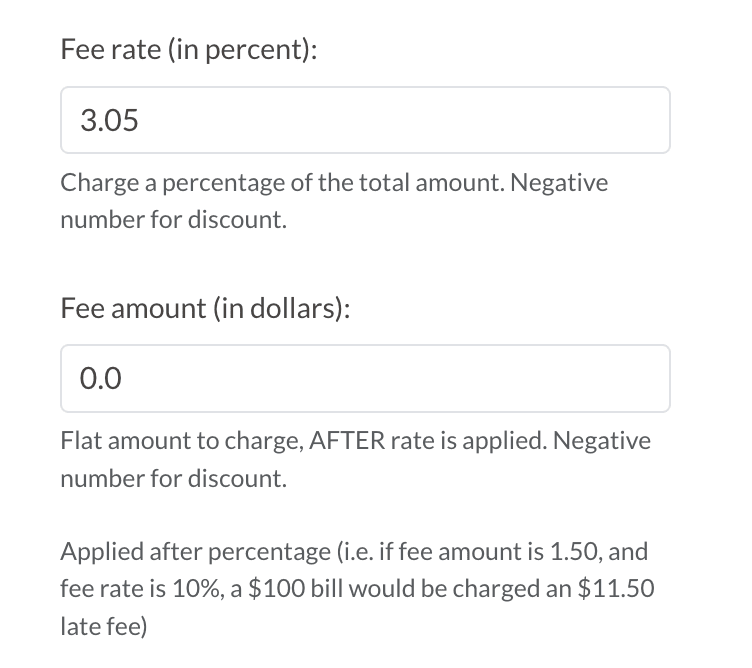
Fee Rate (in percent)
- If you'd like to pass on a percentage-based convenience fee to parents, enter an amount into this field.
- You can decide to enter a higher or lower amount than your school's convenience fee rate, at the discretion of your school, if you would like to cover a greater or smaller portion of the merchant fees.
- Set this to a negative number if you would like it to be a discount rather than a fee.
Fee Amount (in dollars)
- This is a flat amount that is added to the transaction AFTER the Fee Rate above is calculated. For example, for a charge of $100, if the fee amount is $1.50, and the fee rate is 10%, the total convenience fee would be $11.50.
IMPORTANT: Convenience fees will be withheld from your payouts even if these are set to 0, as this only refers to the fee that is passed along to your families. Learn more about passing on convenience fees in this article: Payments: Passing on Convenience Fees to Families.
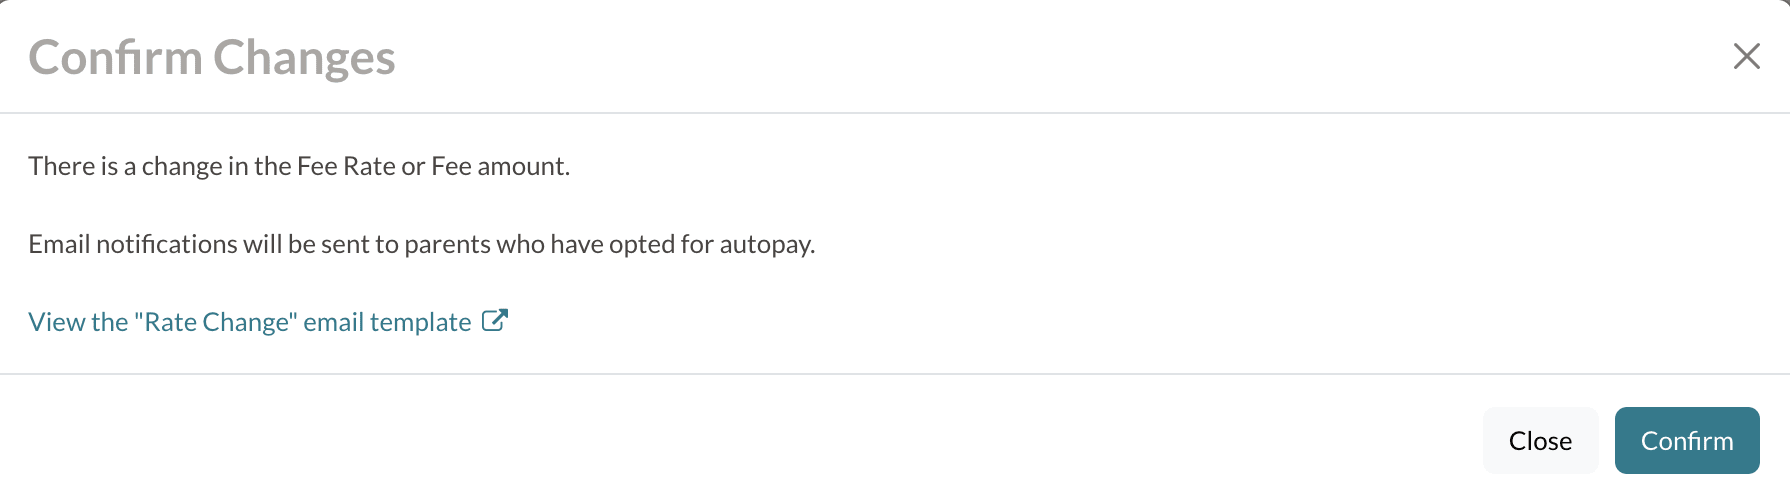
Rate Change Email
When you update the convenience fees that you are passing along to parents, the Rate Change email is sent out. When you click Save after adjusting the rate on either the Credit Card or Electronic Check tabs, you'll see a pop-up window asking you to acknowledge that the email will be sent.
Who is the email sent to?
This email is automatically sent to affected parents who have autopay enabled. It's sent based on what you update and is only sent to applicable parents with autopay enabled.
For example, if you only update the Credit Card convenience fee, only parents with a Credit Card saved to autopay will be emailed.
In addition, the email is only sent to active accounts. Active accounts are those that either have:
- An upcoming charge that will be pulled in the next autopay cycle
- Or an unpaid past charge that will be pulled in the next autopay cycle
Parents who are no longer active with the school but may still have autopay enabled on their end will not receive the email.
What happens if I click Close instead of Confirm?
The rate change that you made will not be saved, and the email will not be sent.
Where can I update the Rate Change email?
It can be updated on the Billing Email templates page: Settings > Communication > Email Templates > Billing Emails.
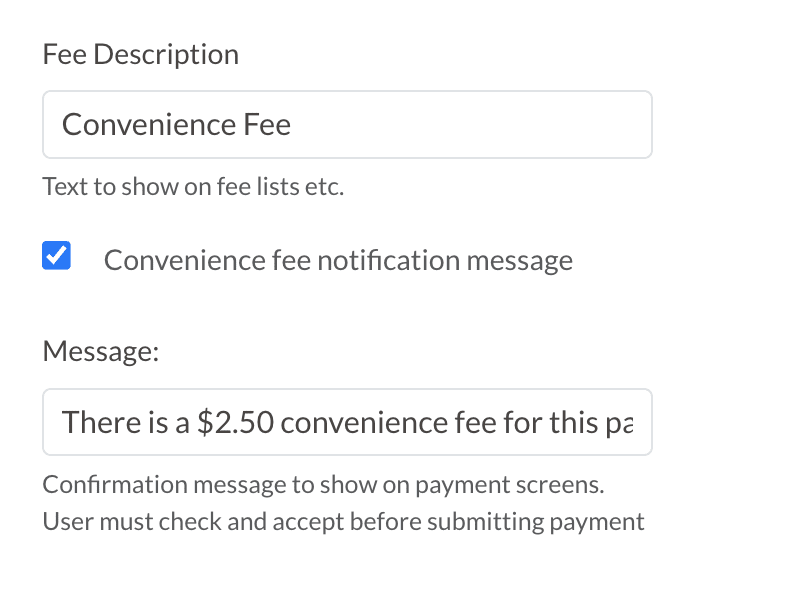
Fee Description and Convenience Fee Notification Message
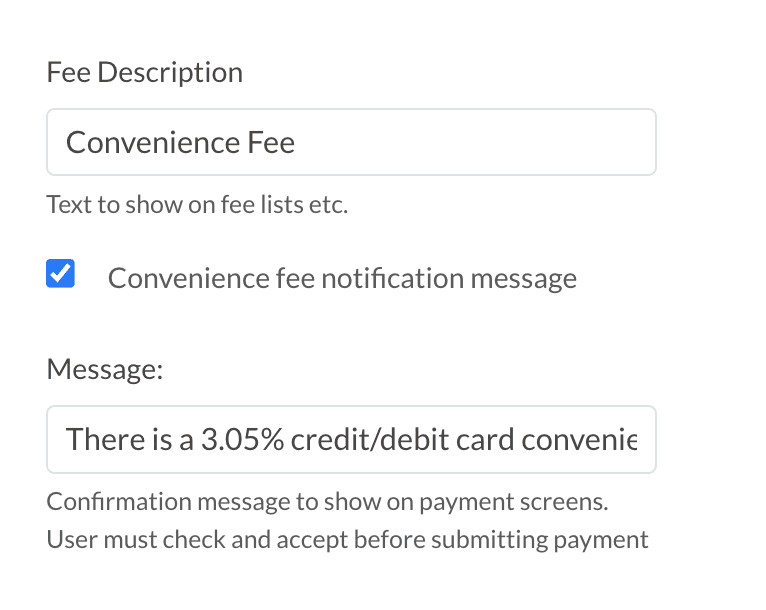
- Fee Description: This is the text that will be displayed wherever the fee is referenced.
- Convenience Fee Notification Message: This checkbox determines whether the parent will see the notification message, entered in the Message field, that they must agree to prior to processing their payment. We highly recommend enabling this option and defining a message if you plan to collect a convenience fee.
Important Note
- The Fee Description and the amount you pass to parents are also displayed in the Parent Portal. If your school is passing on credit card fees to parents, they will see a note like this at the top of their Billing Management tab. It will only display if you are passing along convenience fees to parents.
- Message Format: Please note: a {fee description displayed here} of {domestic and international amounts you are passing on to families} will be applied to all Credit Card payments.
- Example: Please note: a Convenience Fee of 3.05% (4.0% for international cards) will be applied to all Credit Card payments.
Electronic Check Configuration
Electronic Check Options
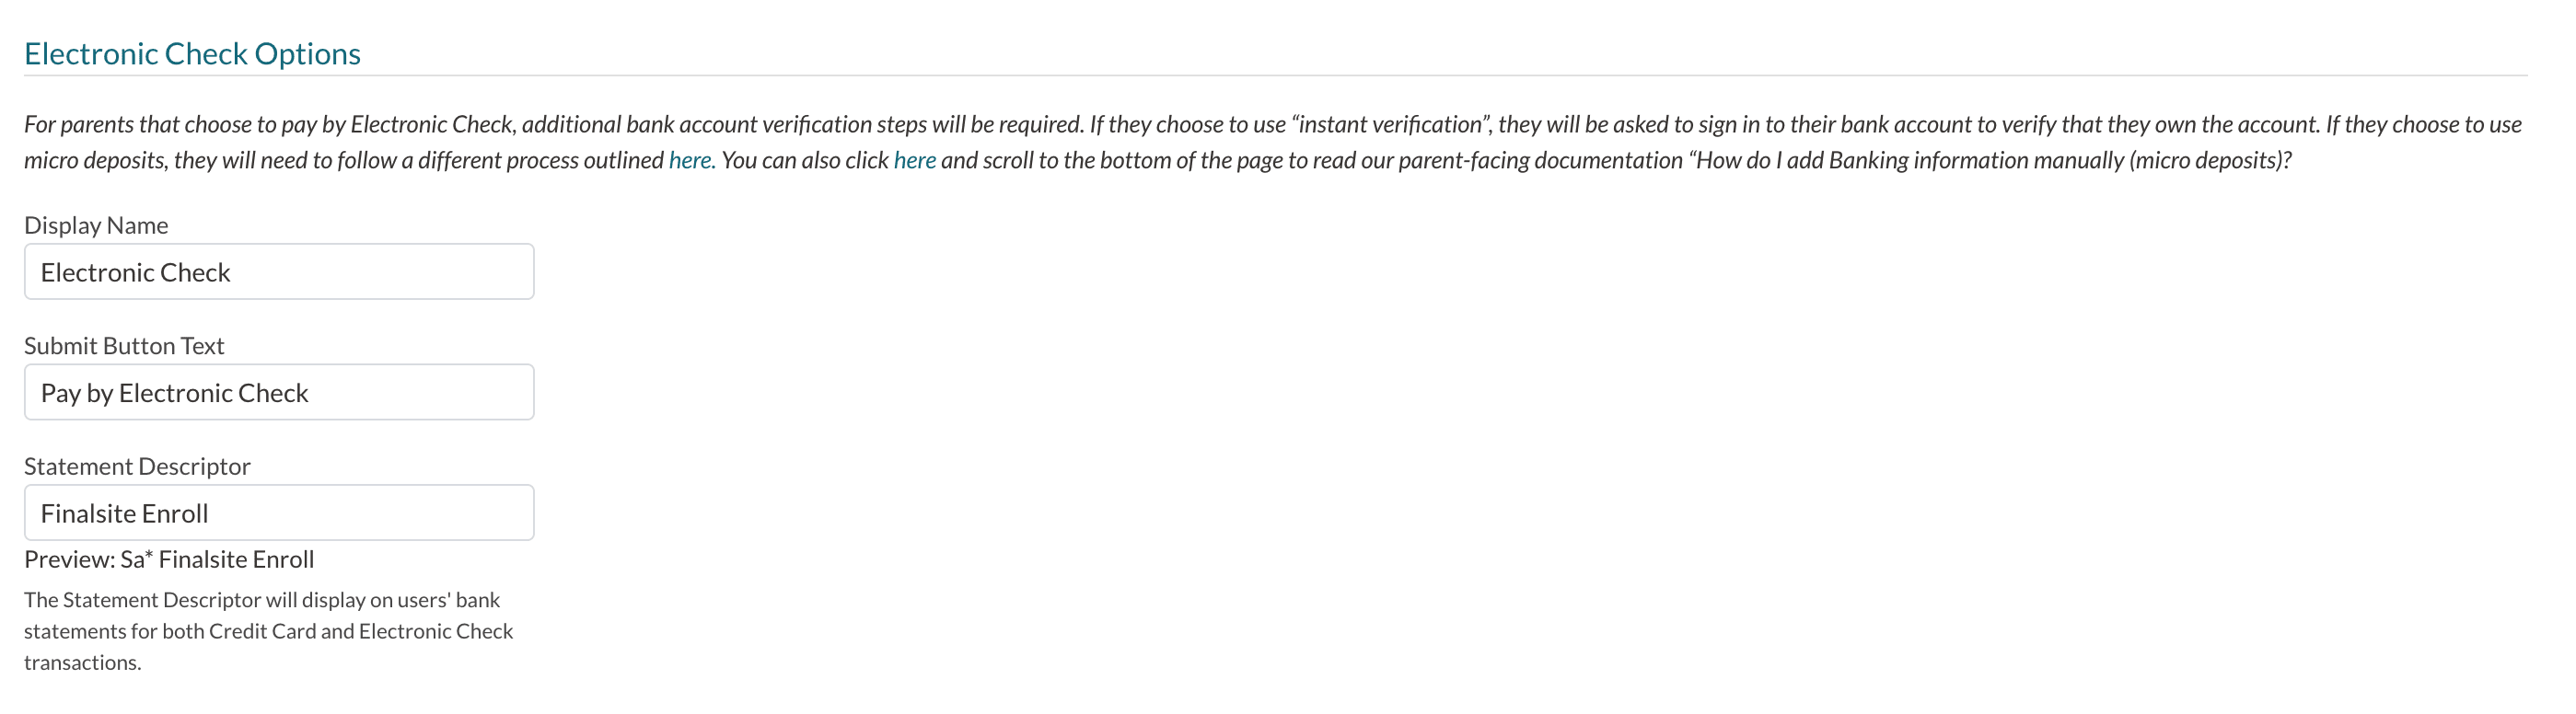
- Display Name: How electronic checks are referred to in the Parent Portal.
- Submit Button Text: What parents will click to process their payment.
-
Statement Descriptor: Your school's Statement Descriptor is what's used on bank accounts or credit card statements when a payment is made through Payments.
- The Statement Descriptor is set by default to the Business Website provided during the Payments onboarding/verification process. Example: Finalsite Enrollment.COM.
- Your descriptor can list up to 19 characters. We recommend adding your school name after the dash. For example, SA-YOUR SCHOOL NAME.
⚠️ Important Note: Information on Deprecated Payment Customization Settings
For Payments customers only: While the options to update the Display Name and Submit Button Text for Credit Card and Electronic Check remain visible within the Payment Setup page, please note that these features are deprecated and will be removed in a future update.
Electronic Check Convenience Fees
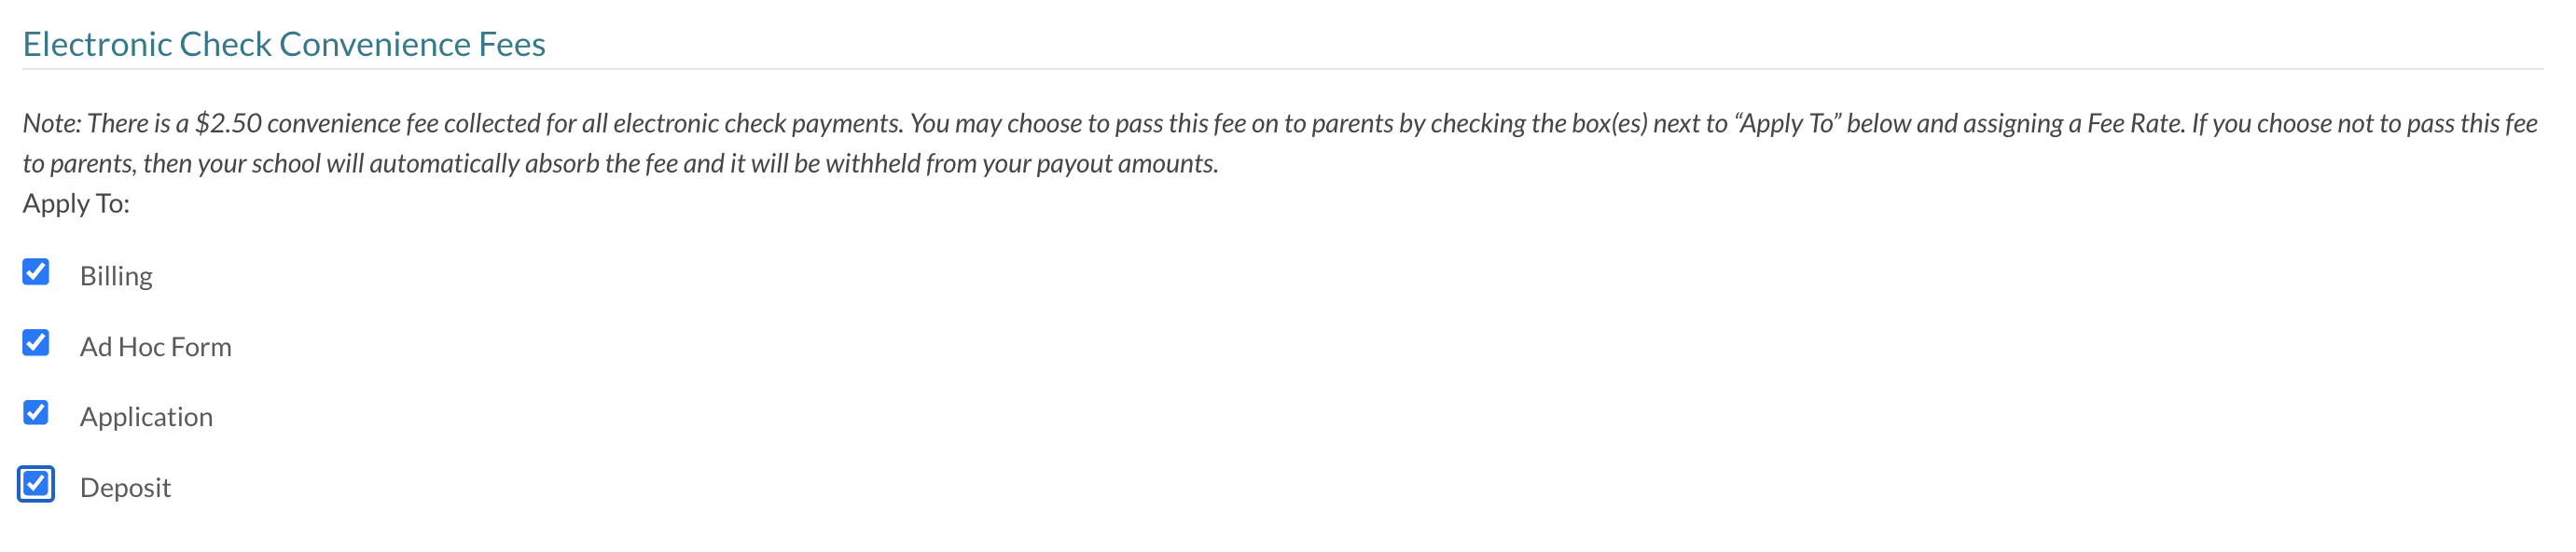
This setting refers to any electronic check convenience fee that you would like to pass along to your parents. Learn more about passing on convenience fees in the article "Payments: Passing on Convenience Fees to Families."
-
Apply To: Choose which charges you want to pass on to parents: Billing, Ad Hoc Form, Application, and/or Deposit.
- For example, if you deselect "Application," families won't be charged a credit card convenience fee for the application fee. However, these fees will still be deducted from your payout.
Convenience Fee Rates
Convenience fee rates vary by school. Your school's specific rates are displayed on this page and on the Payments page (Settings > Financial > Payments), where you can see all of your rates displayed in a read-only (uneditable) format. For a list of the standard convenience fee rates, see the "Before You Start: Convenience Fee Rates" section of "Payments: Passing on Convenience Fees to Parents."
Fee Rate (in percent) and Fee Amount (in dollars)
This setting refers to the amount of the electronic check convenience fee that you would like to pass along to your parents.
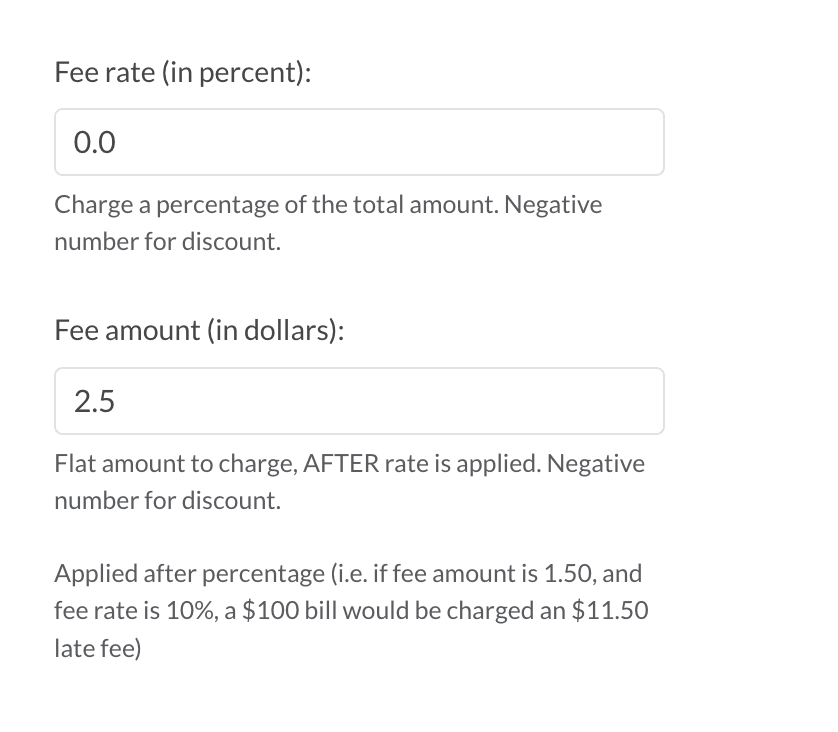
Fee Rate (in percent)
- If you'd like to pass on a percentage-based convenience fee to parents, enter an amount into this field.
- Set this to a negative number if you would like it to be a discount rather than a fee.
Fee Amount (in dollars)
- This is a flat amount that is added to the transaction AFTER the Fee Rate above is calculated. For example, for a charge of $100, if the fee amount is $1.50, and the fee rate is 10%, the total convenience fee would be $11.50.
IMPORTANT: Convenience fees will be withheld from your payouts even if these are set to 0, as this only refers to the fee that is passed along to your families. Learn more about passing on convenience fees in this article: Payments: Passing on Convenience Fees to Families.
Rate Change Email
When you update the convenience fees that you are passing along to parents, the Rate Change email is sent out. When you click Save after adjusting the rate on either the Credit Card or Electronic Check tabs, you'll see a pop-up window asking you to acknowledge that the email will be sent.
Who is the email sent to?
This email is automatically sent to affected parents who have autopay enabled. It's sent based on what you update and is only sent to applicable parents with autopay enabled.
For example, if you only update the Credit Card convenience fee, only parents with a Credit Card saved to autopay will be emailed.
In addition, the email is only sent to active accounts. Active accounts are those that either have:
- An upcoming charge that will be pulled in the next autopay cycle
- Or an unpaid past charge that will be pulled in the next autopay cycle
Parents who are no longer active with the school but may still have autopay enabled on their end will not receive the email.
What happens if I click Close instead of Confirm?
The rate change that you made will not be saved, and the email will not be sent.
Where can I update the Rate Change email?
It can be updated on the Billing Email templates page: Settings > Communication > Email Templates > Billing Emails.
Fee Description and Convenience Fee Notification Message
- Fee Description: This is the text that will be displayed wherever the fee is referenced.
- Convenience Fee Notification Message: This checkbox determines whether the parent will see the notification message, entered in the Message field, that they must agree to prior to processing their payment. We highly recommend enabling this option and defining a message if you plan to collect a convenience fee.
Important Note
- The Fee Description and the amount you pass to parents are also displayed in the Parent Portal. If your school is passing on electronic check fees to parents, they will see a note like this at the top of their Billing Management tab. It will only display if you are passing along convenience fees to parents.
- Message Format: Please note: a {fee description displayed here} of {amount you are passing on to families} will be applied to all Electronic Check payments.
- Example: Please note: a Convenience Fee of $2.50 will be applied to all Electronic Check payments.
Check Configuration
Customize how check payments will display to families.
- Display Name: How checks are referred to in the Parent Portal.
- Submit Button Text: What parents will click to process their payment.
Custom Payment Configuration
Customize how custom payments will display to families.
- Display Name: How custom payments are referred to in the Parent Portal.
- Submit Button Text: What parents will click to process their payment.
Interested in setting up Wire Transfer as a custom payment method? Follow the steps in the article "Set Up Wire Transfer as a Custom Payment Method."
Convenience Fee Merge Tokens
We have some merge tokens that automatically display convenience fee information in emails, forms, and Parent Portal content. Please check out our dedicated article "Convenience Fee Merge Token" to learn more.
View the Audit Log
Within the Payment Setup page, you also have access to an audit log that displays the history of any changes made to any of the tabs within this page (Credit card configuration, Electronic Check configuration, Check, and Custom).
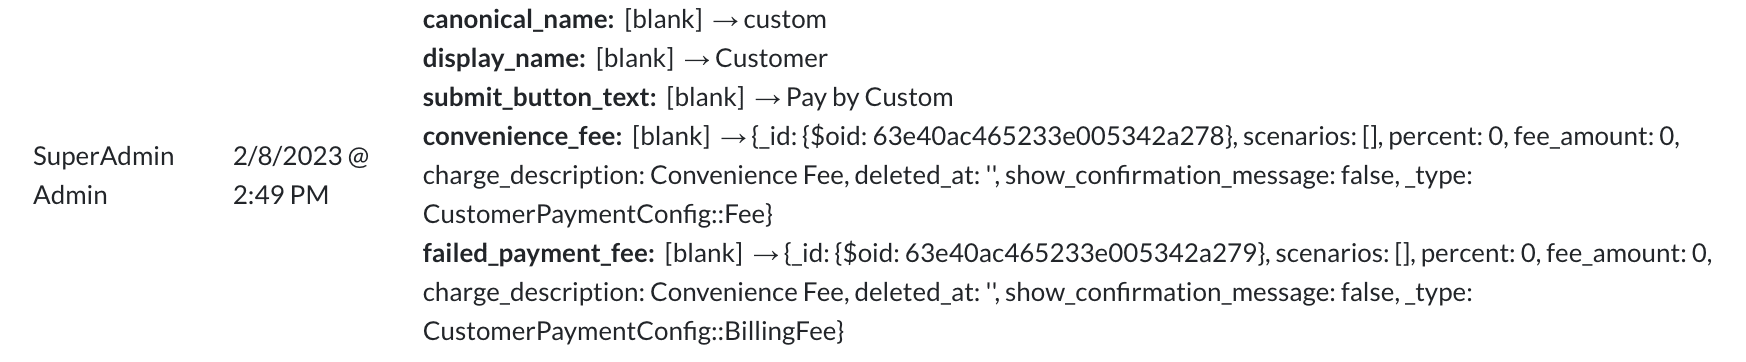
Next to Payment Setup, click View Changes to open the Recent Edit History dialogue box, which will display the audit history of all of the tabs within the Payment Setup page. Changes will only be recorded in the audit log after clicking Save at the bottom of the page.

- The first time a change is made to one of the tabs, you will see a large list of text. This is just the system populating the fields first, so it can start recording changes from then on. After this, you'll just be seeing a list of the exact change(s) that have been made.
Comments
0 comments
Article is closed for comments.