The Parent Portal is the starting point for a parent to fill out an application for their student and complete the required items for the Admissions or Enrollment process.
In this article
- Access to the Portal
- Login to the Portal
- Begin the Admissions Process
- Navigate the Student Checklist
- Complete the Enrollment Process
- View Student Communications
Access to the Portal
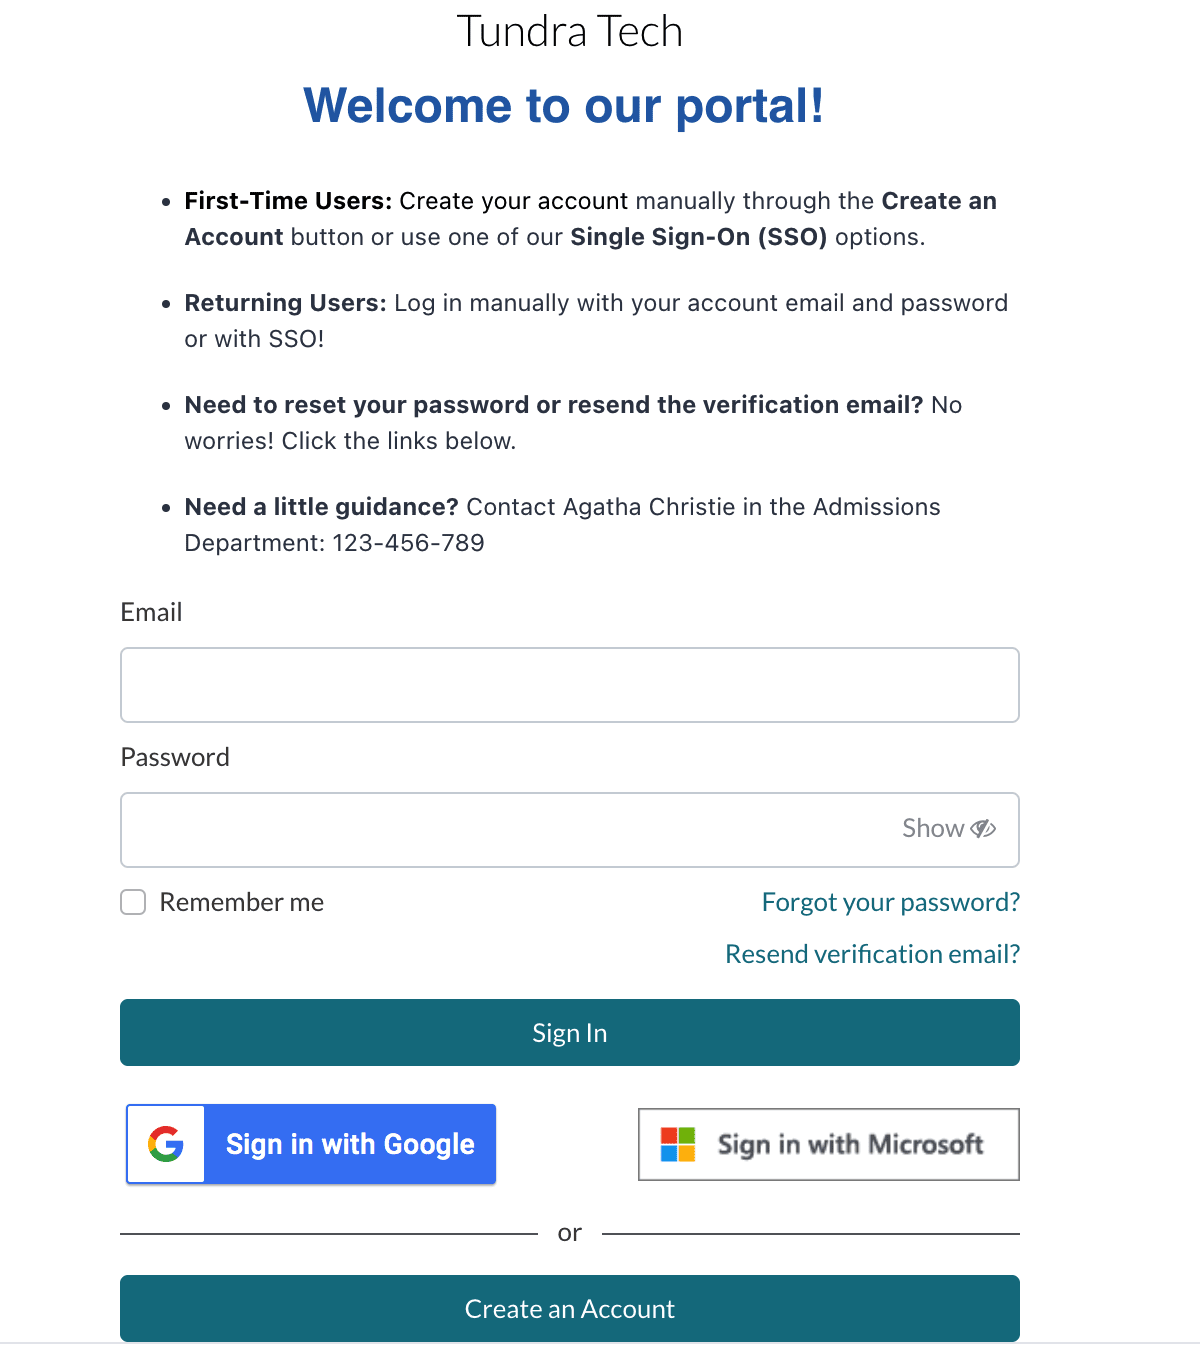
Parents can access the Parent Portal login page by going to your unique school portal link. The format for this link is shown below:
Non-Canadian Clients:
- Link Format: https://[Subdomain Here].fsenrollment.com/portal
- Example: https://myschool.fsenrollment.com/portal
Canadian Clients:
- Link Format: https://[Subdomain Here].fsenrollment.ca/portal
- Example: https://mycanadianschool.fsenrollment.ca/portal
Something Good to Know
You can also use the merge token {{school.parent_portal_url}} in your Finalsite Enrollment Emails in order to auto-populate this link. Click here for more information.
Log in to the Portal
Did you know?
Logins are the same across all Finalsite Enrollment Parent Portals.
That means, if a parent has created an account before on another school's portal, they do not need to create another account, rather, they can log in with the same email/password or SSO in without creating a new account.
First-time visitors will either:
-
Manually create an account by selecting the Create an Account button and entering their username and password.
- To create a new parent portal account, all that is required is the parent's first and last name, a login email, and a password (minimum 8 characters and cannot include your subdomain).
- Manually created accounts will require parents to verify their email address within 24hrs.
- Create an account through SSO by selecting to sign in with Google or Microsoft.
Returning visitors:
Can sign in to an existing account with their email address and password or SSO in.
Pro Tips:
- Check out our Overview of Parent Login Options: Manual Account Creation and SSO article for an in-depth overview of the parent login experience.
- Customize your school's Login Page Description template to welcome families to your Parent Portal and provide information on getting started, how to use the portal, and how to contact your school with any questions!
Begin the Admissions Process in the Parent Portal
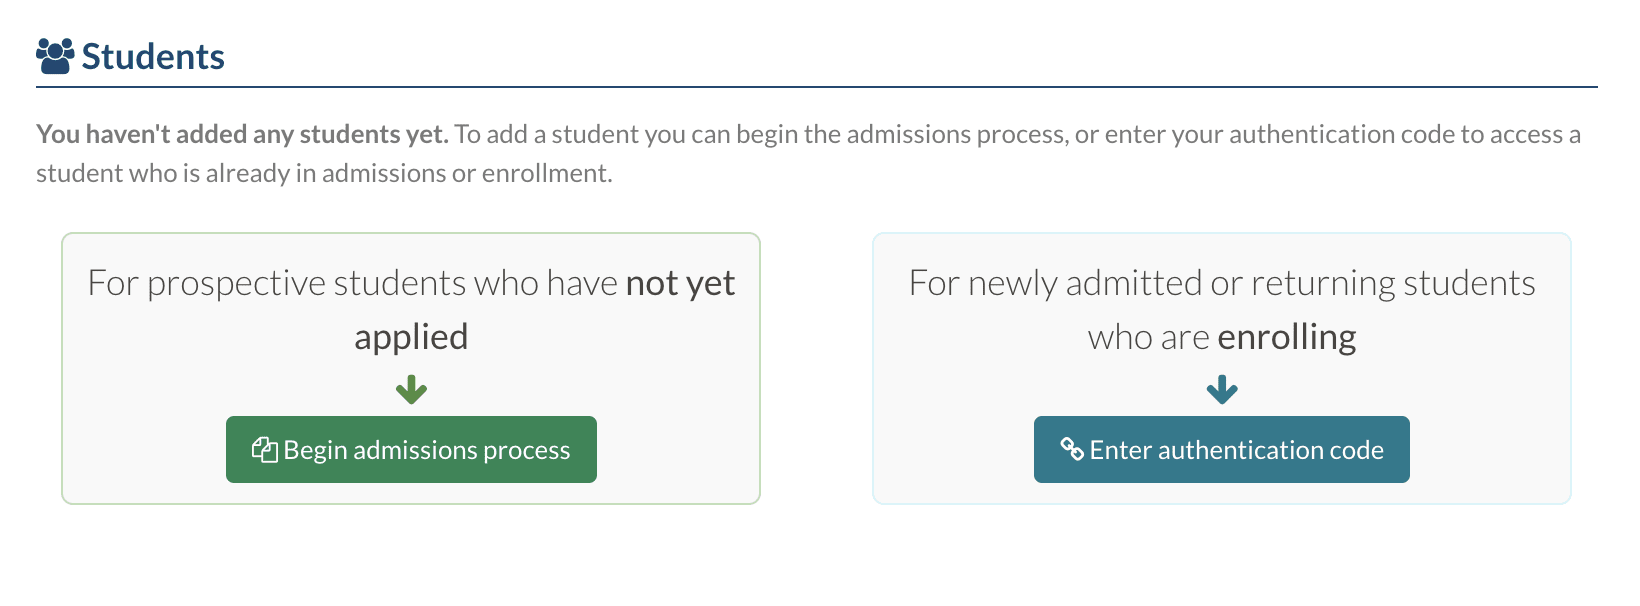
The first time that parents log into the Parent Portal to apply, they will see the text that they haven't added any students yet, and a green 'Begin Admissions Process' button.
When clicked, this button will take them to your Application Form. Click here to learn more about the parent view of the application form and any associated fee.
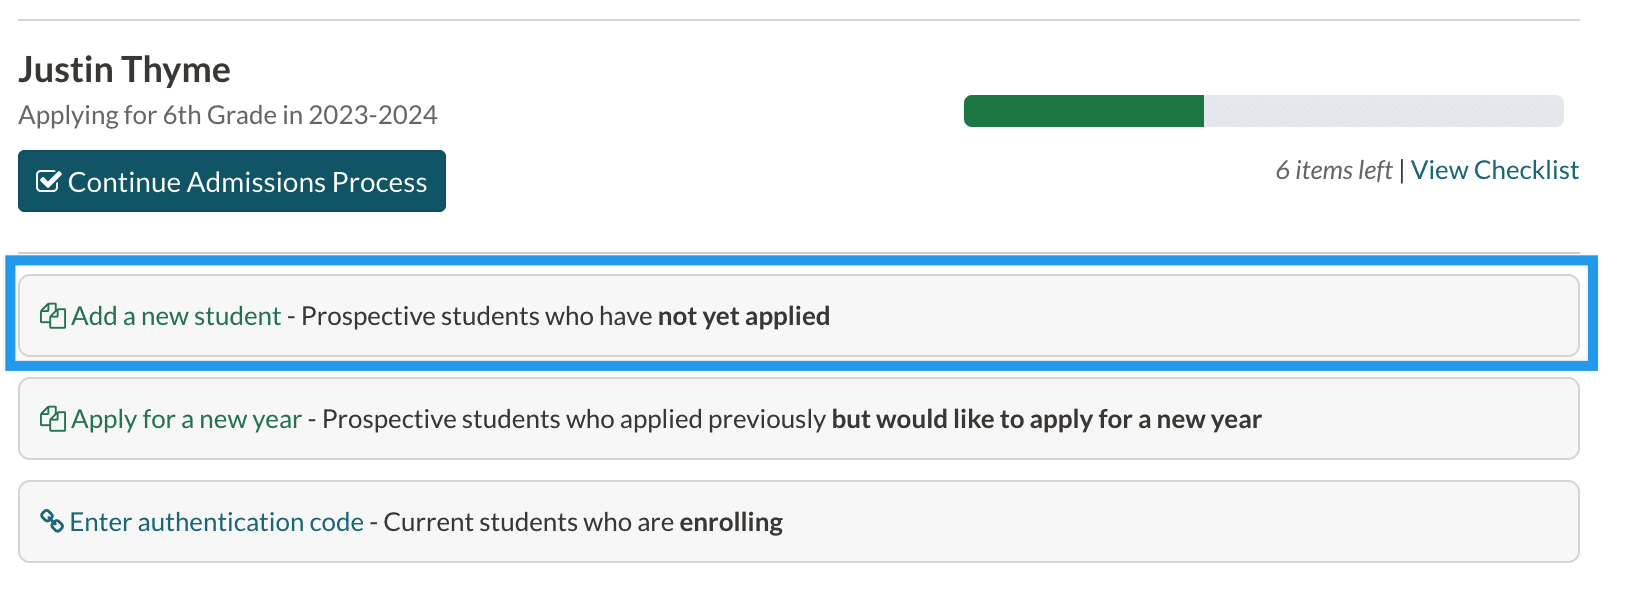
If the parent already has other students in the admissions or enrollment process, they will see those students listed when they log into the portal. Below the list of students, they can click the green 'Add a new student' button to start an application for a new student.
After the parent submits a new application, they will be taken to the Application Thank You Page, which is customizable from within 'Settings' - 'Portal' - 'Parent Portal Content'. They will also receive the Application Thank You Email if this option is enabled within your Communication Setup.
Pro Tip: Customize your school's Portal Widget and Summary Page Sidebar templates to provide key information about the process, highlight the best parts of your school, list the contacts that parents can reach for help, and more.
Good to know
Did you know that some of the Admissions and Enrollment terminology can be customized? Read more information in our Customize Admissions & Enrollment Terminology in the Parent Portal article.
Navigate the Student Checklist in the Parent Portal
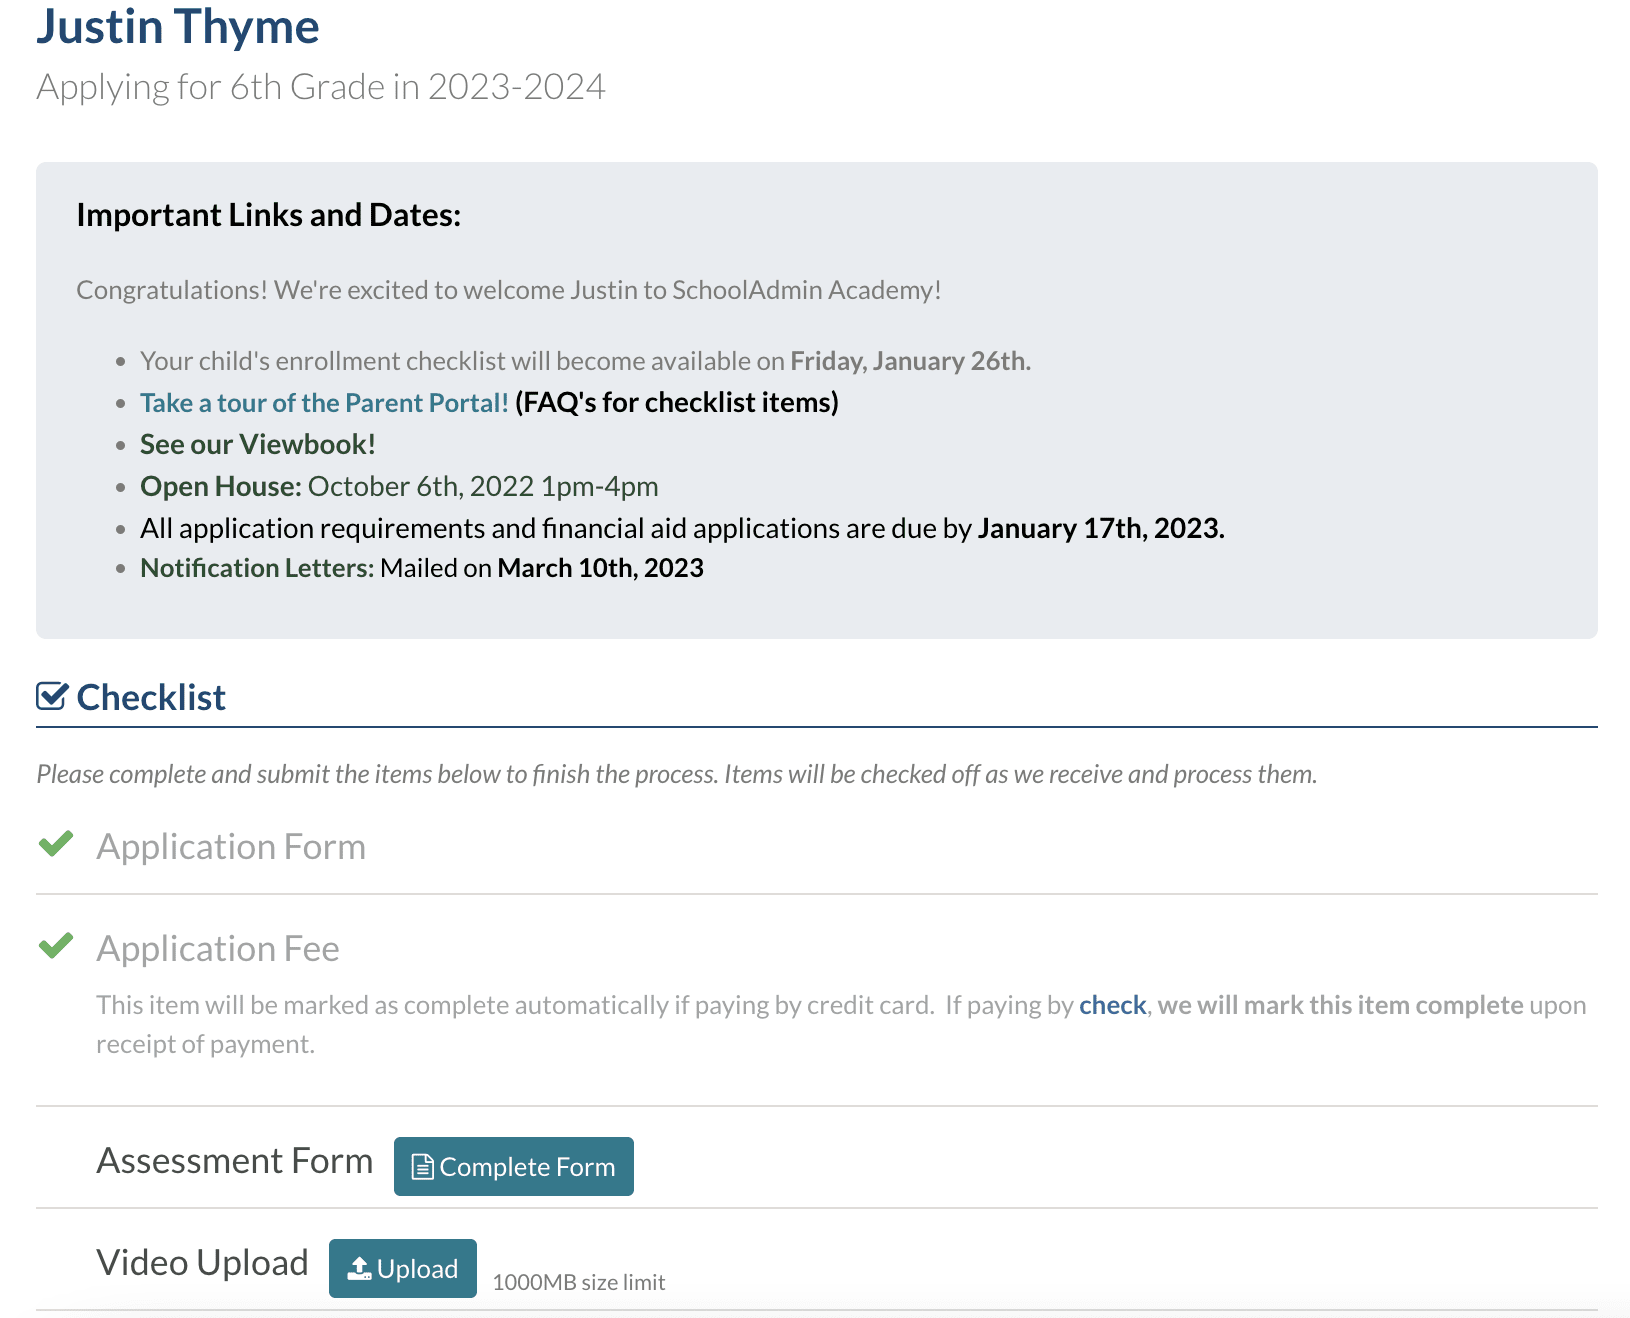
Once a parent has added and authenticated to a student in the Parent Portal, they can access that student's checklist by clicking the blue 'Continue Admissions/Enrollment Process' (seen in the image above) button underneath their name in the list of students. From here, the parent can work their way through the checklist items. All required items will be in the top section, while any optional items will be separated below in an 'Optional Steps' section.
Most item types will have a blue button for the parent to take some sort of action (e.g. complete an online form, upload a file, send a recommendation request, etc.), although you may also have some Basic checklist items that need to be manually marked complete by your internal team. We recommend including clear parent explanations for each checklist item so that the parent knows exactly what they need to do in order to complete it - click here for more information.
Pro Tip: Customize your school's Contact Communication Area and Contact Page Sidebar templates to show specific information by student type. Our Support Team can help you set up liquid logic statements/rules so that you can set up different content based on the stage the student is in, such as admissions vs. enrollment.
Complete the Enrollment Process in the Parent Portal
Getting Started
Once you have generated a student's contract and enabled parent enrollment, the parent can log into the Parent Portal and begin the process of enrolling in your school. They will access the checklist by clicking on the blue 'Continue Enrollment Process' button as described in the section above.
A best practice is to have the Contract and Deposit checklist items at the top of the checklist. Click here to learn how to edit checklist settings. To open the contract, the parent will click on the blue 'Complete Form' button. Once a parent has opened the contract, the contract status will change from Generated to In Progress - click here for more information.
Please note: A parent/guardian must be authenticated and have financial responsibility set to 'Yes' on the student contact record in order to open the contract. Students cannot have financial responsibility for themselves and therefore, will not be able to view the contract if they are authenticated instead of a parent/guardian.
Filling Out the Contract
The specifics of your Contract Form will depend on your school. However, most will have the tuition and fees, payment plans, and totals summary fields on them so that parents can see exactly how much they will be responsible for now and later. Any fields on the contract that were filled out previously (e.g. during the admissions process) will auto-populate the information as it exists on the student or parent records. Parents can select “Save and Finish Later” at any point while filling out the contract.
If you are using the Dual Signature feature on your contract, the first parent will complete the contract, then be prompted to invite the additional signer. Both parties must sign the contract before the deposit can be paid. Click here to learn more about the dual signature workflow.
Paying Deposit
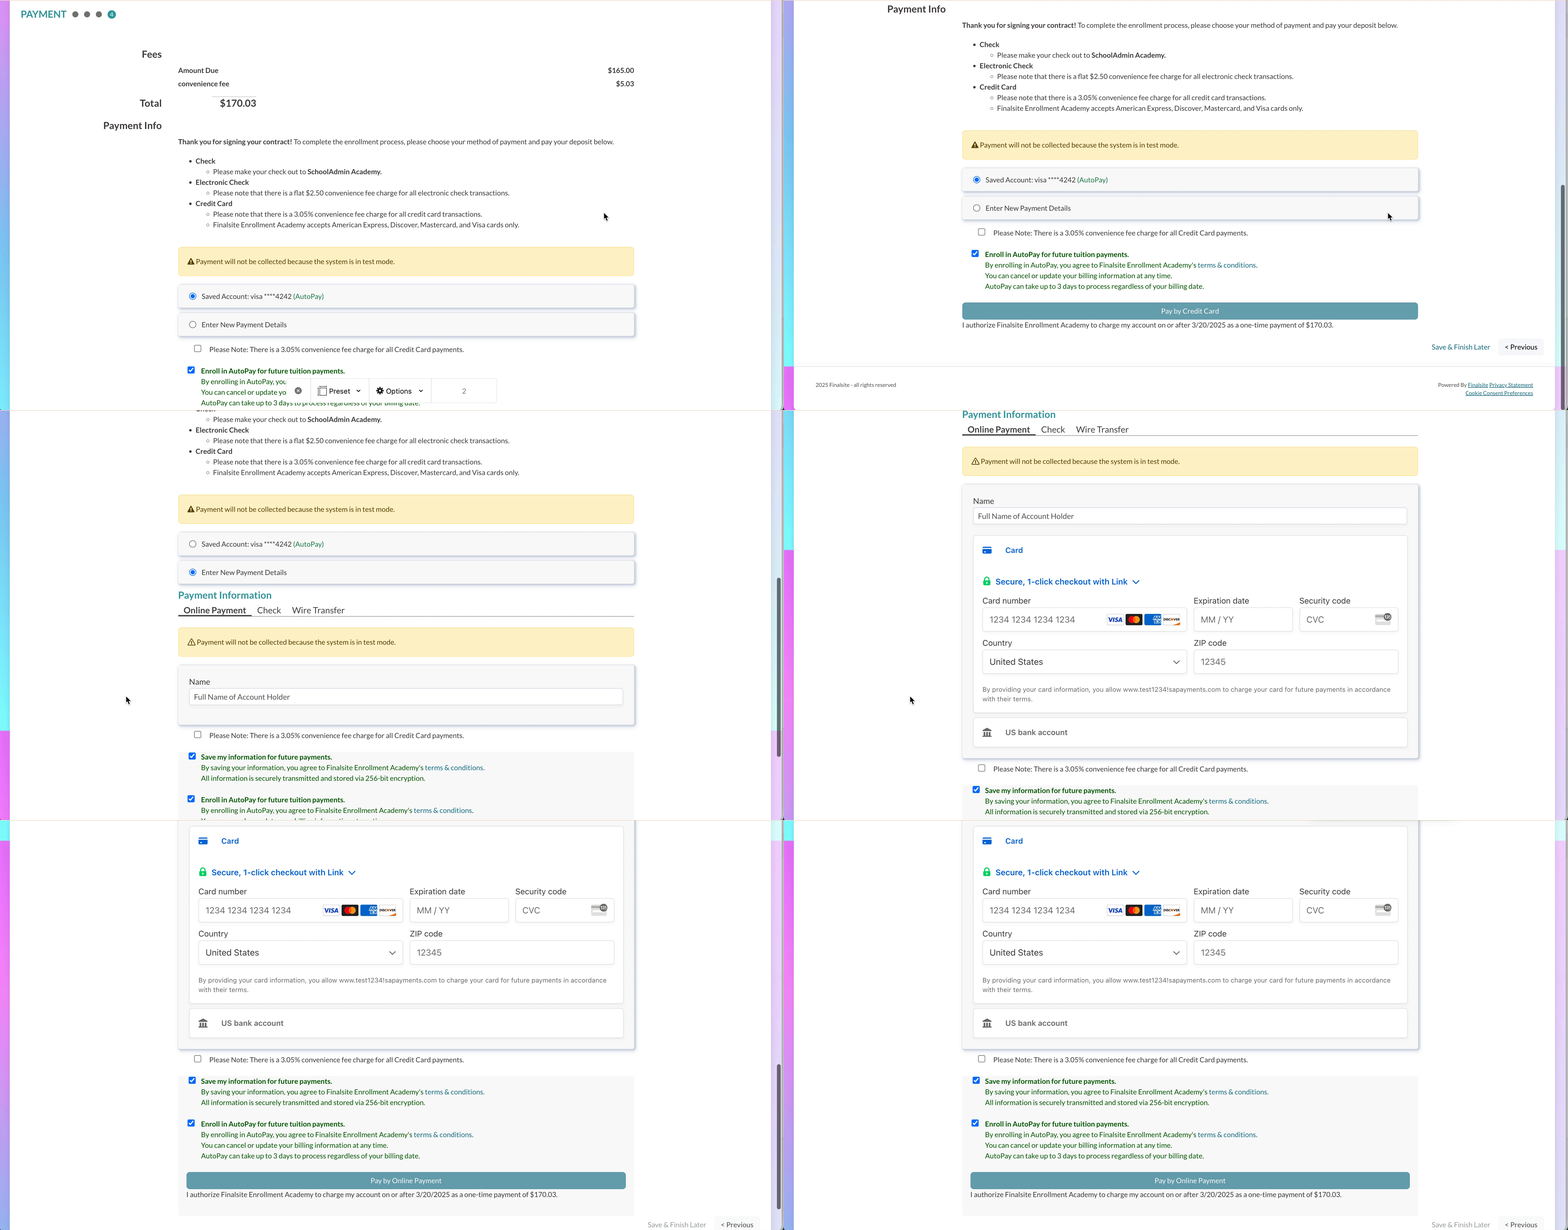
The final page of your contract is the payment page where the parent can pay the amount due now (i.e. contract deposit + any fees added to the deposit). The parent will select their method of payment, fill out any necessary fields and click the corresponding payment button to submit the contract and deposit.
If the parent saves on this page, the contract status will change to Pending Payment.
The Deposit checklist item will be marked complete automatically if the parent pays by credit card or electronic check. If they have elected to pay by check or a custom payment method, you will need to manually mark the checklist item as complete from the student's contact record upon receipt of the payment.
Post-Submit Behavior
At this point, the contract moves into a status of Submitted and the parent can no longer go back into the Contract to make changes (unless you regenerate the contract for the student). The parent can click on 'View Form' next to the completed contract checklist item to view or download a PDF copy of the submitted contract.
After the parent submits the contract, they can be taken to the Contract Thank You Page, which is customizable from within 'Settings' - 'Portal' - 'Parent Portal Content'. They can also receive the Contract Thank You Email. These options can be enabled or disabled within your Communication Setup. A best practice is to direct them back to the Enrollment Checklist to complete any additional items.
Please note: Even if enabled, Contract Thank You Emails are only sent automatically if the contract submission is performed by the parent. Bulk contract submissions by an admin or contracts subjected to countersign will not trigger the system Contract Thank You Email.
If you are using the countersign or bulk submission feature and would like to learn how to set up an automatic communication plan to trigger a Thank You email post-contract completion, please refer to this article within the How-To Set Up an Automatic Contract Thank You Email section.
View Student Communications
For schools with the Student Communication feature enabled, parents will see a Student Communication section next to their child's checklist. Here, they can view all email and text communications sent to the student directly. Learn more about this optional feature by visiting the article "Make student communications visible on the Parent Portal."

Comments
0 comments
Article is closed for comments.